¶ How to Set Up Extra 4 Color Printing Feature with ECM
You need to add ECM to your set to print more than 4 colors with your printer. By adding ECM's, color range can be expanded up to 20 colors.
¶ What to do if you're connecting ECM to ChromaPad;
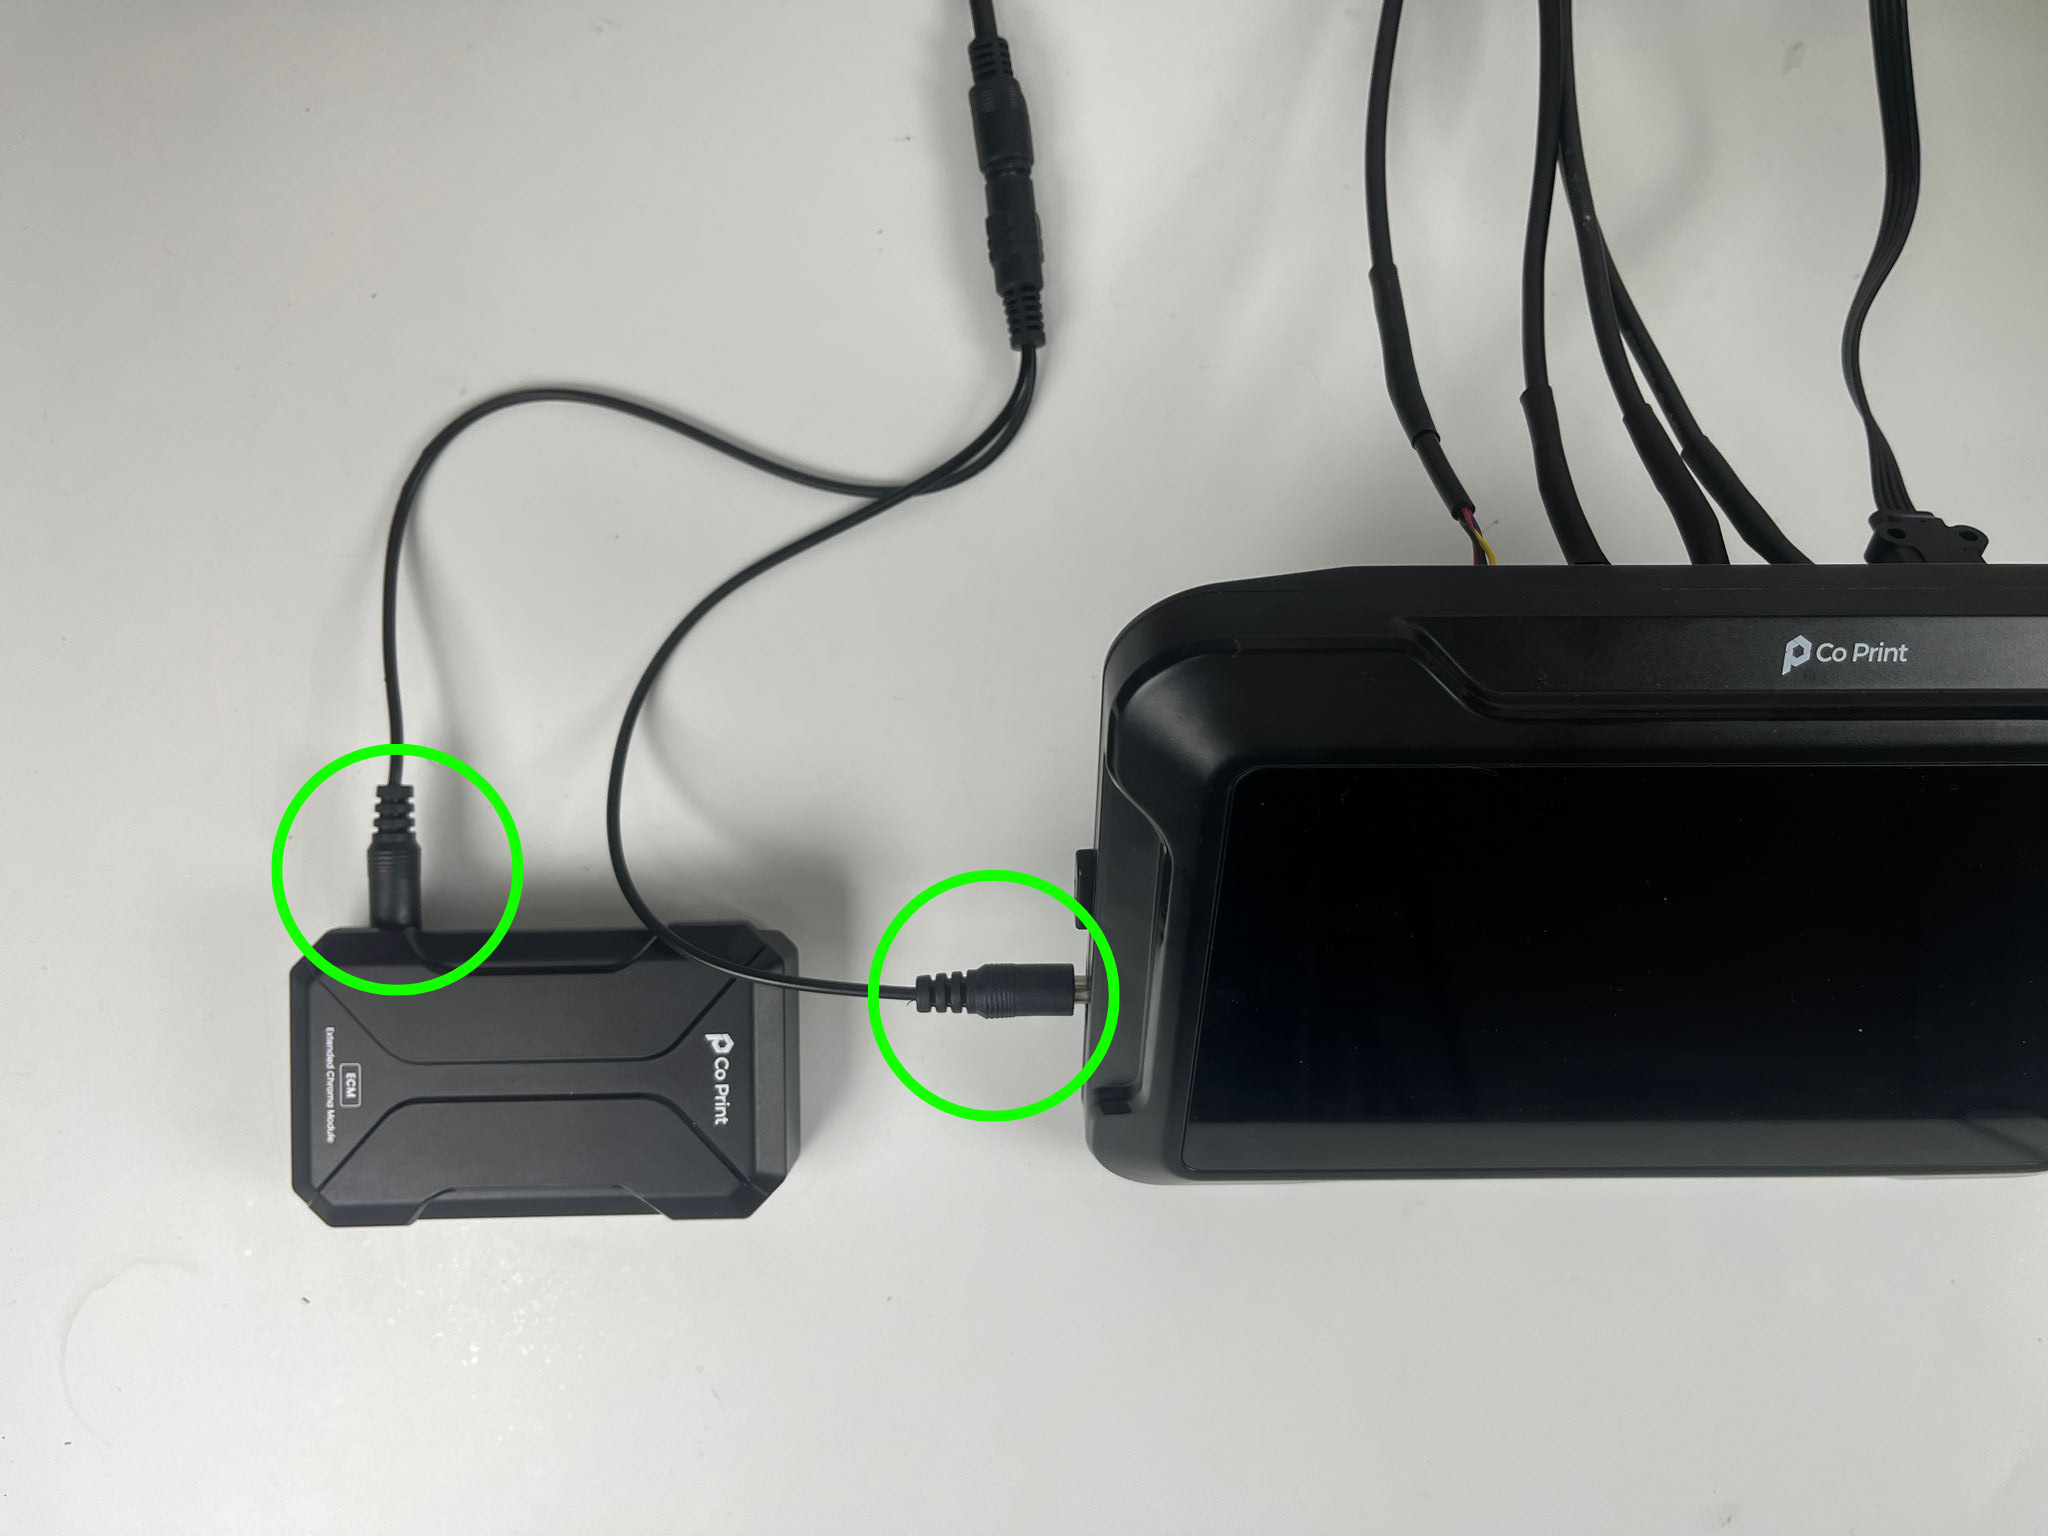
- Turn off the power of ChromaPad and put a splitter to the adapter.

- Plug in the power splitter cable to the end of the power adapter. Also plug in one side to the ChromaPad, adn the other side to the ECM.
- Connect the Type-C cable between ChromaPad and ECM. After connecting ECM to ChromaPad, you can turn on the ChromaPad.

- After turning on the ChromaPad, Please access the Mainsail via typing the IP address of ChromaPad to the searchbar of any browser.
-- - Go to "MACHINE" section.
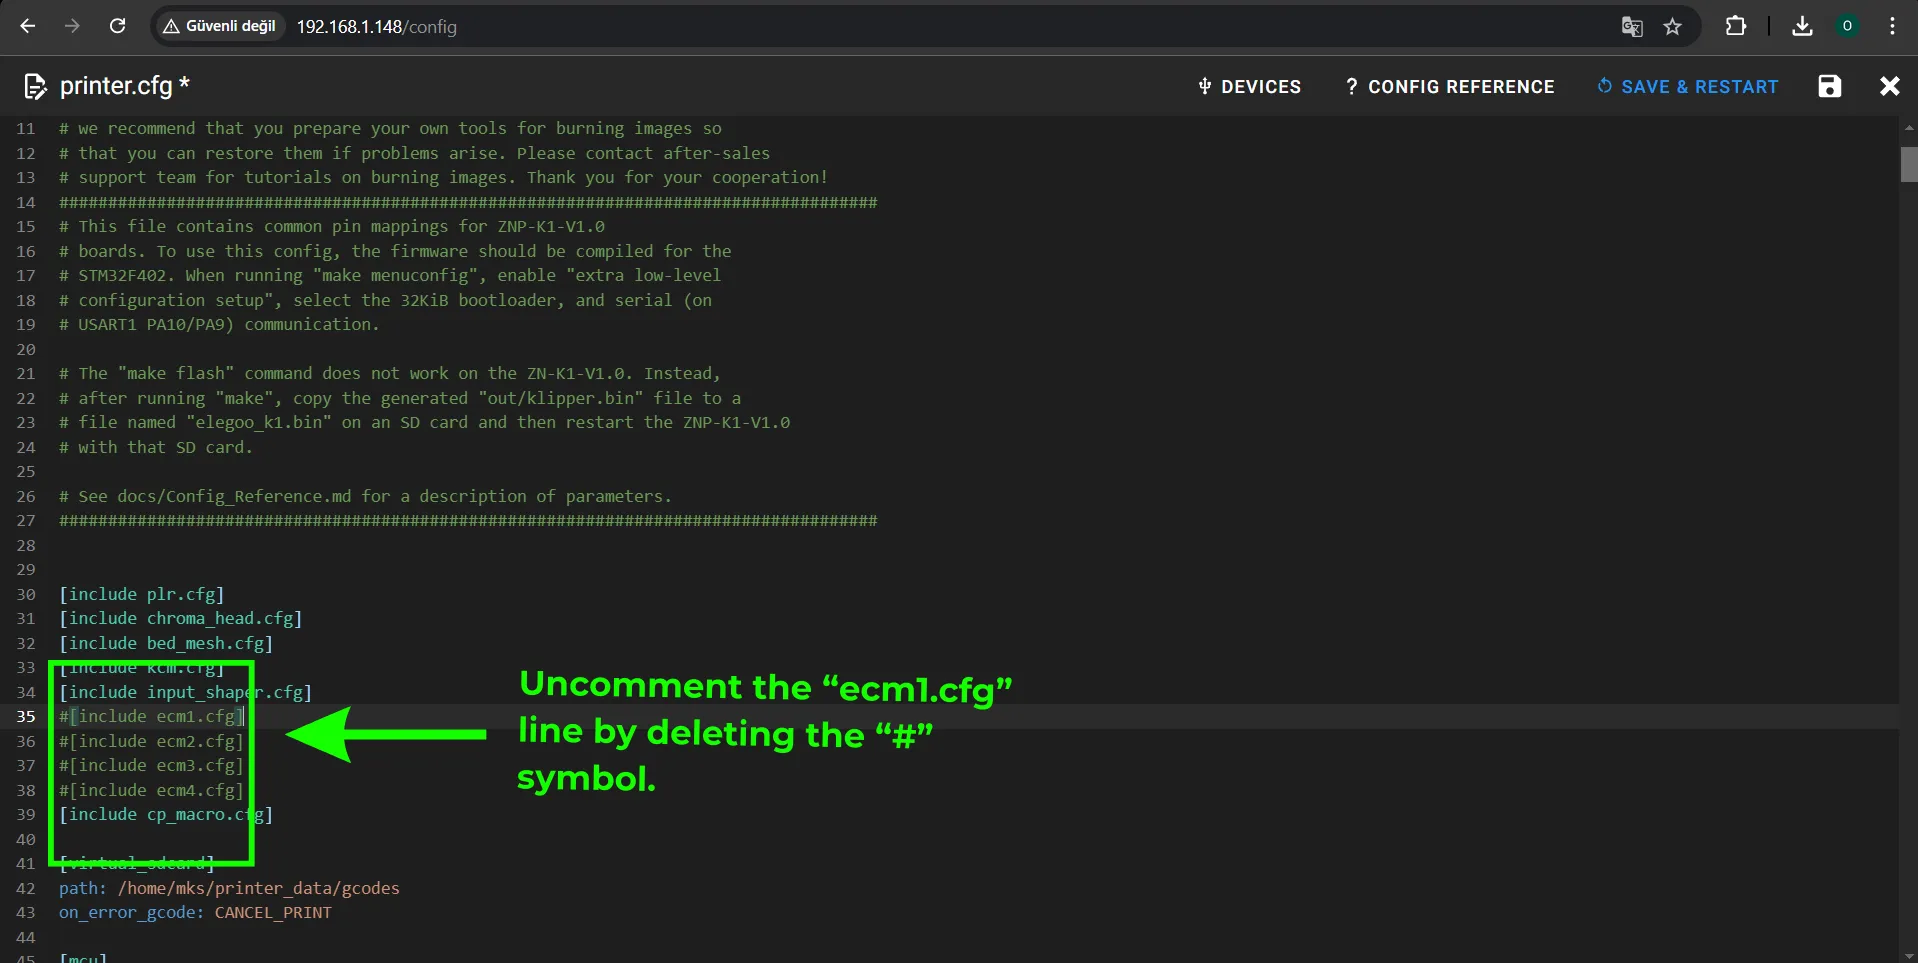
- In the "MACHINE" section, enter the "printer.cfg".
- Enter the printer.cfg file.
- Uncomment the "ecm1.cfg" in "printer.cfg" by deleting the "#" symbol. Then click on "SAVE & RESTART".
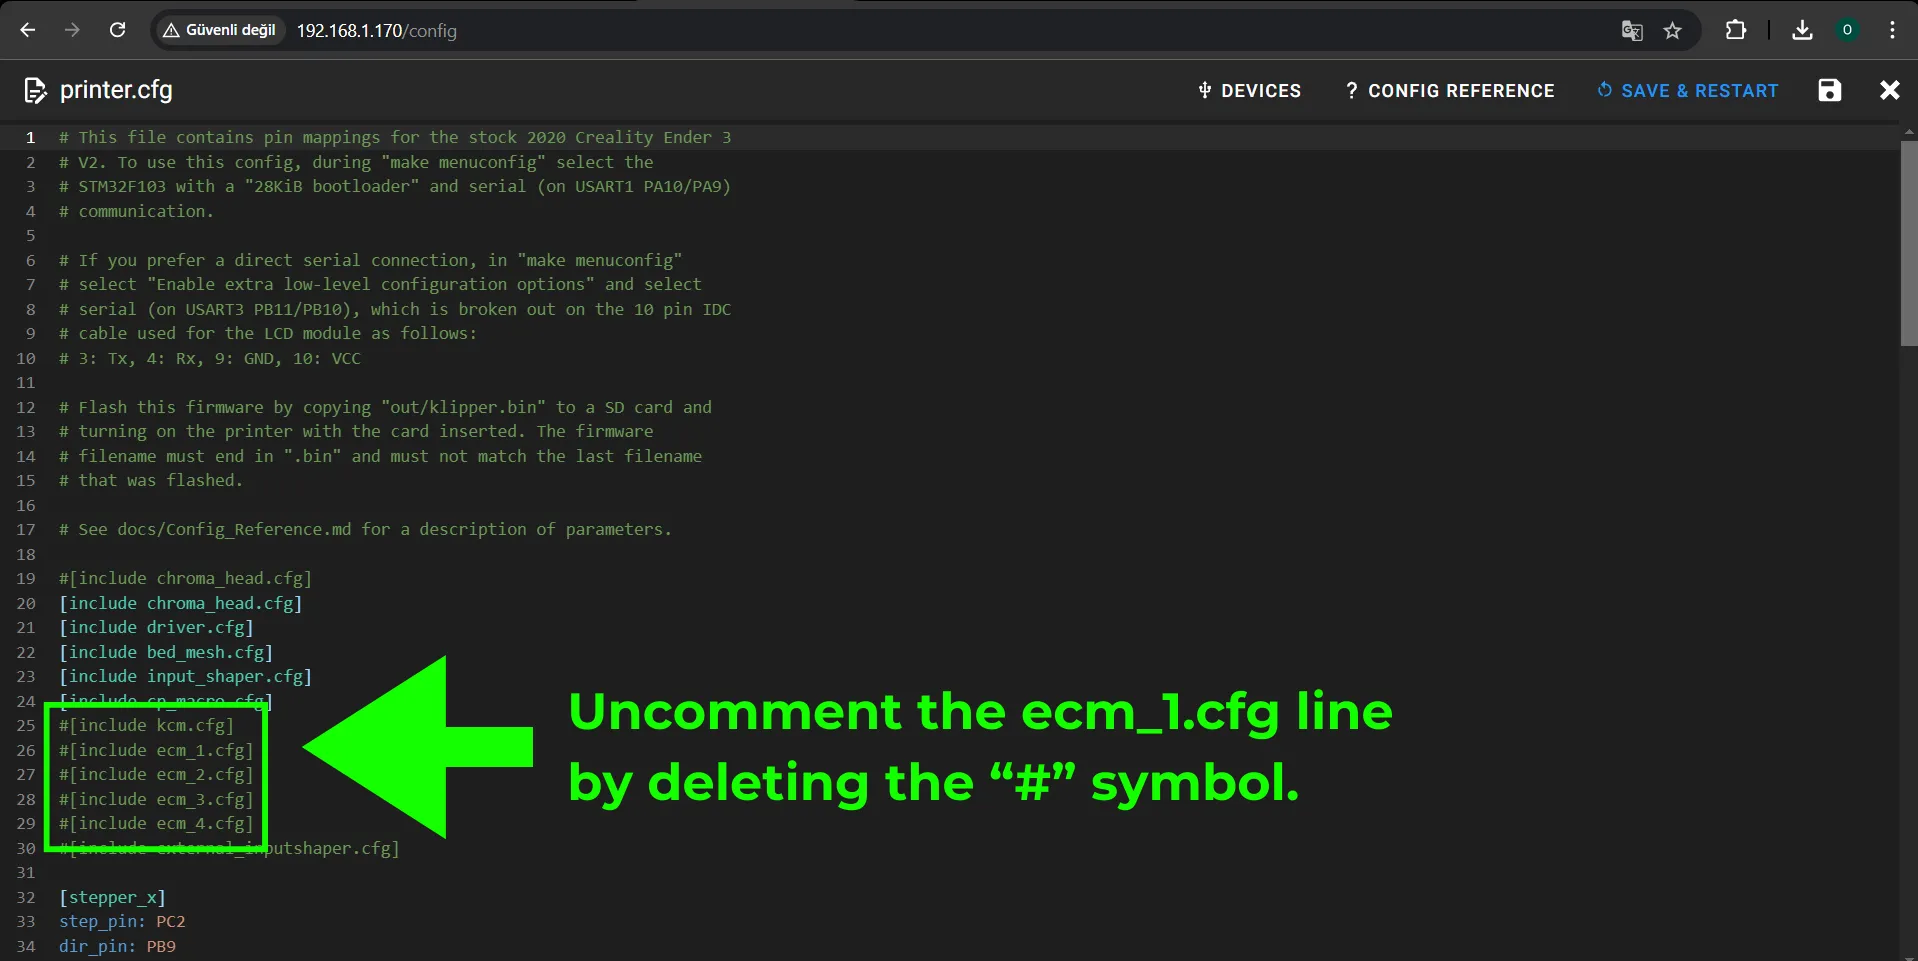
Please do not forget to click on "SAVE & RESTART".
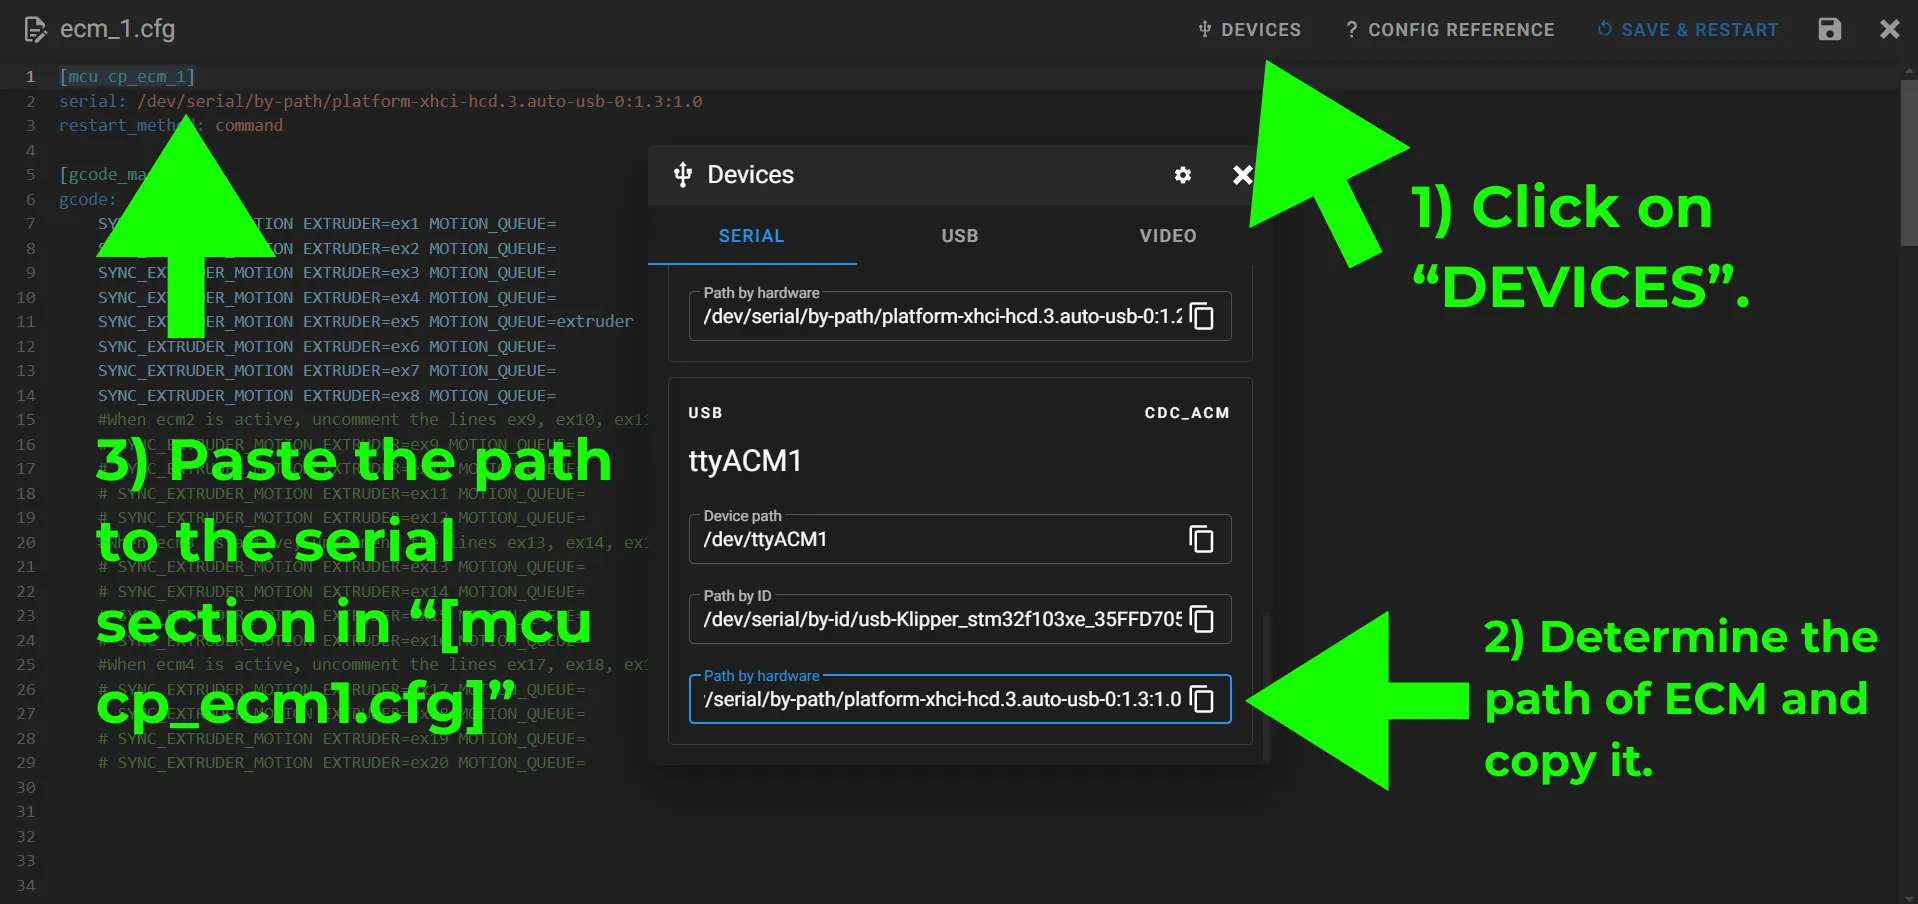
- Enter the ecm1.cfg file.
- Press the "DEVICE" section and copy the port that where you connect the ECM. And then paste the path to the serial section in "[mcu cp_ecm_1]". And then please click on "SAVE & RESTART".
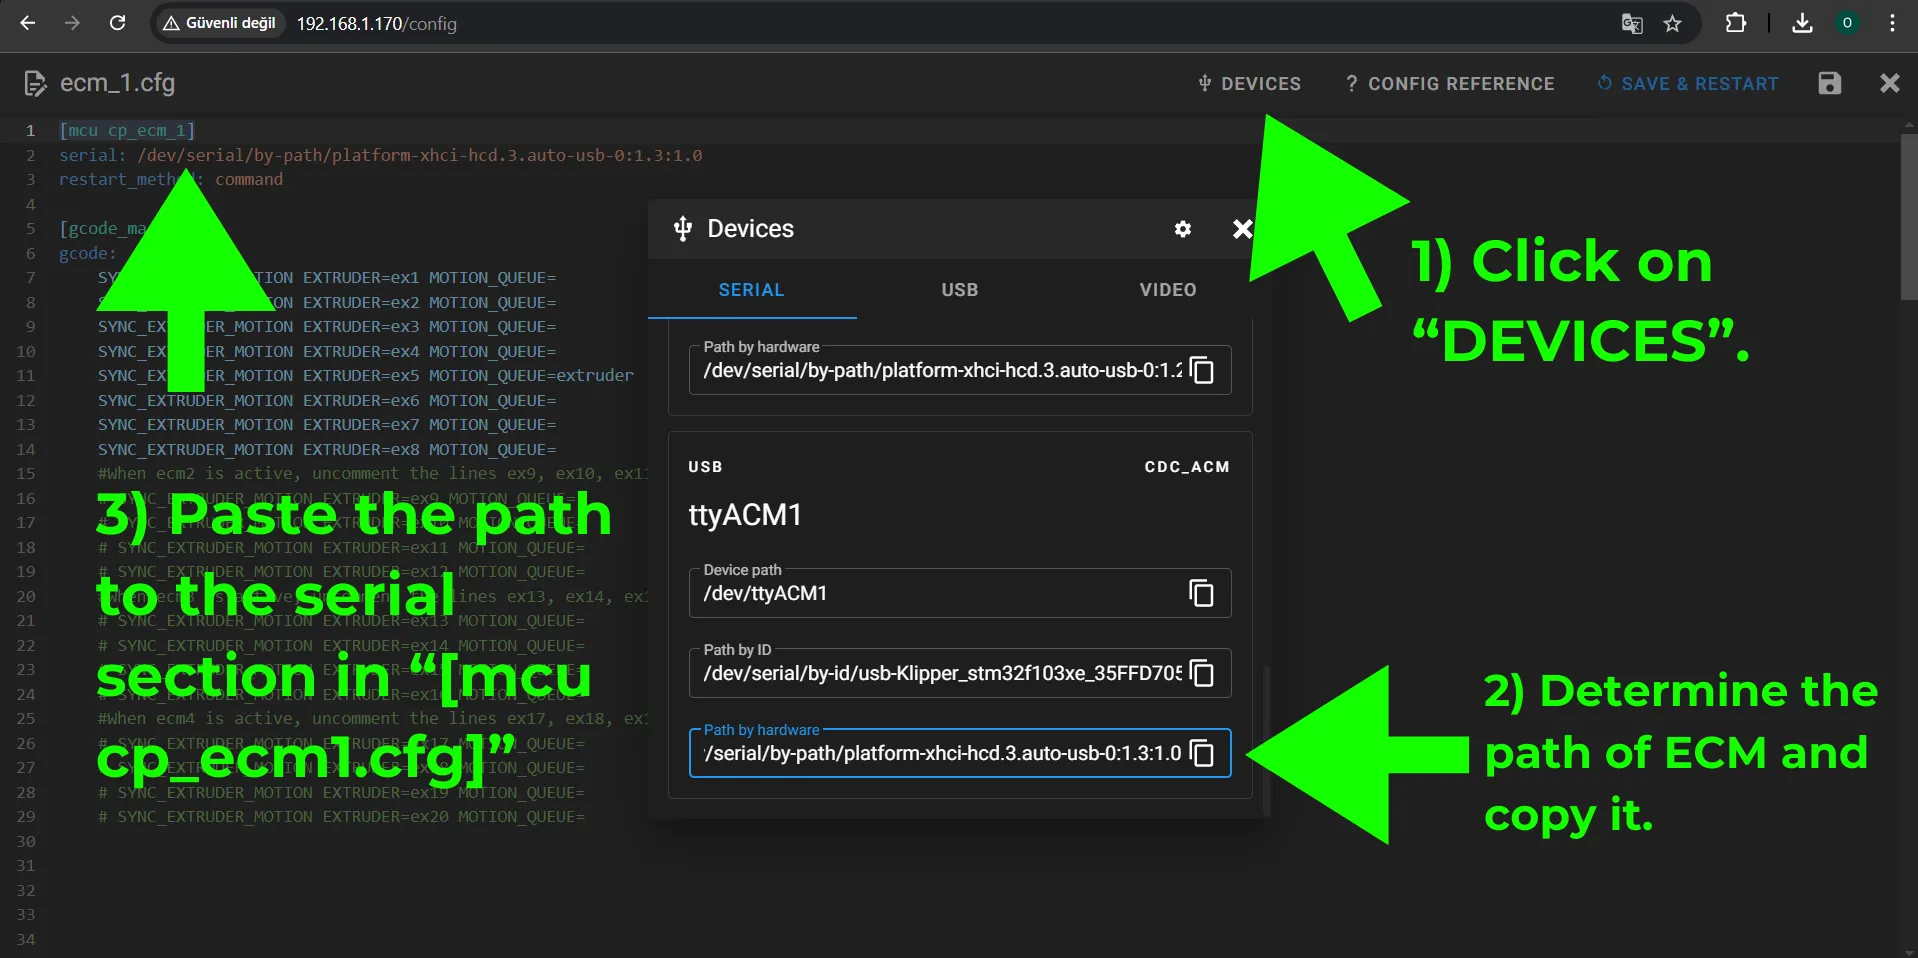
Please do not forget to click on "SAVE & RESTART".
- Enter the driver.cfg file. Uncomment the lines that shown below.
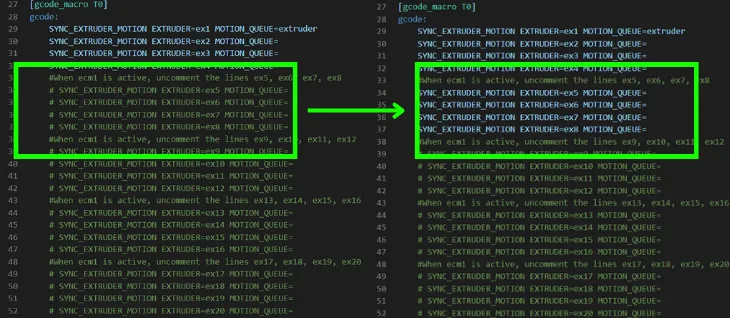
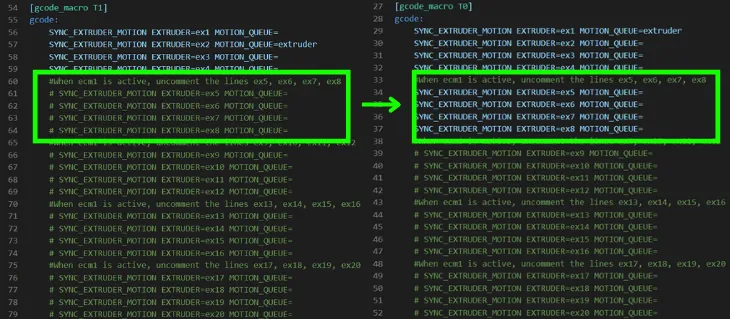
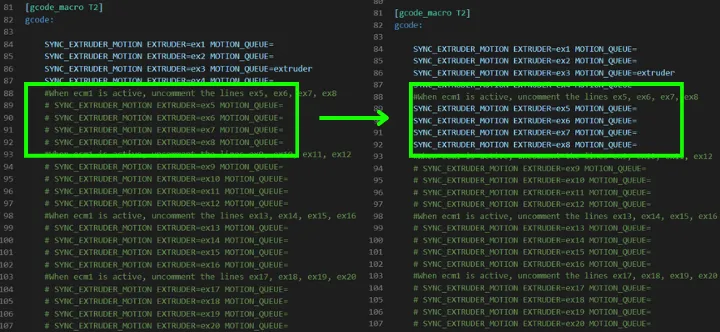
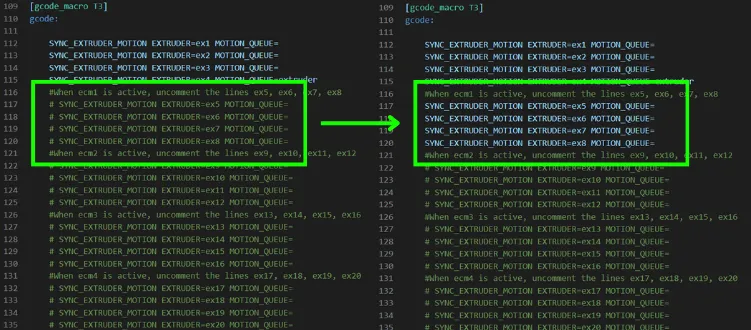
After all uncommenting process is done, please click on SAVE & RESTART.
Please do not forget to click on "SAVE & RESTART".
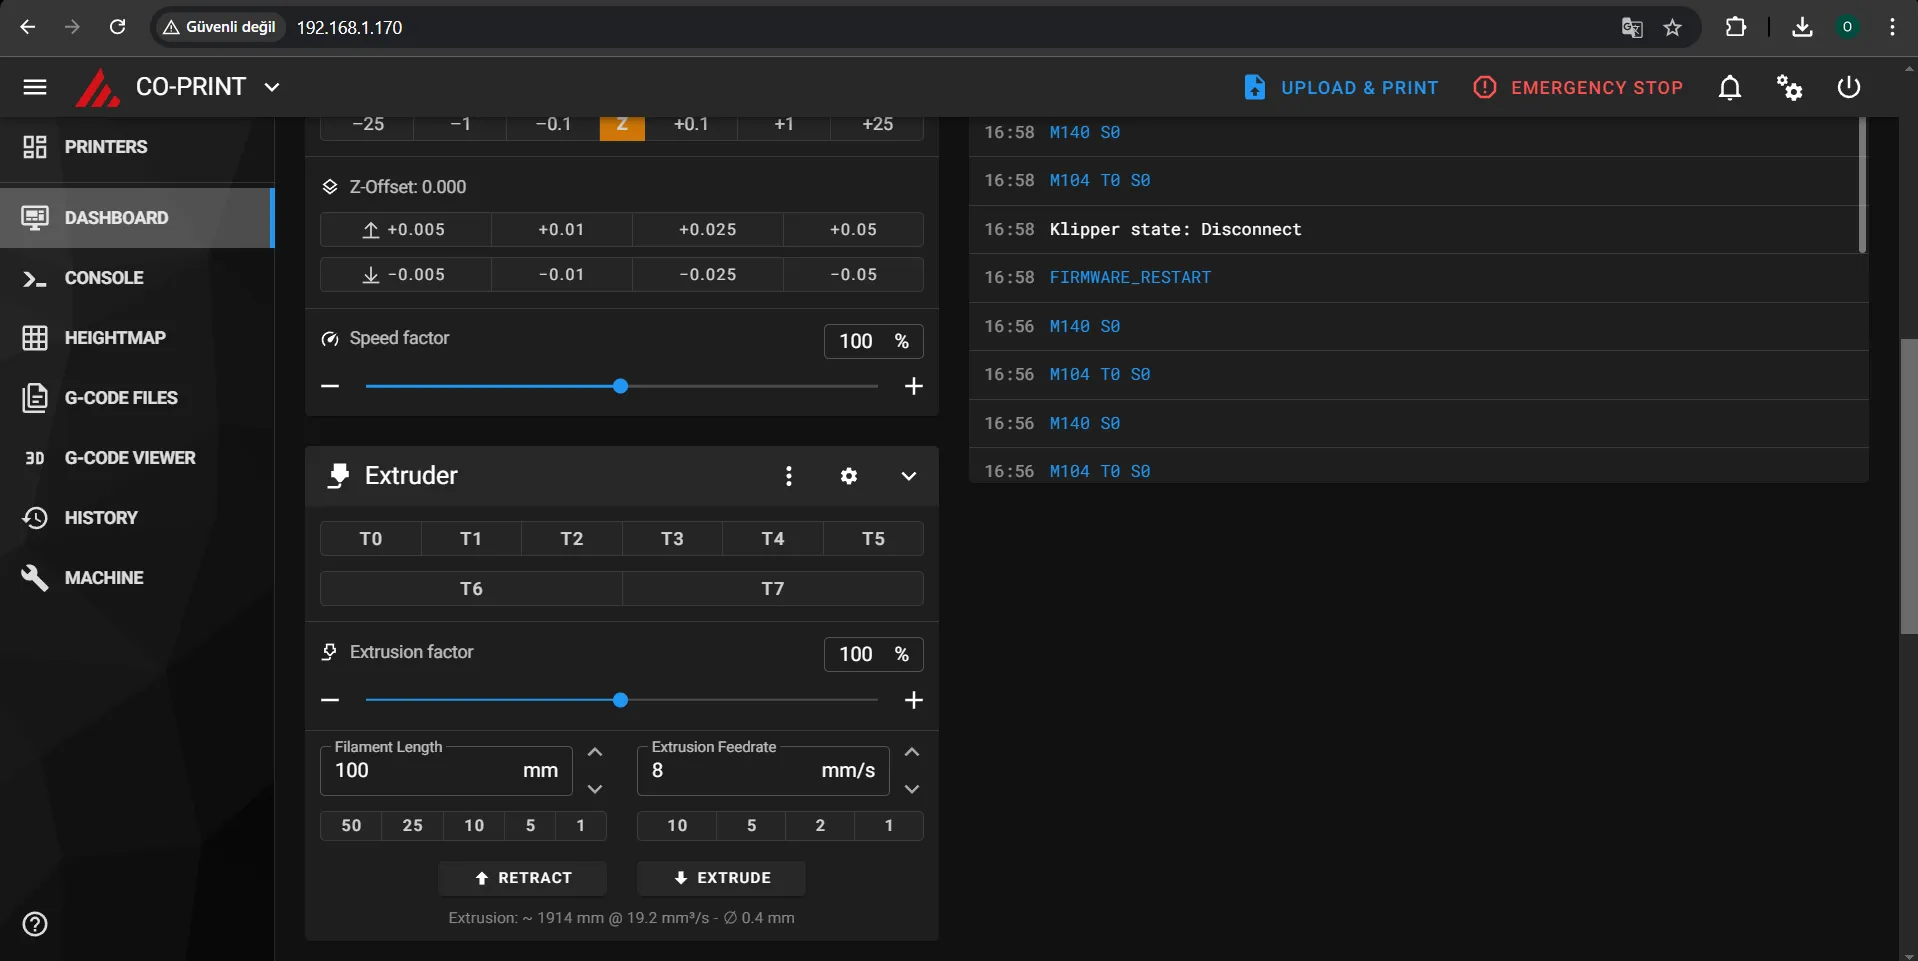
- After all these steps, in the Extruder section of Mainsail must be like the image below.
¶ What to do if you're connecting ECM to KCM;
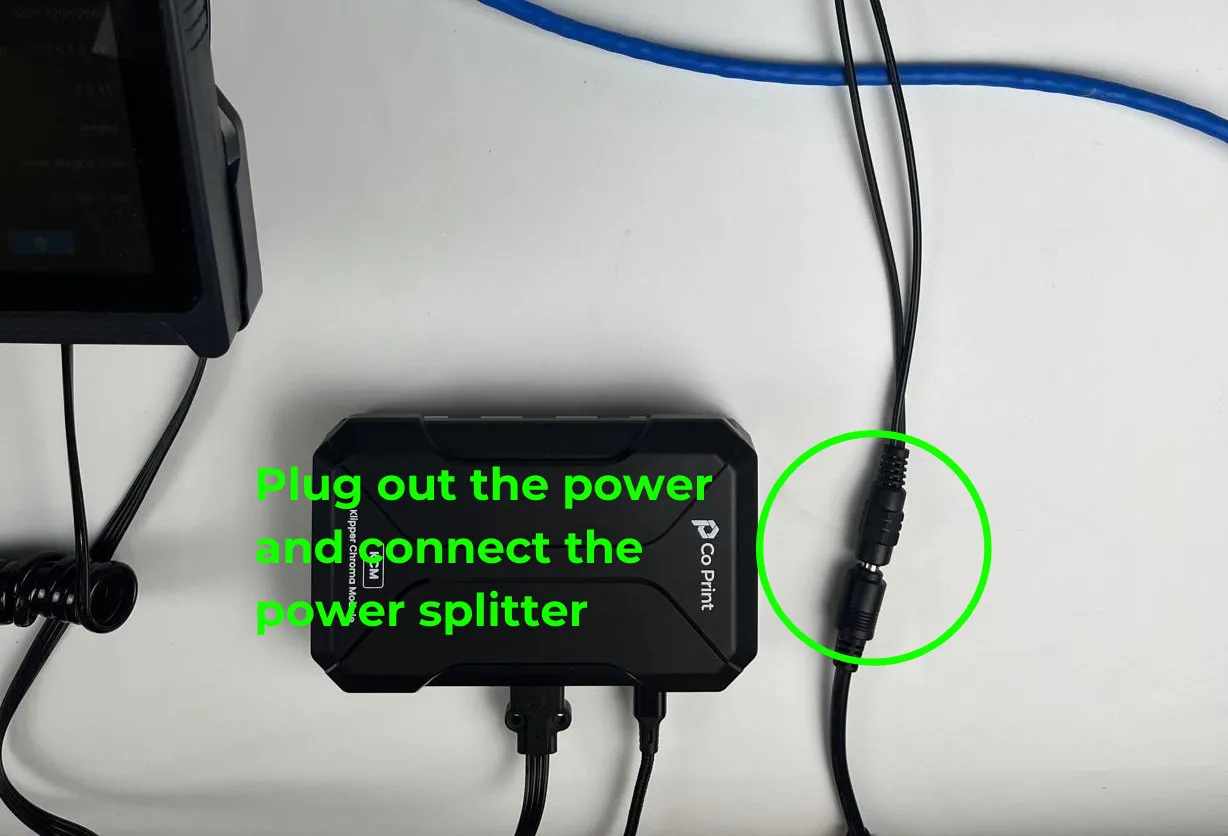
- Plug out the power of KCM and put a splitter to the adapter.
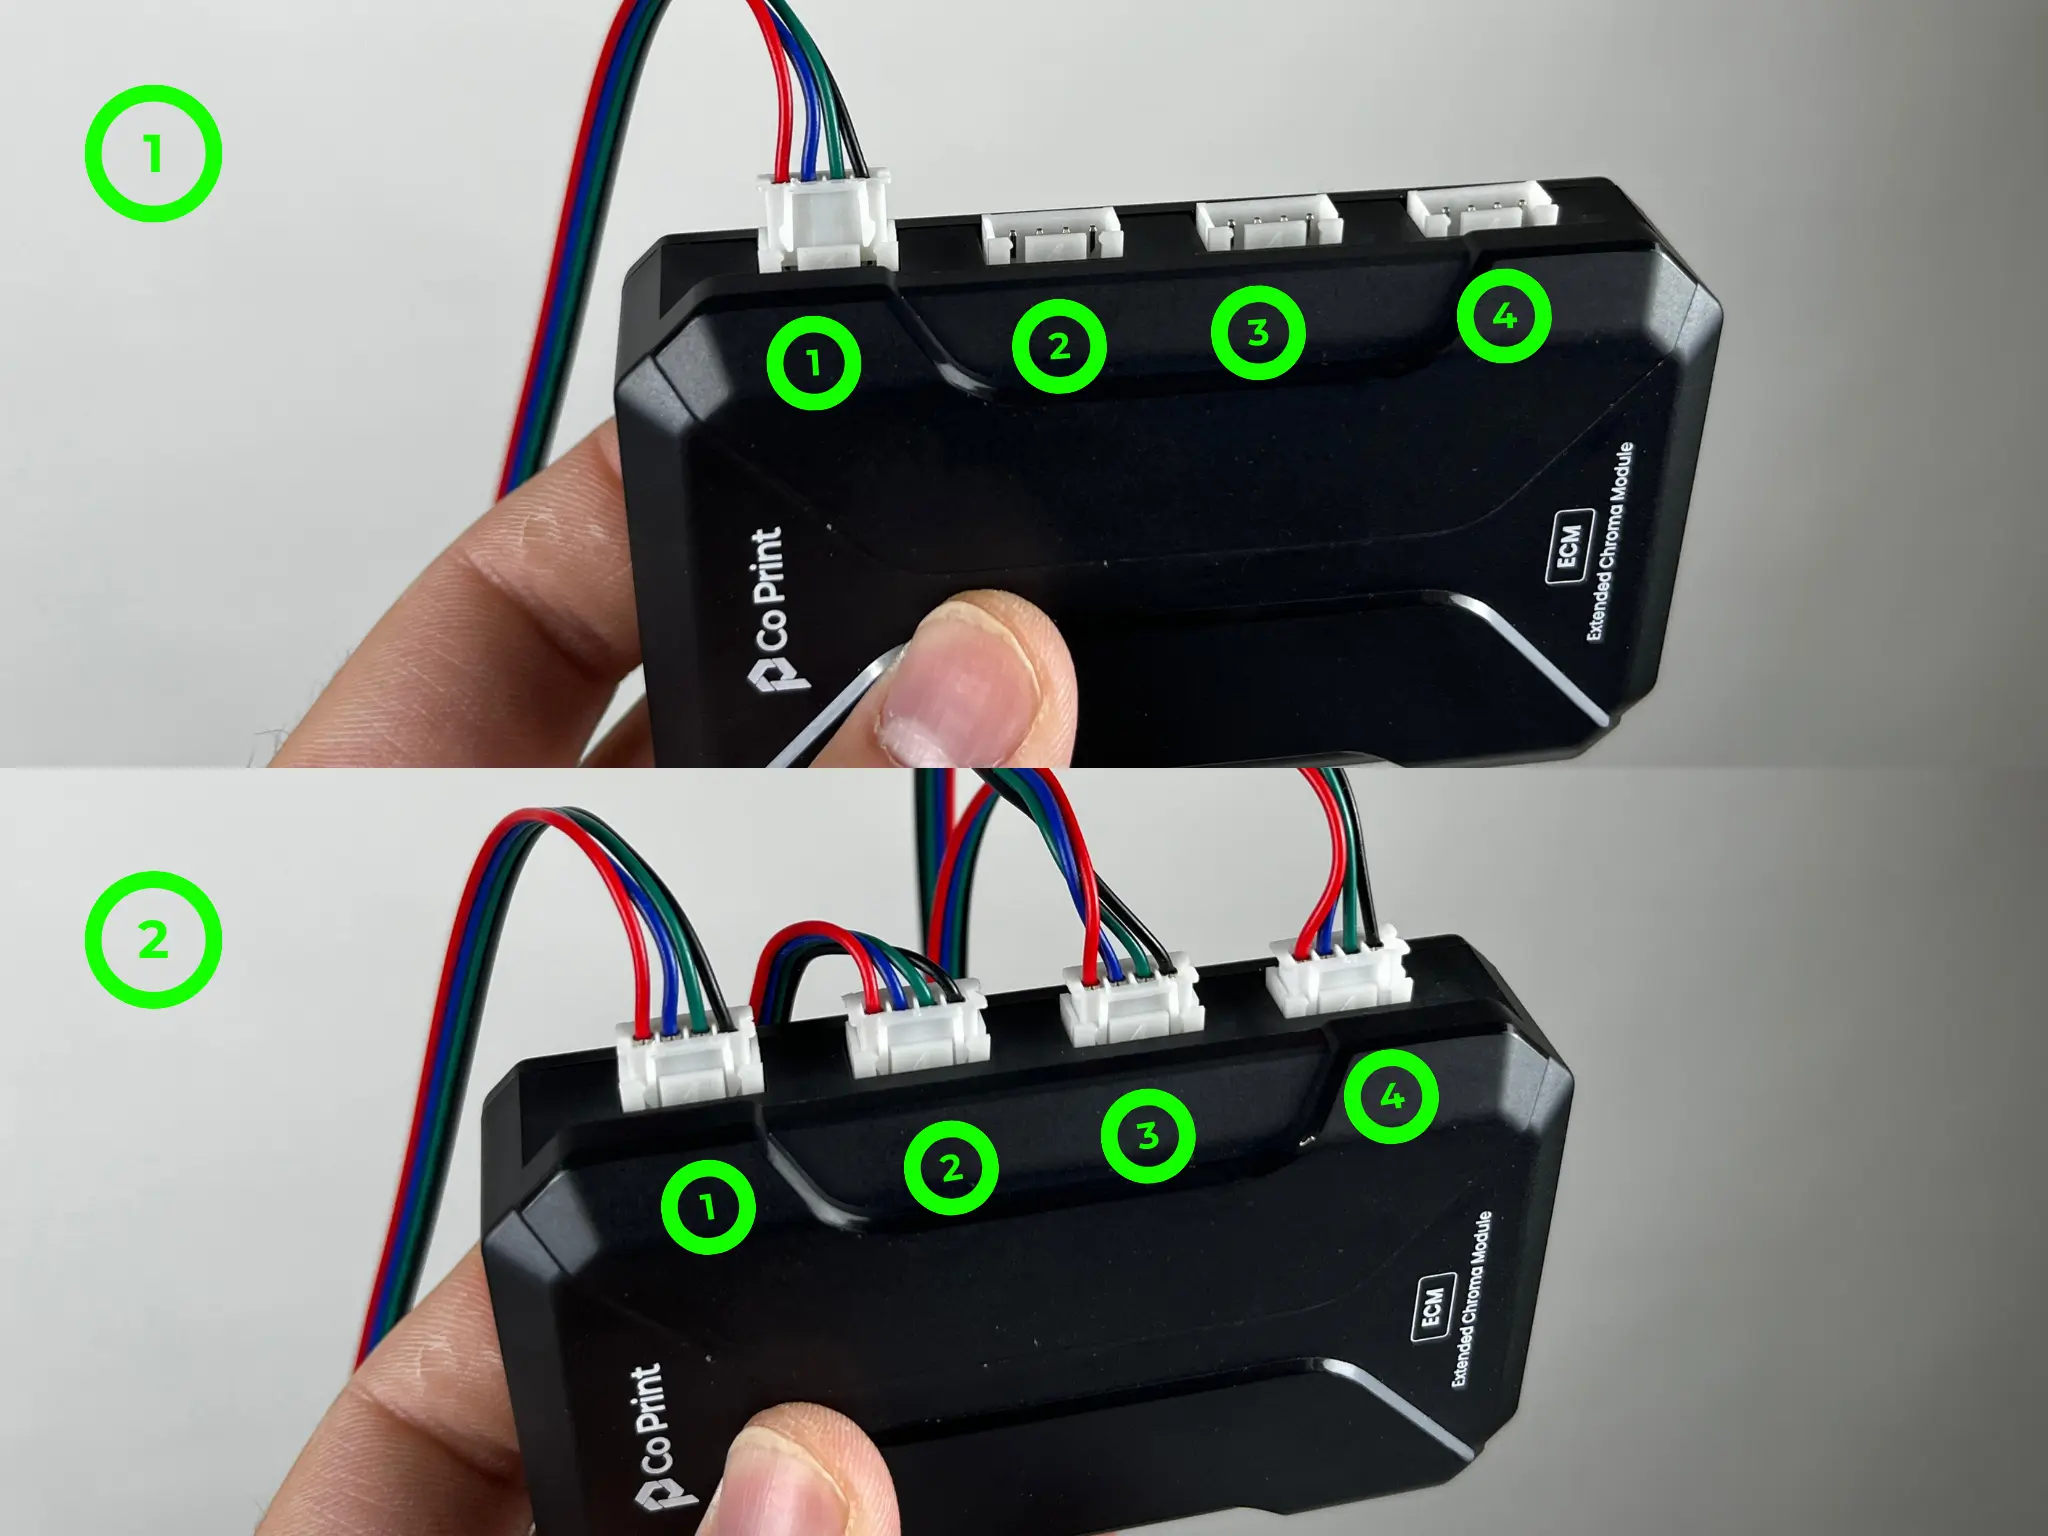
- Connect the motor cables of newly added CX-I Extruders to the ECM.
- Connect the Type-C cable between 3D printer and ECM.
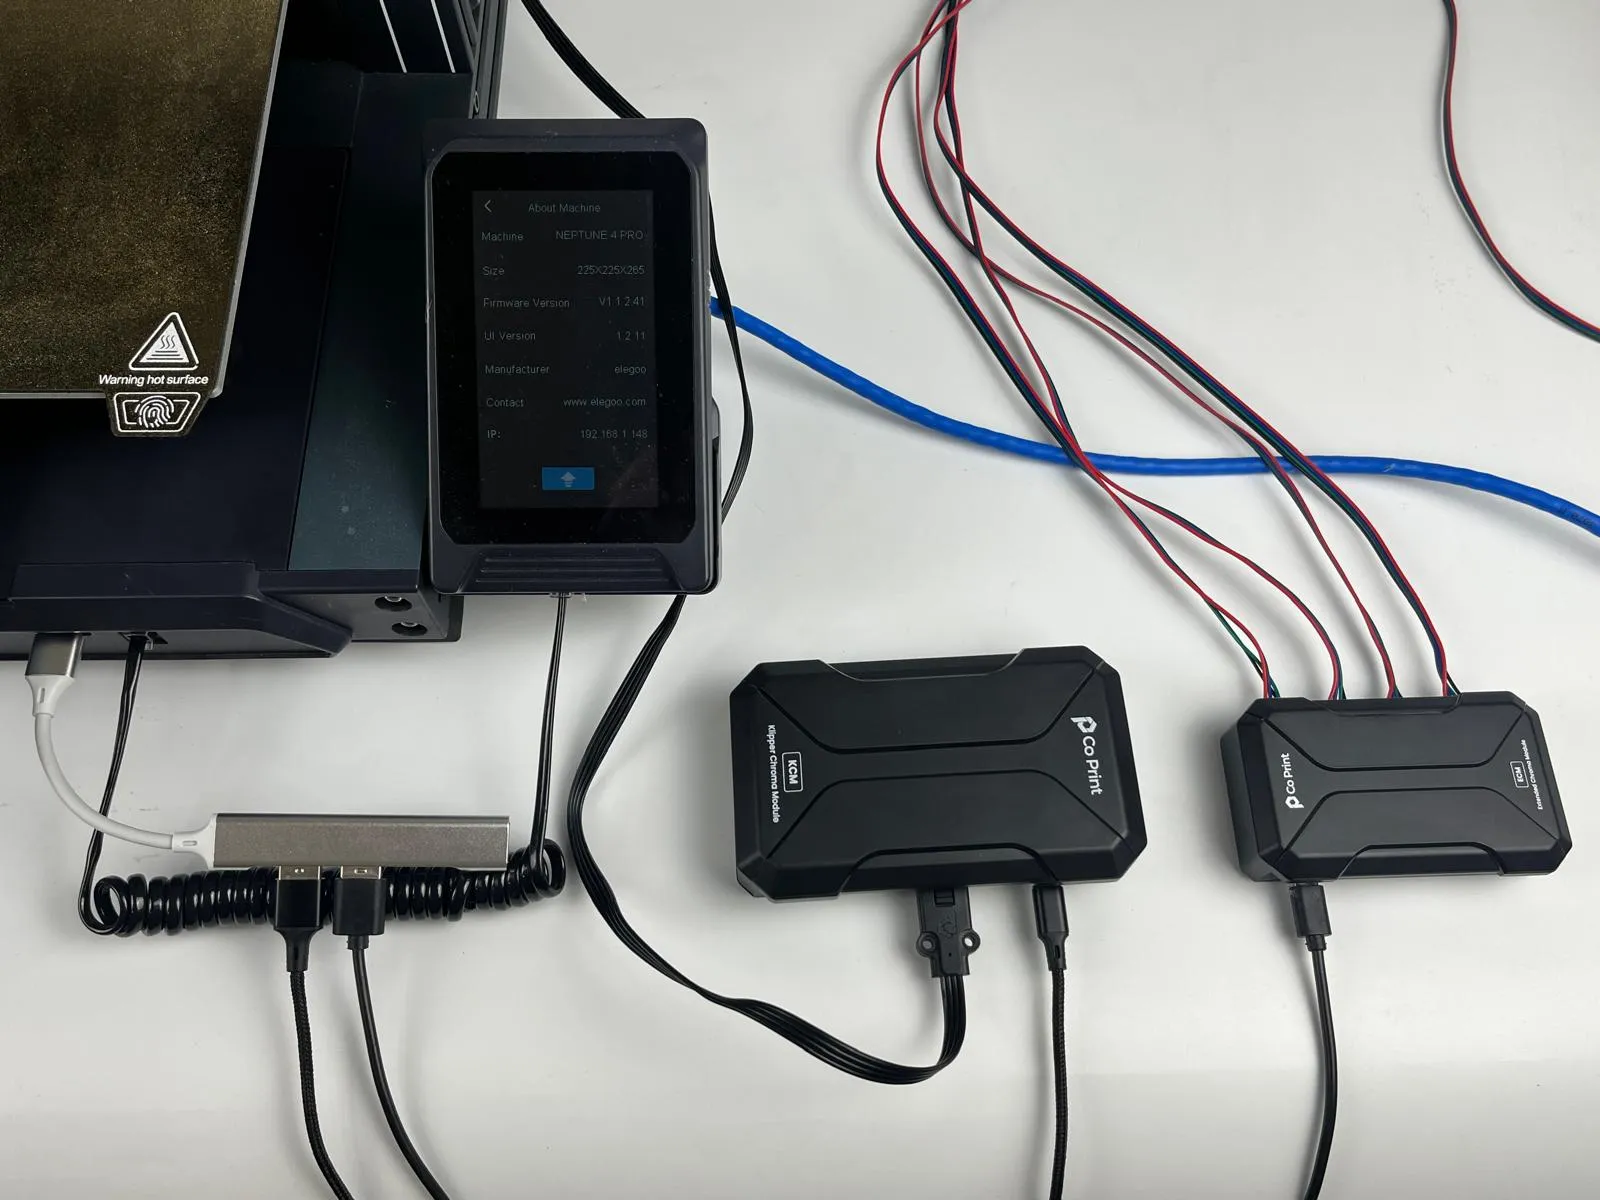
In this tutorial we worked on Elegoo Neptune 4 Pro. Elegoo Neptune 4 Pro has only 1 USB port so using a USB is necessary. If your printer has multiple USB ports, you don't need to use a USB hub.
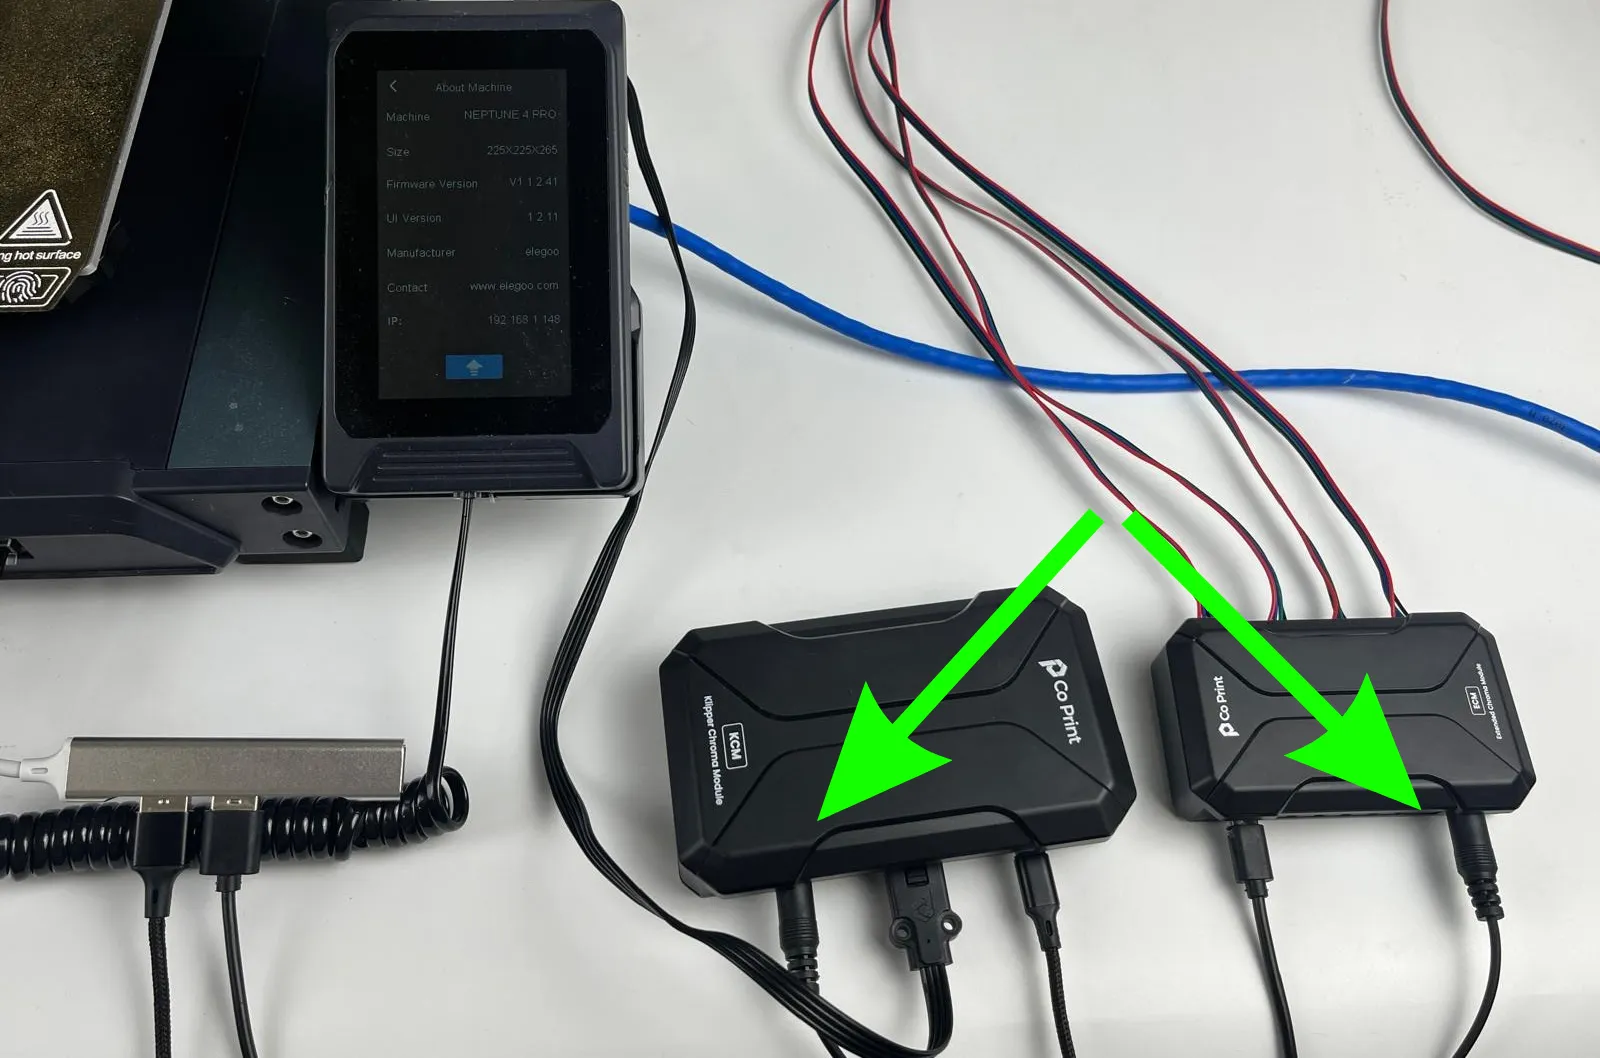
- Plug in the power cables to KCM and ECM.
- Access the Mainsail via typing the IP address of your 3D printer to the searchbar of any browser.
- Go to "MACHINE".
- Enter the printer.cfg file.
- Uncomment the "ecm1.cfg" in "printer.cfg" by deleting the "#" symbol. Then click on "SAVE & RESTART".
Please do not forget to click on "SAVE & RESTART".
- Enter the ecm1.cfg file.
- Press the "DEVICE" section and copy the port that where you connect the ECM. And then paste the path to the serial section in "[mcu cp_ecm_1]". And then please click on "SAVE & RESTART".
Please do not forget to click on "SAVE & RESTART".
- Enter the kcm.cfg file. Uncomment the lines that shown below. And then please click on "SAVE & RESTART".
Please do not forget to click on "SAVE & RESTART".