¶ Elegoo Neptune 4 Pro KCM Set Setup Guide
| Image | Information |
|---|---|
 |
Welcome to the installation page for Elegoo Neptune 4 Pro with KCM Set. This guide will help you update your printer's firmware to ensure compatibility with KCM Set, download and print the required .STL files for mechanical assembly, complete the mechanical setup, and configure the Klipper settings. By following these steps, you will successfully complete the installation process. |
¶ 1) Mechanical Setup of KCM Set on Elegoo Neptune 4 Pro
Before starting the KCM Set installation on your Elegoo Neptune 4 Pro, you need to 3D print some parts for the ChromaHead and CX-I Extruder assembly.
¶ - Downloadable parts required for the installation
You can download the required STL files below.
| Part Name | Quantity | Links |
|---|---|---|
| ChromaHead Adapter Part | 1x | Download |
| CX-I Extruder Holder For Sigma Profiles | 4x | Download |
¶ 1.1) ChromaHead Installation on Elegoo Neptune 4 Pro
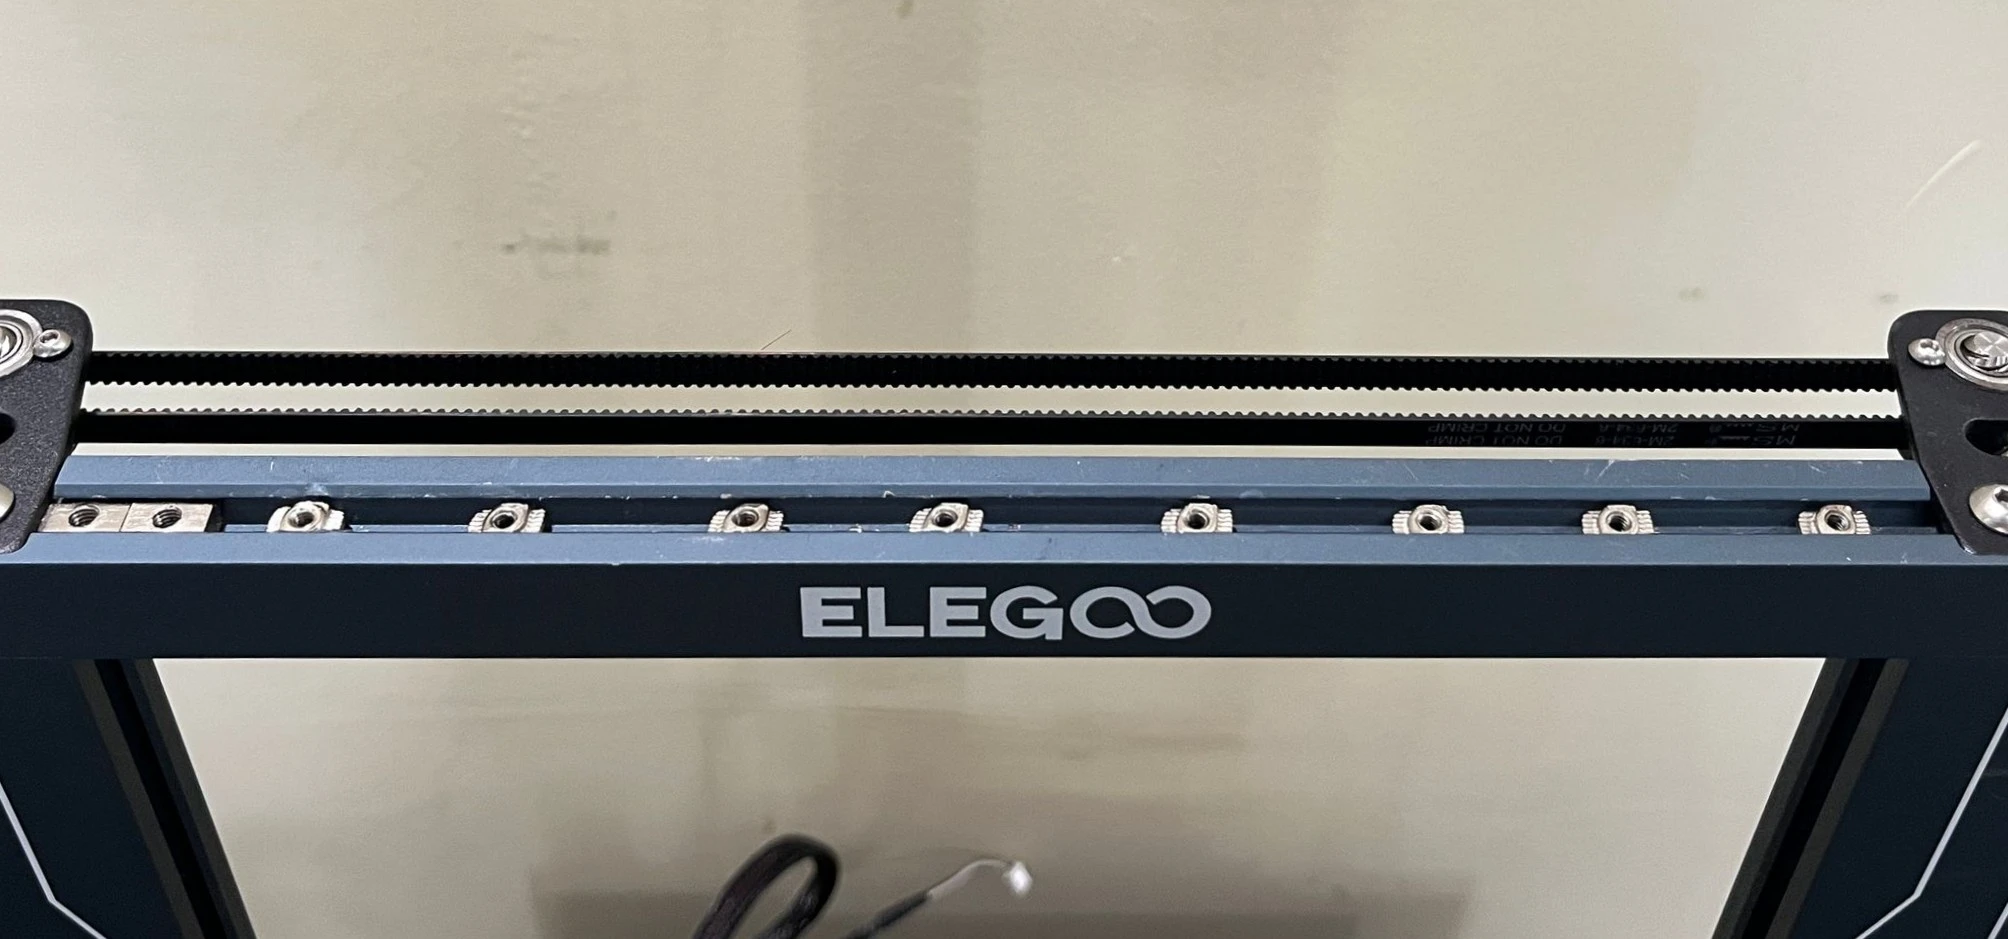
- To remove the External Fan on the X-axis of the Elegoo Neptune 4 Pro, first loosen the three screws on the back, then remove the fan.
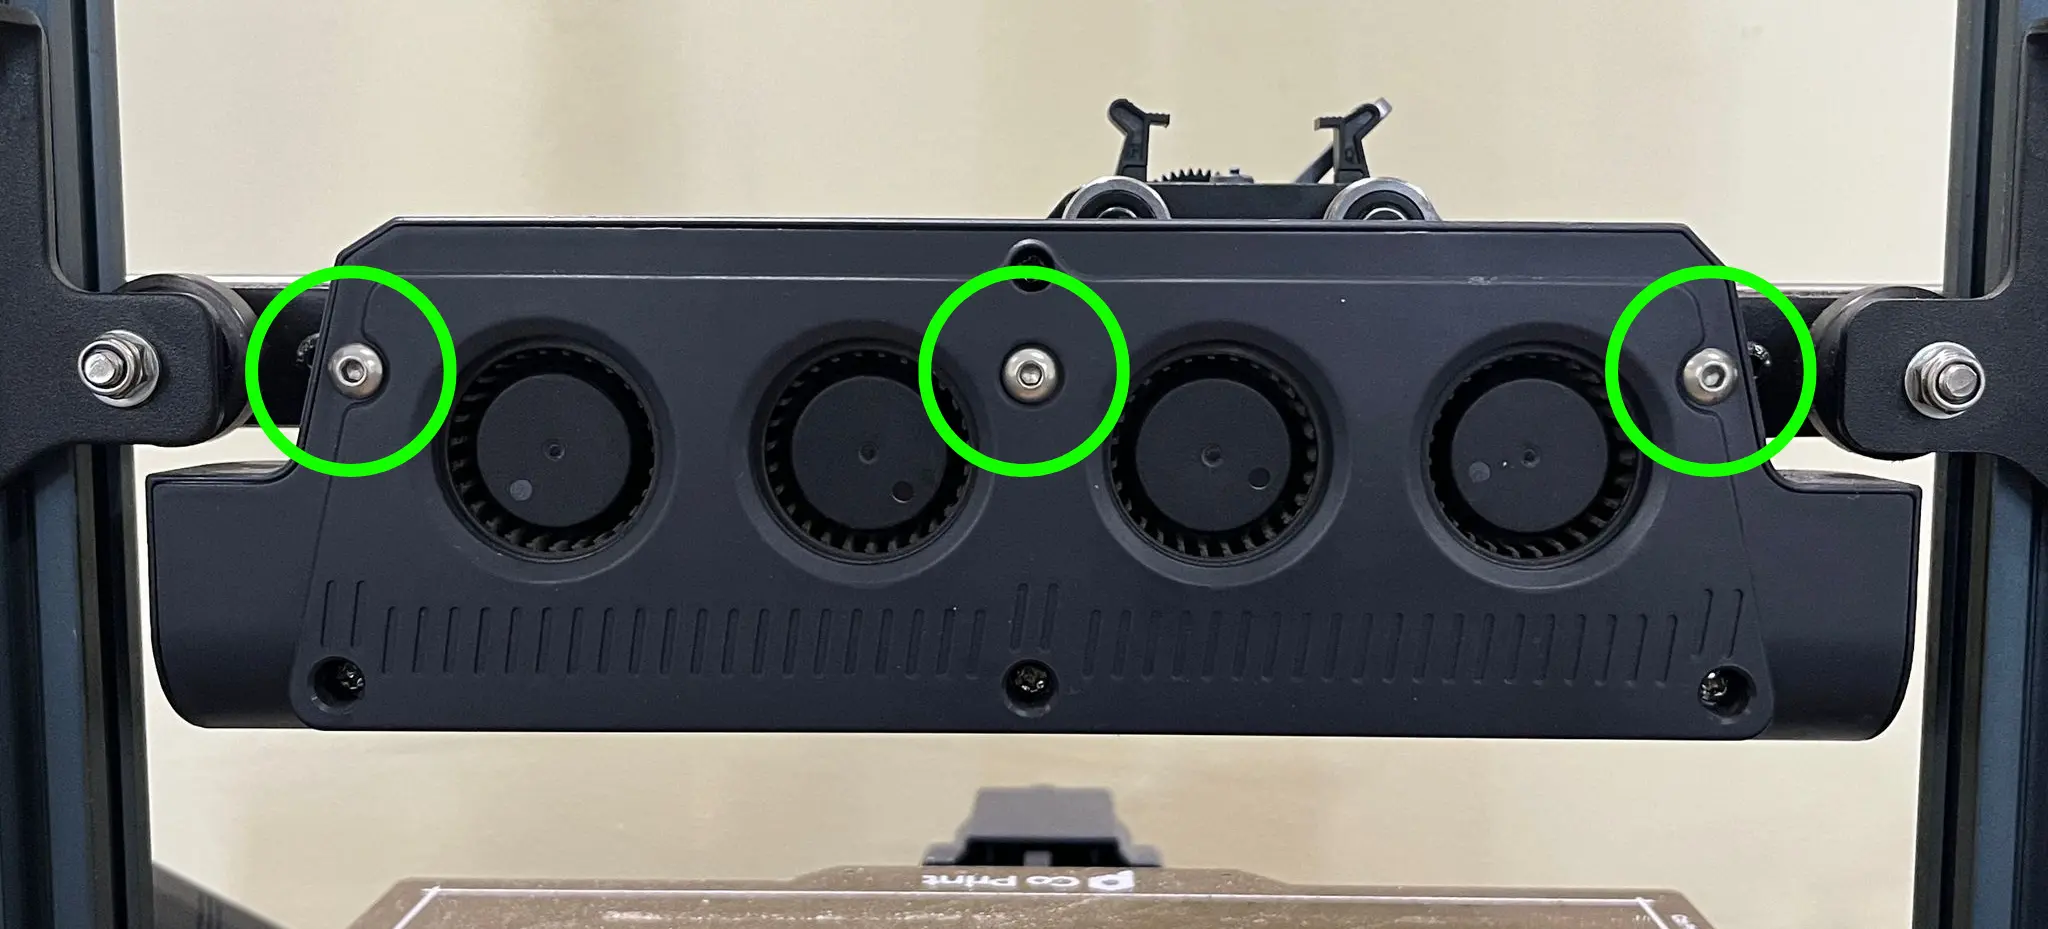
- On the back of the Elegoo Neptune 4 Pro's stock toolhead, there are four screws that attach it to the metal sheet. Remove these screws.
- Then, remove the 2 screws on front cover and disconnect the cable and fully detach the stock toolhead from the printer.
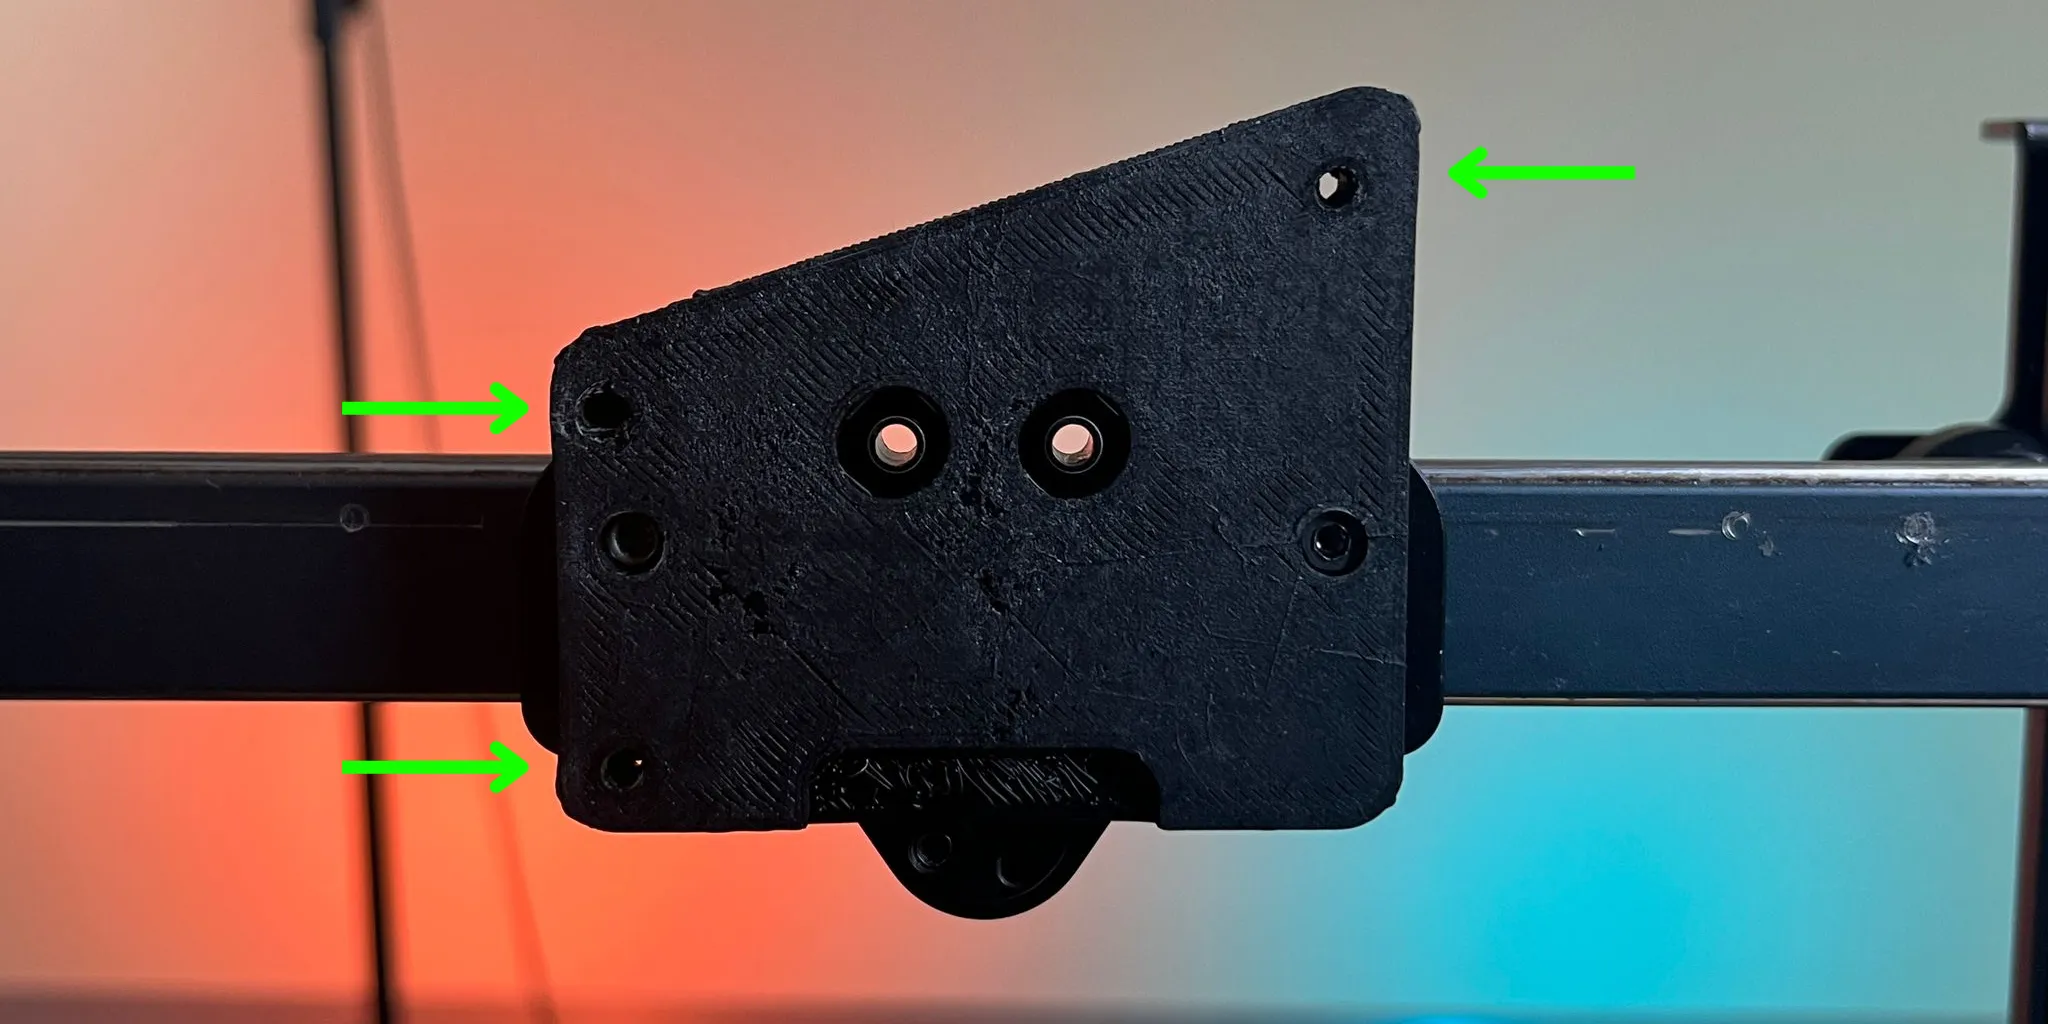
- Place the printed part onto the exposed metal sheet as shown in the picture. Then insert M3x10 screws into the holes on the left and right sides, and tighten them.
- Insert square nuts into the slots: 2 on the right side and 1 on the left side.
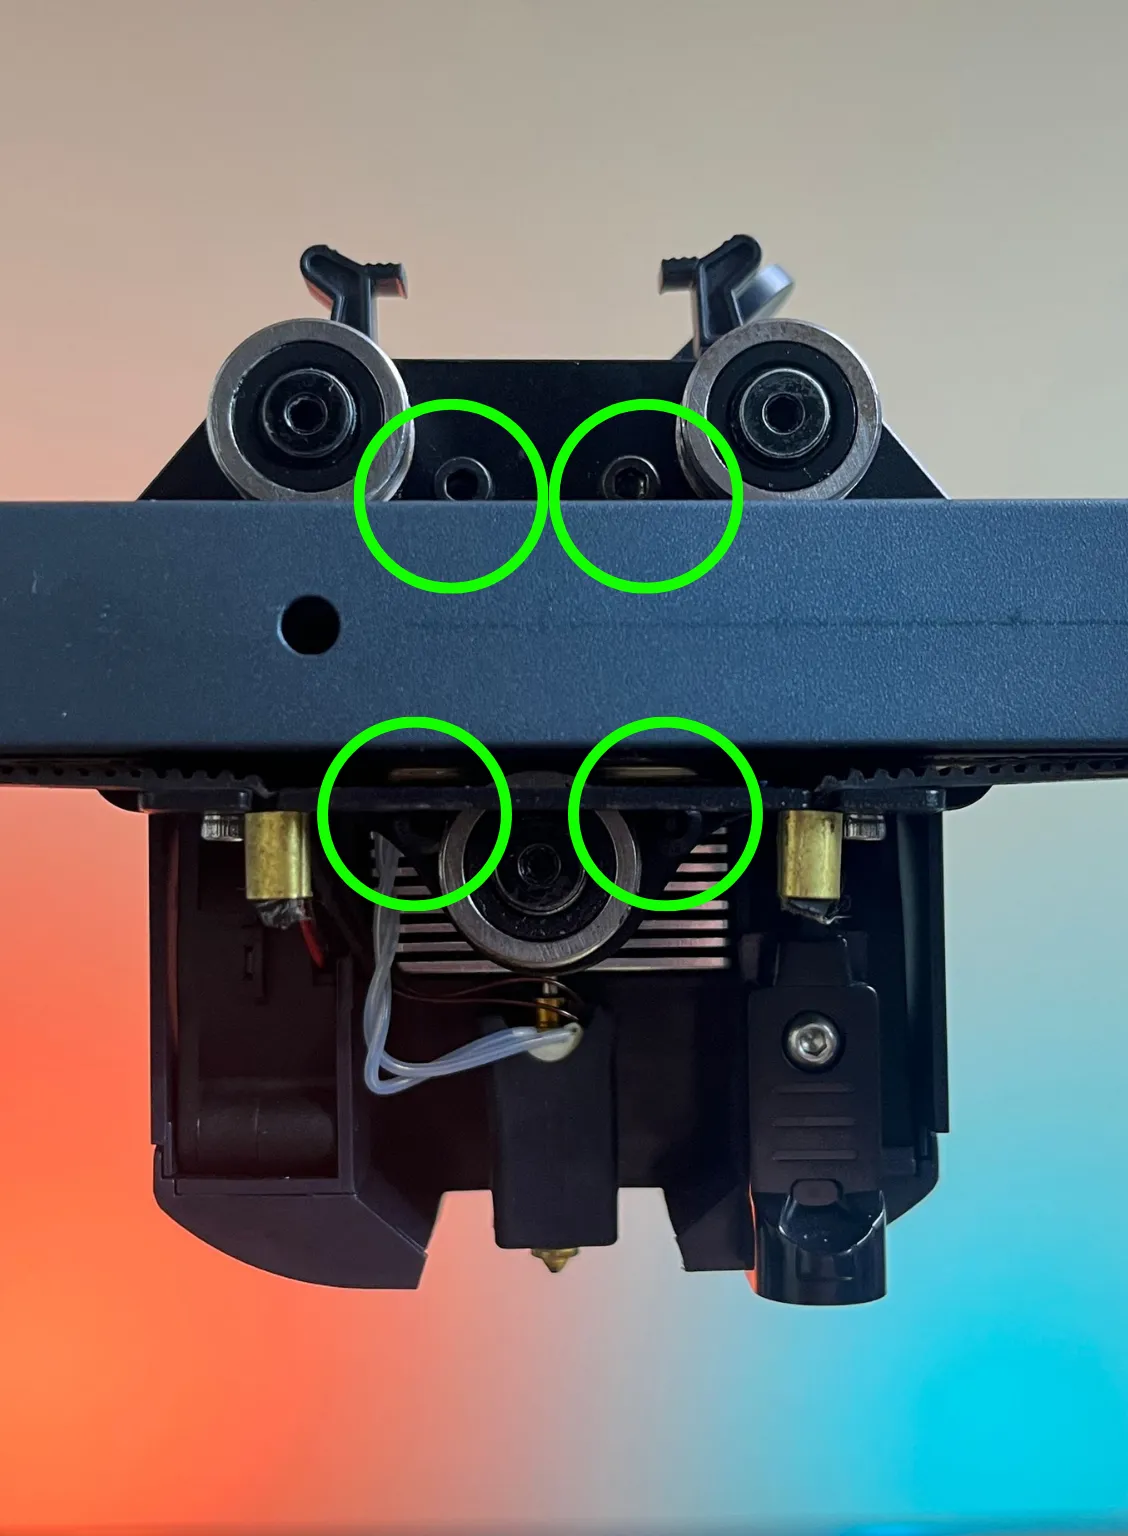
- Remove the cover of the ChromaHead and disconnect the fan cable.
- Align the ChromaHead with the correct holes and place it properly. Then use three M3x10 screws to secure the ChromaHead to the printer.
- Reconnect the fan cable and close the ChromaHead cover.
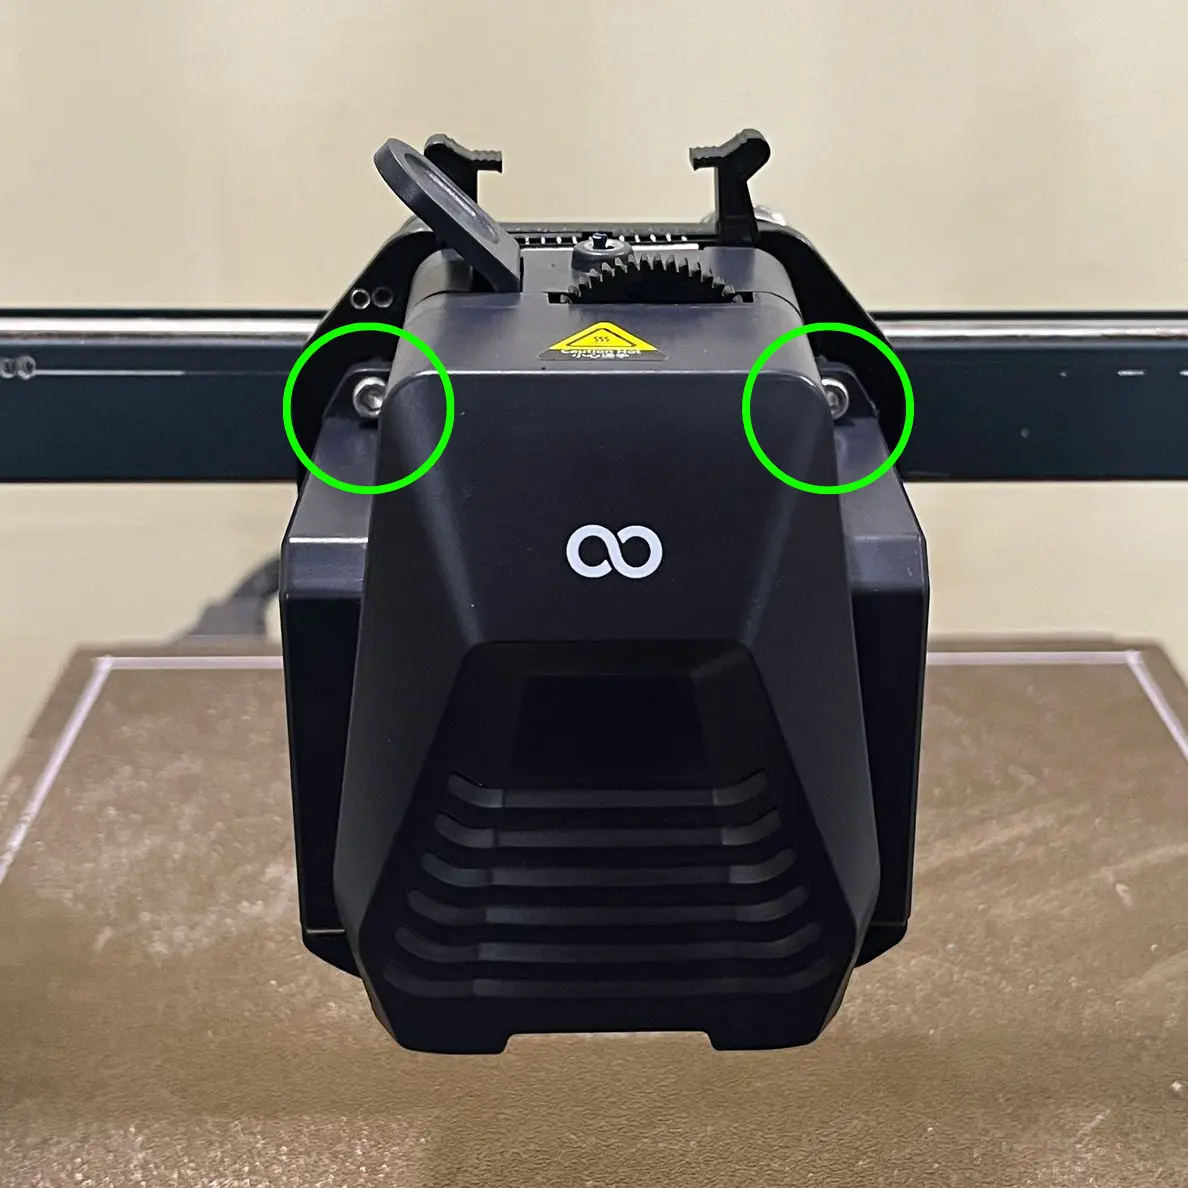
- Finally, you can reattach the external fan of the Neptune 4 Pro.
¶ 1.2) CX-I Extruders Installation on Elegoo Neptune 4 Pro
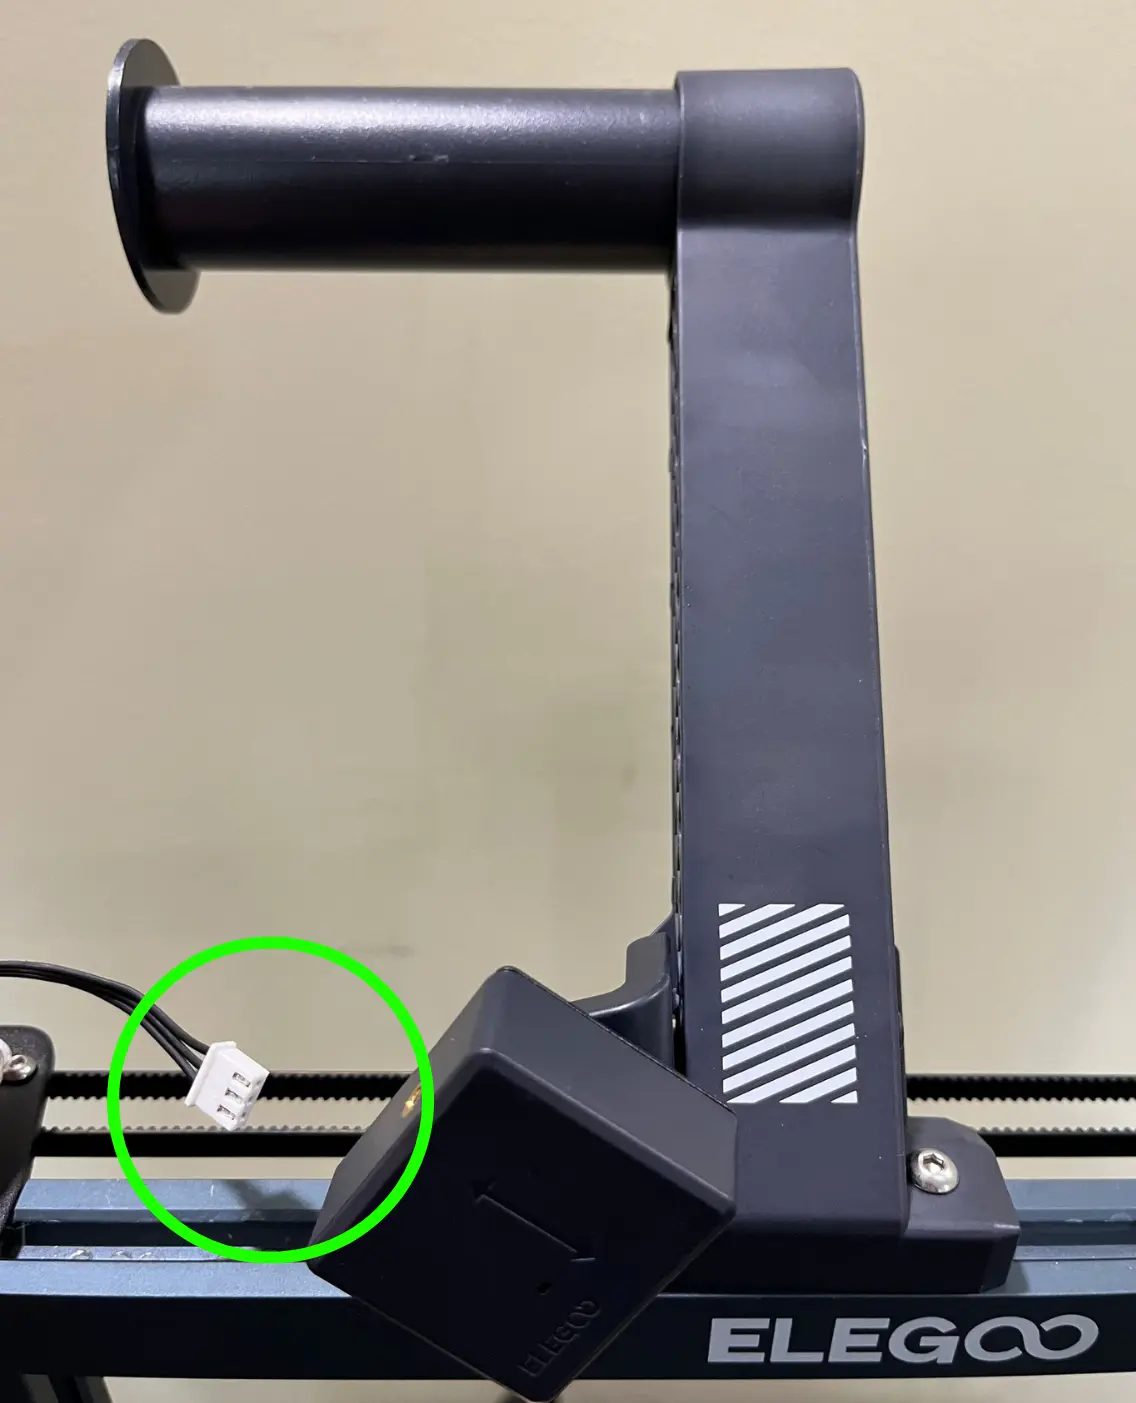
- Disconnect the filament sensor cable from its socket.
- Remove the screw that holds the filament sensor from the spool holder.
- Remove the two screws on the right and left sides of the spool holder, and detach the spool holder from the printer.
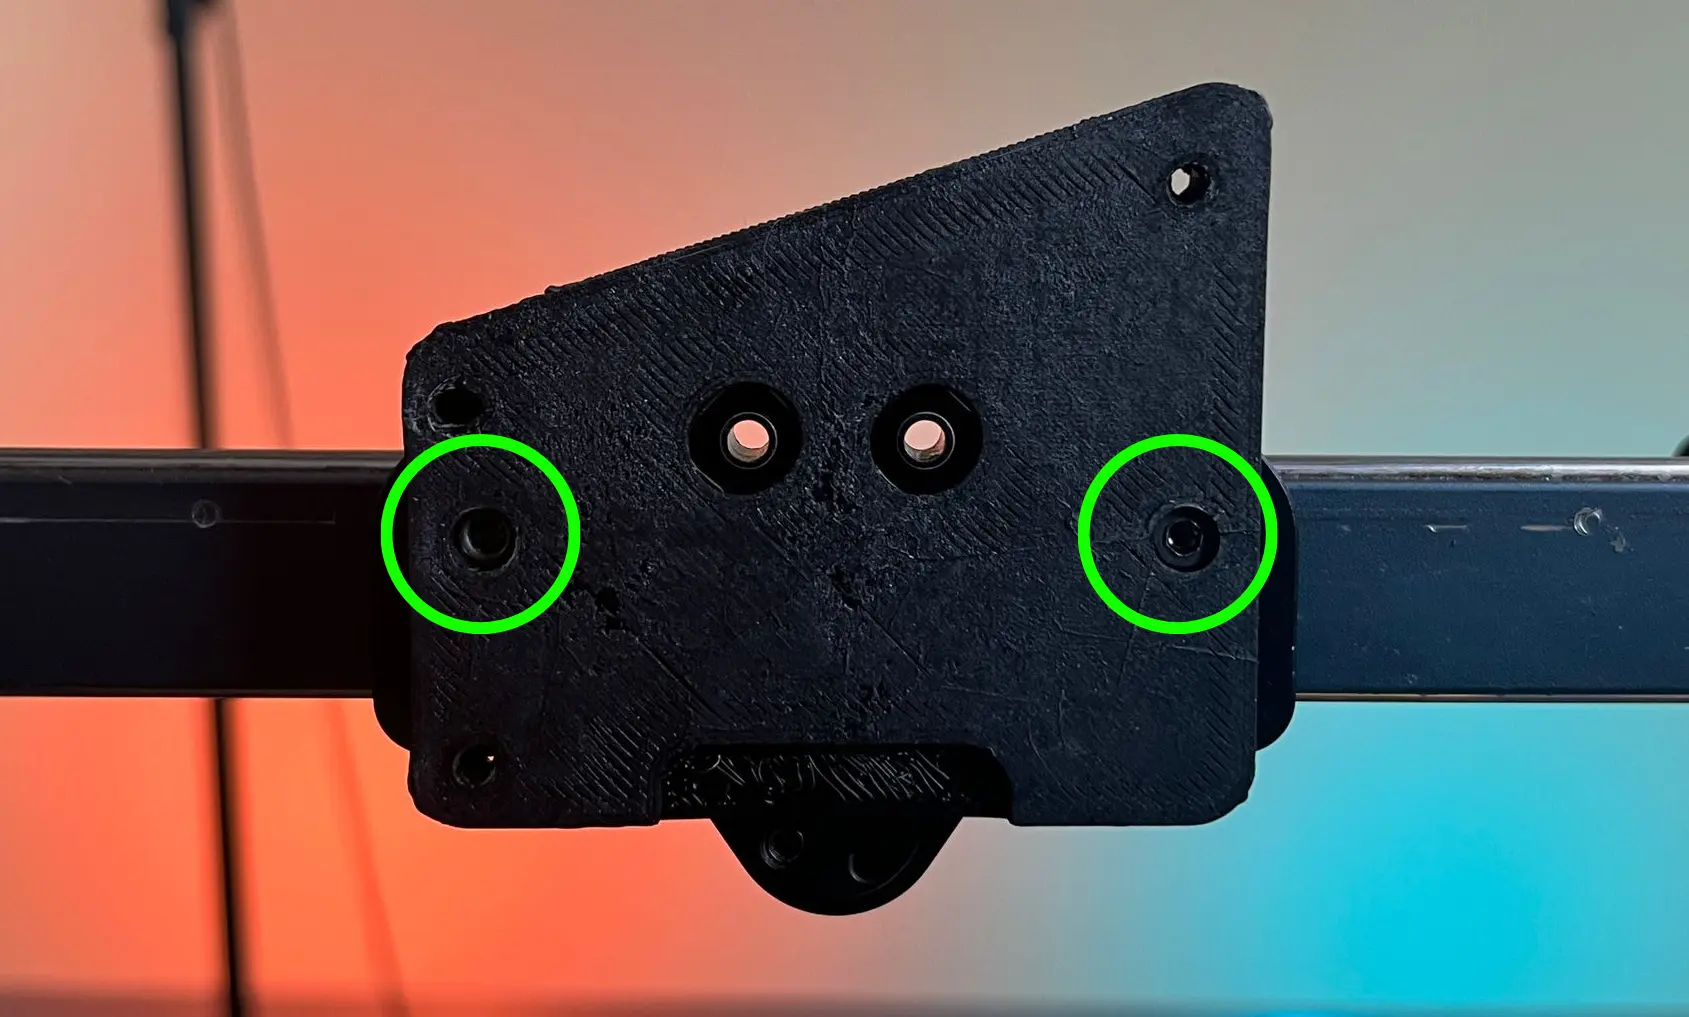
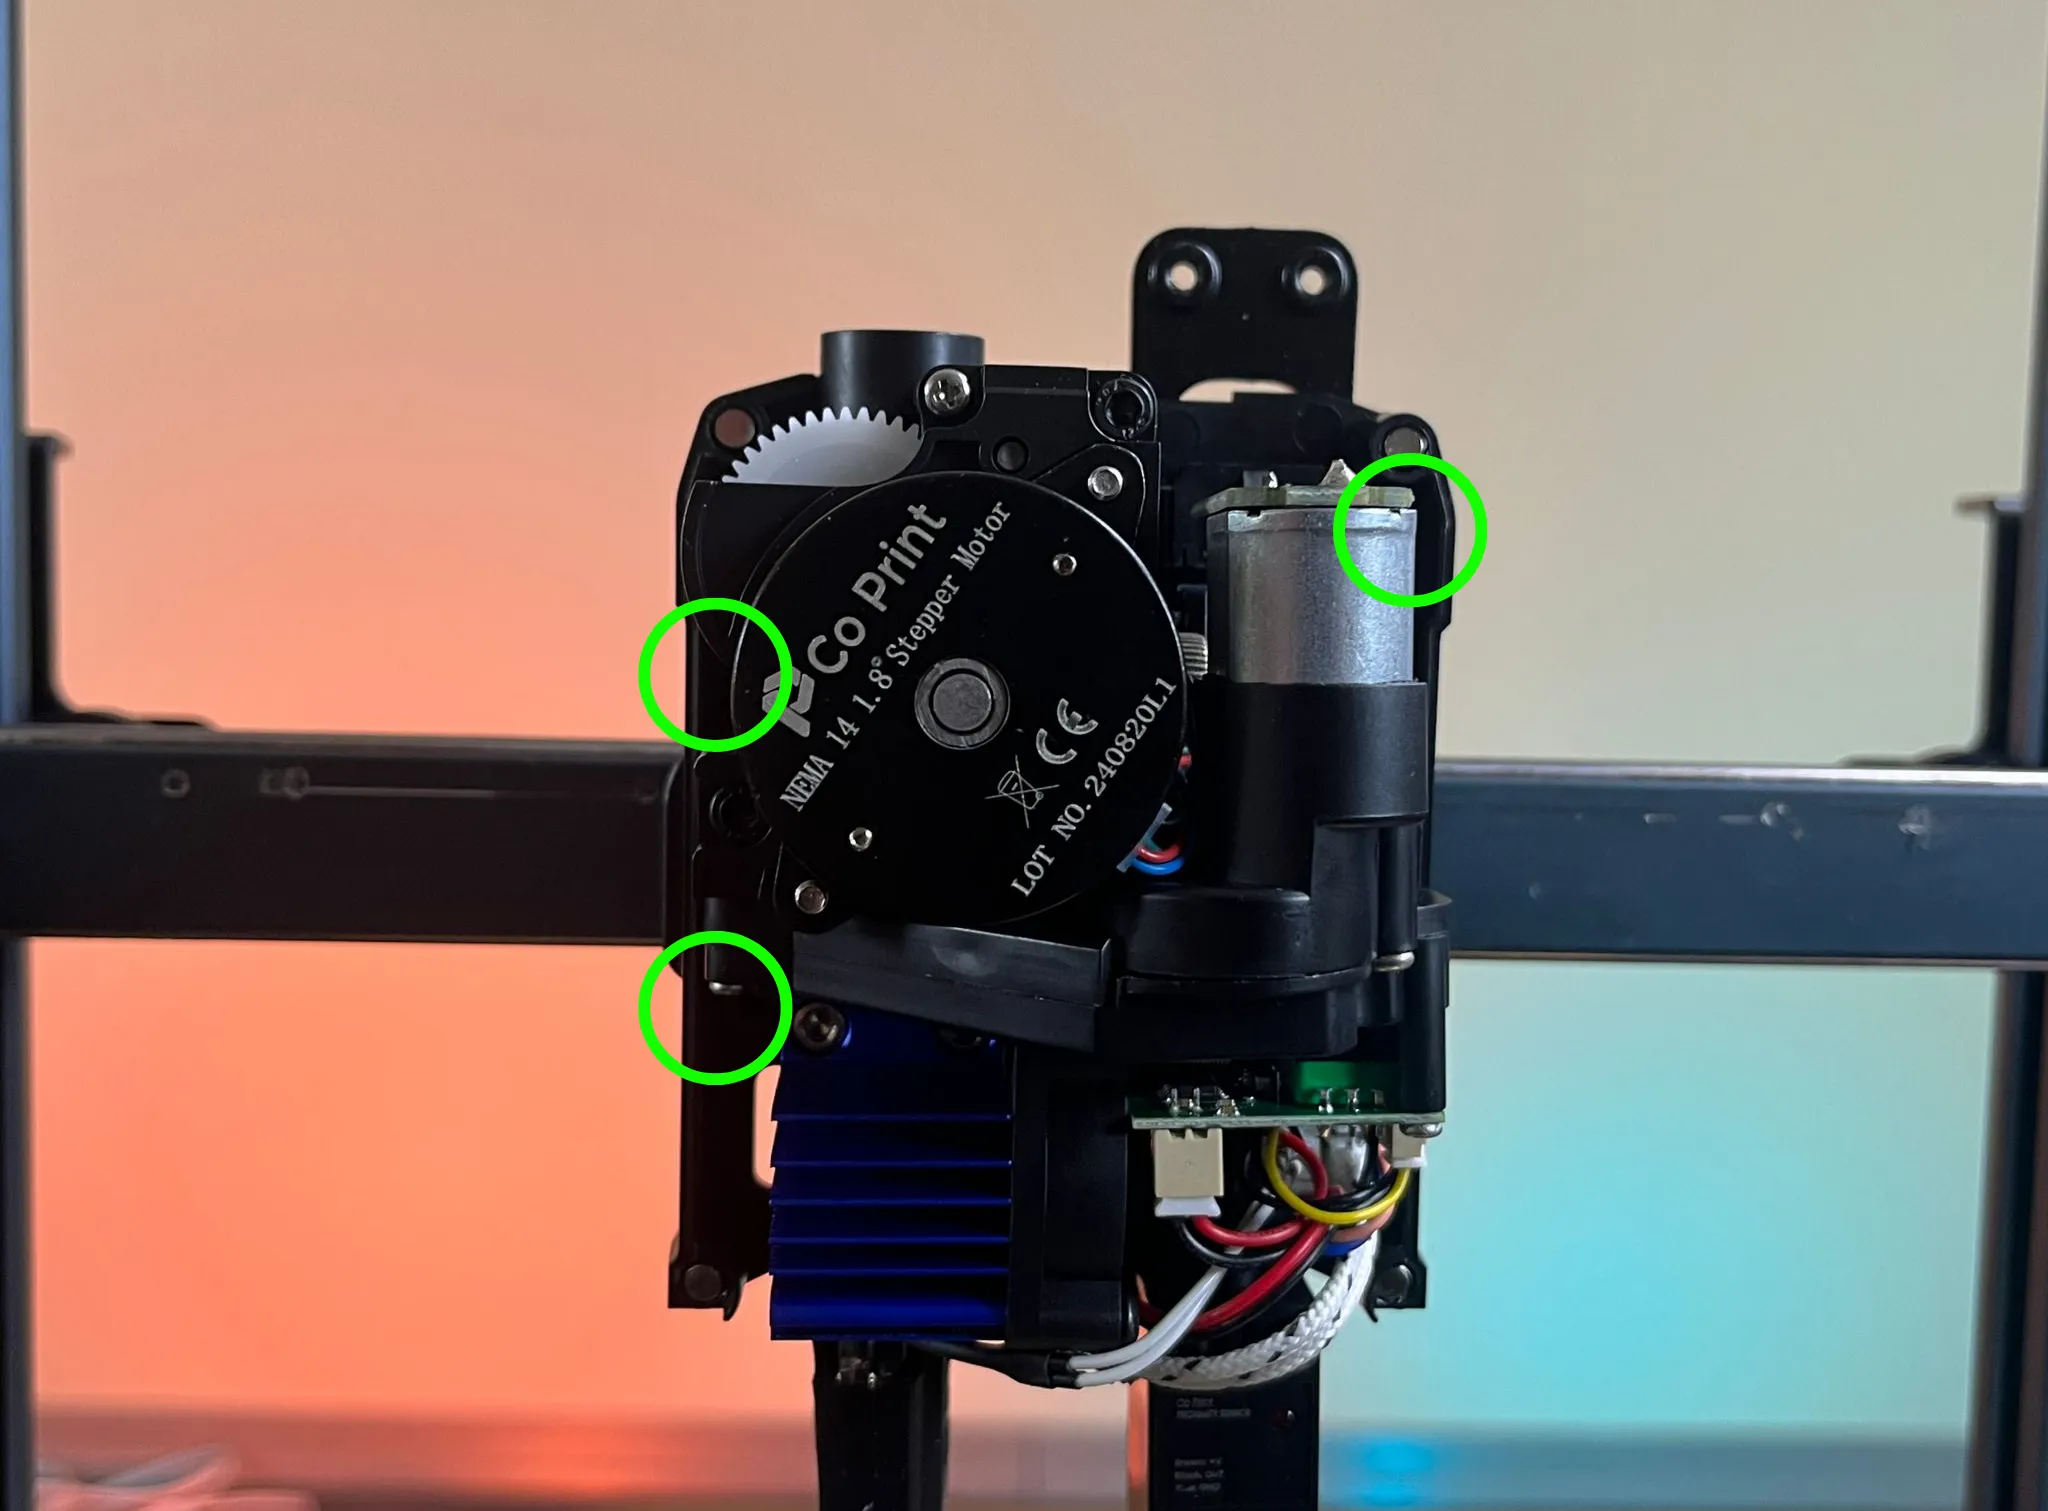
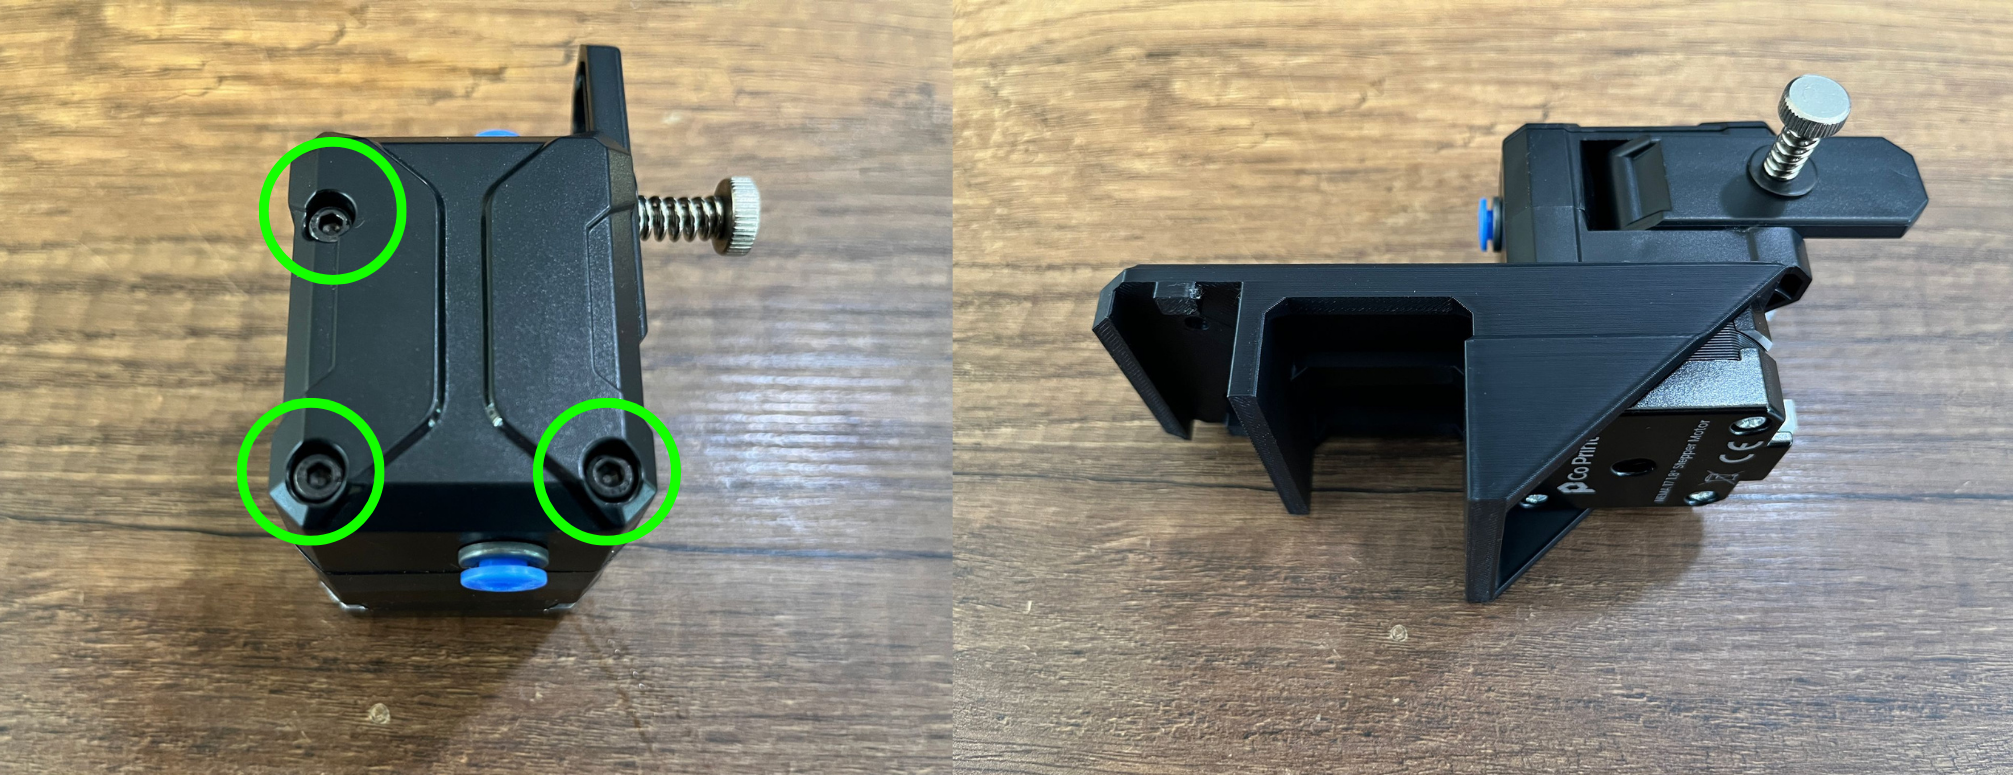
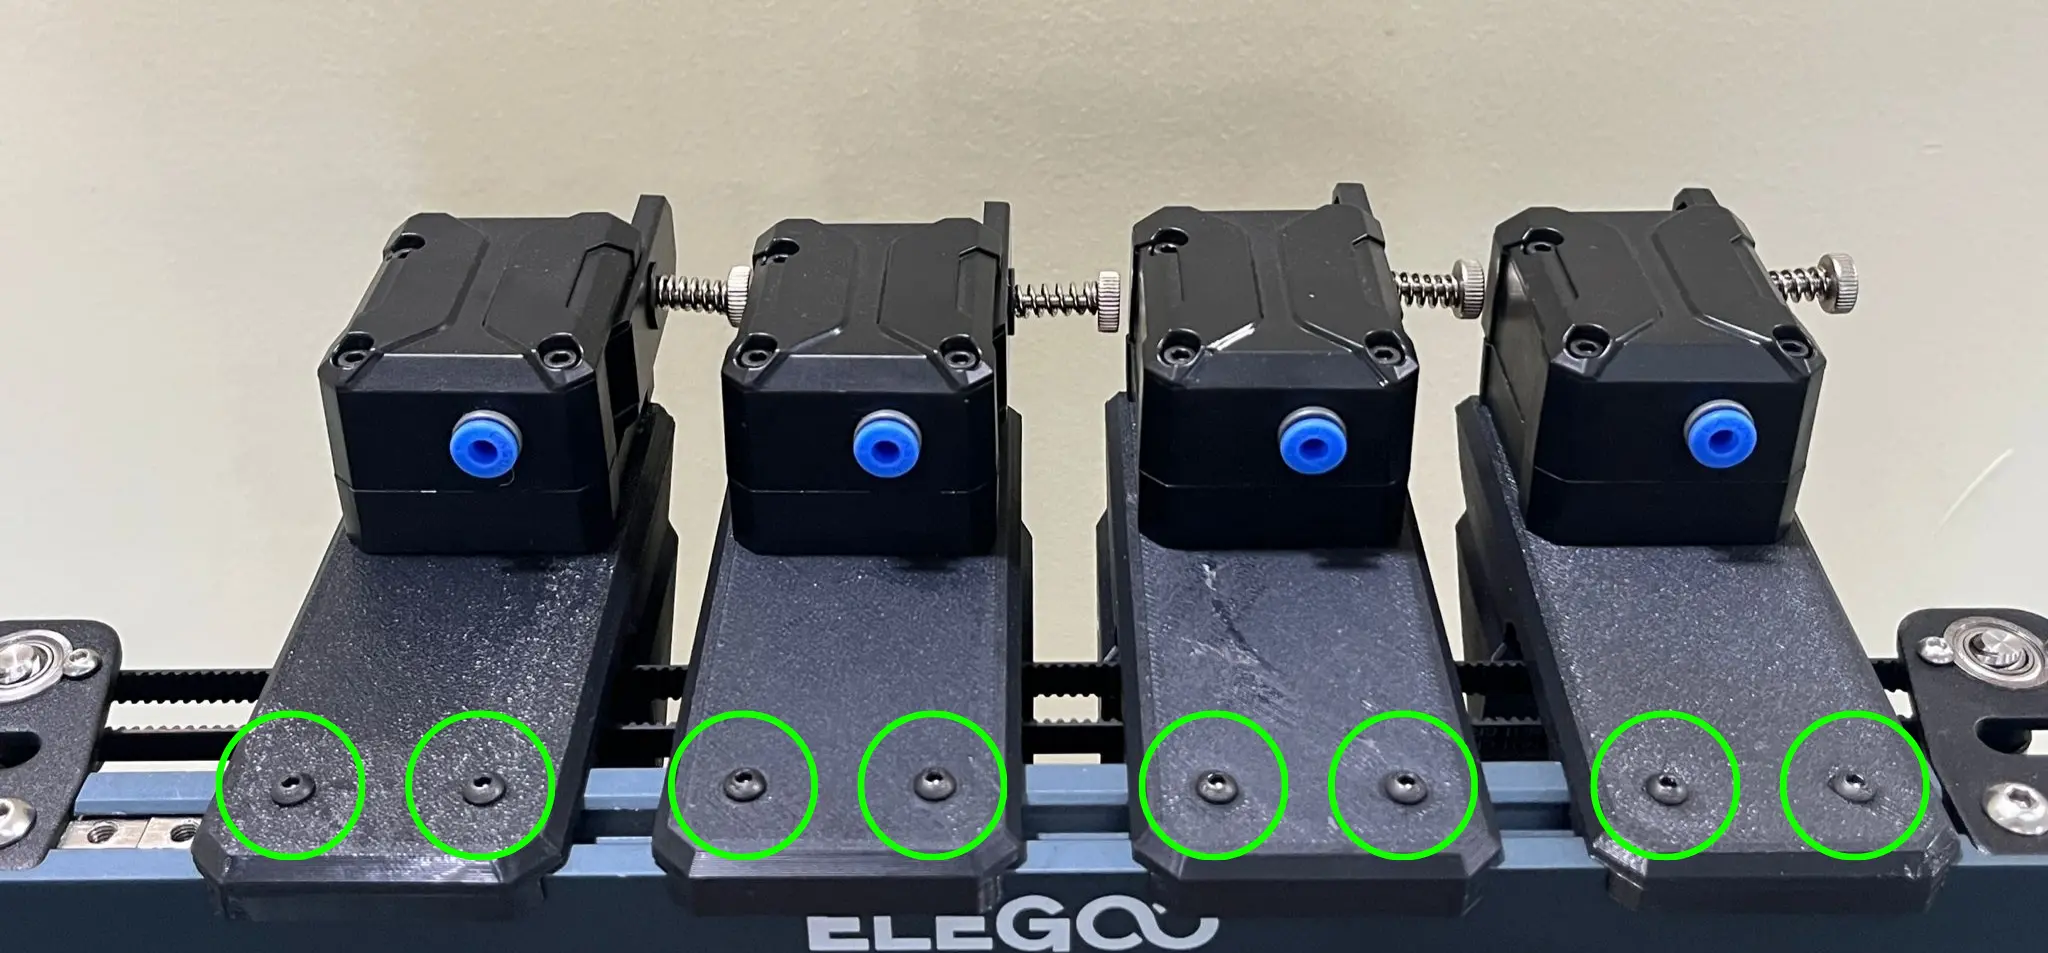
- Loosen the three M3x35 screws on each CX-I Extruder and separate the plastic part from the motor. Then, attach the CX-I Extruders to the printed Extruder Holder as shown in the picture.
- Place the T-nuts from the CX-I Extruder boxes onto the sigma profile.
-
Place the CX-I Extruders which are combined with the printed Extruder Holders, onto the T-nuts on the sigma profile using the M3x10 screws from the CX-I Extruder box. Tighten the screws to securely attach the CX-I Extruders to the printer.
-
Connect the motor cables to the CX-I Extruders.
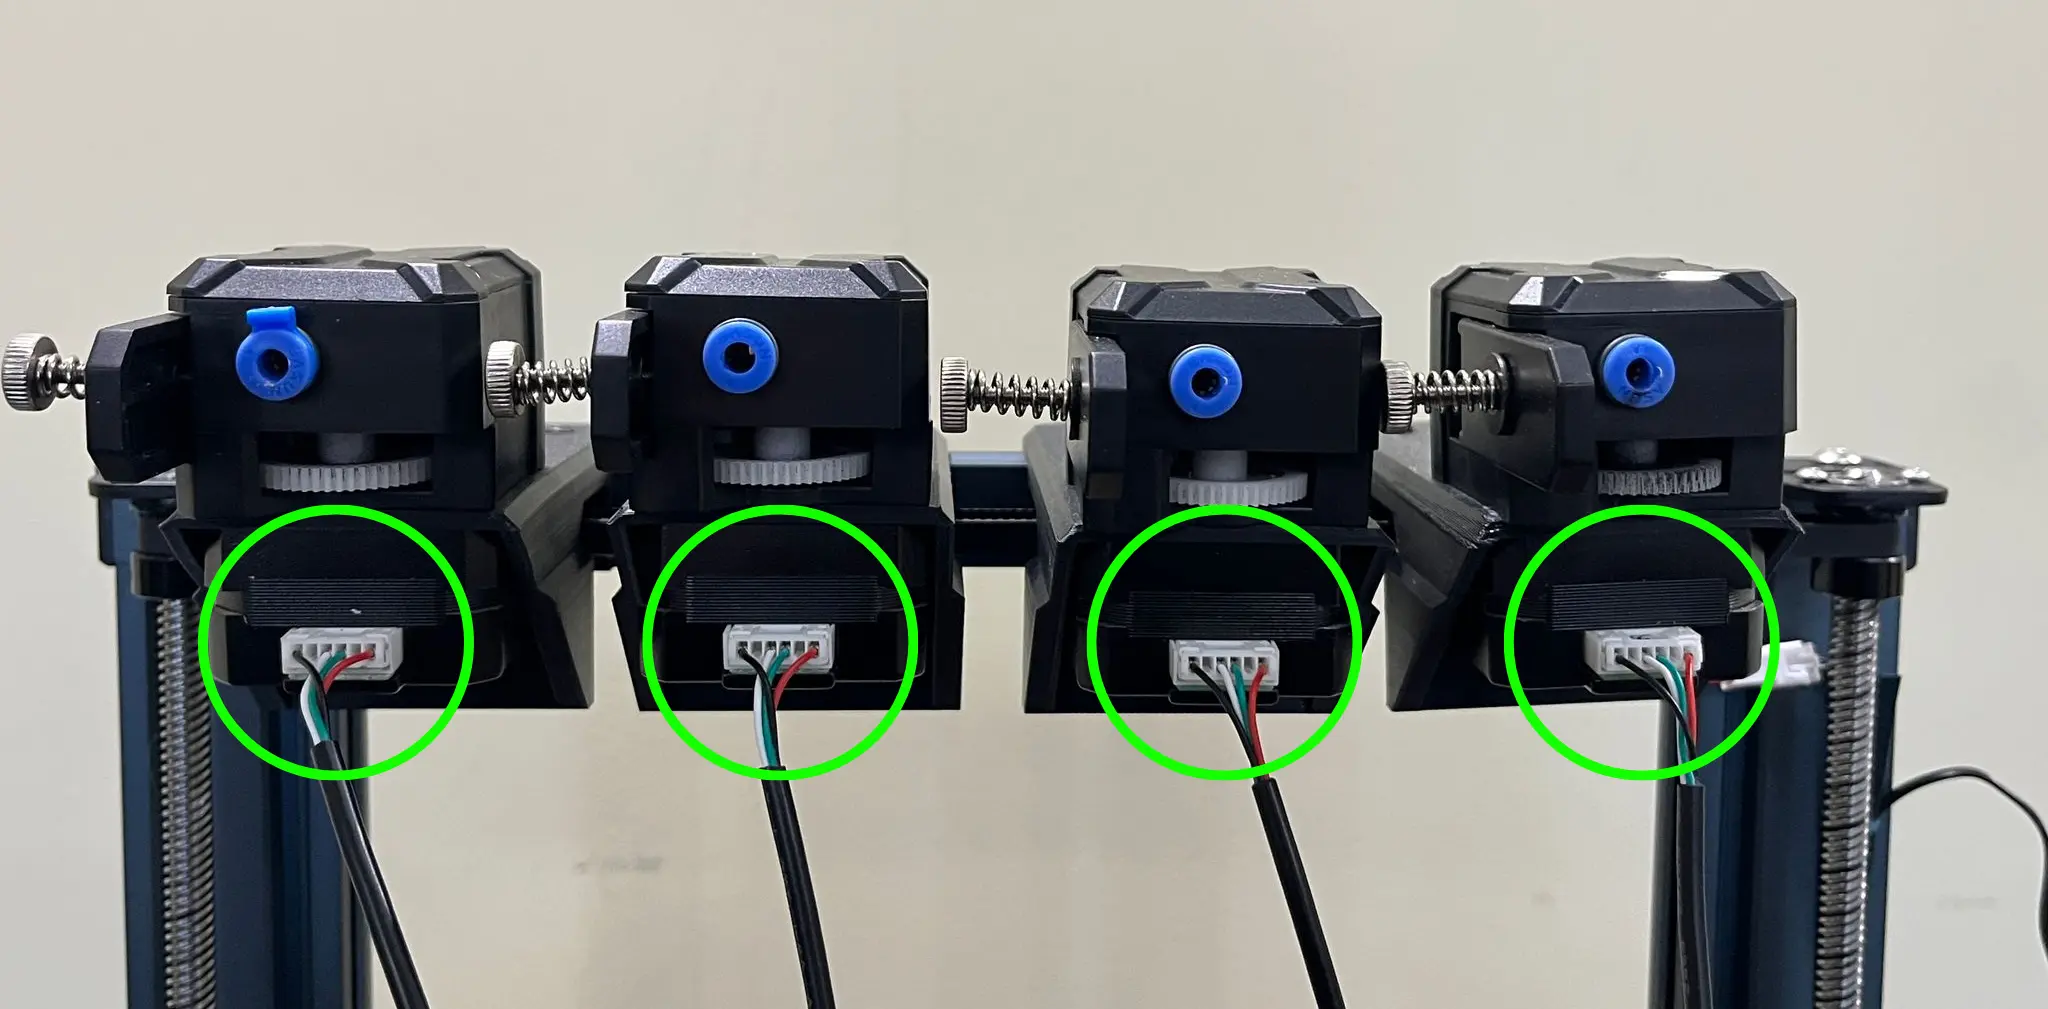
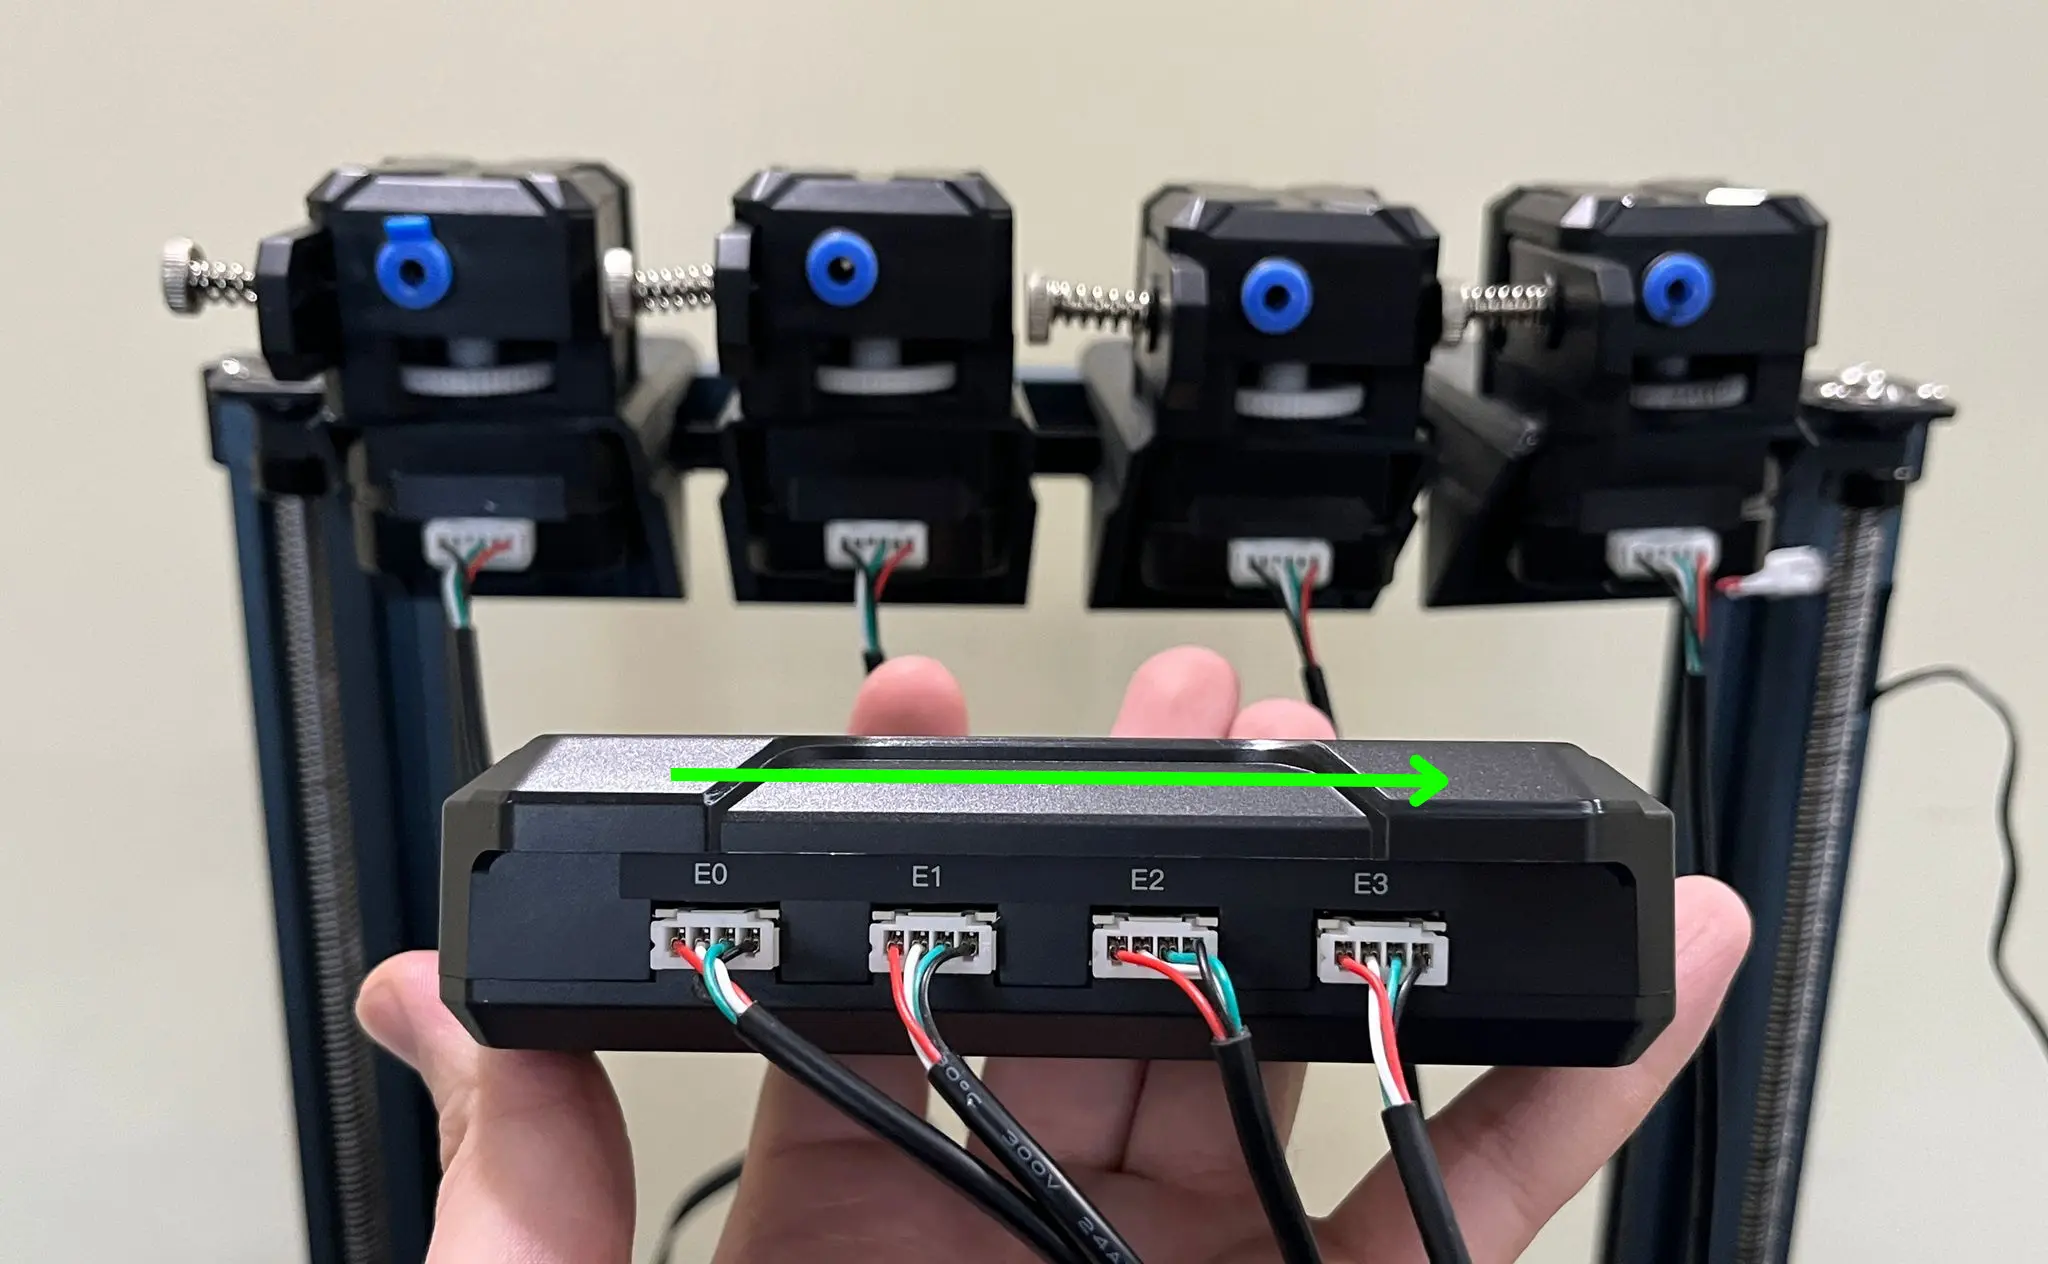
- Connect the other ends of the motor cables you attached to the CX-I Extruders to the KCM module. Make sure to follow the correct sequence.
¶ 2) Software-side Setup of KCM Set on Elegoo Neptune 4 Pro
After completing the mechanical installation, an error message may appear on the printer’s display. This is expected behavior and does not indicate a malfunction.
If the printer's IP address is already known, you can proceed directly to the software configuration phase.
If the IP address is unknown, ensure that an Ethernet cable is properly connected to the printer. On the error screen, press the "Back" button to retrieve the printer’s IP address.
Once the IP address has been obtained, you may continue with the following software setup steps.
Before performing these steps, make sure to back up your configuration files.
If you are experiencing a Python-related error (such as startup or script failure after CoPrint configuration changes), this issue is typically caused by an incompatible or corrupted Python environment or mismatched dependencies in the CoPrint setup.
Please refer to the official troubleshooting guide below for the recommended solution:
https://wiki.coprint3d.com/troubleshooting/pythonproblem
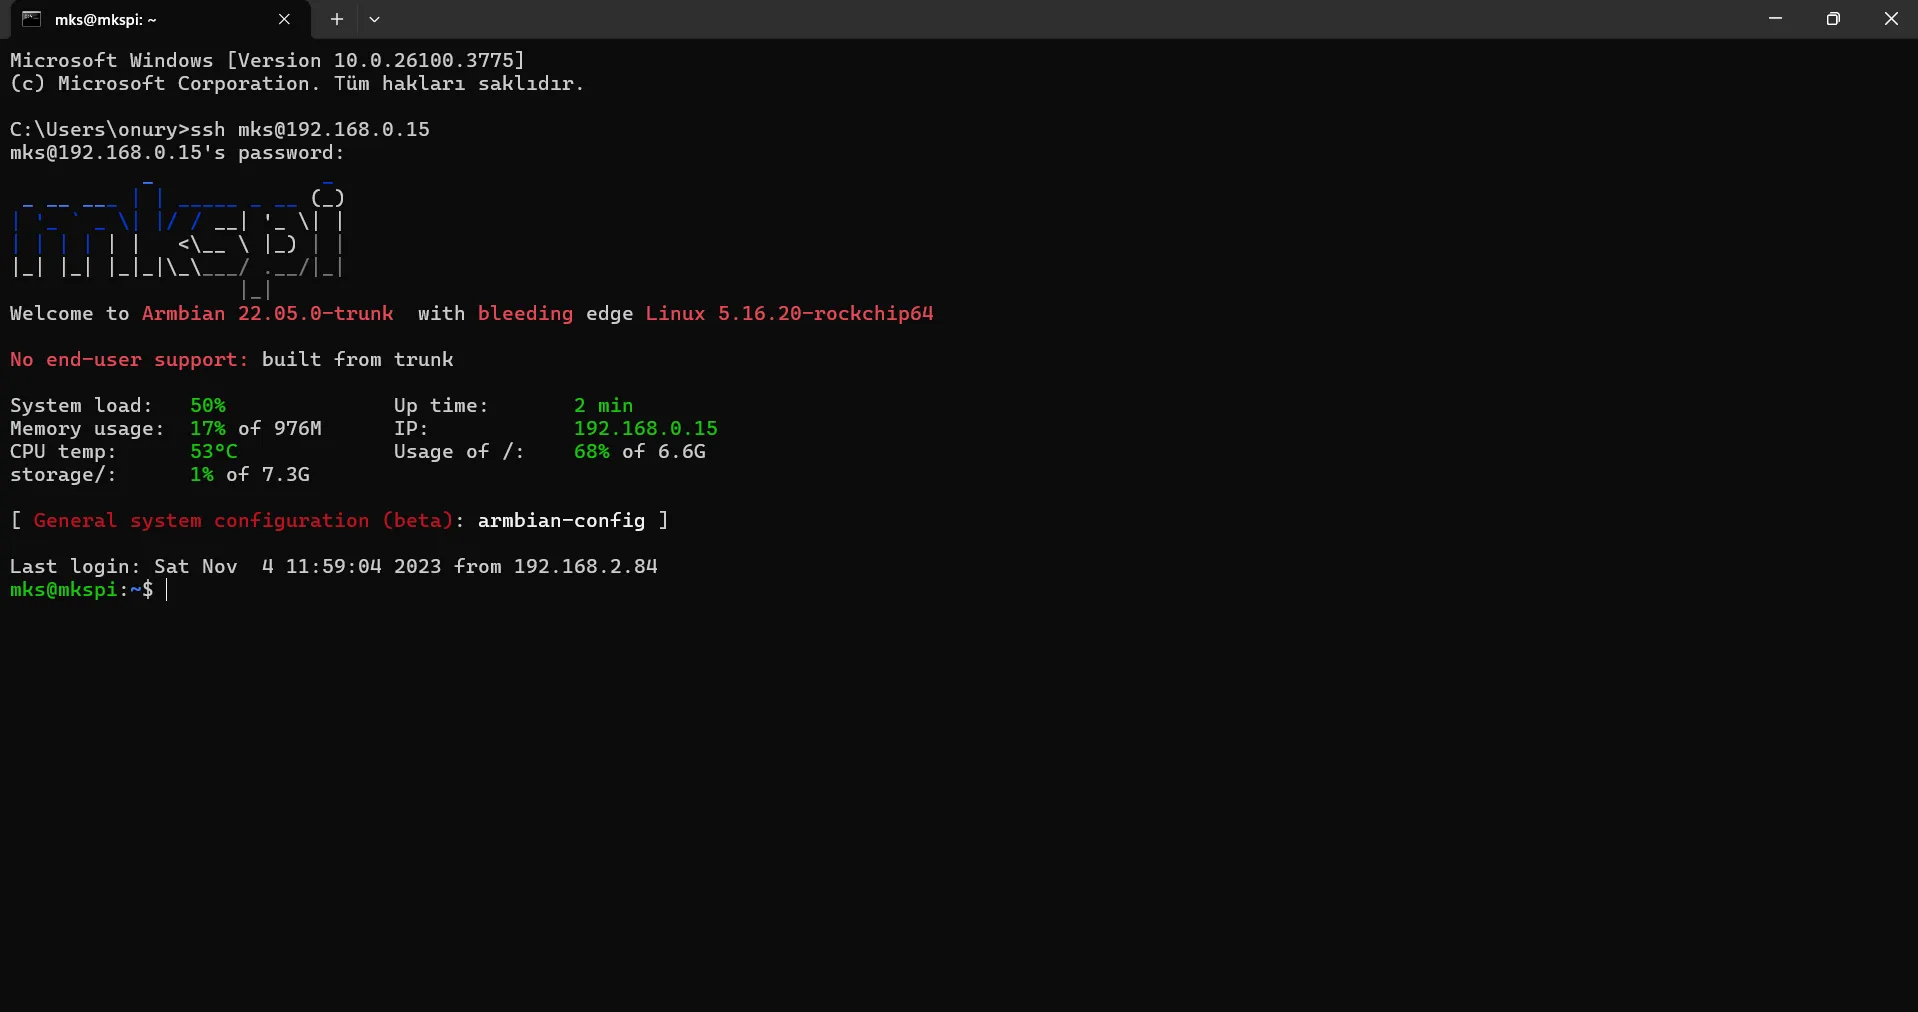
- Open cmd (Command Prompt) on your computer.
-
To access the printer via SSH, use the following command:
ssh mks@printer_ipFor example, if your printer’s IP address is 192.168.0.15, the command you should enter is:
ssh root@192.168.0.15After entering the command and pressing Enter, the system will prompt you for a password. The default password is:
makerbasefor Elegoo Neptune 4 Series.
- After successfully accessing the printer via SSH, enter the following command and press Enter:
./kiauh/kiauh.sh
- After entering the command, the system will ask if you want to update KIAUH. Confirm the update. Once the update is complete, you will be prompted to restart KIAUH.

To do this, simply re-enter the command: ./kiauh/kiauh.sh
After restarting, you will see an option asking if you want to use the updated KIAUH version. Select No to continue.
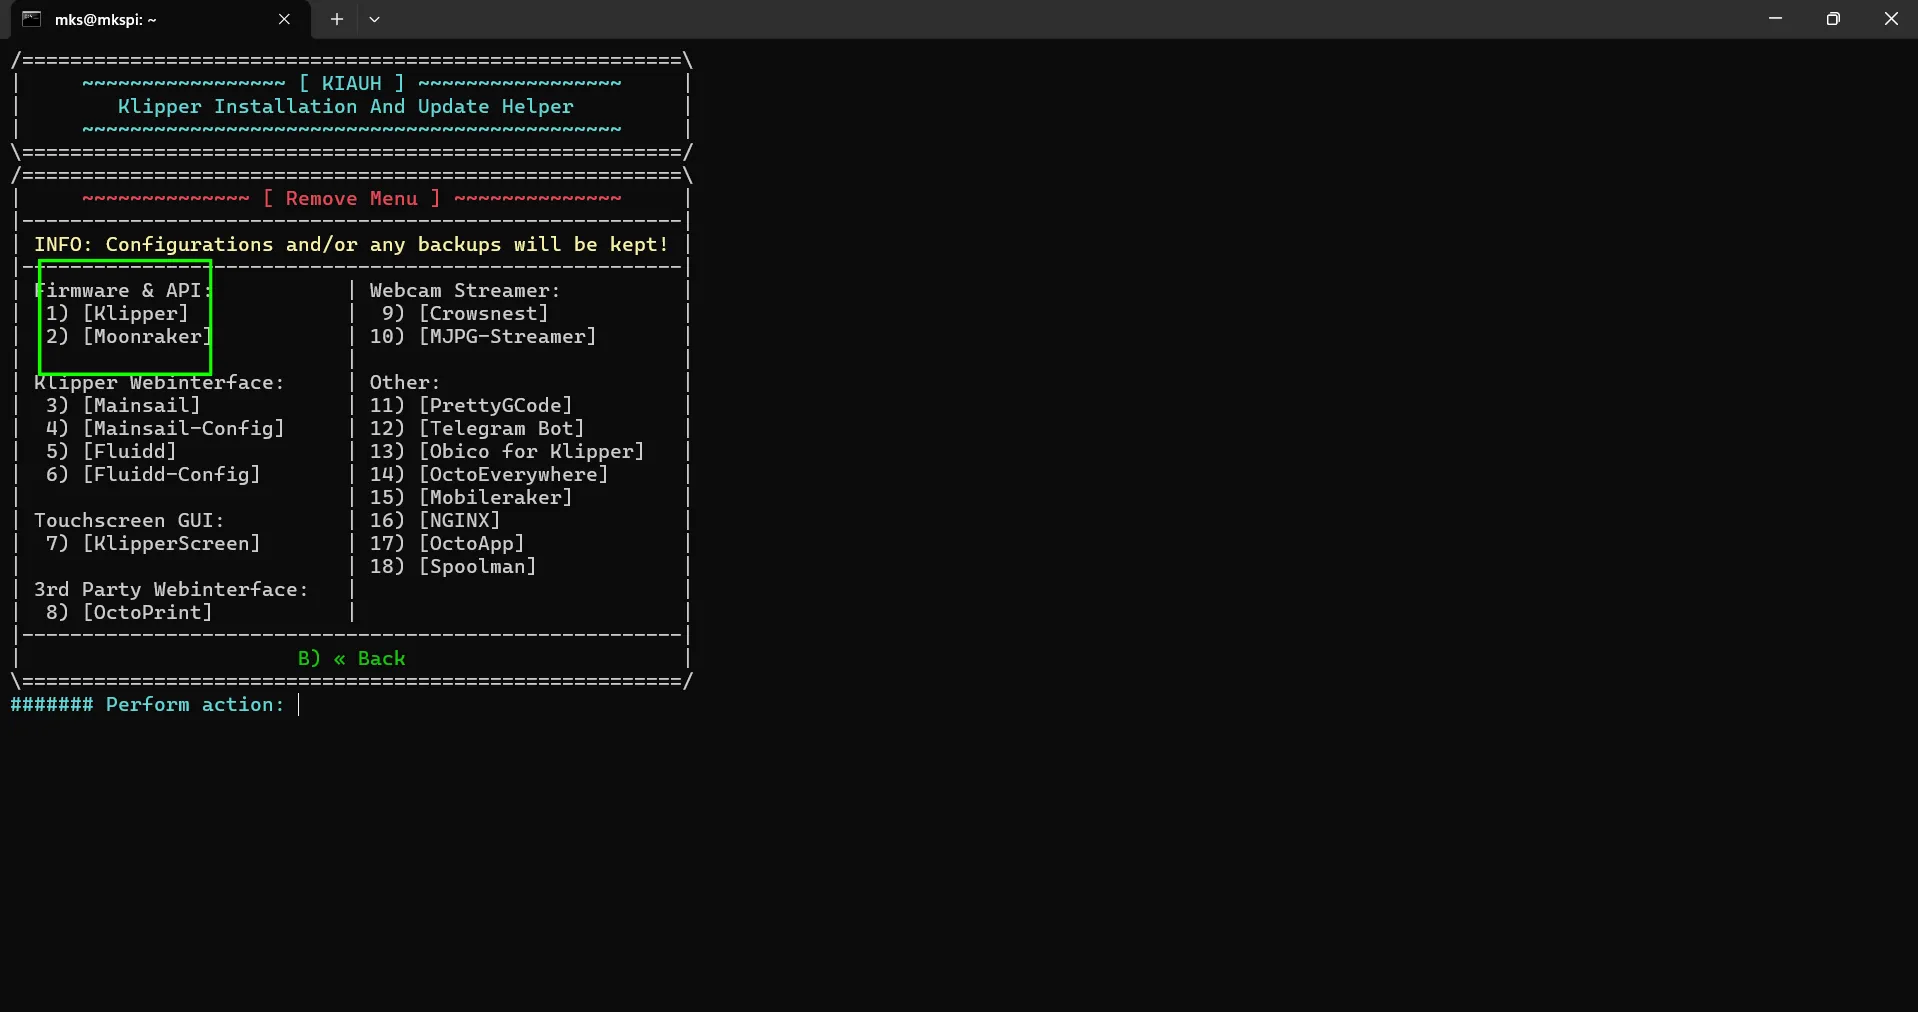
- Once you access the KIAUH menu, press 3 to open the "Remove" section. Inside the "Remove" menu, uninstall both Klipper and Moonraker.
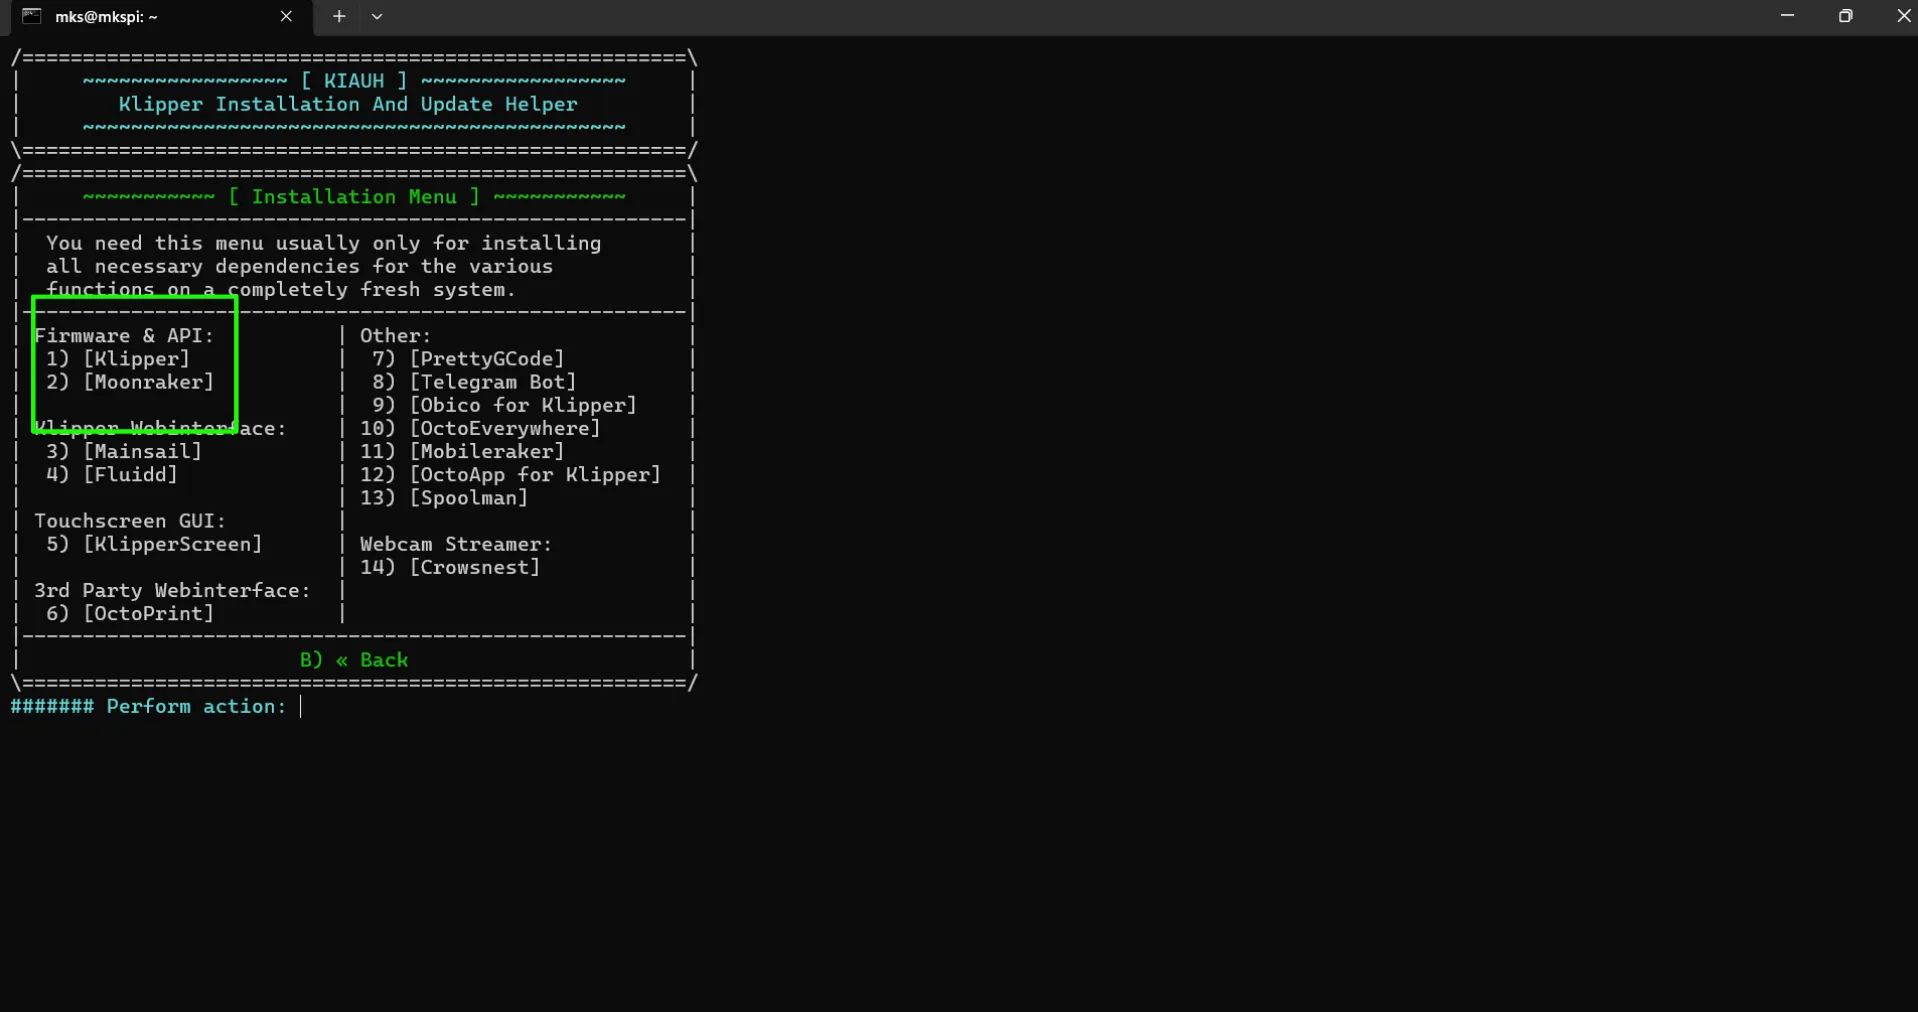
- After successfully removing Moonraker and Klipper, return to the KIAUH main menu and press 1 to enter the "Install" section.
From there, first install Klipper, and then install Moonraker.
This process may take some time, so please be patient and wait for the installations to complete.
-
After completing the installation of Klipper and Moonraker, we suggest to switch from Fluidd to the Mainsail interface.
To do this, first return to the KIAUH menu, access the "Remove" section, and uninstall Fluidd.Then go back to the KIAUH main menu, enter the "Install" section, and install Mainsail.
¶ 3) Editing Configuration Files and Setting Up Serial Paths
After successfully completing the Software-side Setup, the next step is to edit the configuration files and set up the serial paths for the ChromaHead and KCM module included in the KCM Set.
¶ 3.1) Editing Configuration Files
To access the configuration files we have published for the Elegoo Neptune 4 Pro, please use the link below.
Elegoo Neptune 4 Pro Config Files - Download
At this stage, you may encounter errors in the Mainsail interface. Please ignore these errors and continue following the setup steps.
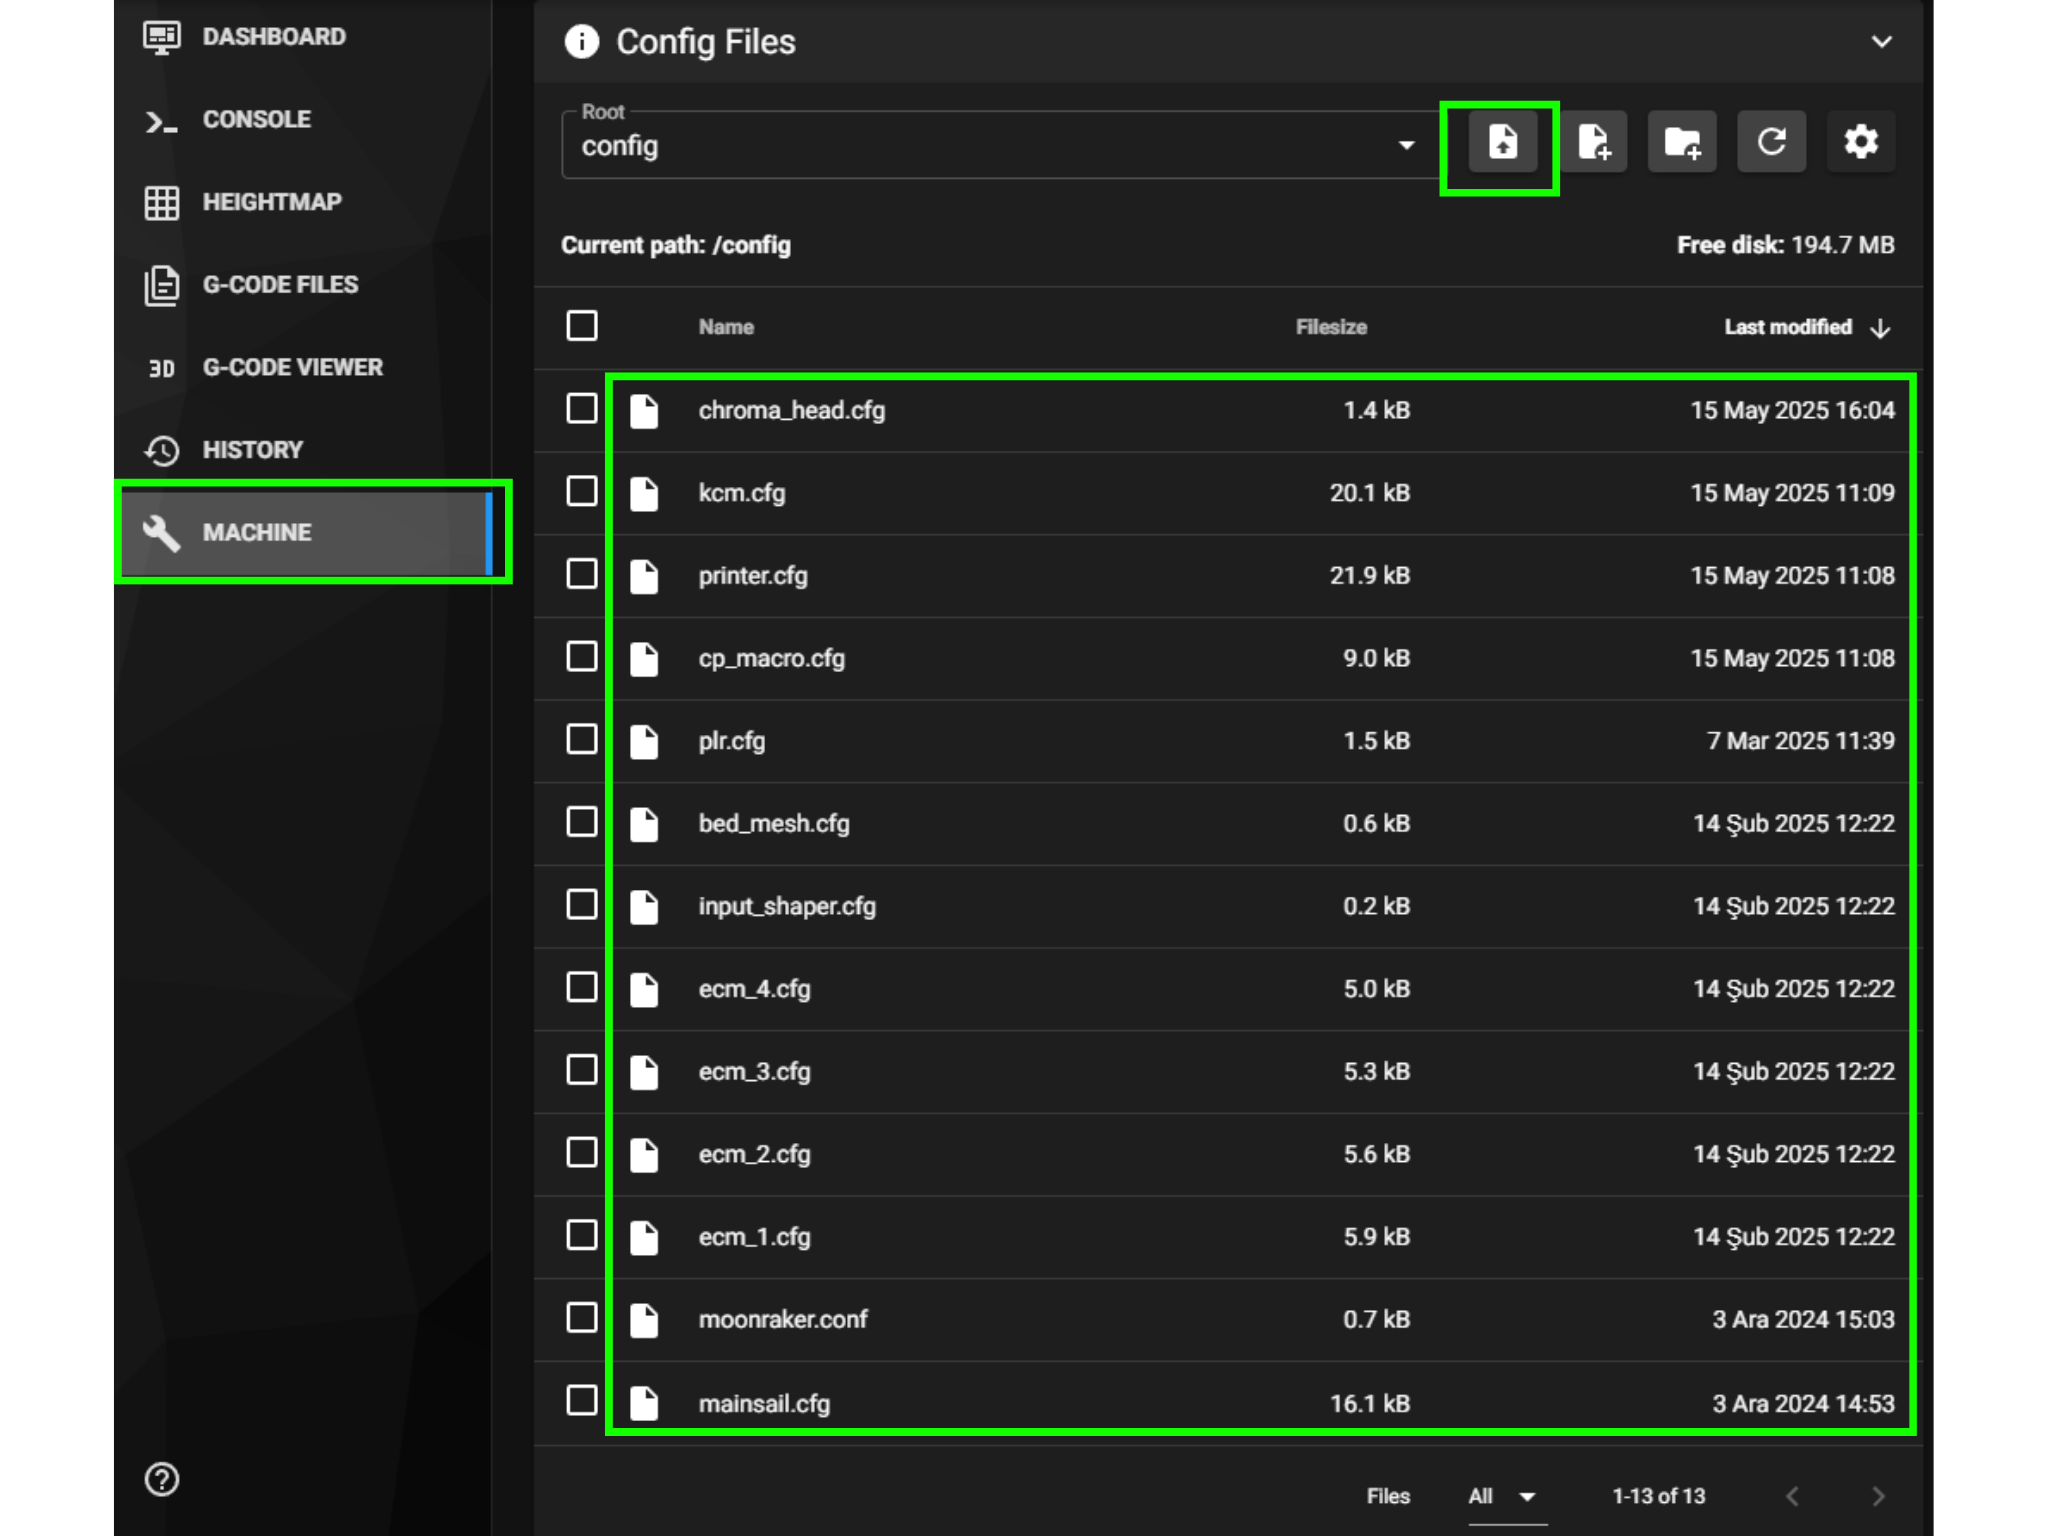
- To edit the configuration files, first enter the printer’s IP address into your web browser to access the Mainsail control interface.
- In the left menu, click on the "MACHINE" section.
- In the "Config Files" section under "MACHINE", click the "Upload File" button and upload the configuration files you have downloaded.
The required configuration files for the Elegoo Neptune 4 Pro are as follows:
- printer.cfg
- plr.cfg
- saved_variables.cfg
- kcm.cfg
- chroma_head.cfg
- cp_macro.cfg
- input_shaper.cfg
- bed_mesh.cfg
After making sure that none of these files are missing, we can now proceed to configure the serial connections for the KCM module and the ChromaHead.
¶ 3.2) Setting Up Serial Paths
Do not plug in the power cable to the KCM module while the KCM and ChromaHead cables are disconnected!
Also, do not disconnect the KCM or ChromaHead cables while the power is connected!
- For a more stable and reliable setup, first connect the KCM module to the printer using a Type-C to USB cable.
- Next, connect the ChromaHead cable to the KCM module as well.
- While the KCM module is connected to the printer via USB and the ChromaHead cable is properly connected between the KCM and the ChromaHead, plug in the power cable to the KCM module.
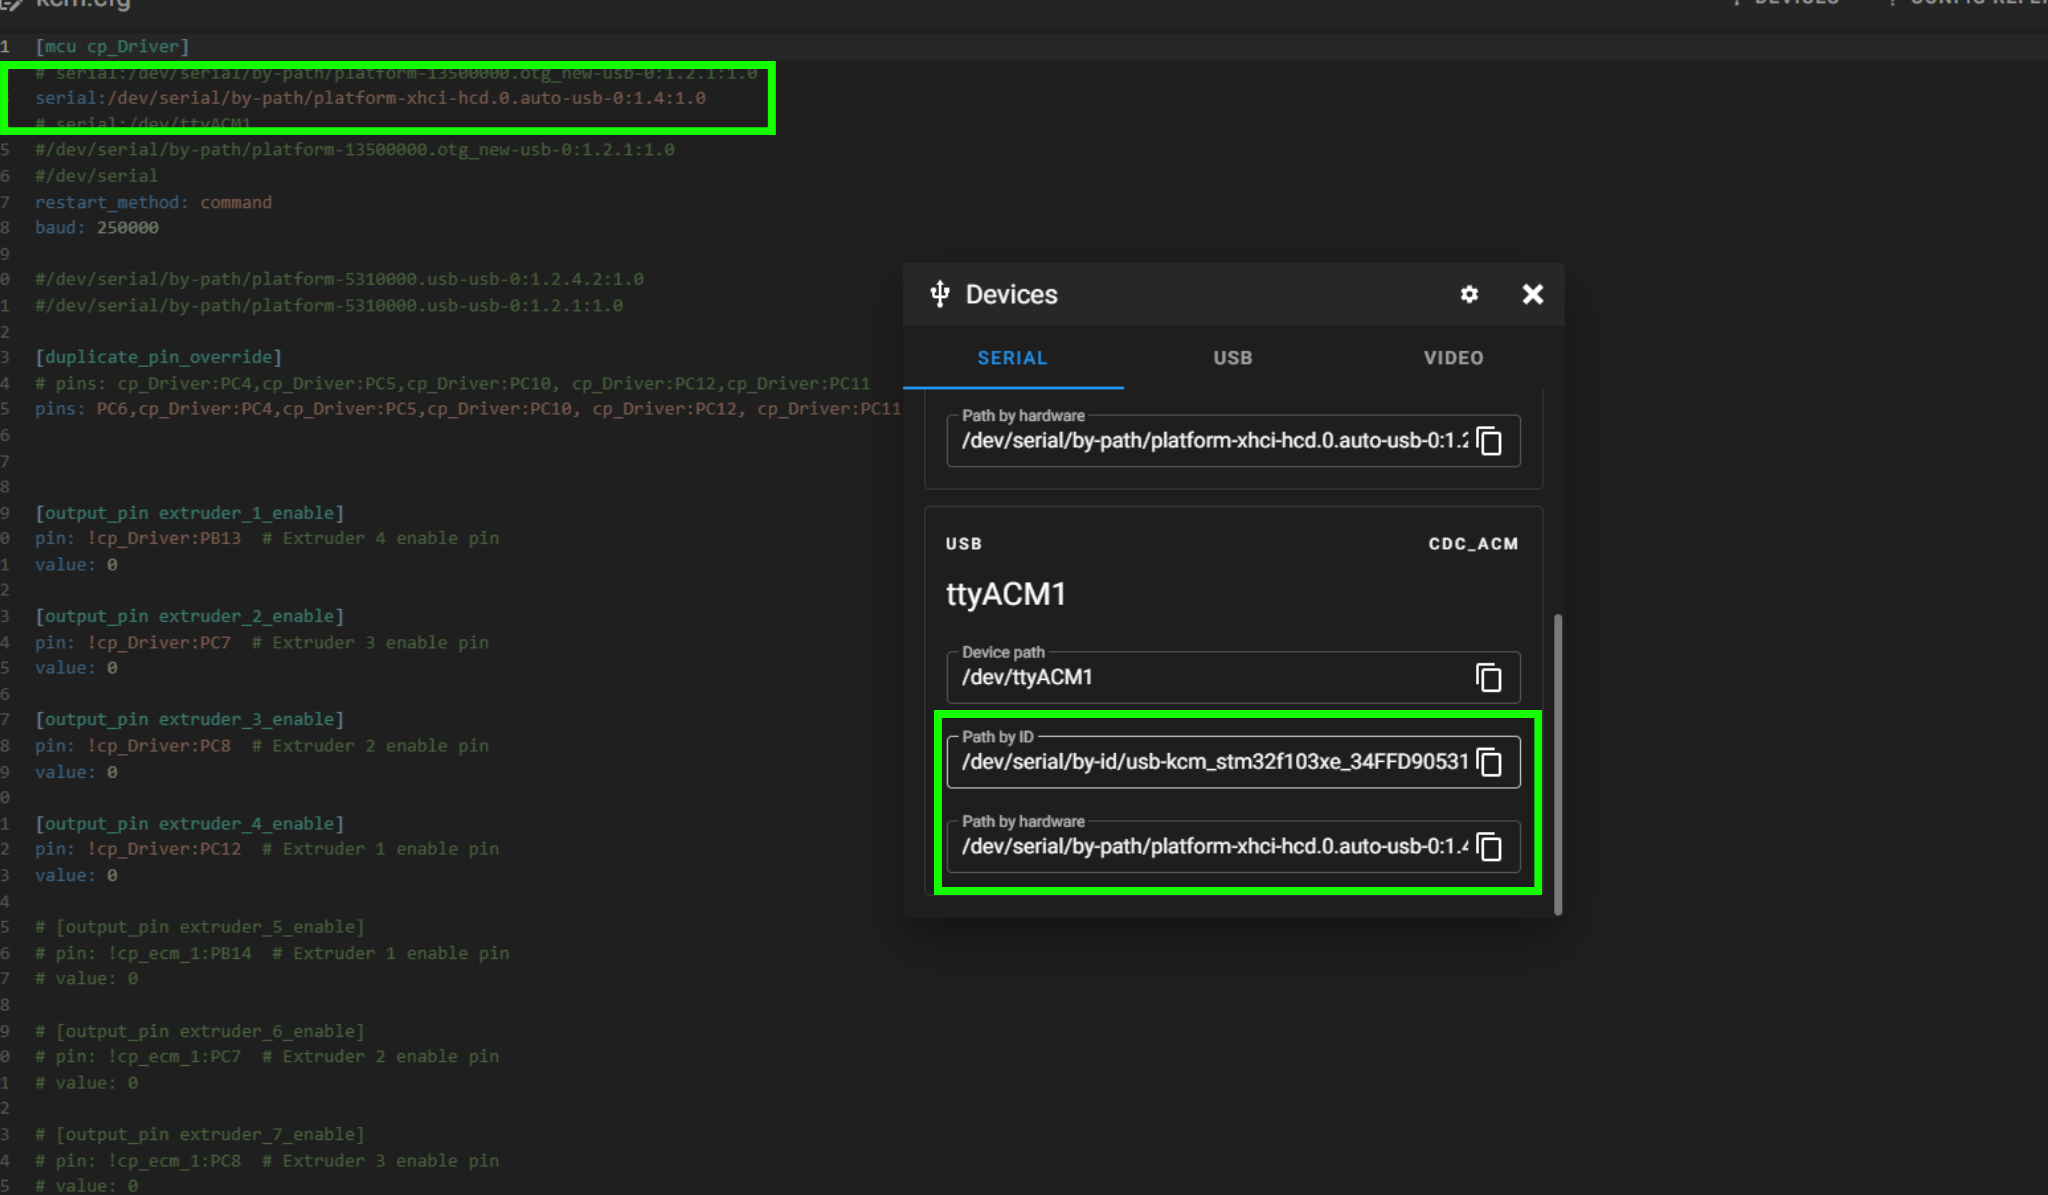
- From the Mainsail interface, click on "MACHINE" and then open the kcm.cfg file from the config files section.
- Click the "DEVICES" button to identify the serial path of the KCM. Copy the correct path and paste it into the "serial:" field. Then, click "SAVE & RESTART" and exit the file.
- Click on the "chroma_head.cfg" file. Then click the "DEVICES" button to identify the ChromaHead’s serial path. Copy the correct serial path and paste it into the "serial:" field. After that, click "SAVE & RESTART" and exit the file.
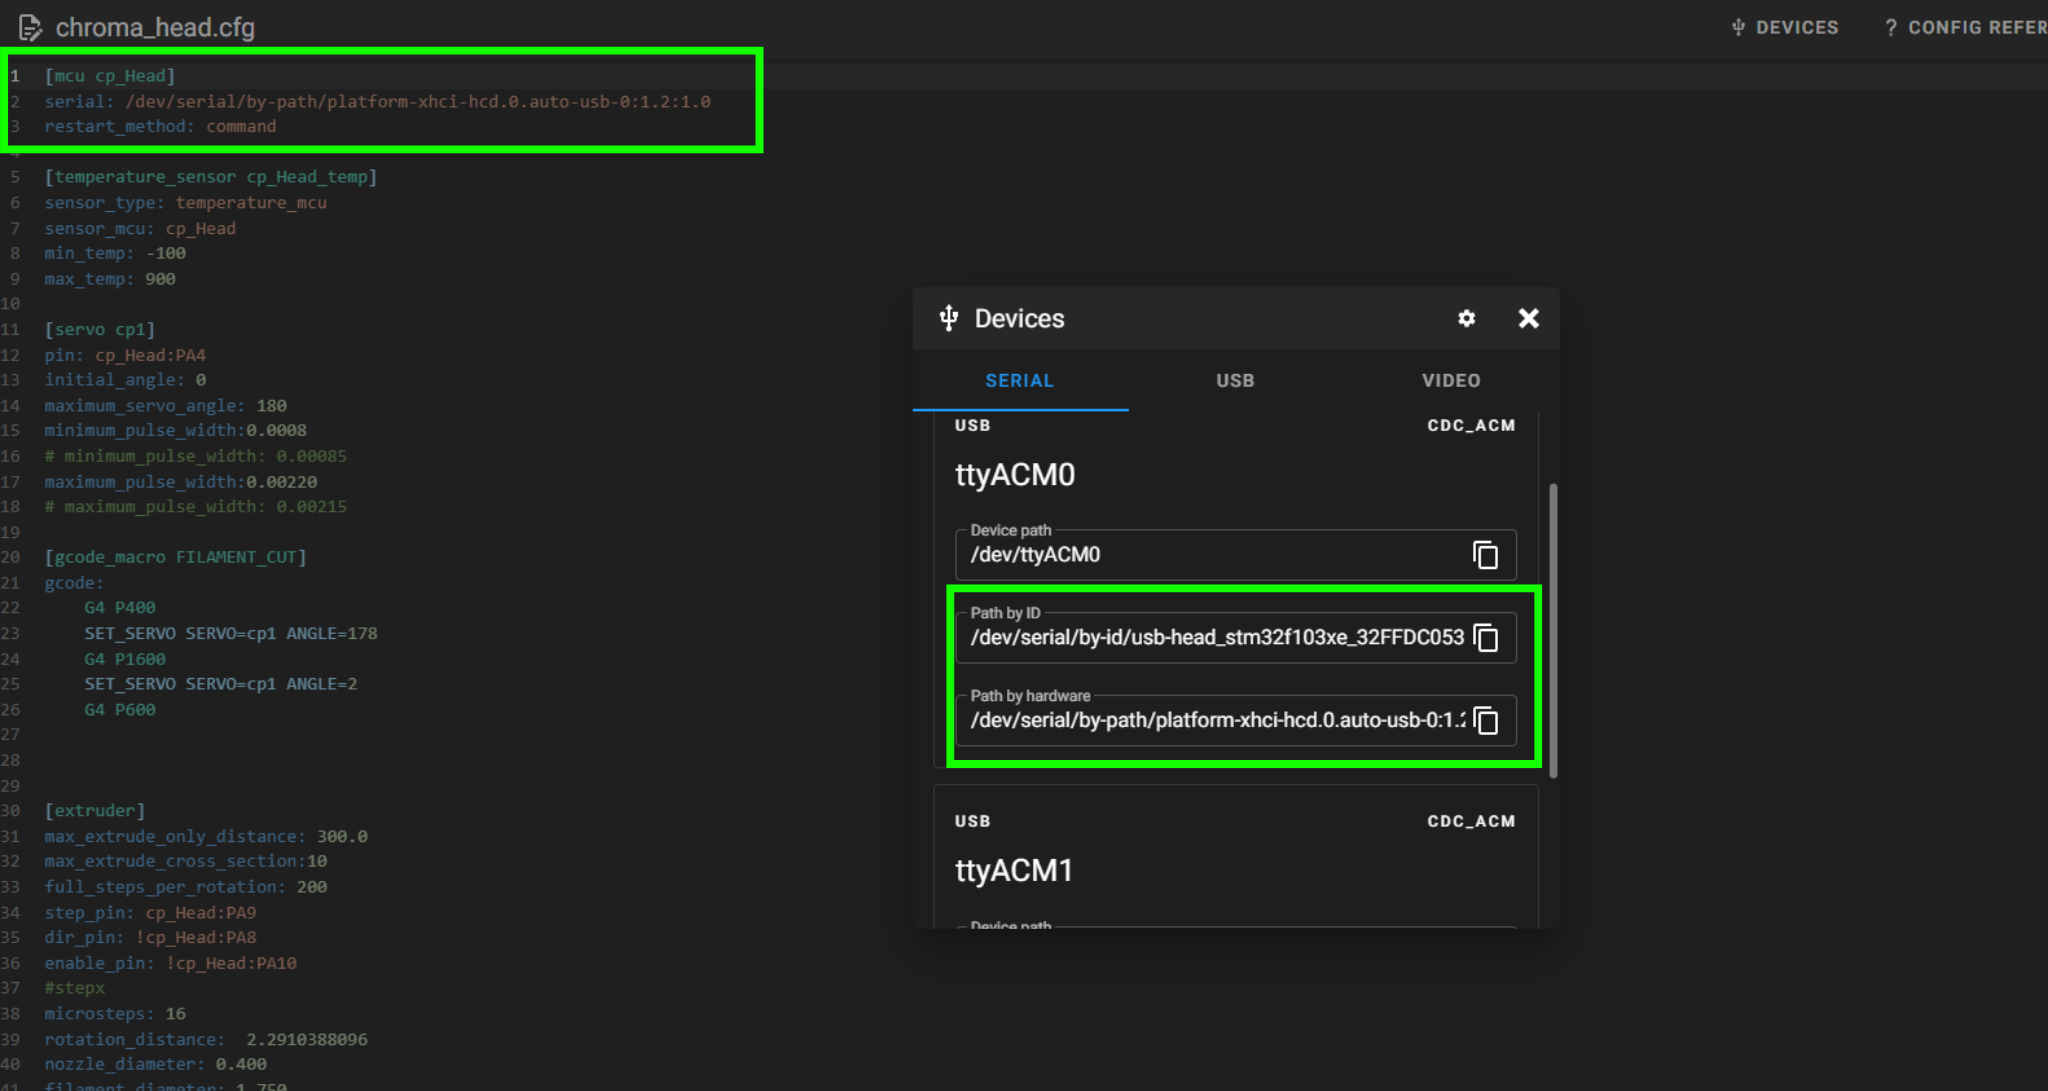
- Once the system is powered on, check the "Extruder" temperature. If it displays a value over 100°C, it means the serial paths have been entered incorrectly.
⚠️ Two different serial paths must appear for the ChromaHead and the KCM. Make sure they are not the same — otherwise, the system will fail to start.
- Paste the newly identified serial path into the serial: field inside the chroma_head.cfg file.Then click "SAVE & RESTART" and exit the file.
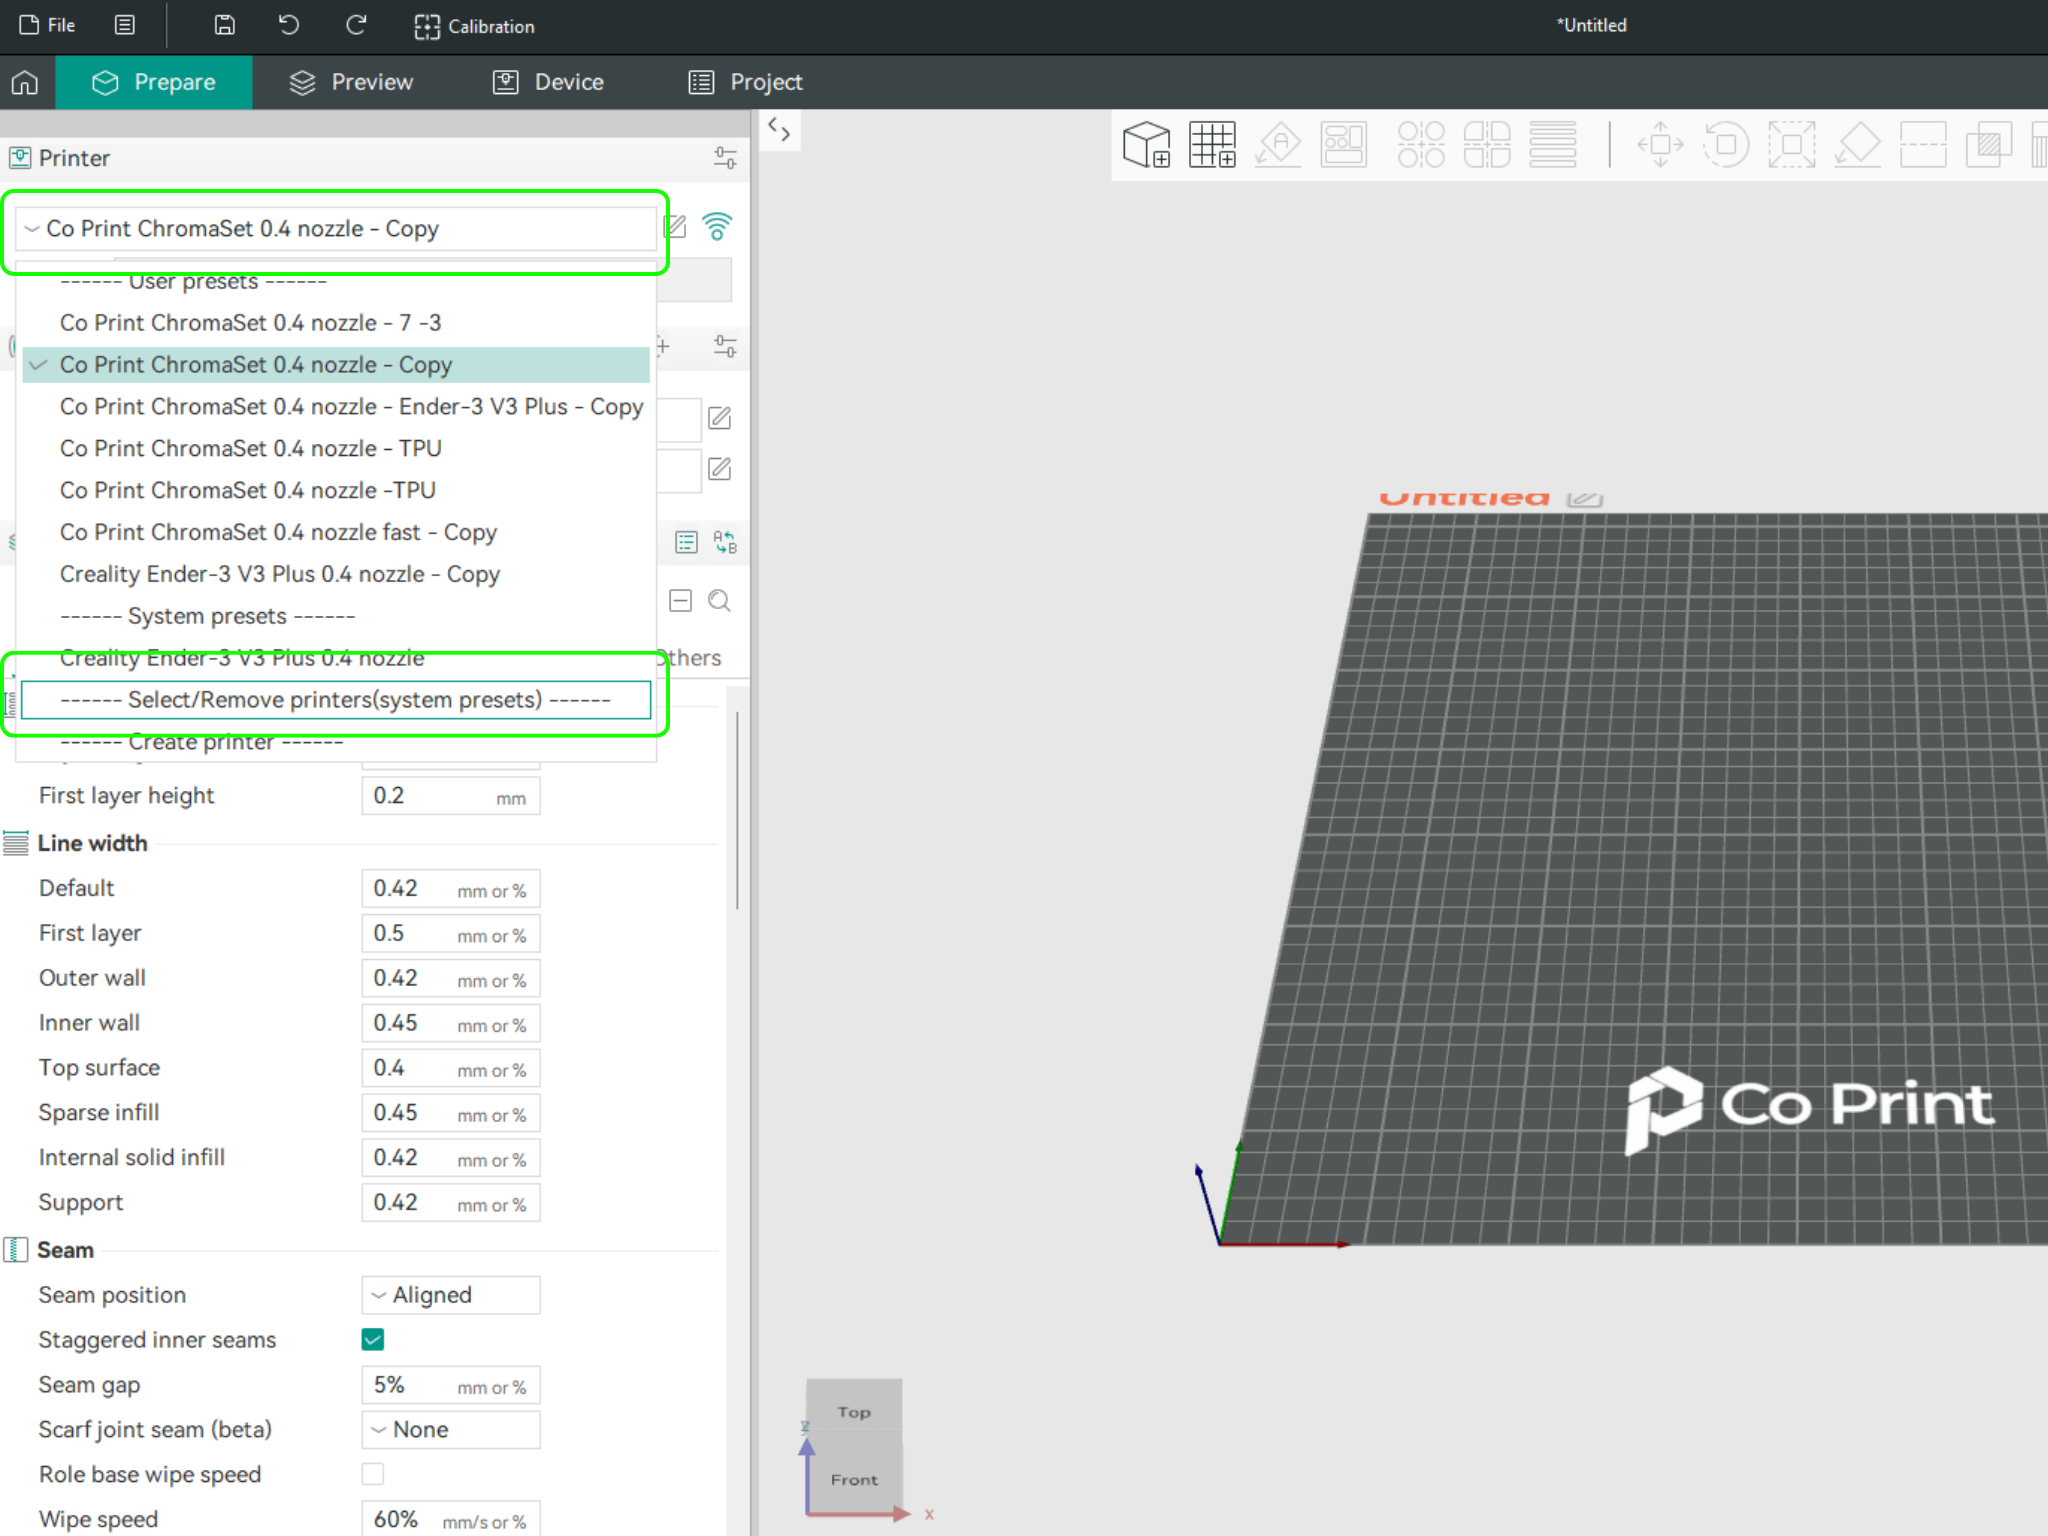
¶ 4) Post-Installation OrcaSlicer Configuration
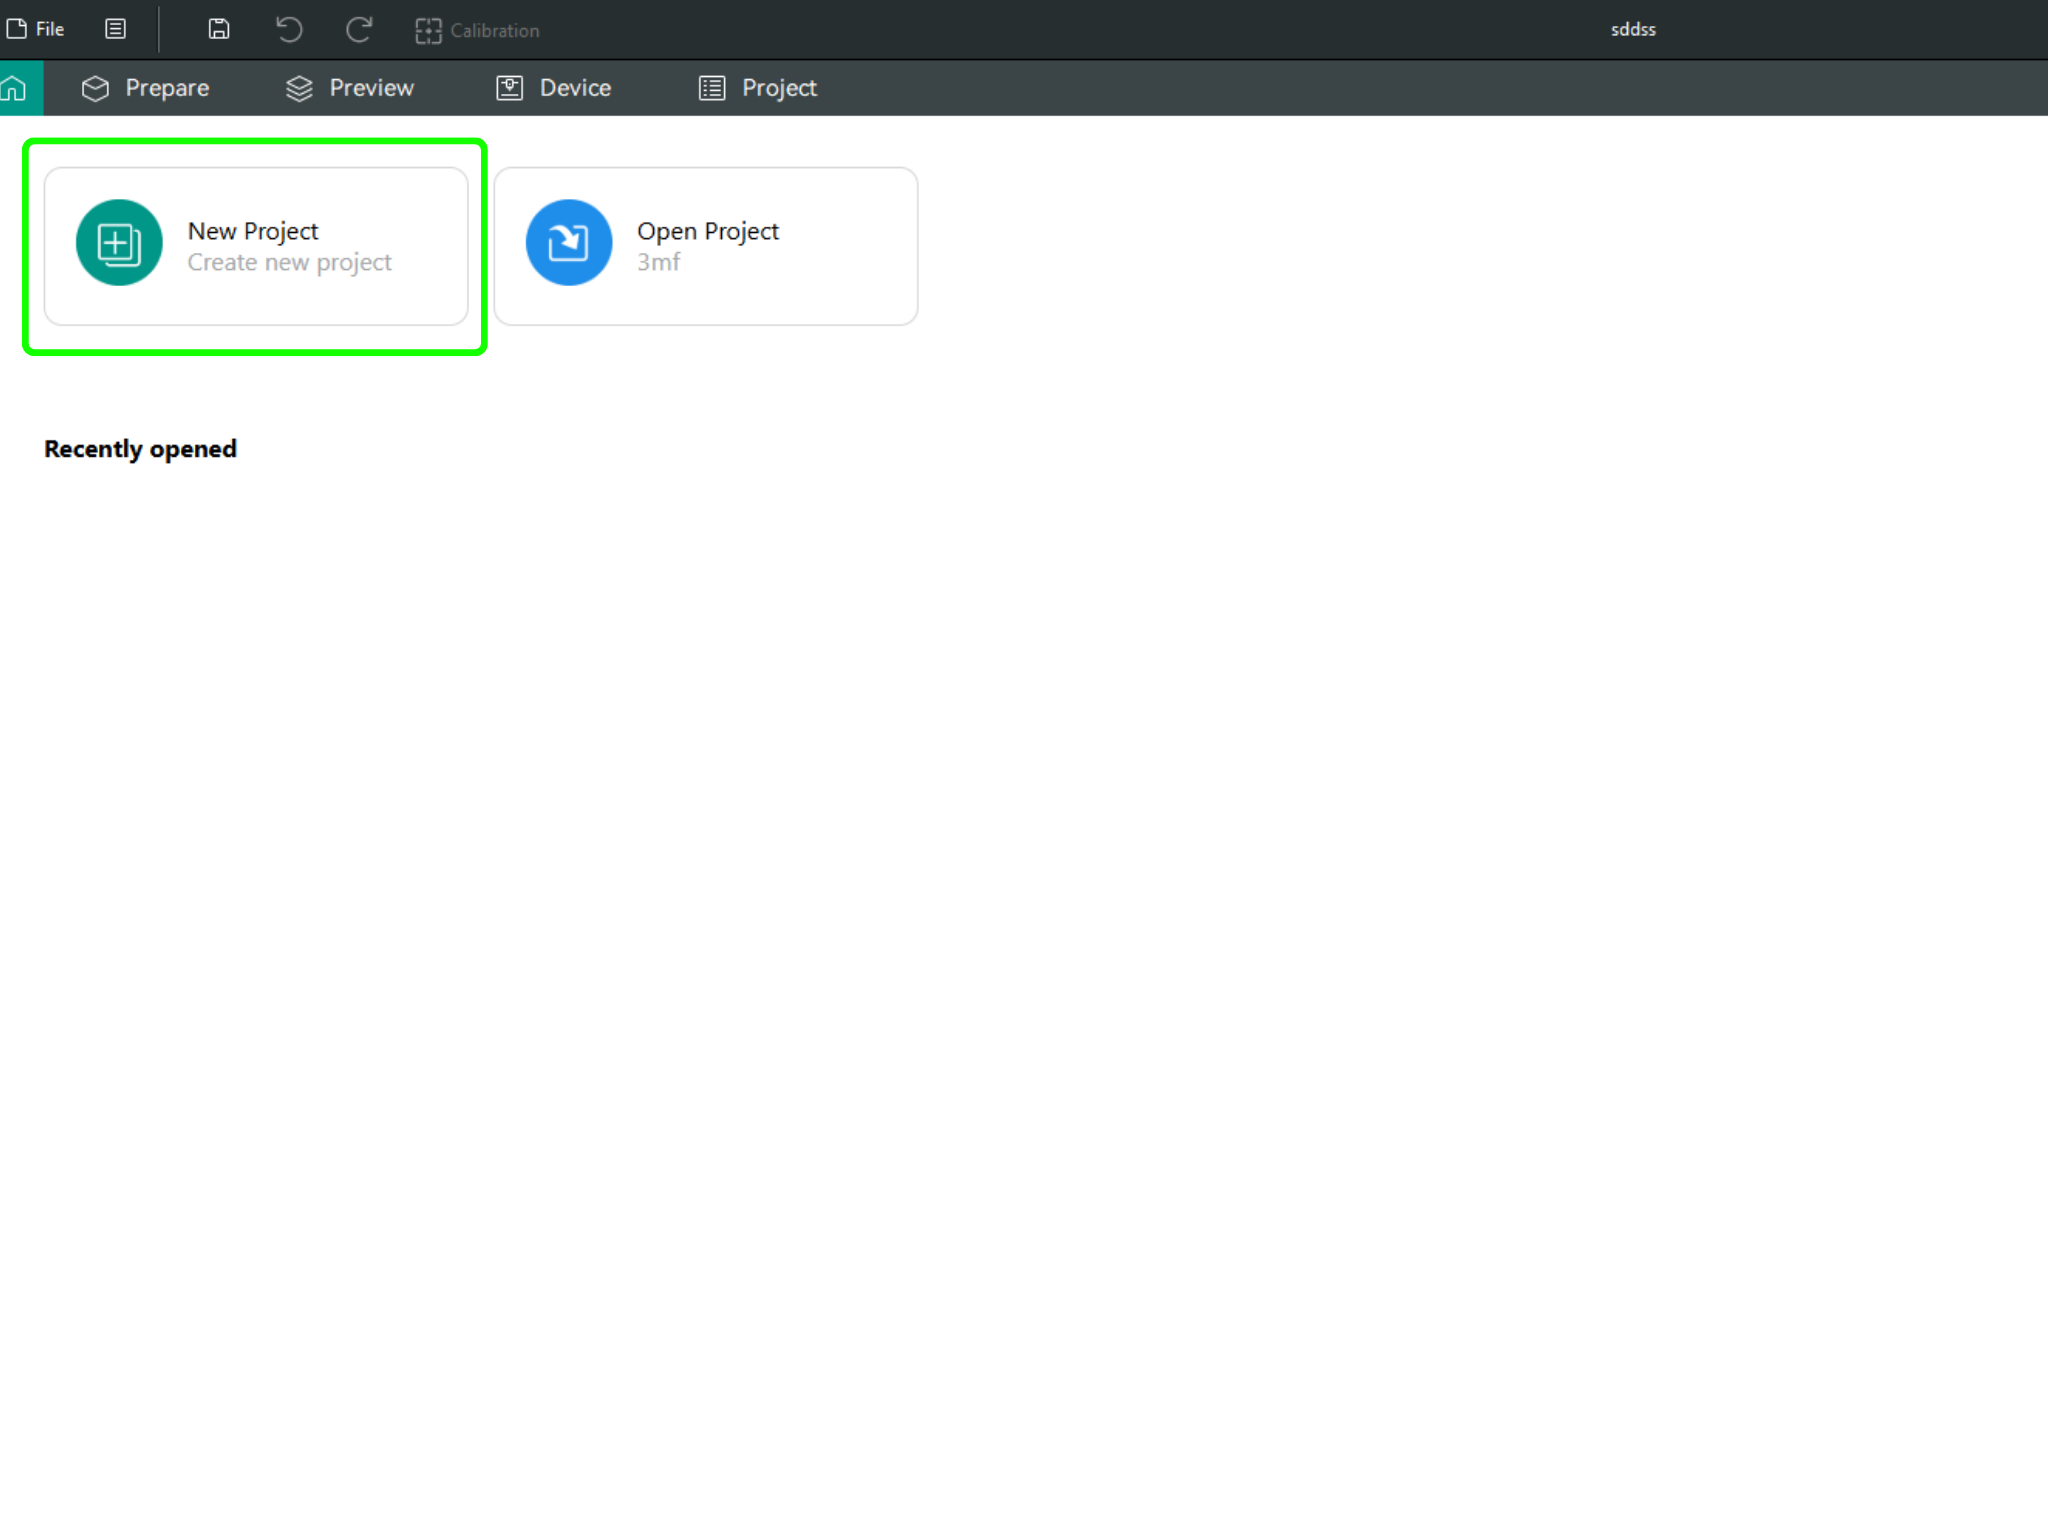
After completing the installation, you also need to configure OrcaSlicer. We recommend downloading the latest version of OrcaSlicer for optimal compatibility. You can use the link below to get the most recent release.
OrcaSlicer Download Link - Download
-
After downloading OrcaSlicer, click on “New Project”.
-
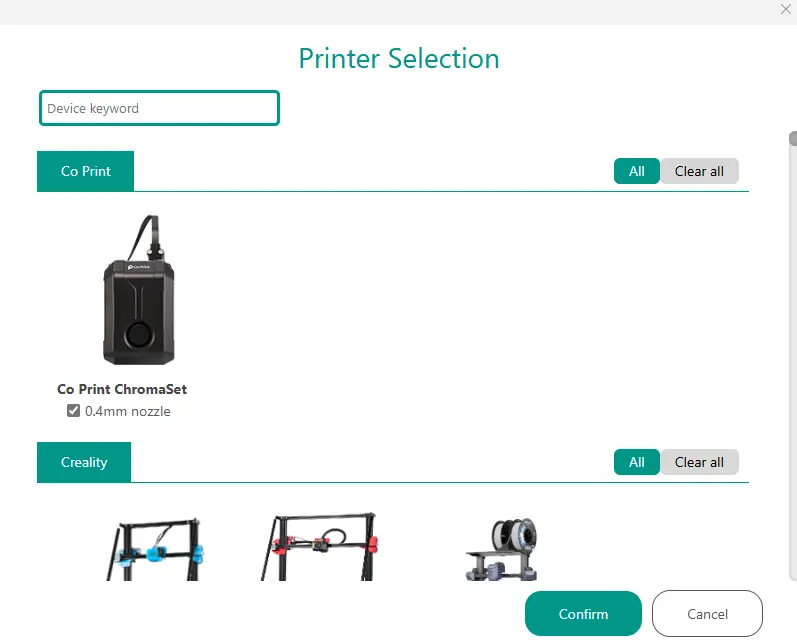
In the left menu, go to the Printers section and click on “Select/Remove printers”.
- In the opened menu, find and select Co Print. Then click "Confirm".
- After loading the settings, you need to adjust them in OrcaSlicer according to your printer’s bed size.
- You can import your model into OrcaSlicer as shown in the videos below, paint it, and start your print directly from within OrcaSlicer.