¶ Ender 5 Max KCM Set Installation Guide
| Image | Information |
|---|---|
 |
Welcome to the installation page for Ender 5 Max with KCM Set. This guide will help you update your printer's firmware to ensure compatibility with KCM Set, download and print the required .STL files for mechanical assembly, complete the mechanical setup, and configure the Klipper settings. By following these steps, you will successfully complete the installation process. |
¶ - Downloadable parts required for the installation
You can download the required STL files below.
| Part Name | Quantity | Links |
|---|---|---|
| ChromaHead Adapter Part | 1x | Download |
| CX-1 Extruder Block | 1x | Download |
| CX-1 Extruder Block Holder | 2x | Download |
¶ 1) Ender 5 Max KCM Installation
Before starting the next steps, make sure your printer is turned off.
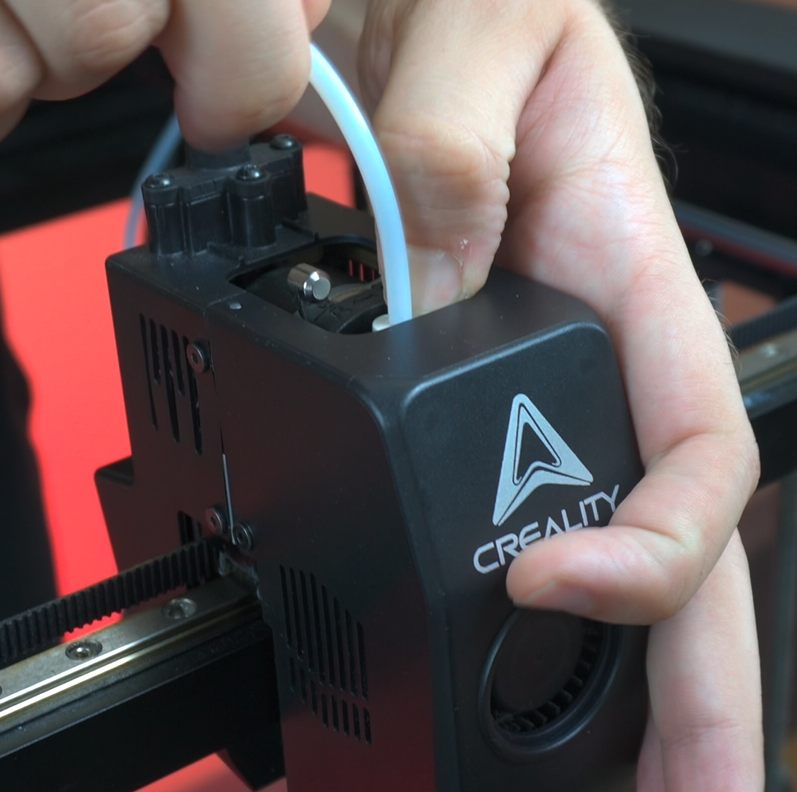
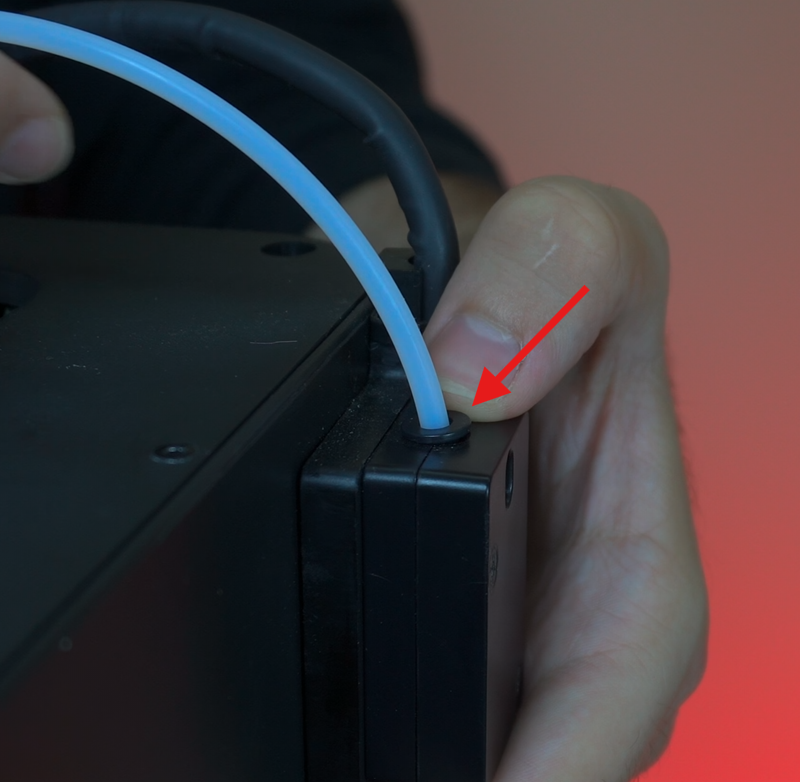
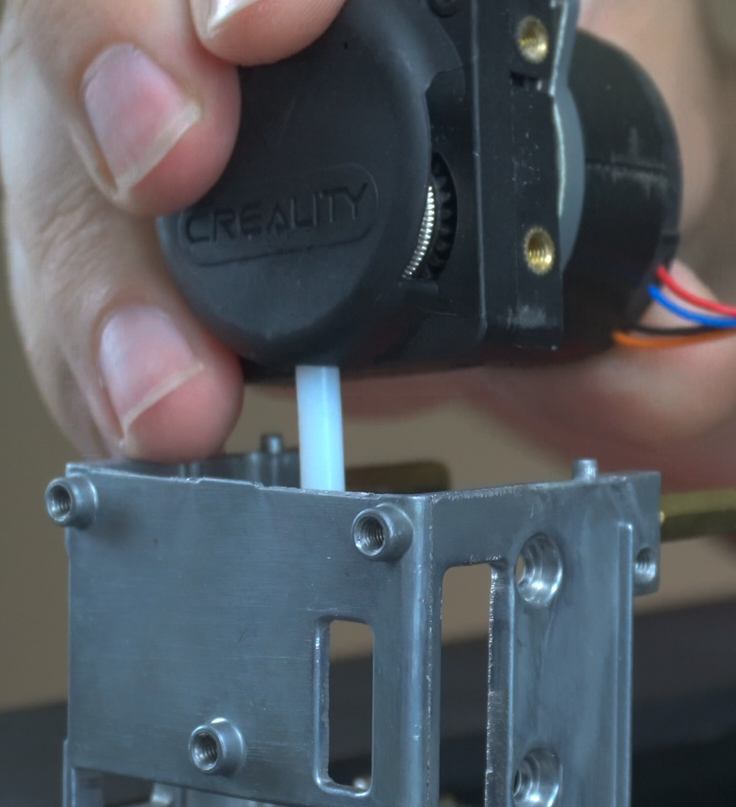
¶ 1.1) Remove The PTFE Tubes
Remove the ptfe tubes by holding ptfe holder.
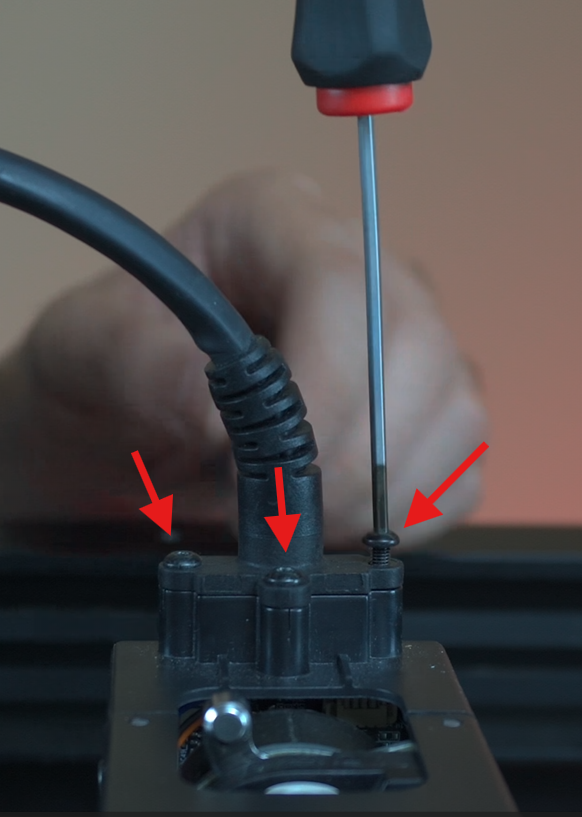
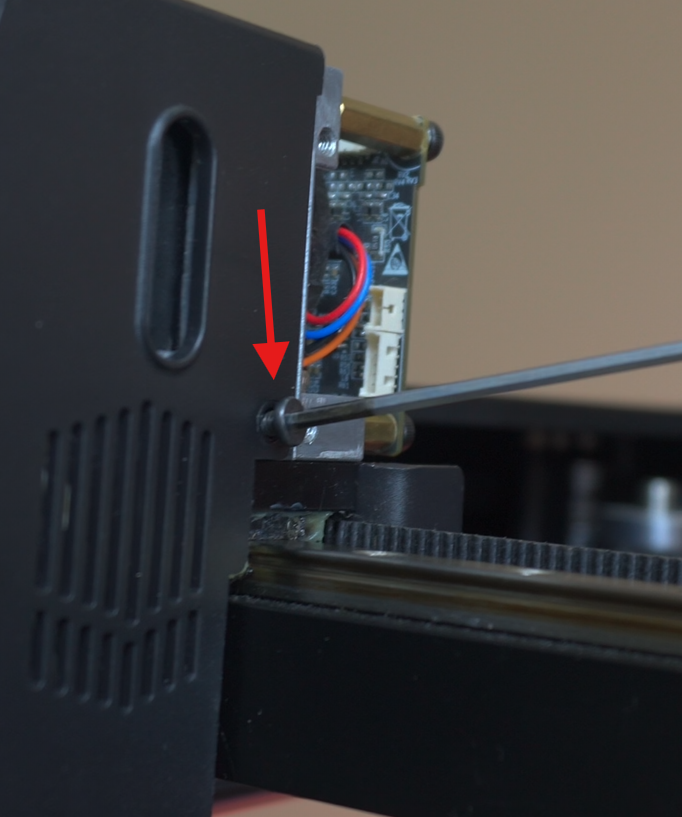
¶ 1.2) Disconnect The Print Head Cable
Disconnect the cable from printhead by unscrewing three screws.
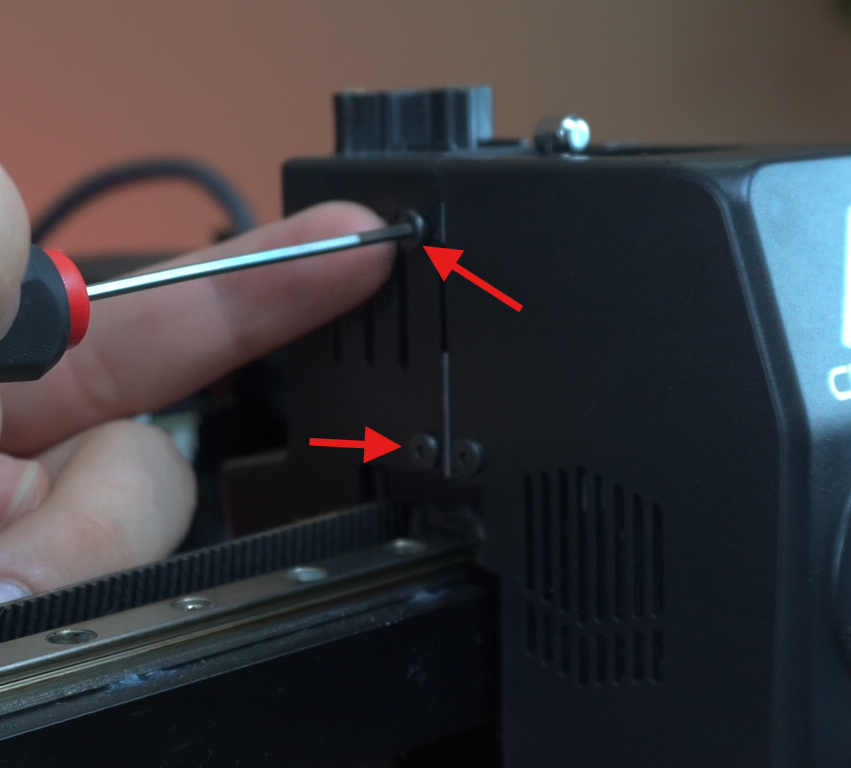
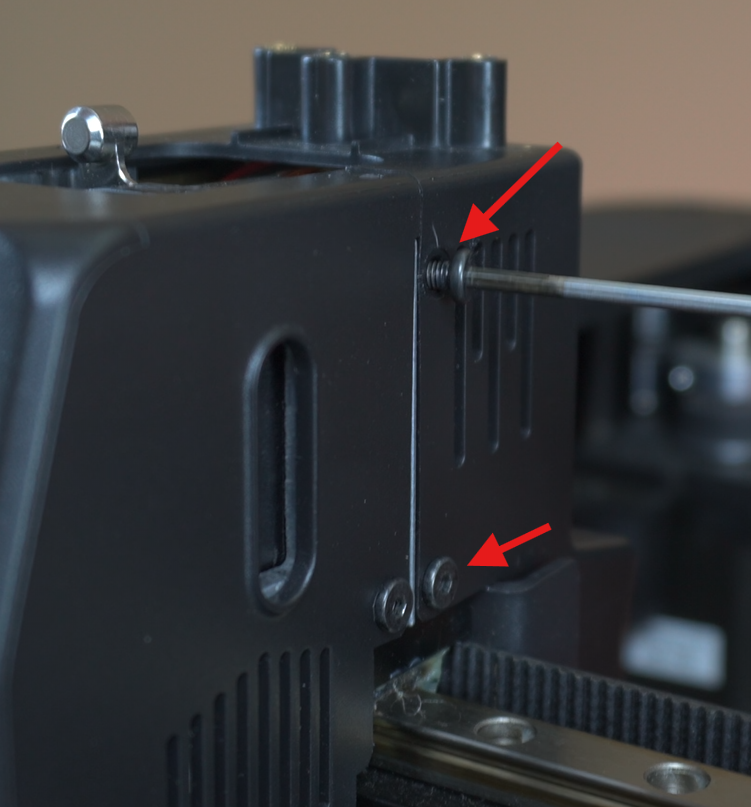
¶ 1.3) Remove The Print Head Covers
Remove the two screws on the left and right sides to detach the back cover and fan cable. After that remove the screws to detach front cover and fan cable.
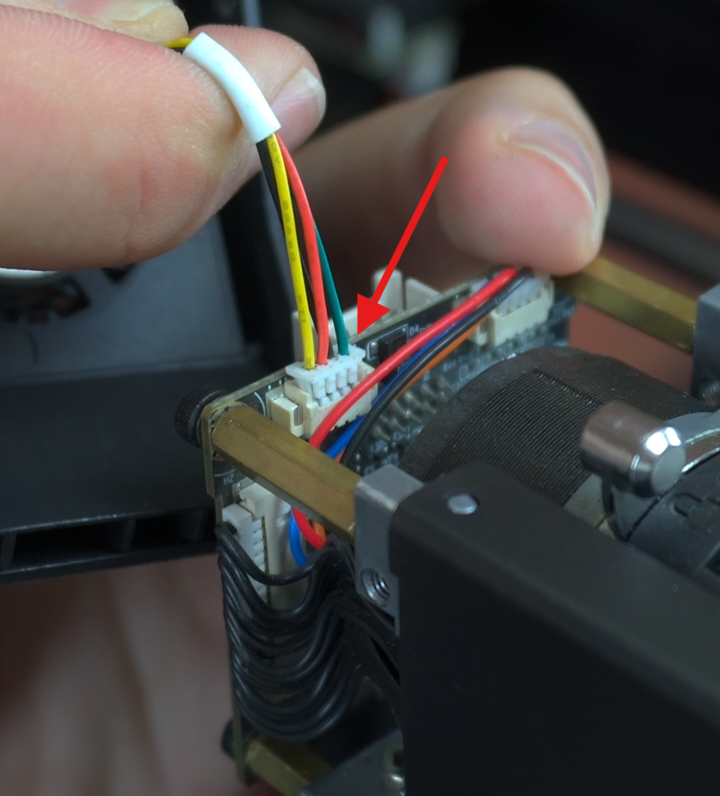
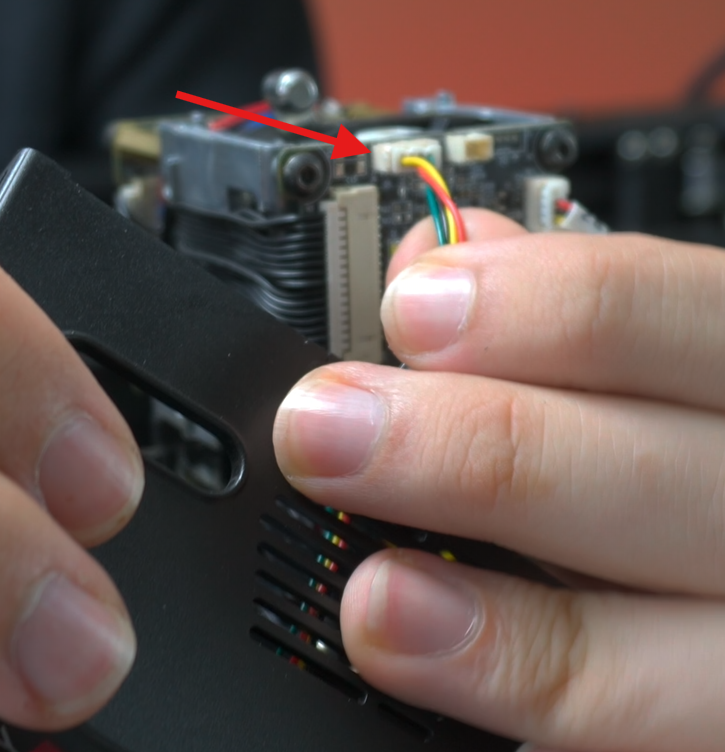
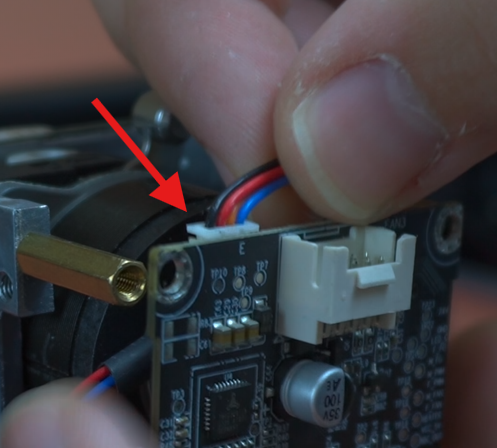
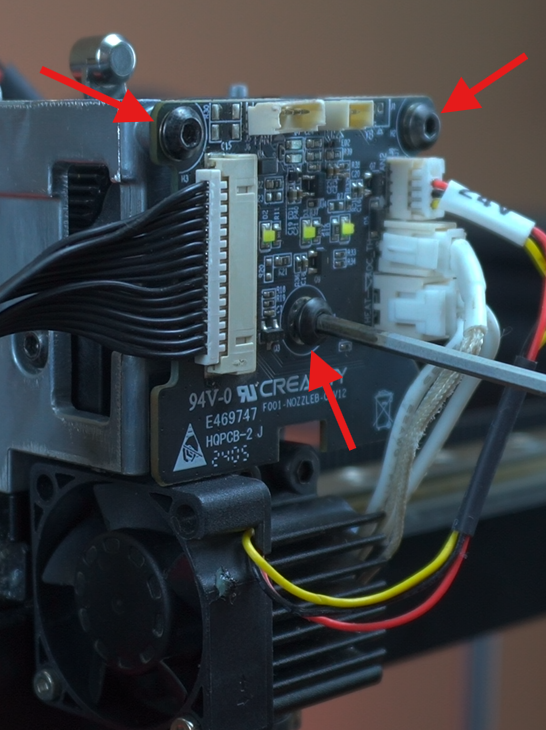
¶ 1.4) Remove The Print Head Board
Remove the screws of the board to detach it. After that disconnect cable from board.
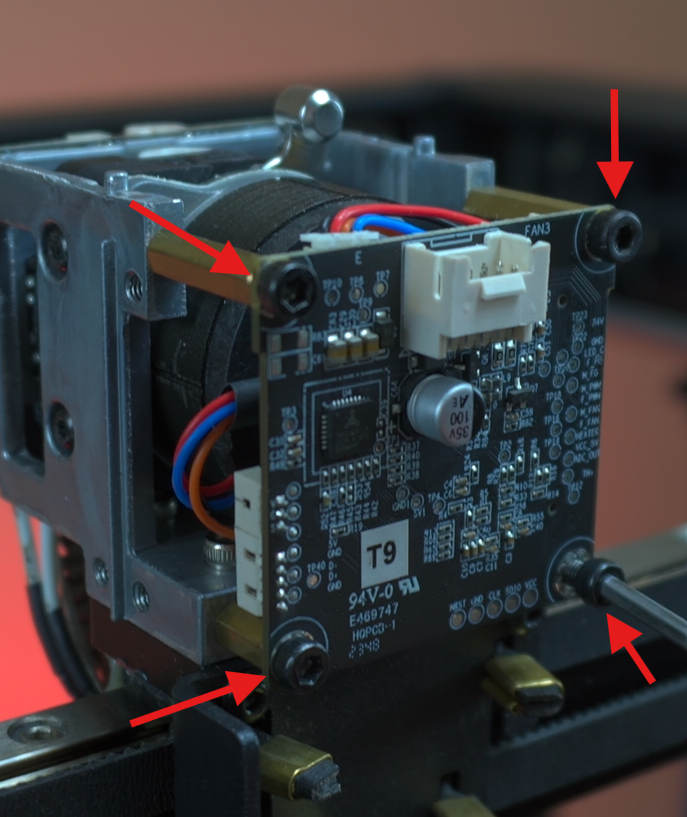
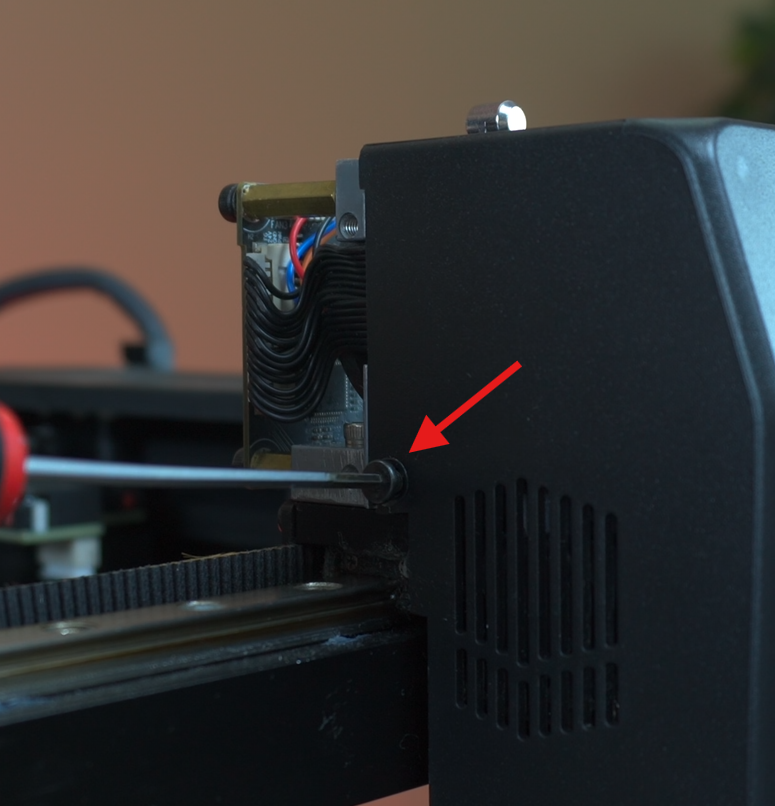
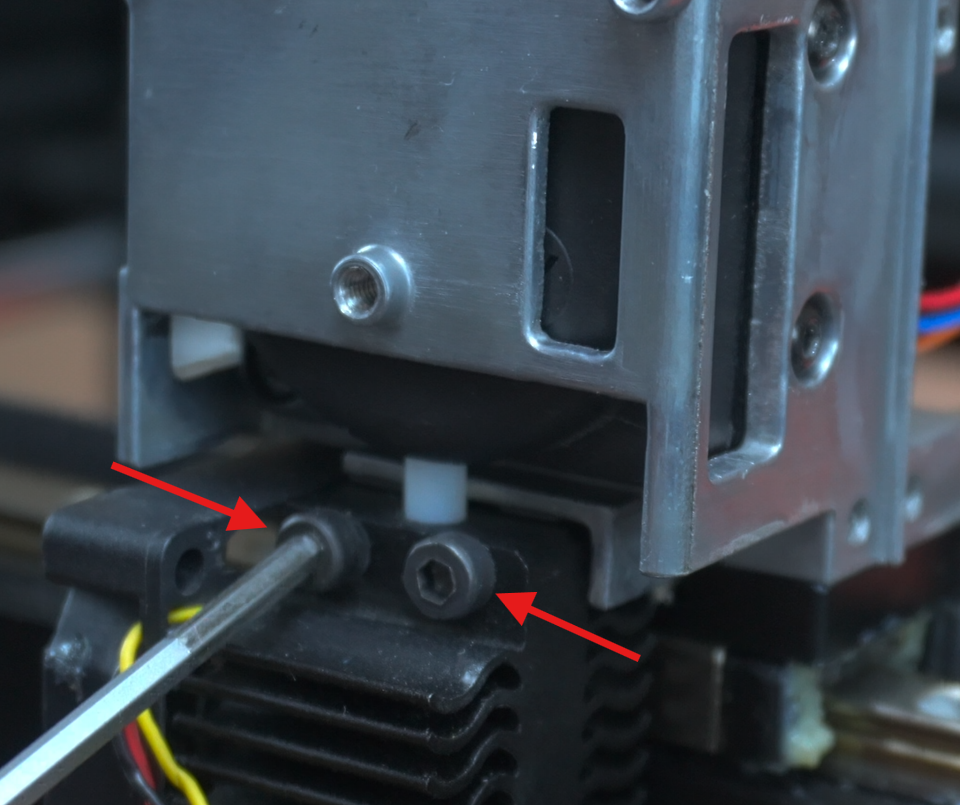
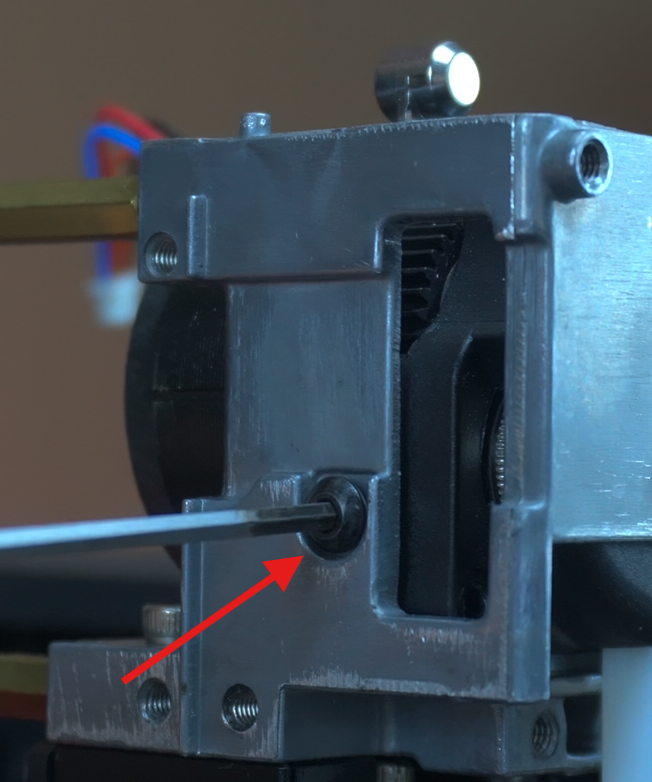
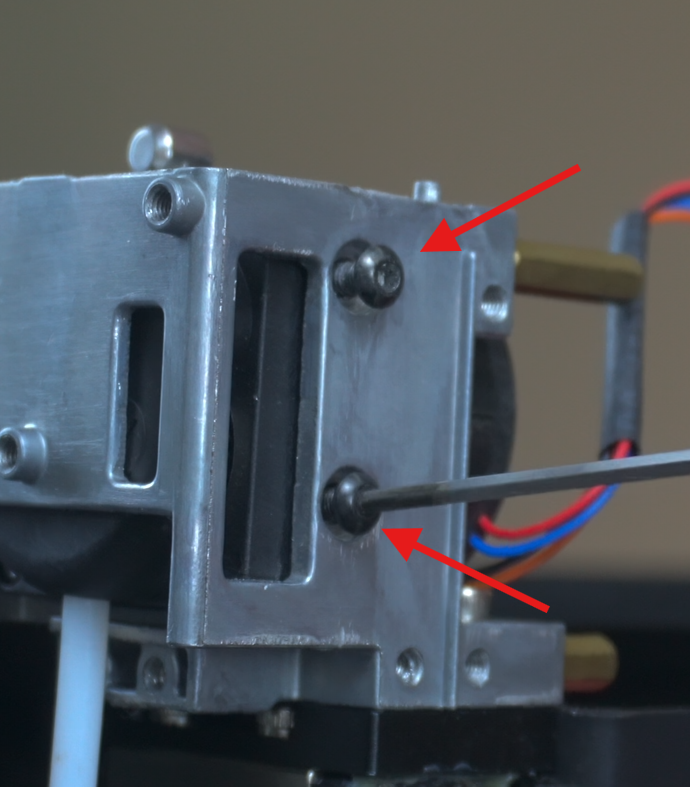
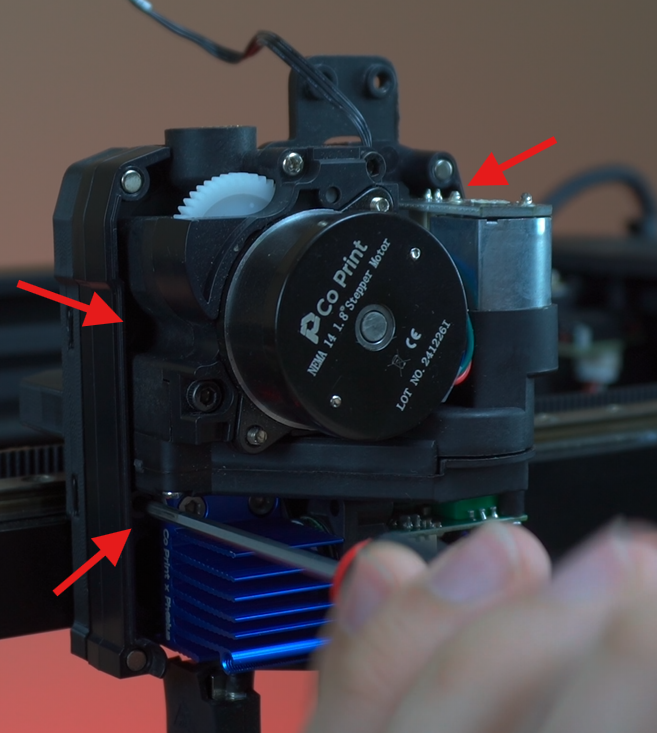
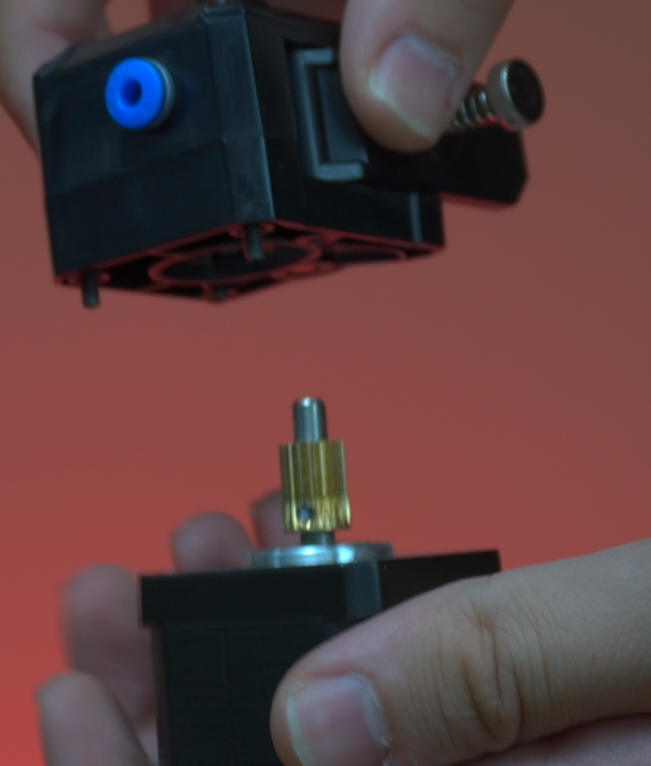
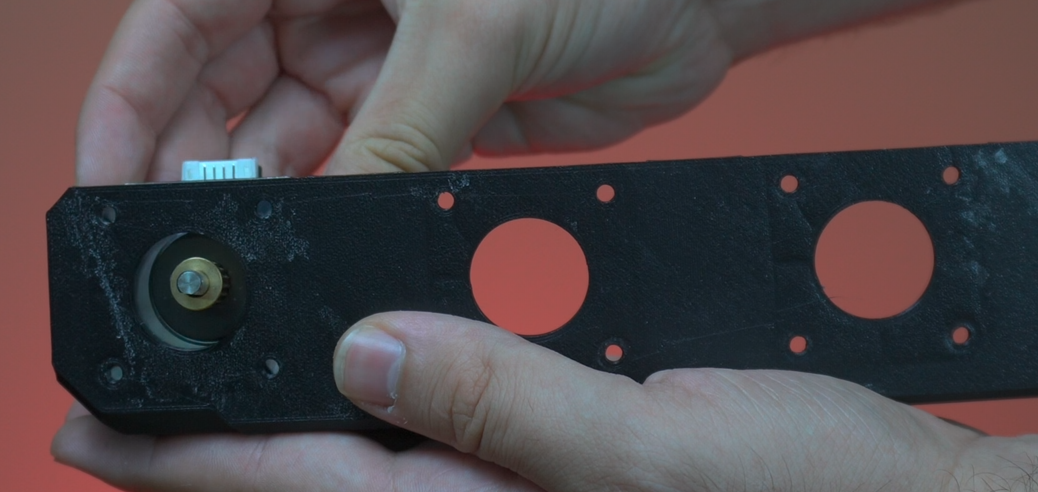
¶ 1.5) Remove The Stepper Motor
Remove the two screws to detach control board from its place. After that unscrew the screws and detach hotend. Finally unscrew the screws which is on both side of stepper motor and detach the stepper motor and the frame.
¶ 1.6) Installing the ChromaHead
Secure the ChromaHead adapter part with screws. Unbox the ChromaHead and detach the front cover also disconnect the fan cable. Attach the ChromaHead and secure with three screw by using screwdriver. Finally attach the 8-in-1 module with ptfe tube holders and connect filament sensor cable.
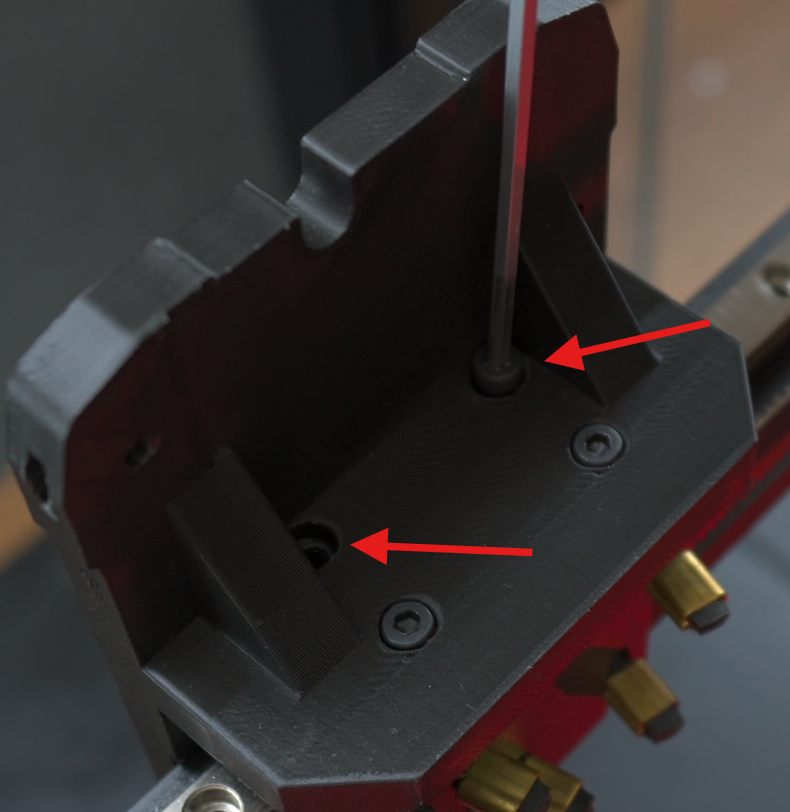
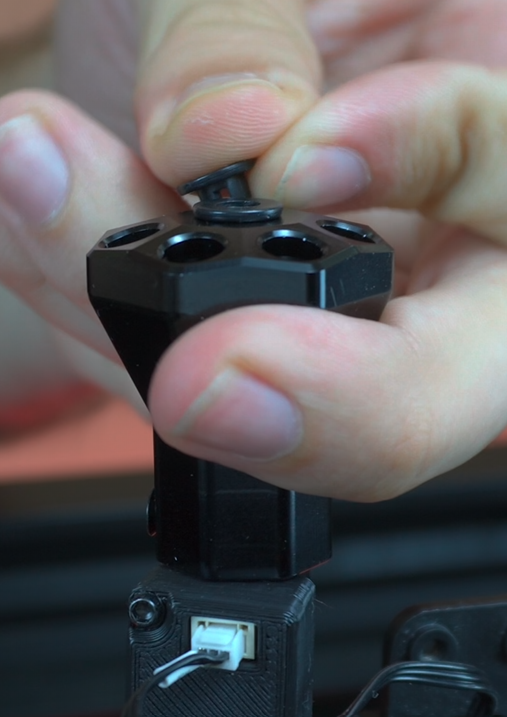
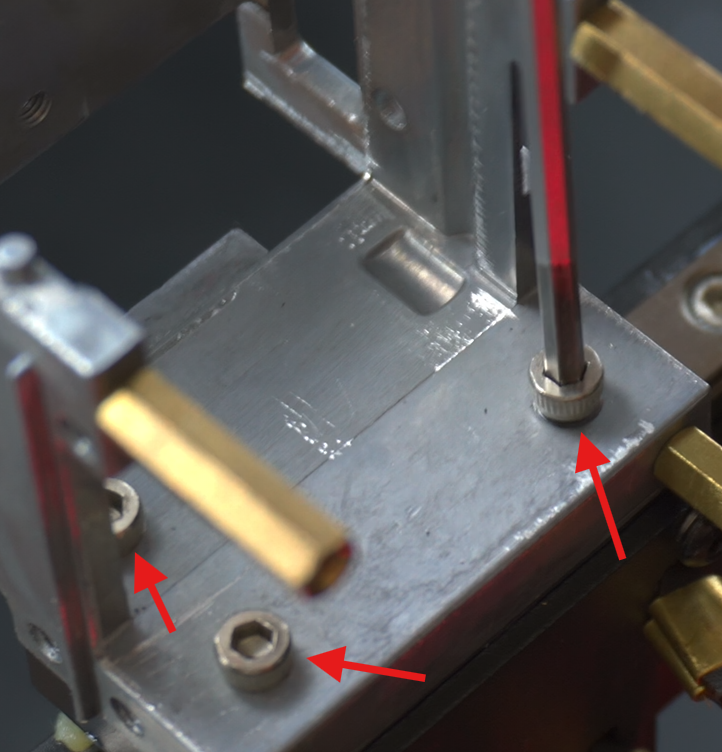
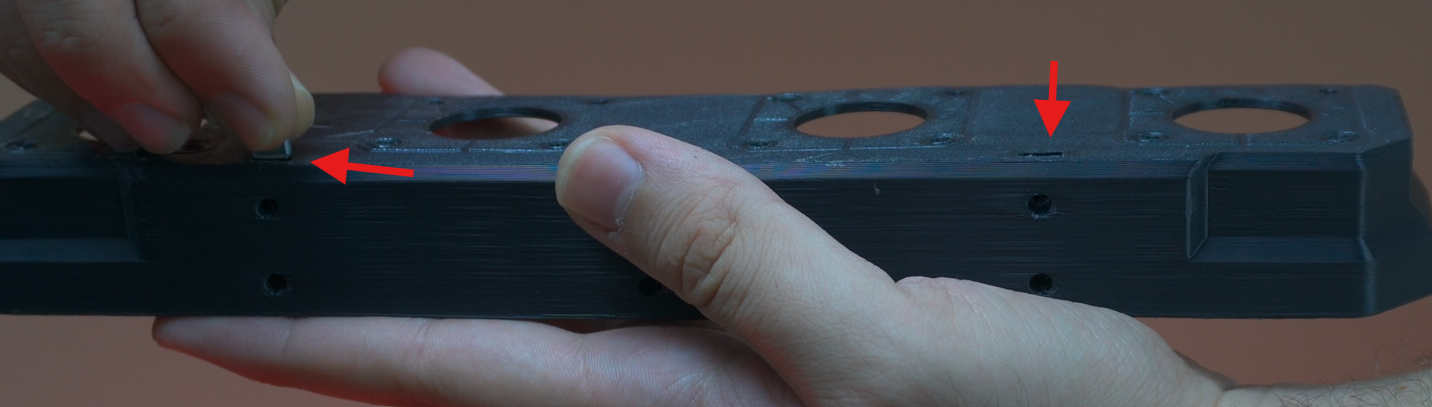
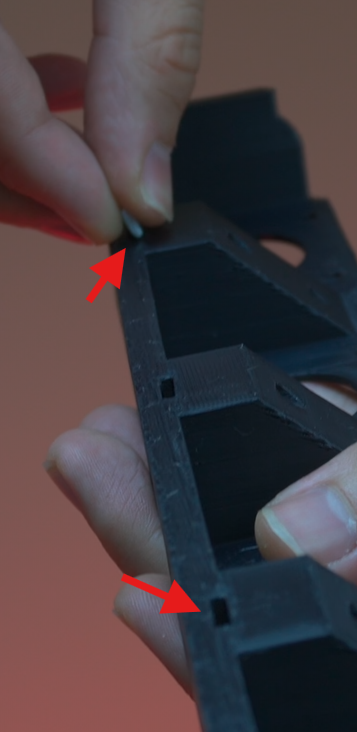
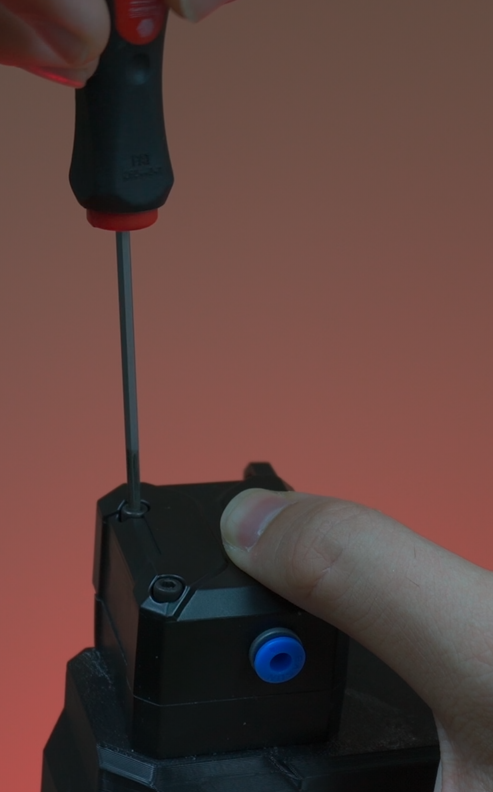
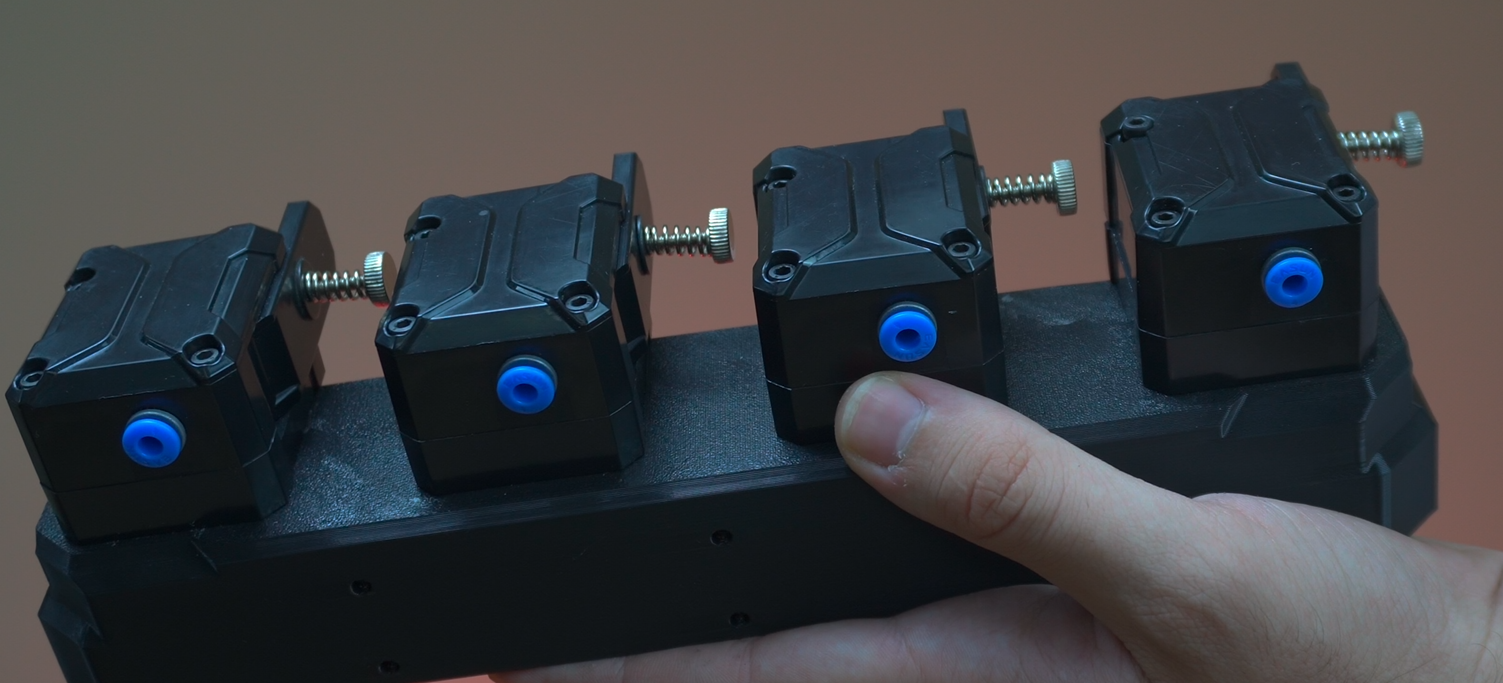
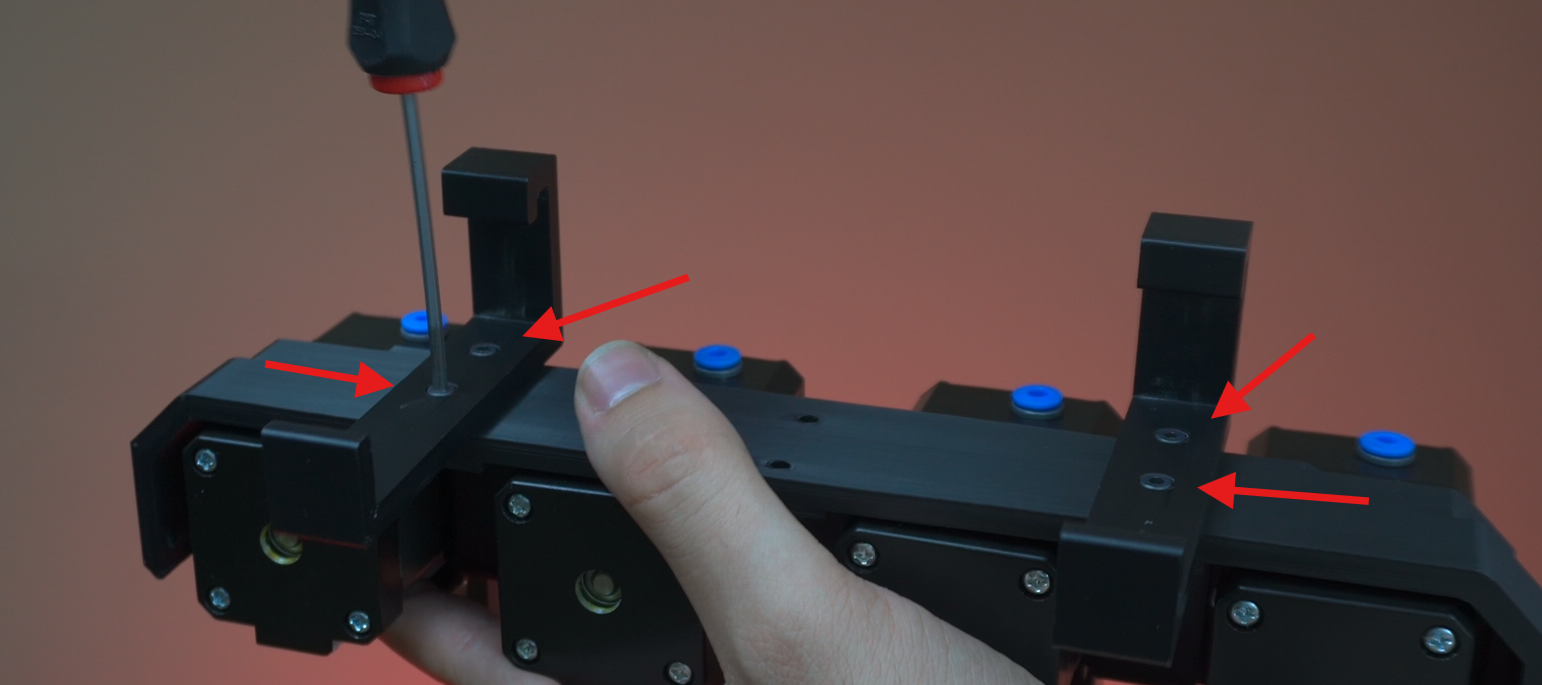
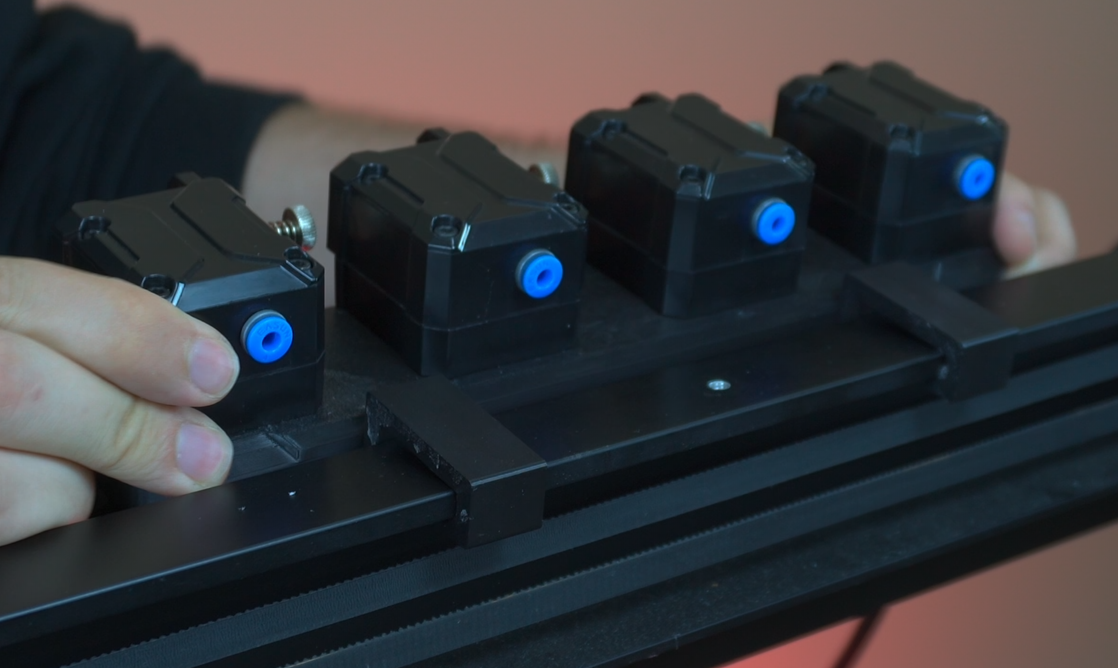
¶ 1.7) Installing The CX-1 Extruders
Take the CX-1 extruders out of boxes and unscrew the top three screws. Take extruder block and insert the nuts to the correct places. After that attach the CX-1 extruders to the extruder block, assamble the extruder block holder and mount to the printer.
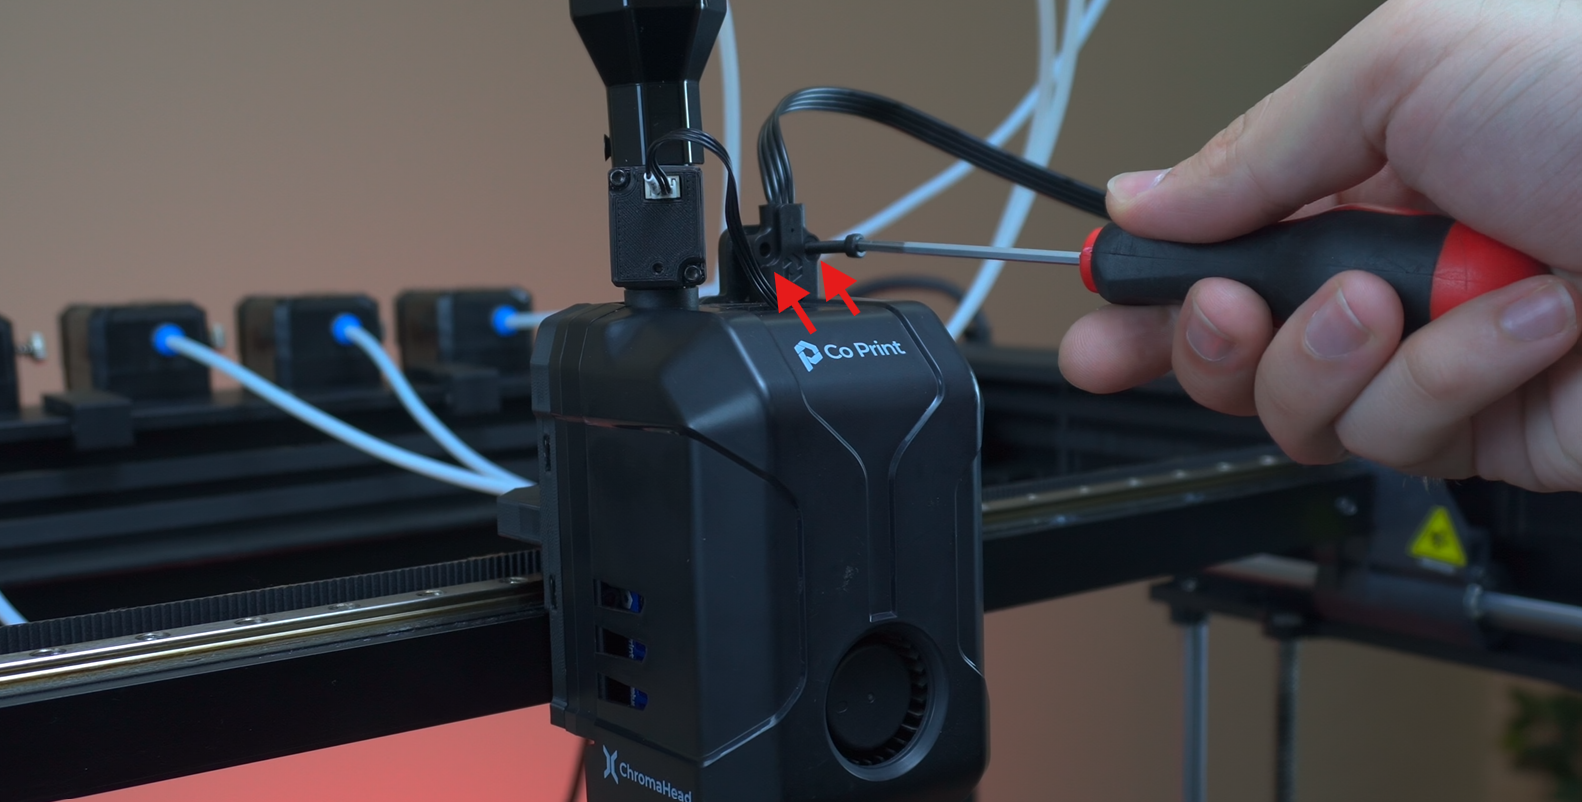
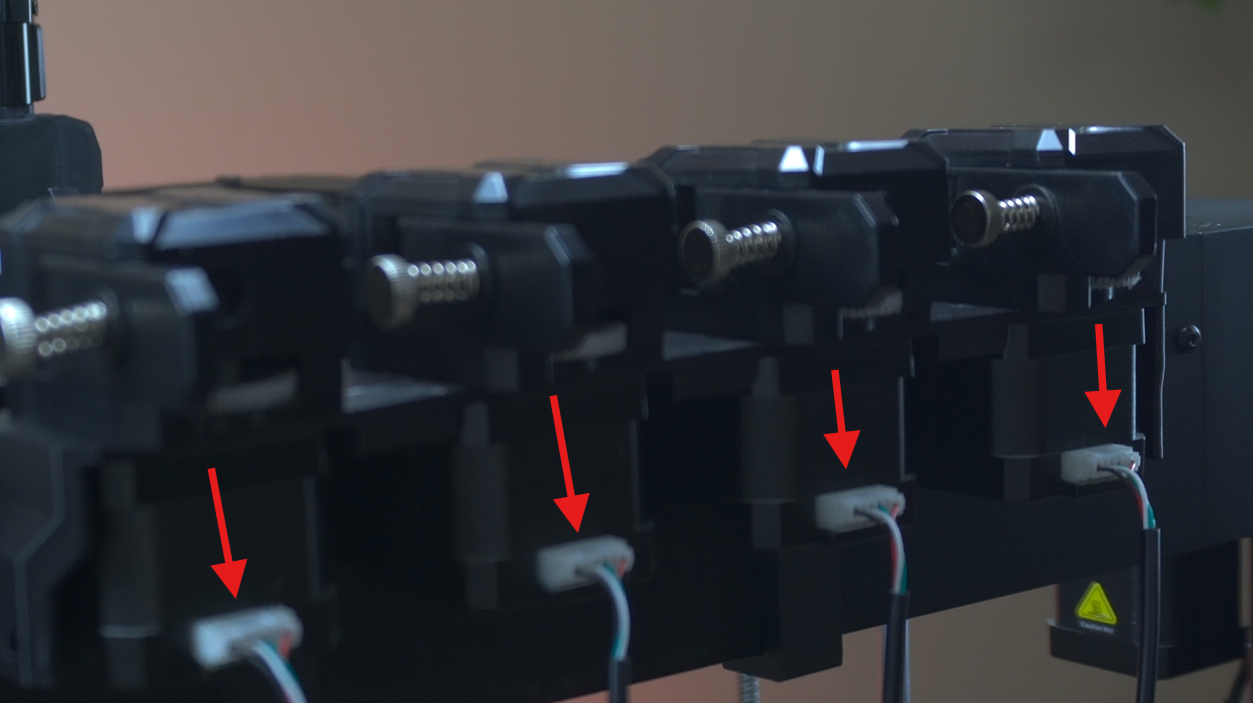
¶ 1.8) Finishing The CX-1 Extruder Installation
Now insert the ptfe tubes to extruders and 8-in-1 module with correct position. Connect the ChromaHead cable and secure wth two screws. Finally connect the extruder motor cables to the KCM module.
WARNING: BE SURE THAT KCM MODULE IS POWERED OFF WHILE CONNECTING CHROMAHEAD CABLE TO THE KCM MODULE.
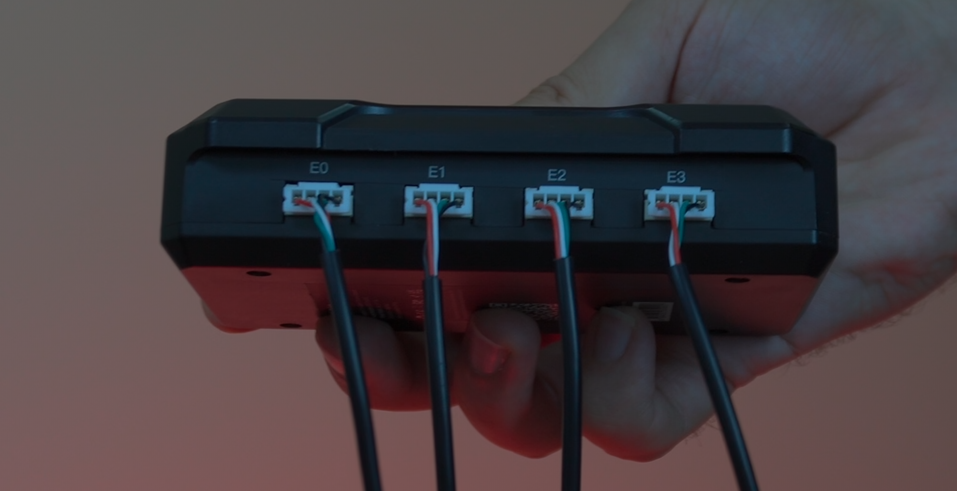
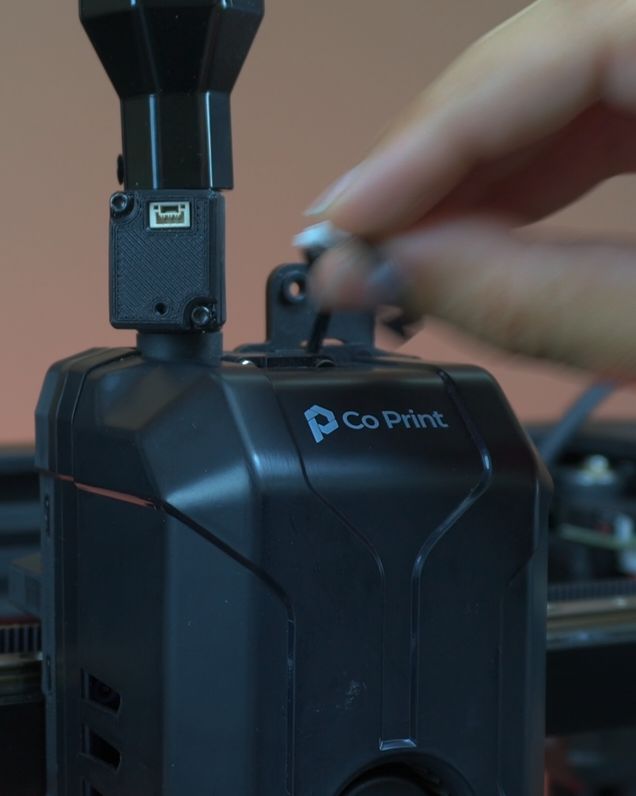
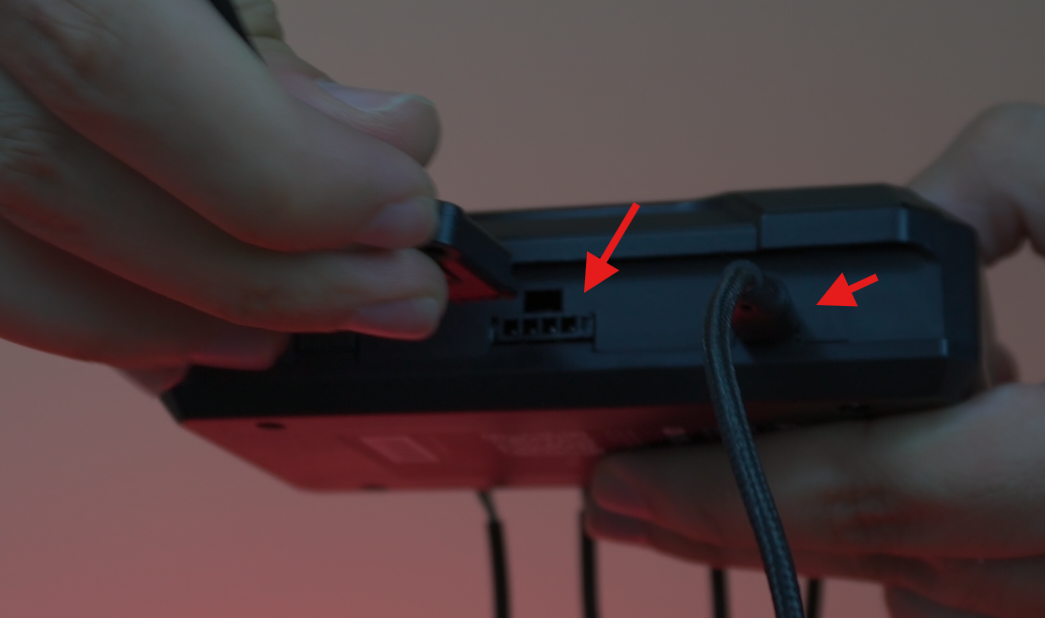
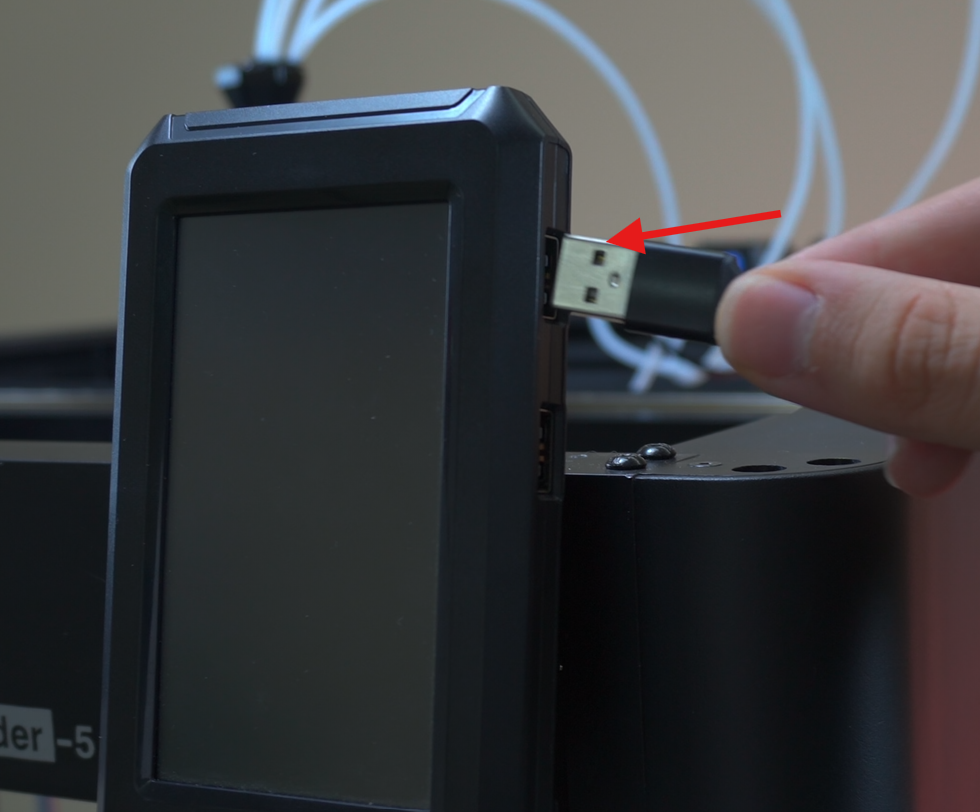
¶ 1.9) Finishing The KCM Set Installation
Now connect the cables to the KCM set, connect the usb to the printer screen and be sure that all extruder motor cables connected. And power on printer.
¶ 1.10) Access SSH
1- Use the IP address obtained to establish an SSH connection via terminal or cmd.
Type "ssh root@(your printer's ip)" then hit enter. The password is "Creality@2024_Wh_464".
2- Type "cd /usr/data" command.
3- Type "git clone --depth 1 https://github.com/Guilouz/Creality-Helper-Script.git /usr/data/helper-script" command.
4- Type sh /usr/data/helper-script/helper.sh and go to the Install Menu type 1 and type y after that install Mainsail by typing 3 and y following. After all that quit by entering q command.
5- Type git config --global core.compression 0 and enter.
6- Type git clone https://github.com/Klipper3d/klipper and enter. After command finish, type cd /usr/data/klipper and enter the following command git reset --hard 08a1c9f12760ee6d89db2b82e76c7d93453212db and wait for command complete.
7- Download the necessary file. (You can find the necessary files on our GitHub page.)
8- Go to YourPrinterIP:4409 on your browser and upload the downloaded file to mainsail in MACHINE menu.
9- Turn back to SSH and type mv /usr/data/printer_data/config/klippy.tar.gz /usr/data/klipper after that type tar -zxvf klippy.tar.gz.
10- Type vi /etc/init.d/S55klipper_service on SSH and find PY_SCRIPT=/usr/share/klipper/klippy/klippy.py and change it to PY_SCRIPT=/usr/data/klipper/klippy/klippy.py
11- Find mcu_reset section by scrolling down and you will see copy_config under the section change it to #copy_config after that quit the configration by hitting ESC button and type :wq to save it.
12- Type /etc/init.d/S55klipper_service restart in SSH menu.
13- Type sh /usr/data/helper-script/helper.sh in SSH menu go to INSTALL menu by typing 1 after that type 5. Also go to MAIN MENU by typing b and go to CUSTOMIZE menu by pressing 3 after that type 3 to install Guppy Screen(release build). Say yes to "Do you want to disable all Creality services". After all process quit by pressing q.
14- Download the config files. (You can find the config files on our GitHub page.) and upload the downloaded file to mainsail in MACHINE menu.
15- Go to kcm.cfg which is located id MACHINE menu. Hit DEVICES button top right. Refresh it and find the path of usb-kcm_stm32 and full copy the path which includes usb-kcm_stm32. Change the serial section which is under the mcu cp_kcm with the following. Save it and exit.
16- Go to chroma_head.cfg which is located id MACHINE menu. Hit DEVICES button top right. Refresh it and find the path of usb-head_stm32 and full copy the path which includes usb-head_stm32. Change the serial section which is under the mcu cp_Head with the following. Save it and exit.
17- Restart the Fimware.
¶ Your printer is ready to use.
¶ 2) Post-Installation OrcaSlicer Configuration
After completing the installation, you also need to configure OrcaSlicer. We recommend downloading the latest version of OrcaSlicer for optimal compatibility. You can use the link below to get the most recent release.
OrcaSlicer Download Link - Download
-
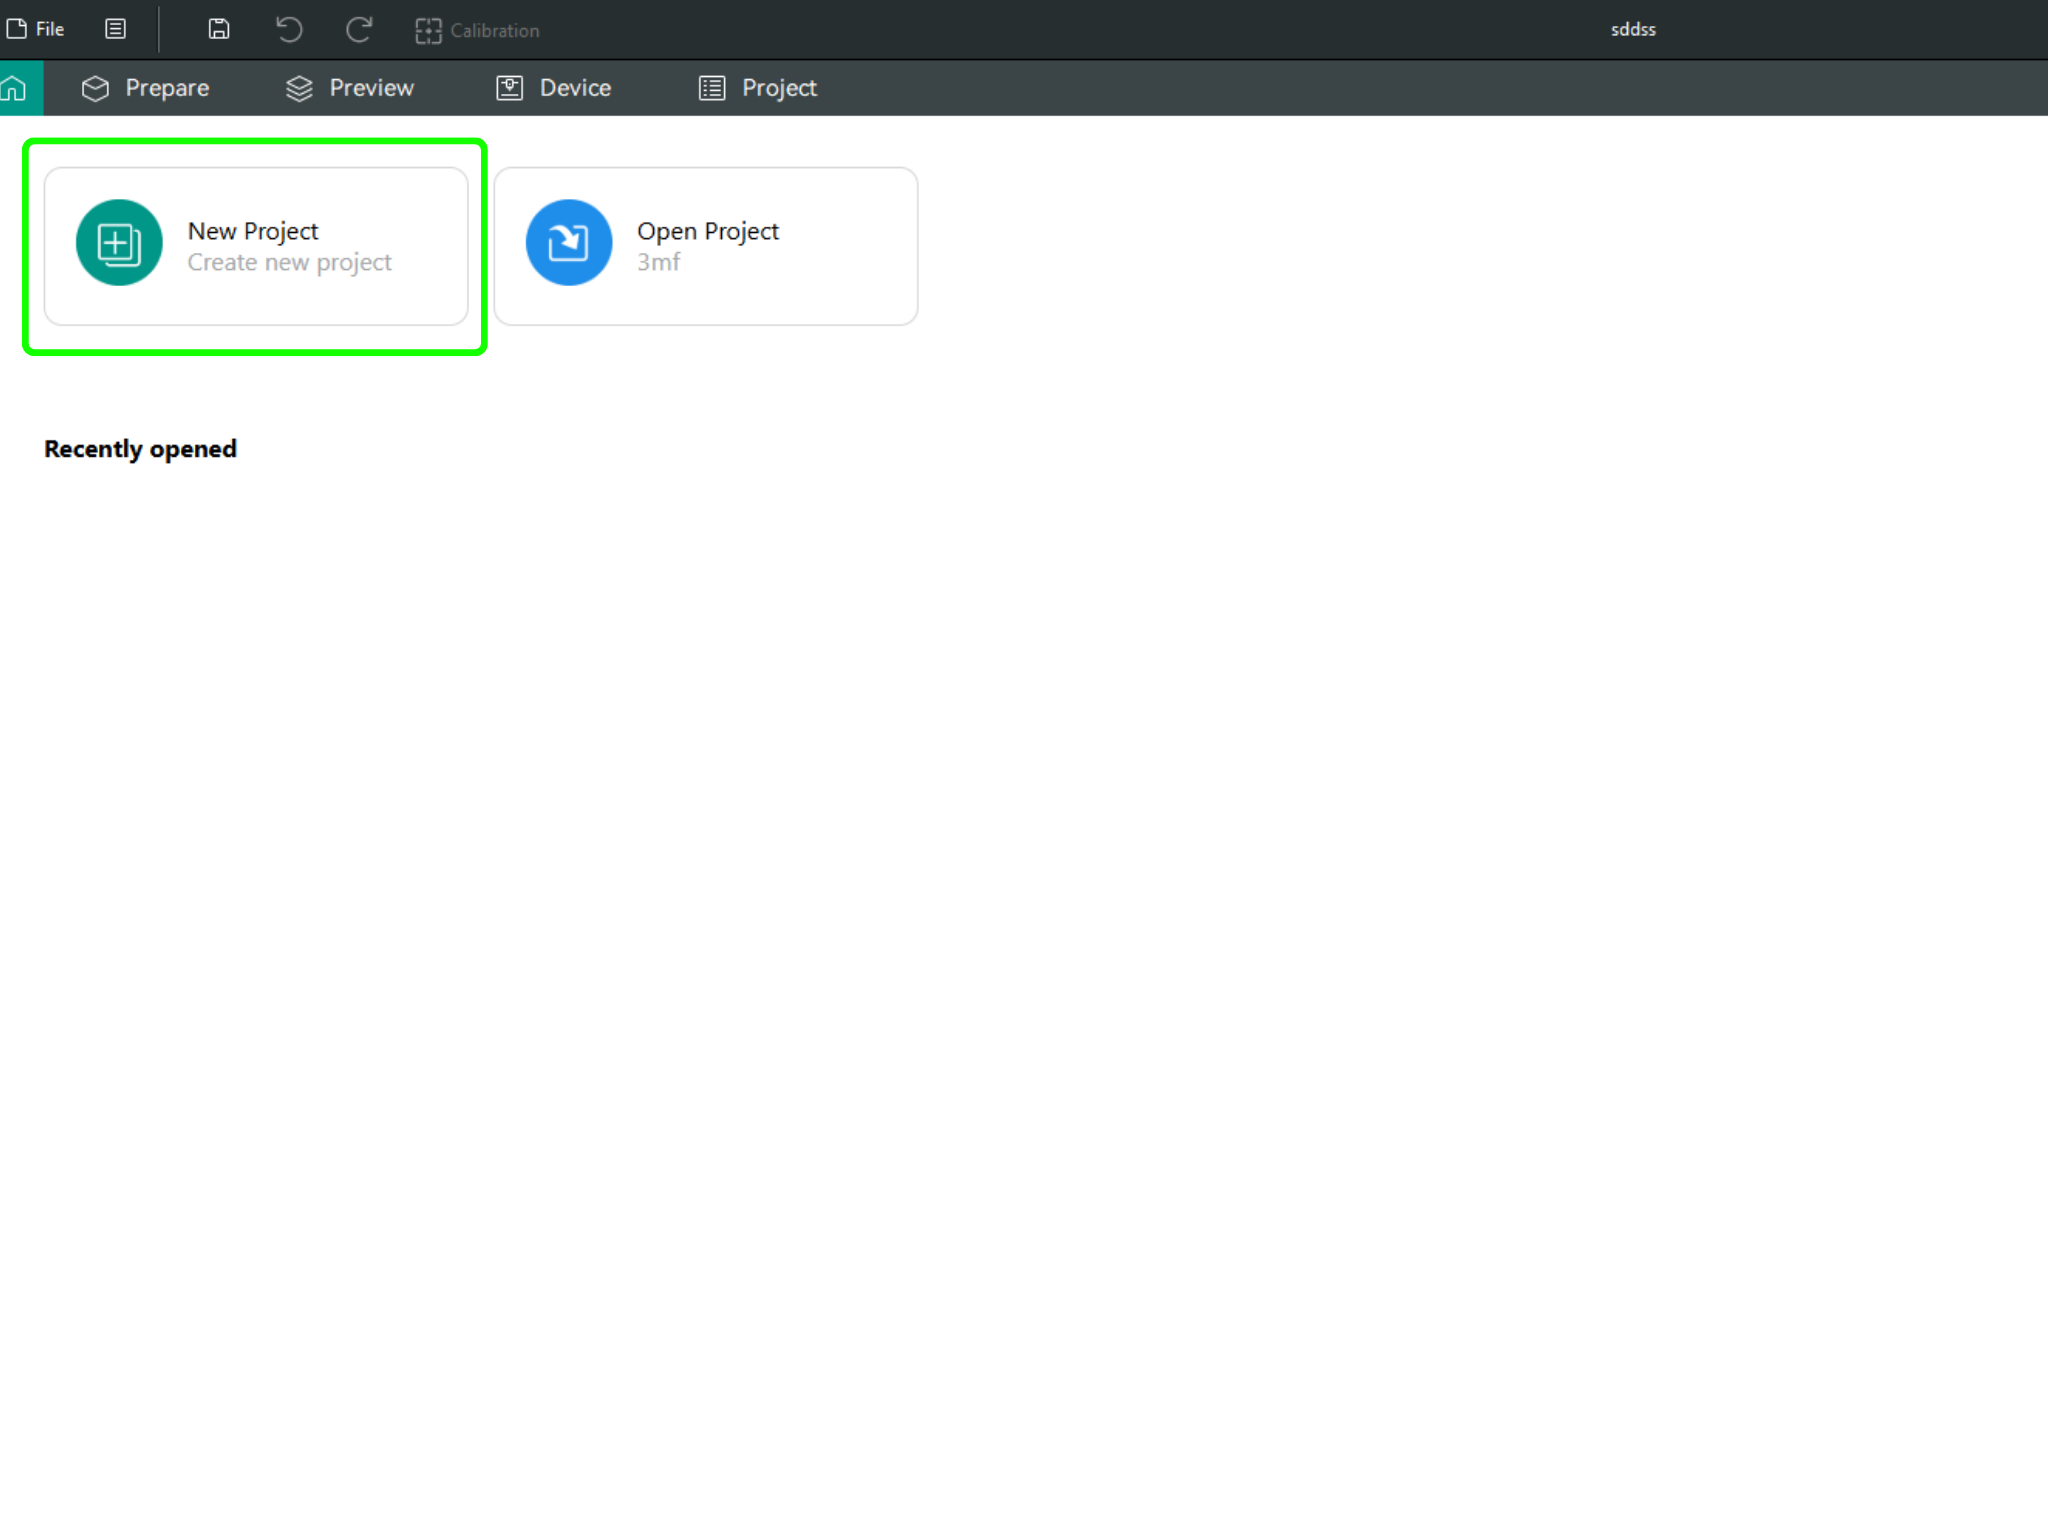
After downloading OrcaSlicer, click on “New Project”.
-
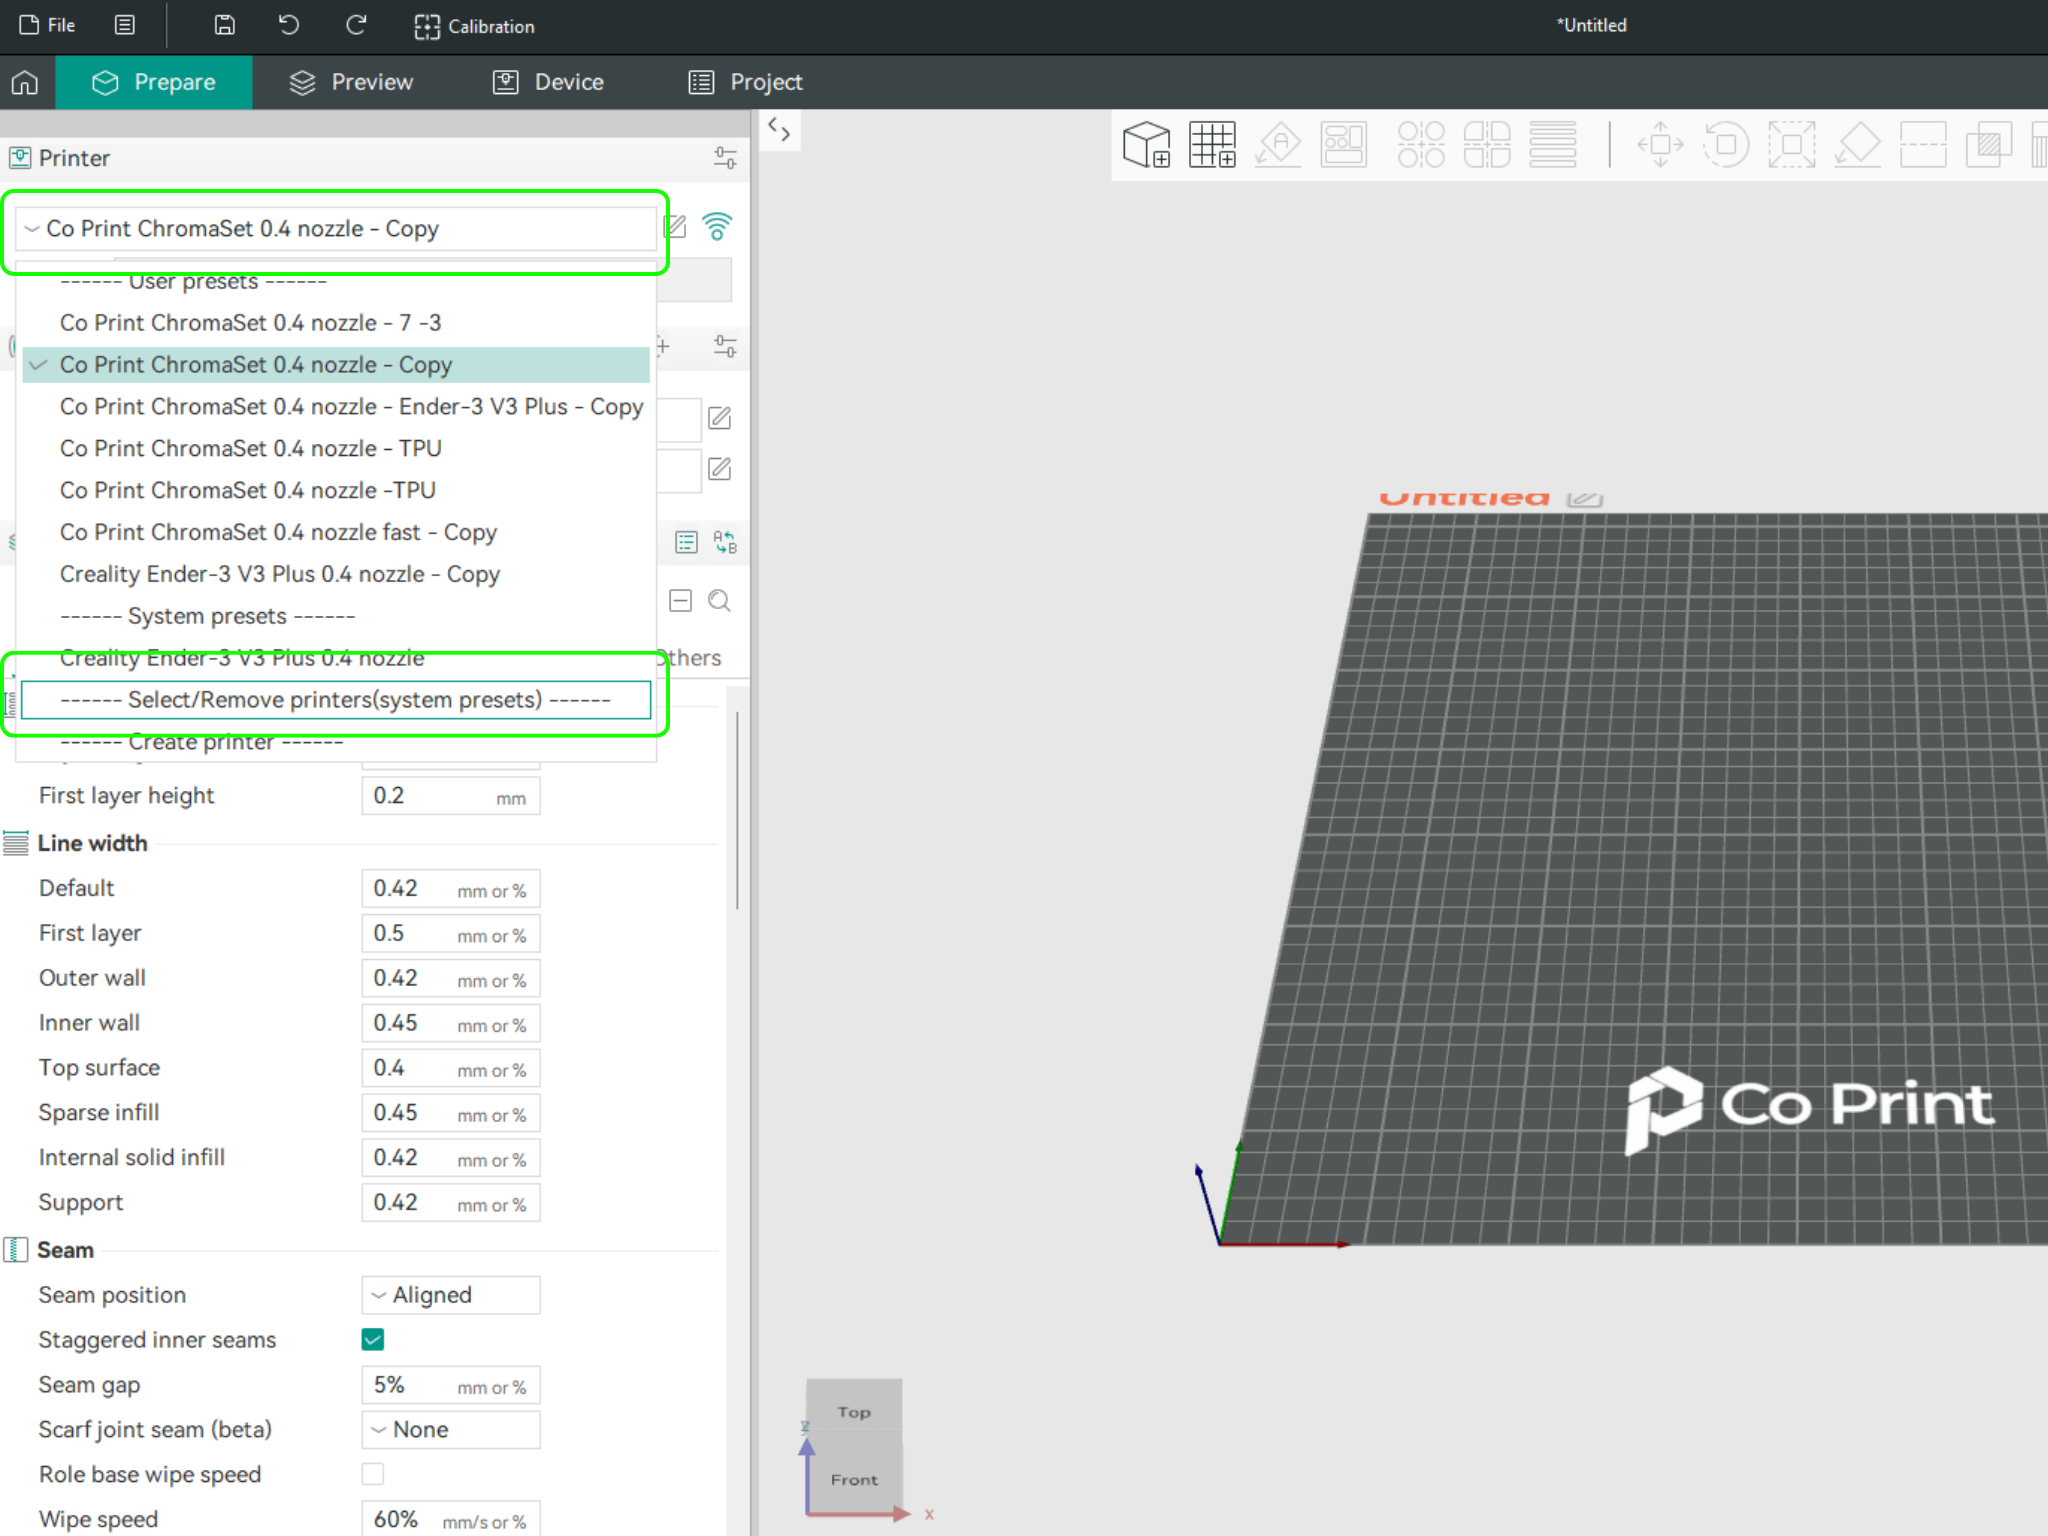
In the left menu, go to the Printers section and click on “Select/Remove printers”.
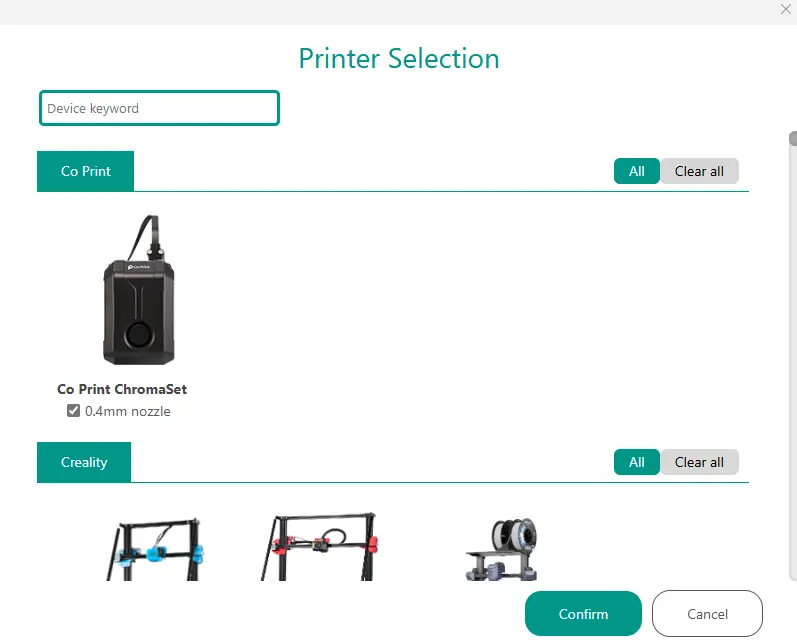
- In the opened menu, find and select Co Print. Then click "Confirm".
- After loading the settings, you need to adjust them in OrcaSlicer according to your printer’s bed size.
- You can import your model into OrcaSlicer as shown in the videos below, paint it, and start your print directly from within OrcaSlicer.