¶ Qidi X-Max 3 KCM Set Installation Guide
| Image | Information |
|---|---|
 |
Welcome to the installation page for Qidi X-Max 3 with KCM Set. This guide will help you update your printer's firmware to ensure compatibility with KCM Set, download and print the required .STL files for mechanical assembly, complete the mechanical setup, and configure the Klipper settings. By following these steps, you will successfully complete the installation process. |
¶ - Downloadable parts required for the installation
You can download the required STL files below.
| Part Name | Quantity | Links |
|---|---|---|
| ChromaHead Adapter Part | 1x | Download |
| 4 CX-1 Extruder Block | 1x | Download |
| KCM Holder | 1x | Download |
| Front Riser | 1x | Download |
| Back Riser | 1x | Download |
| Side Riser | 2x | Download |
| Corner Riser | 4x | Download |
¶ 1) Qidi X-Max 3 KCM Installation
Before starting the next steps, make sure your printer is turned off.
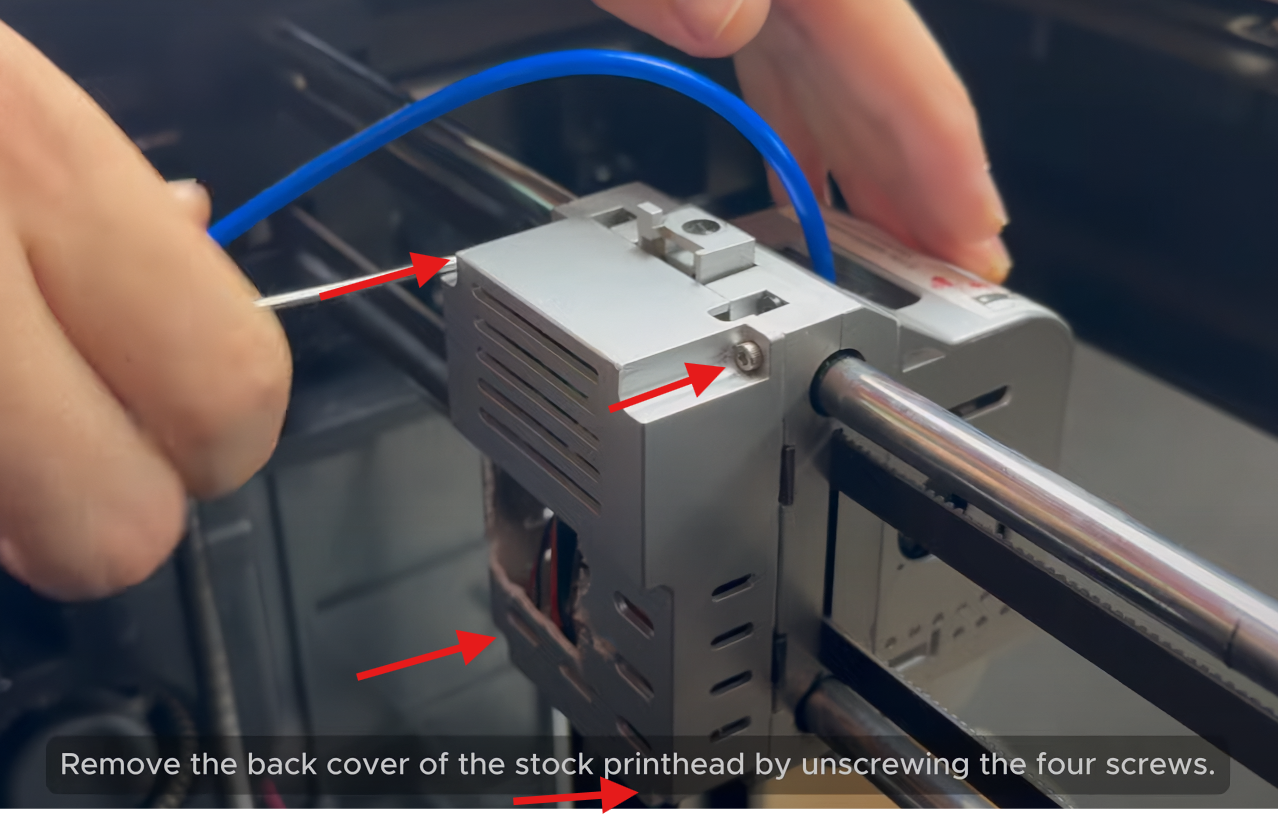
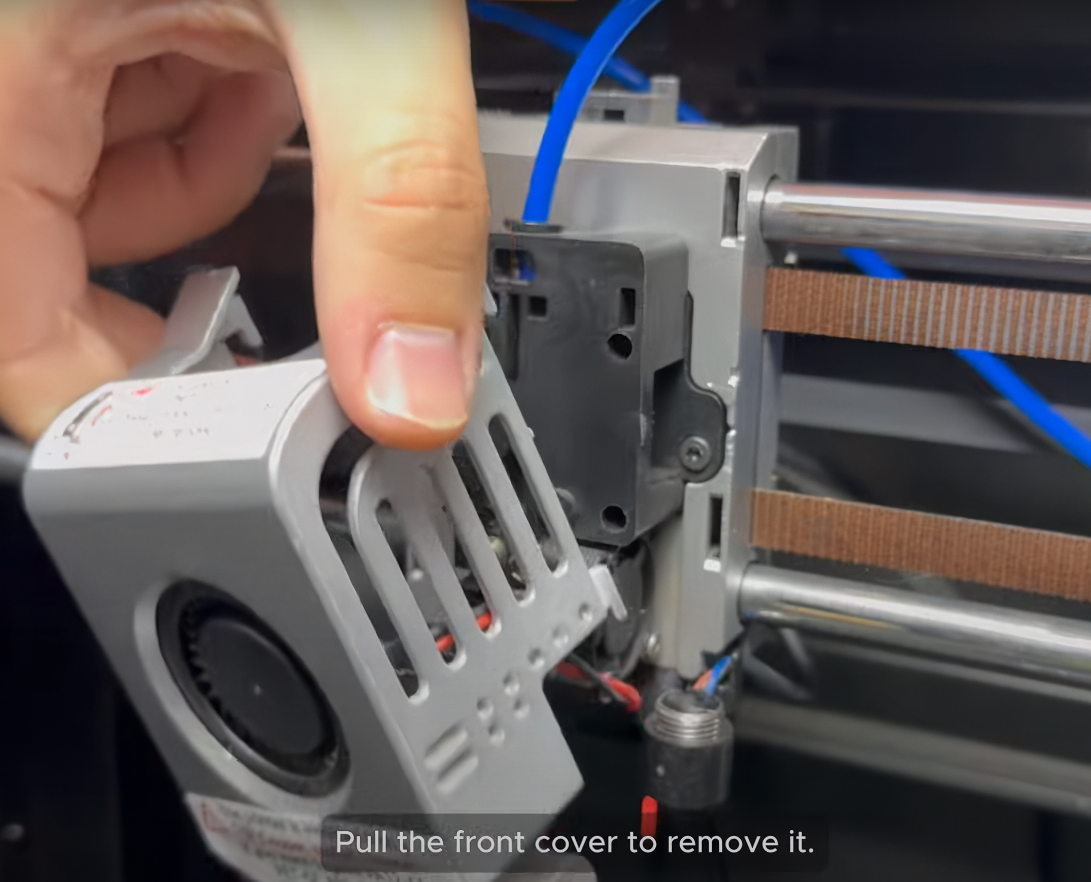
¶ 1.1) Remove The Printhead Covers
Remove the back cover of stock printhead by unscrewing the four screws than pull the front cover.
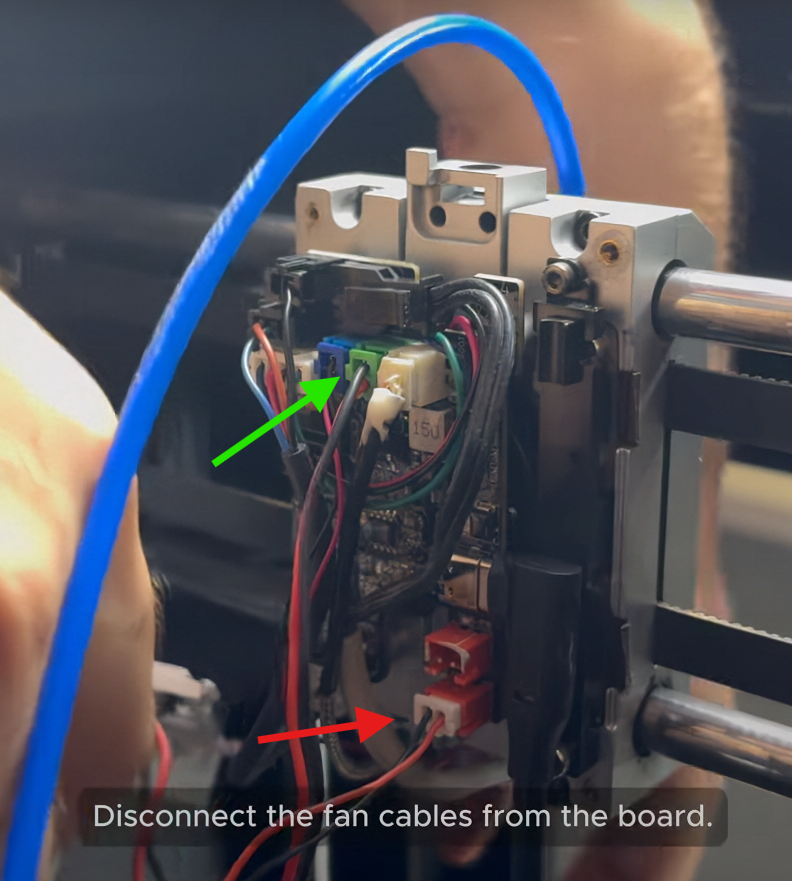
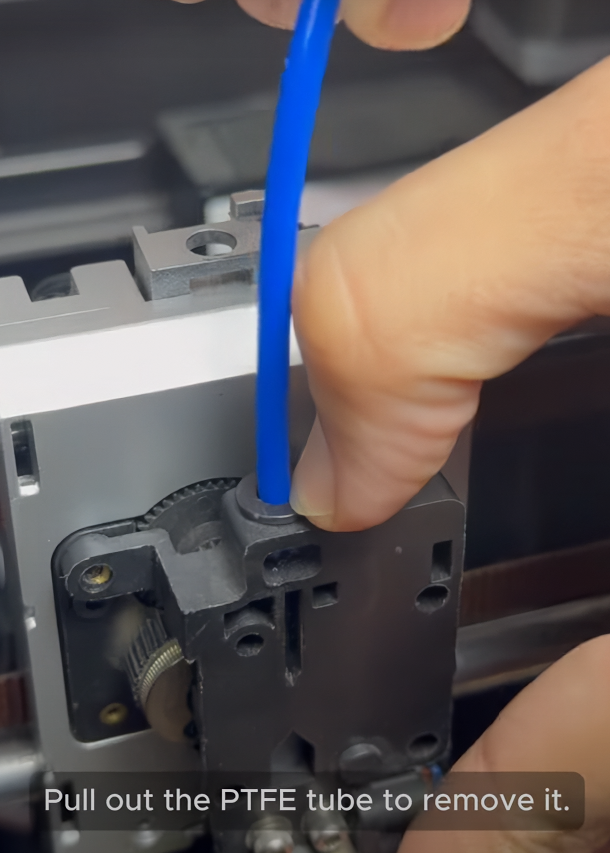
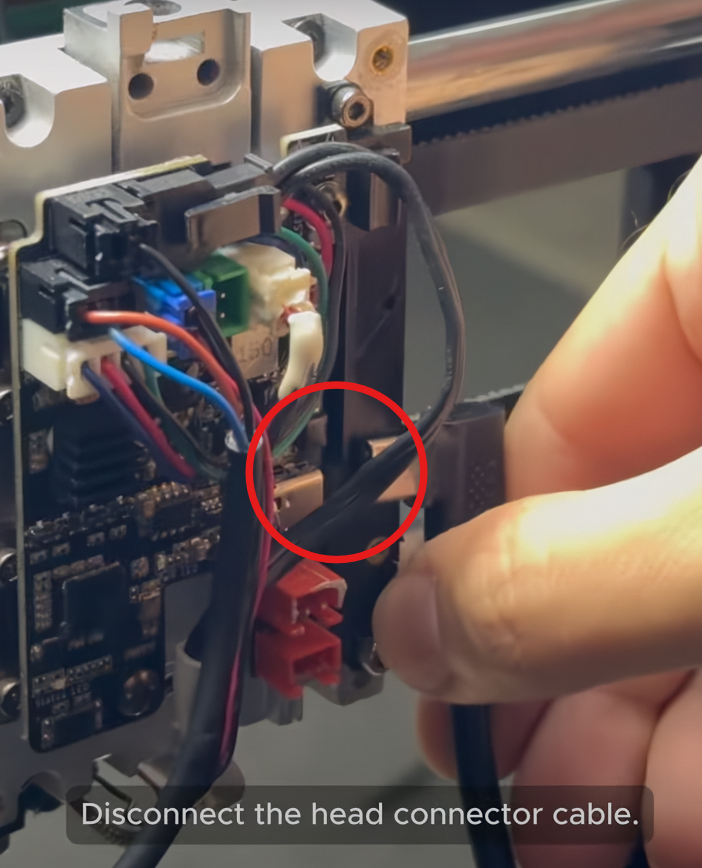
¶ 1.2) Disconnect The Print Head
Disconnect the fan cables from board. Pull out PTFE tube and disconnect the head connector cable.
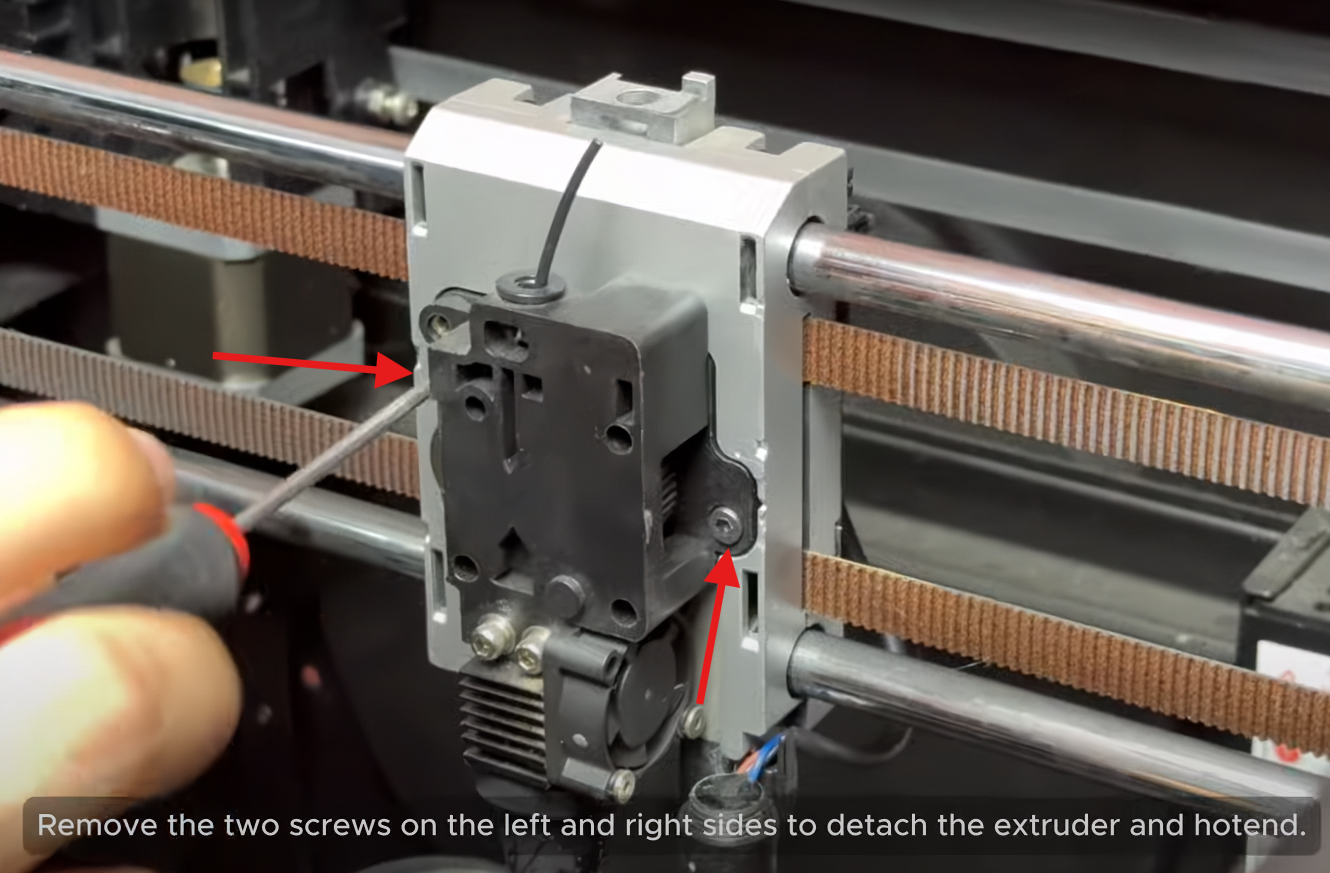
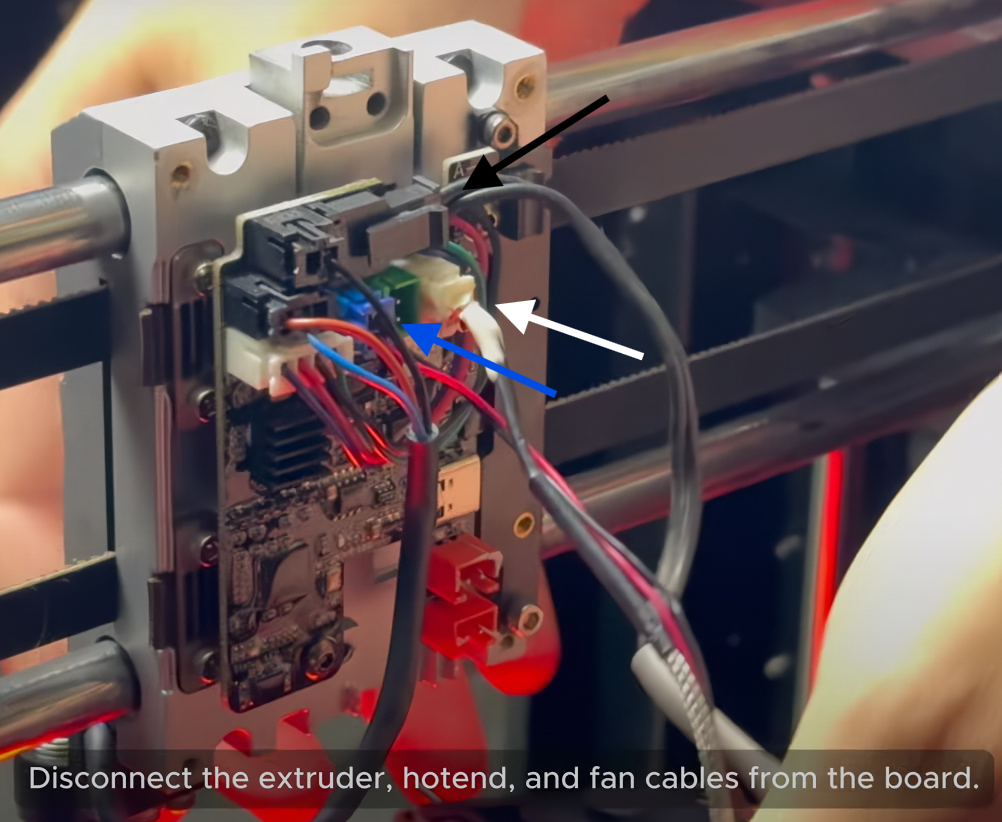
¶ 1.3) Detach The Print Head Board from the Printer
Remove the two screws on the left and right sides to detach the extruder and hotend. After that disconnect the extruder, hotend, and fan cables from board.
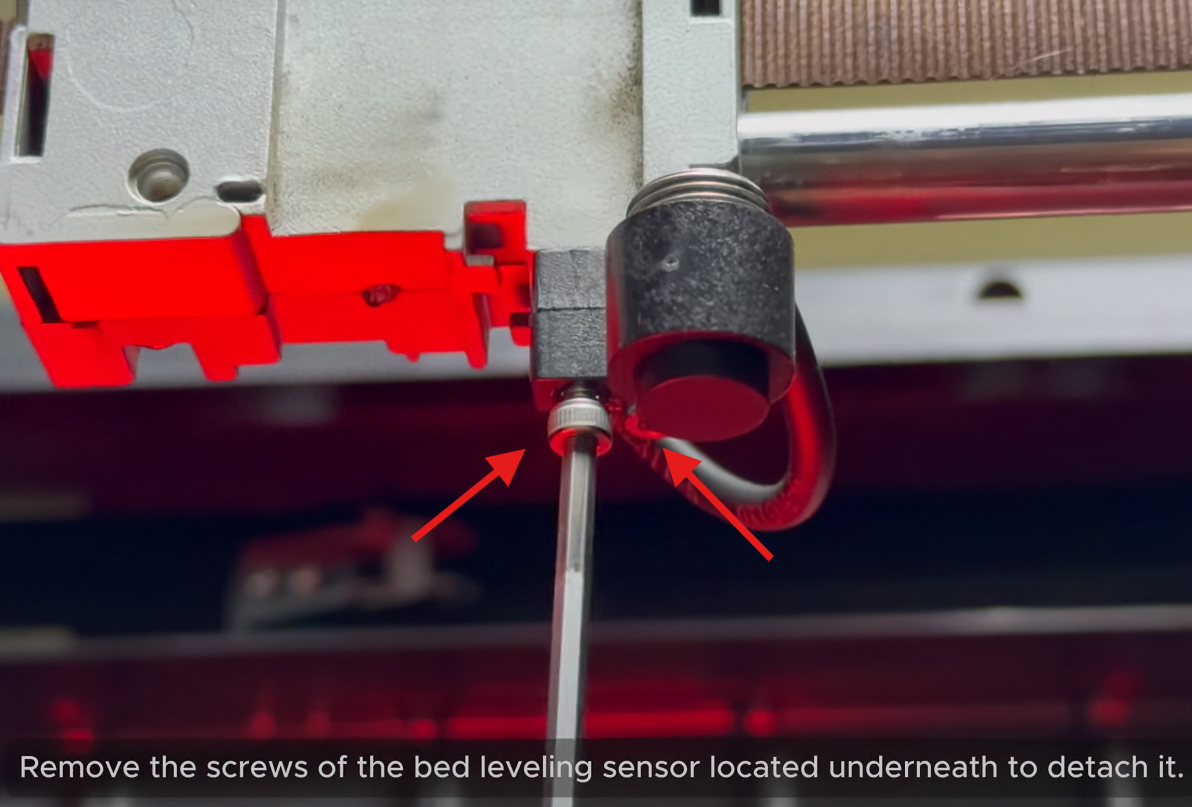
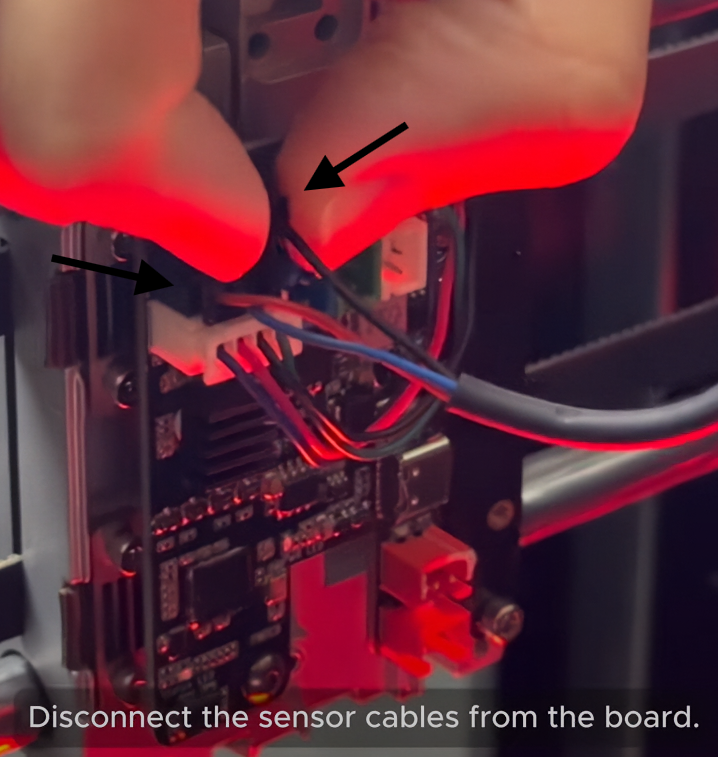
¶ 1.4) Disconnect Sensor Cables
Remove the screws of the bed leveling sensor located underneath to detach it. After that disconnect the sensor cables from board.
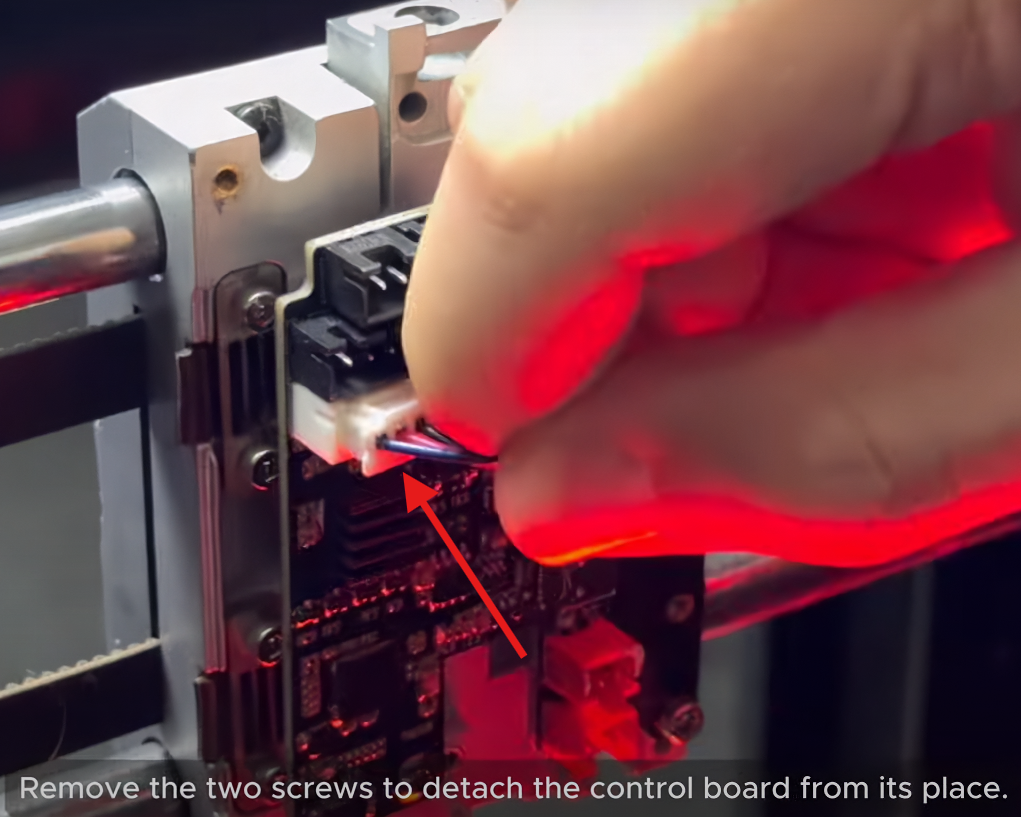
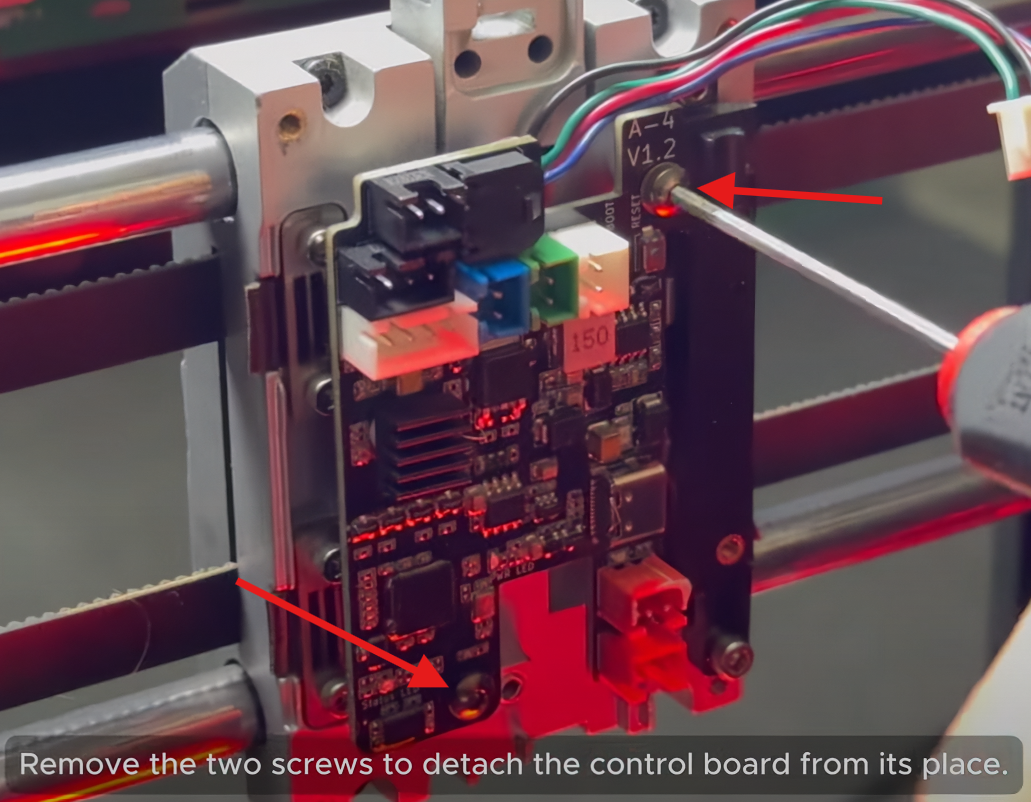
¶ 1.5) Detach The Control Board
Remove the two screws to detach control board from its place.
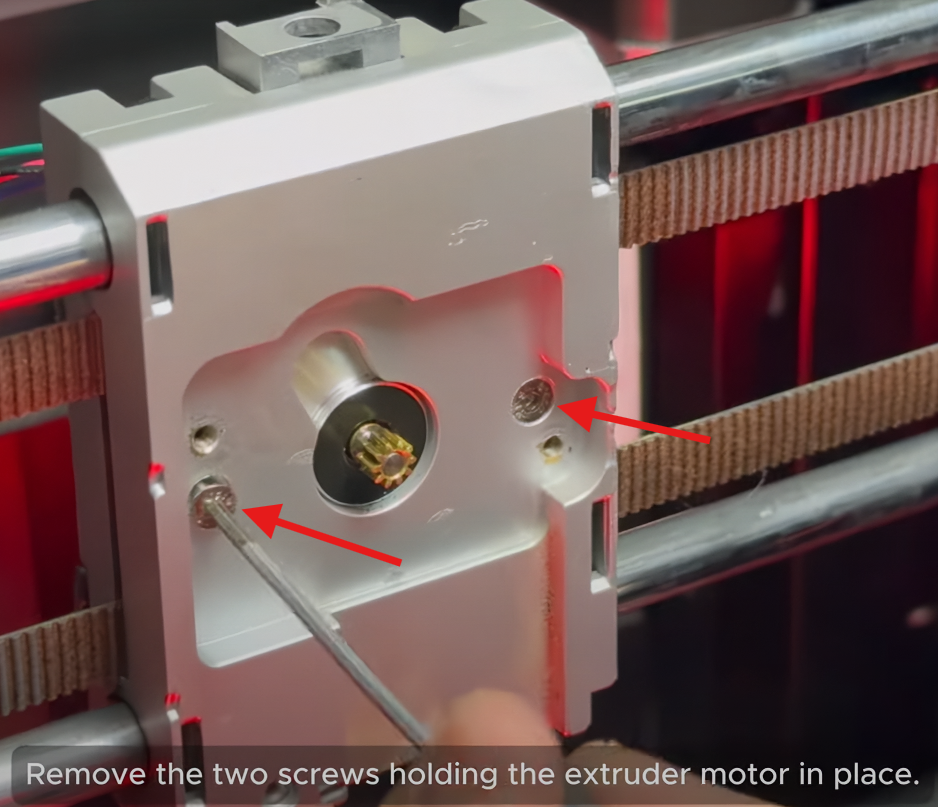
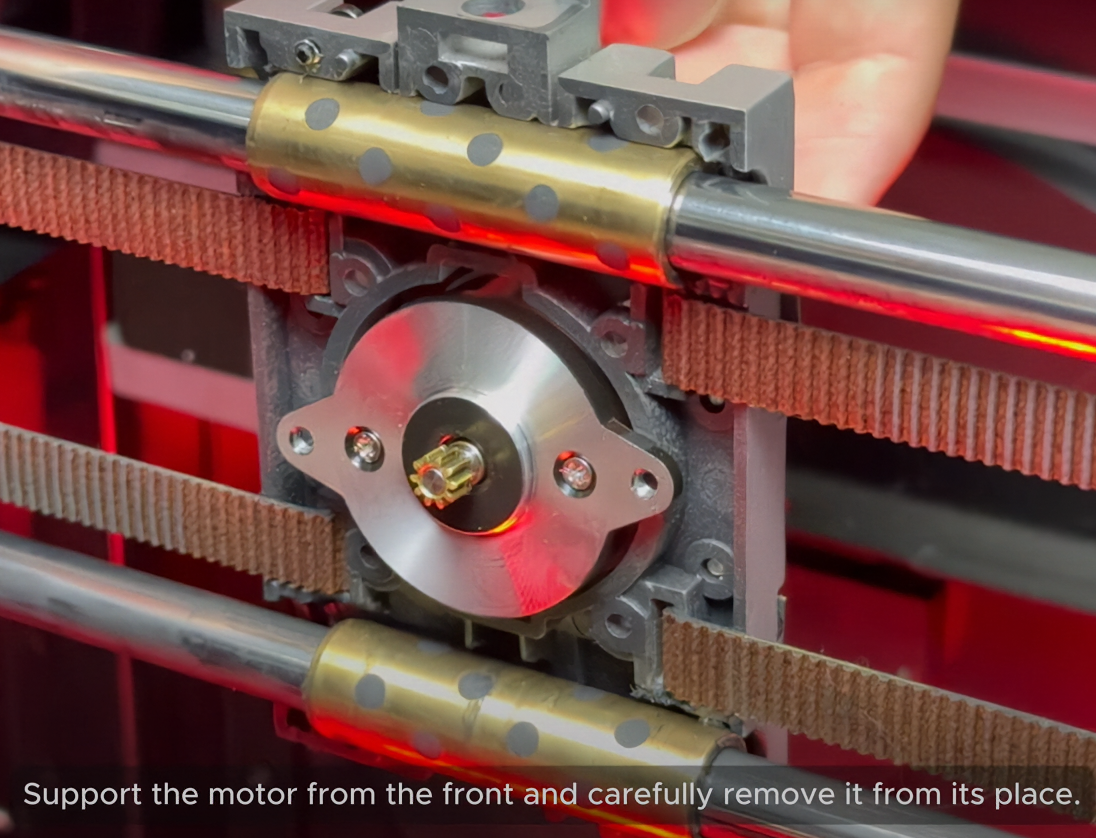
¶ 1.6) Remove The Stock Extruder
Remove the two screws holding the extruder motor in place. Remove the rear part of the carriage by unscrewing the four screws. After that support the motor from the front and carefully remove it from its place.

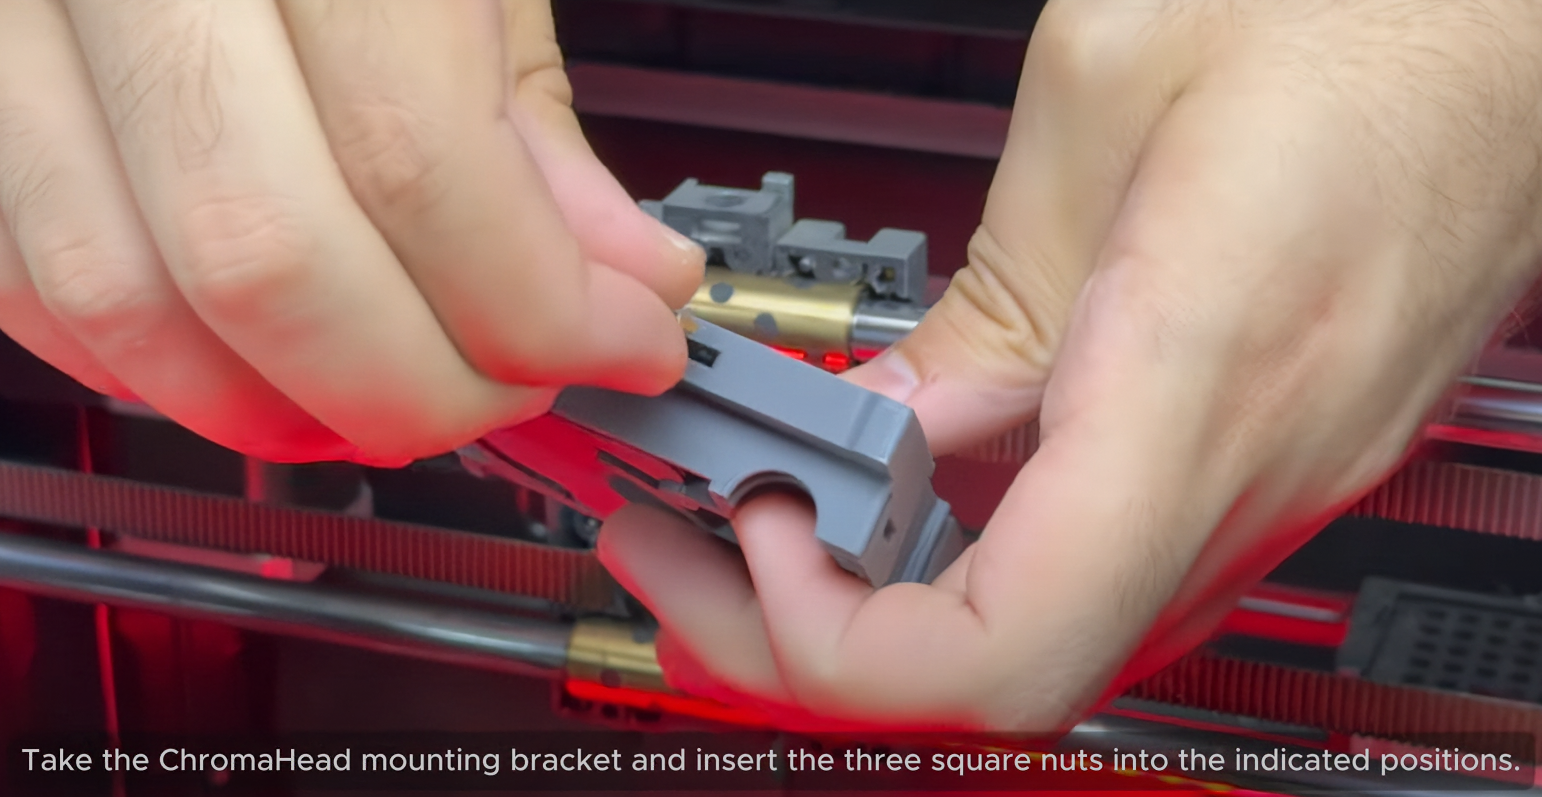
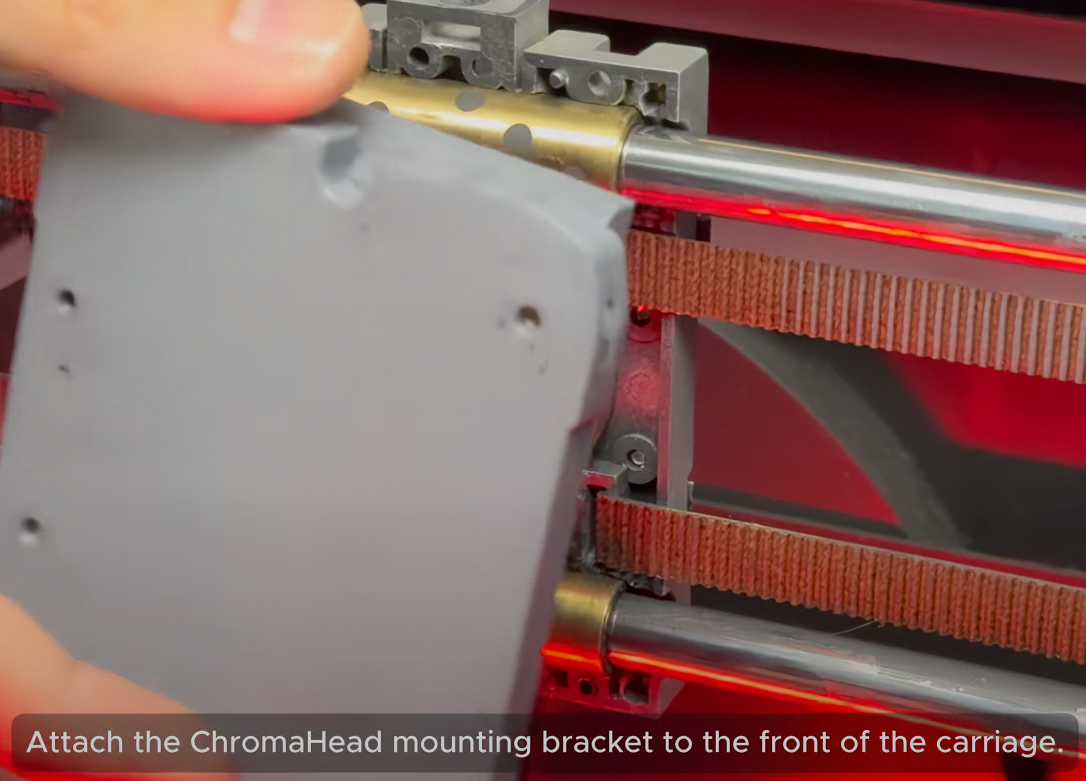
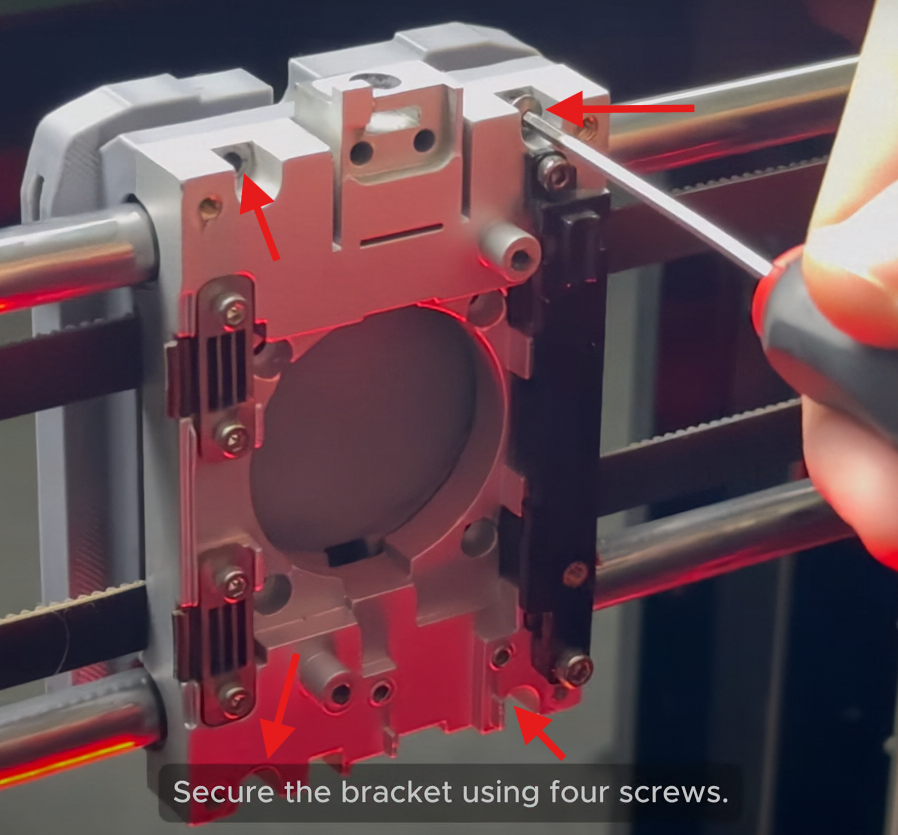
¶ 1.7) Attach The New Mounting Bracket
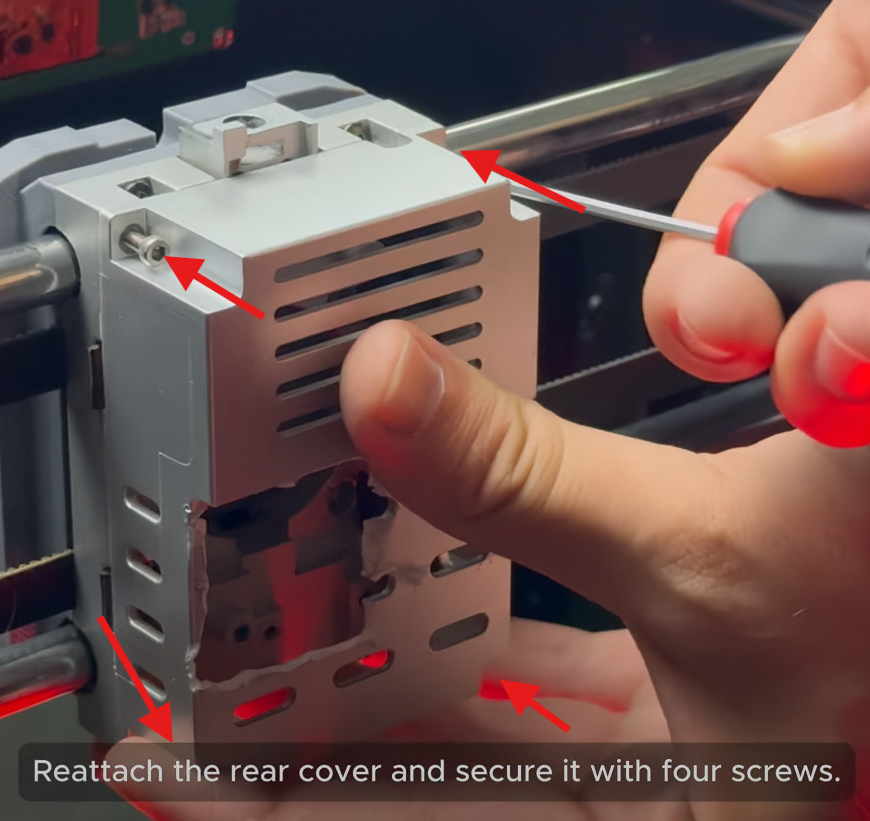
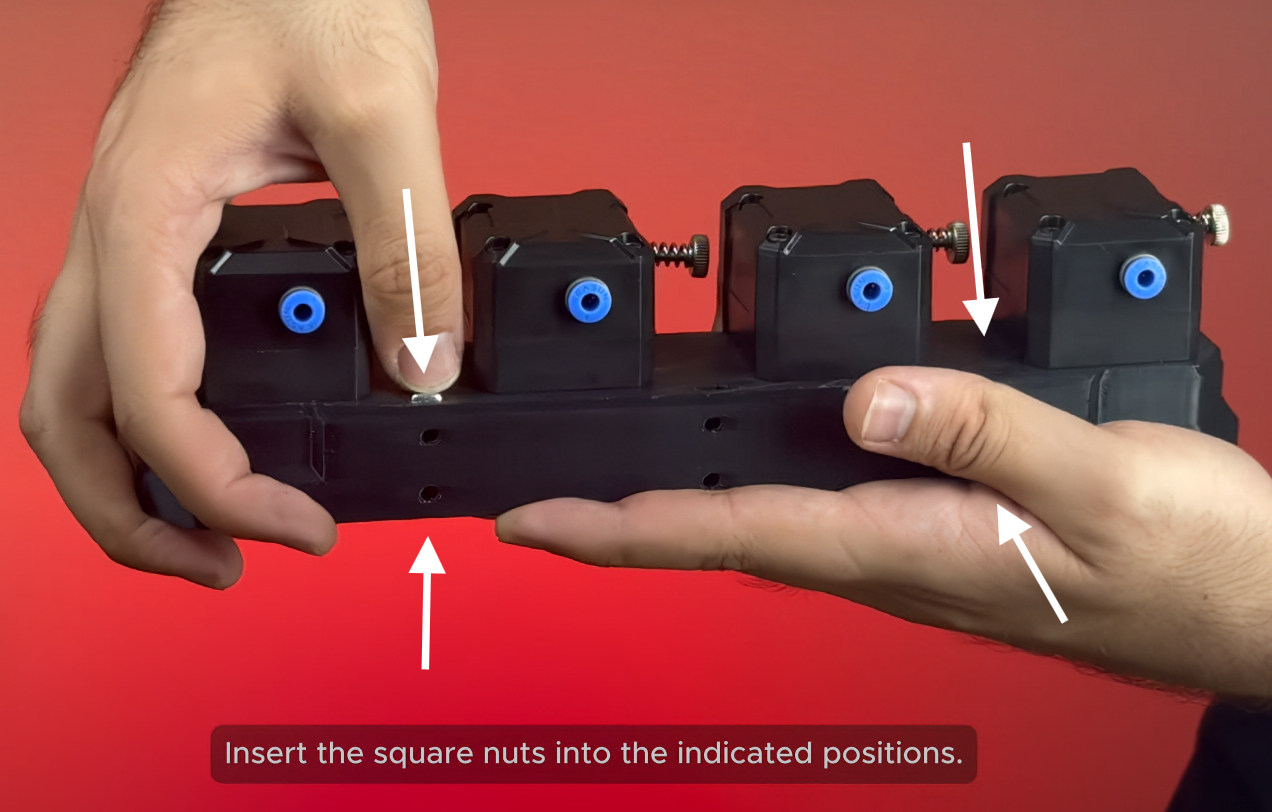
Take the chromahead mounting bracket and insert the three square nuts into the indicated positions. Attach the chromahead mounting bracket to the front of the carriage. Secure the bracket using four screws. Reattach the stock rear cover and secure it with four screws.
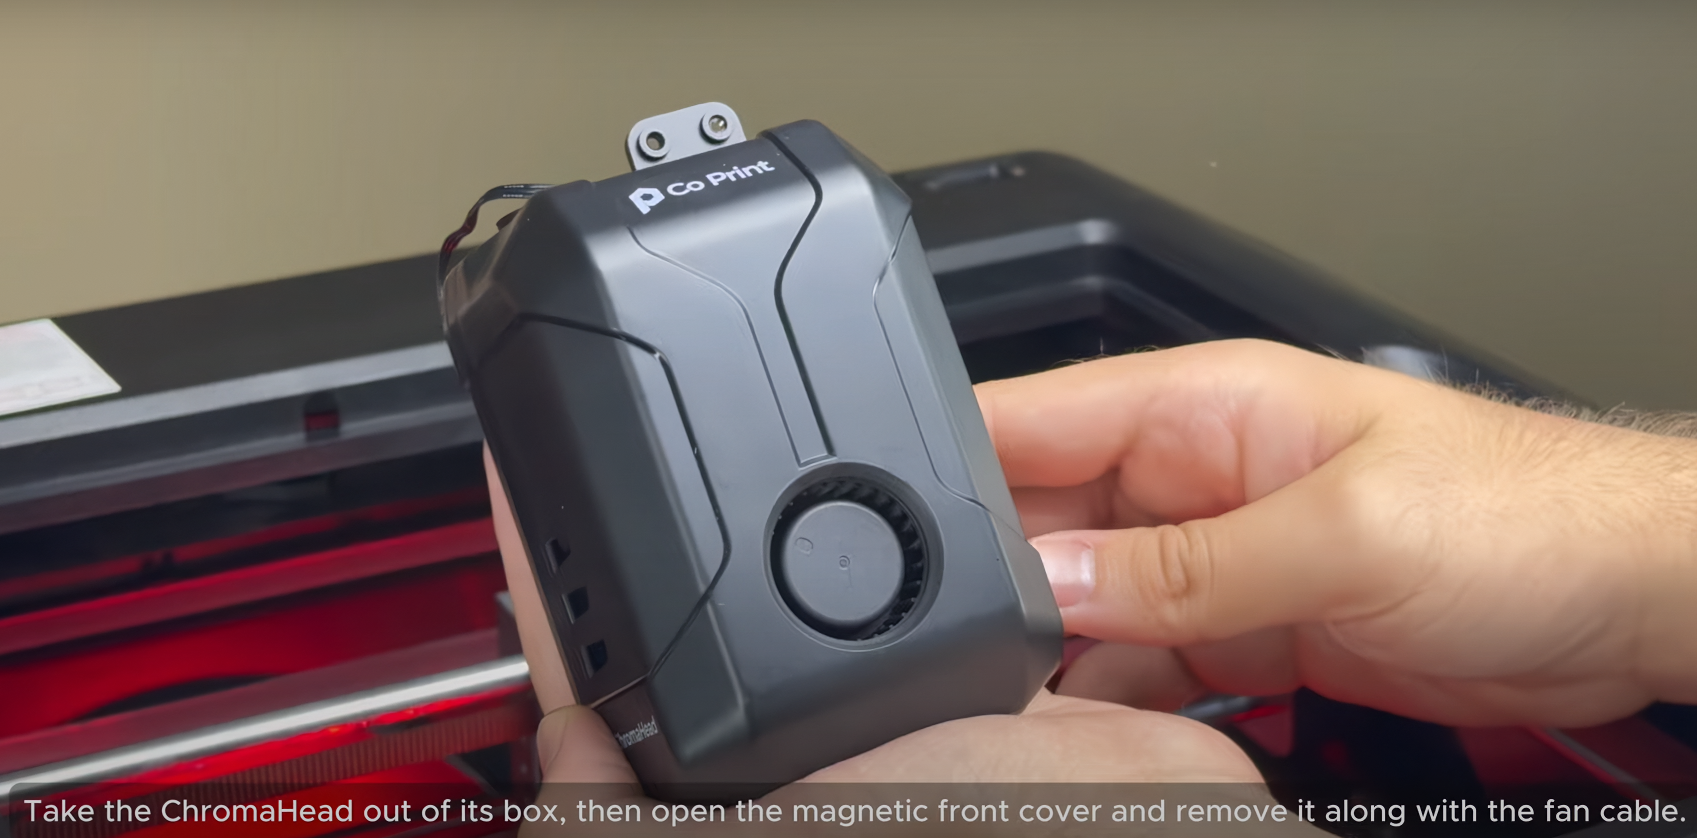
¶ 1.8) Installing The ChromaHead
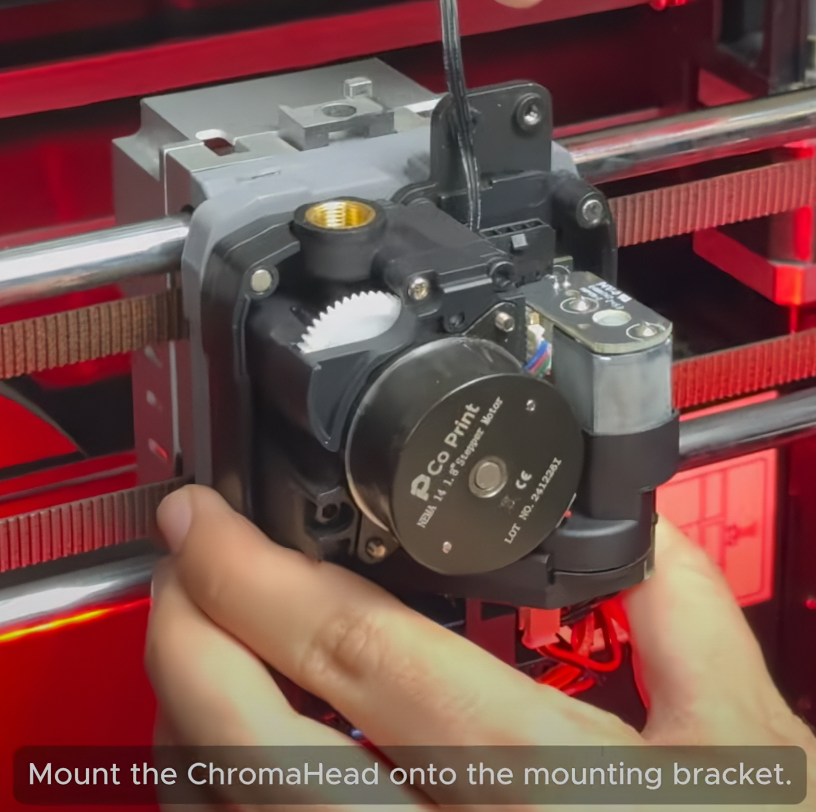
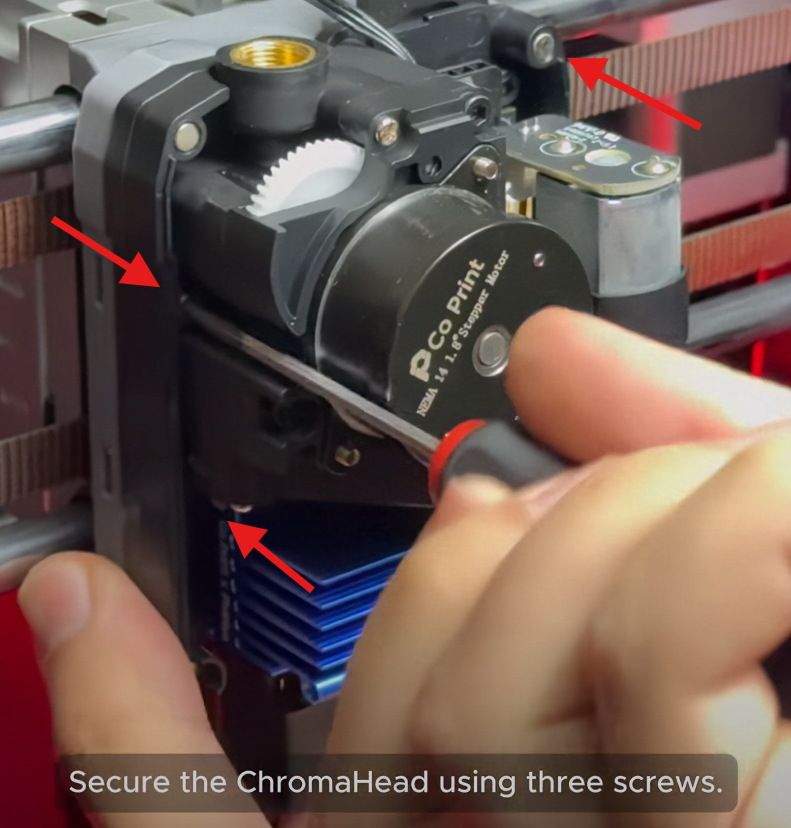
Take the ChromaHead out of its box, then open the magnetic front cover and remove it along with the fan cable. Mount the ChromaHead onto the mounting bracket. Secure the ChromaHead using three screws.
¶ 1.9) Attach The 8-in-1 Module
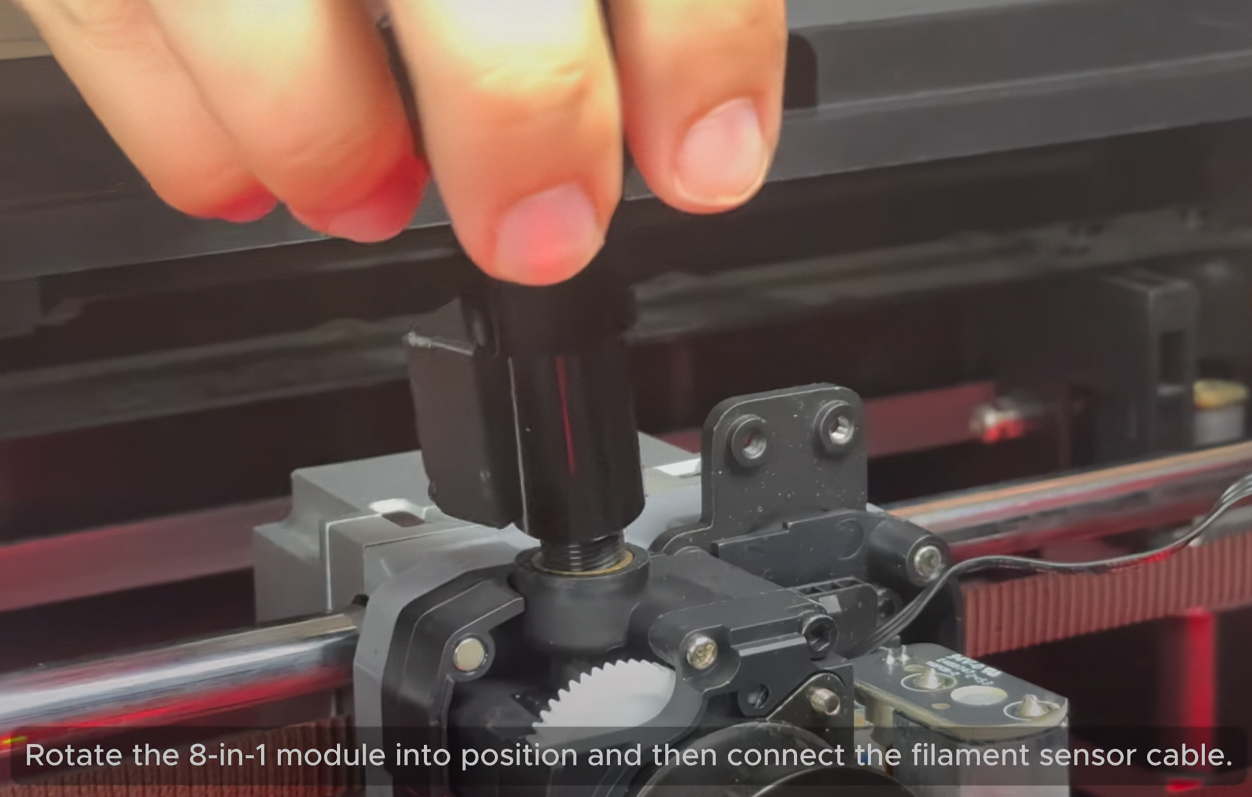
To attach 8-in-1 module, rotate the 8-in-1 module into position and then connect the filament sensor cable.
¶ 1.10) Finishing The ChromaHead Installation
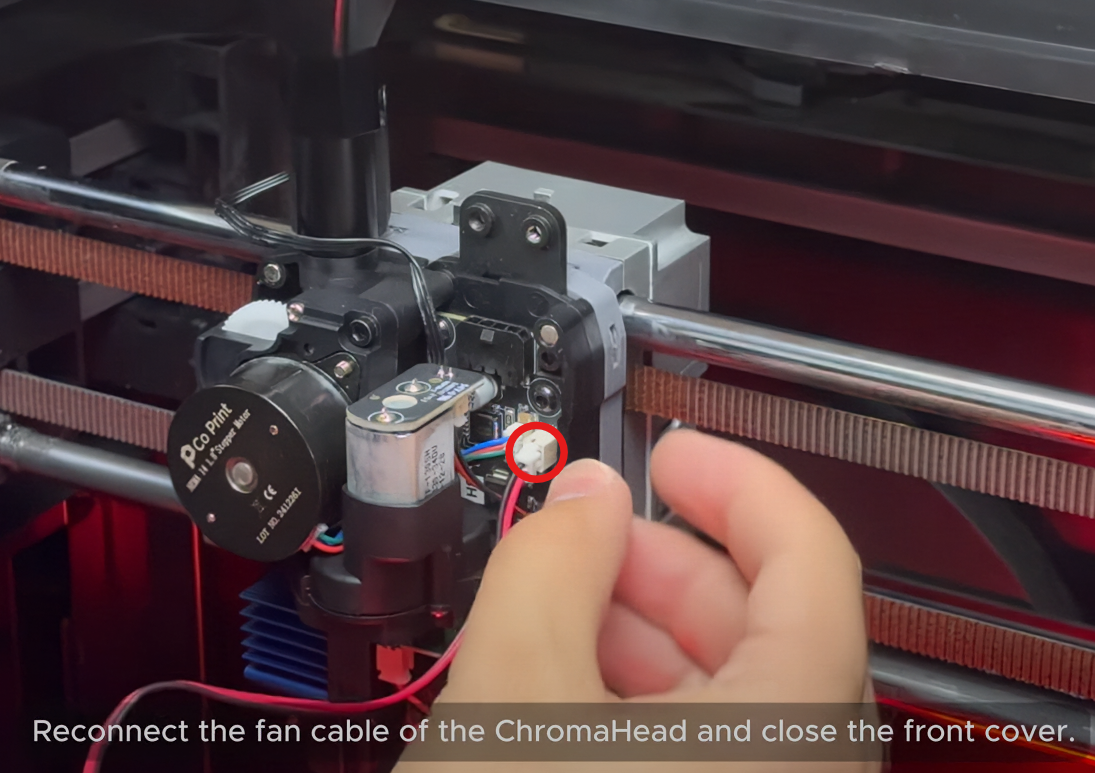
Reconnect the fan cable of the ChromaHead and close the front cover.
¶ 1.11) Installation Of The CX-1 Extruder Modules
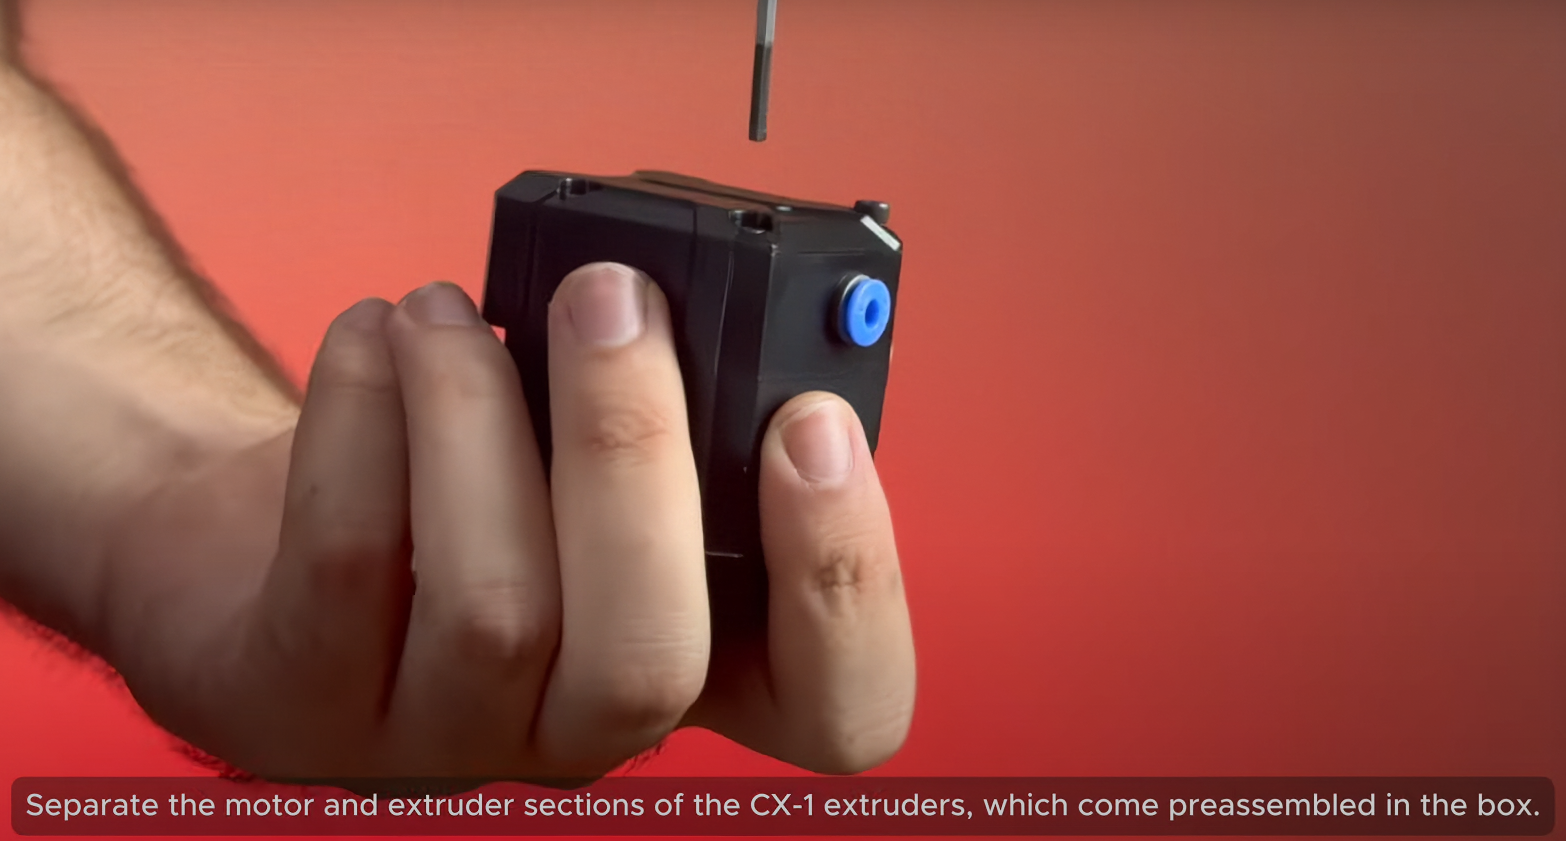
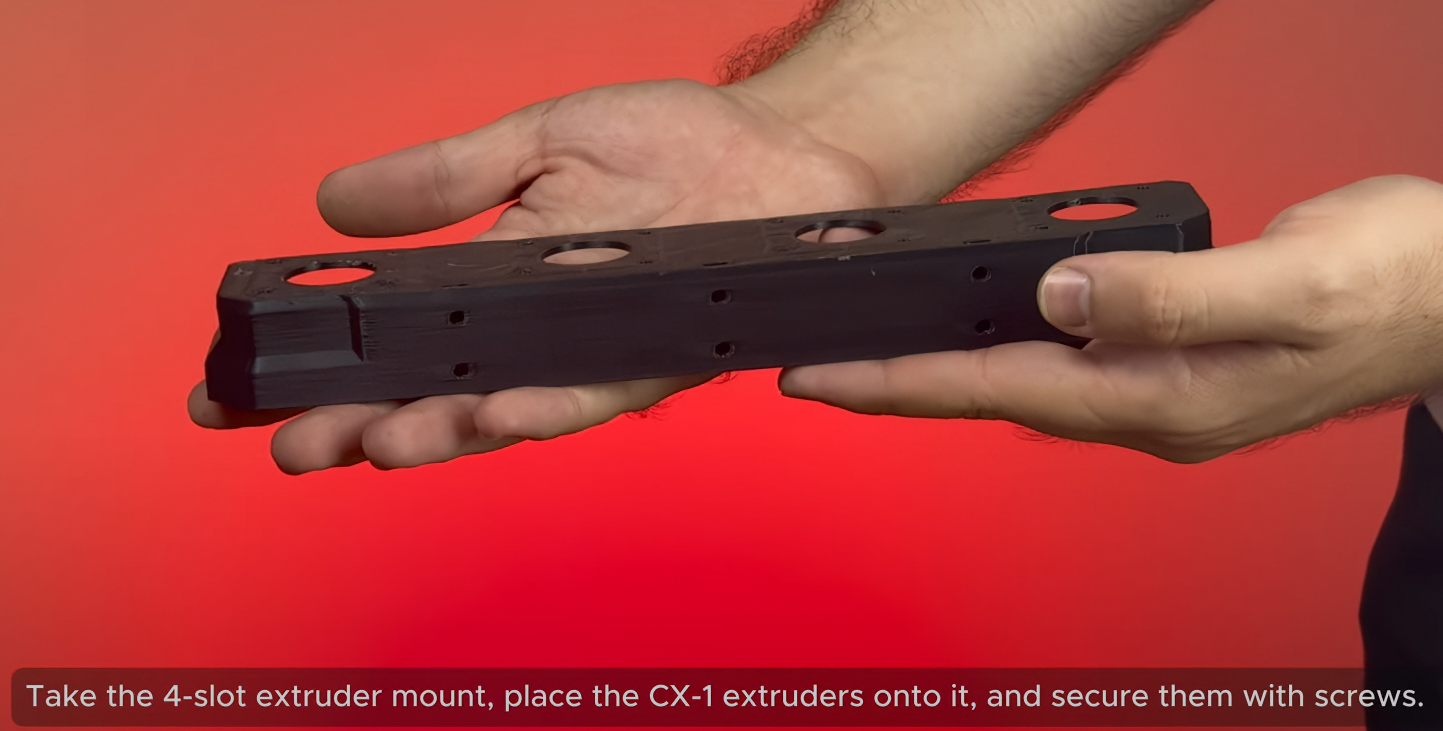
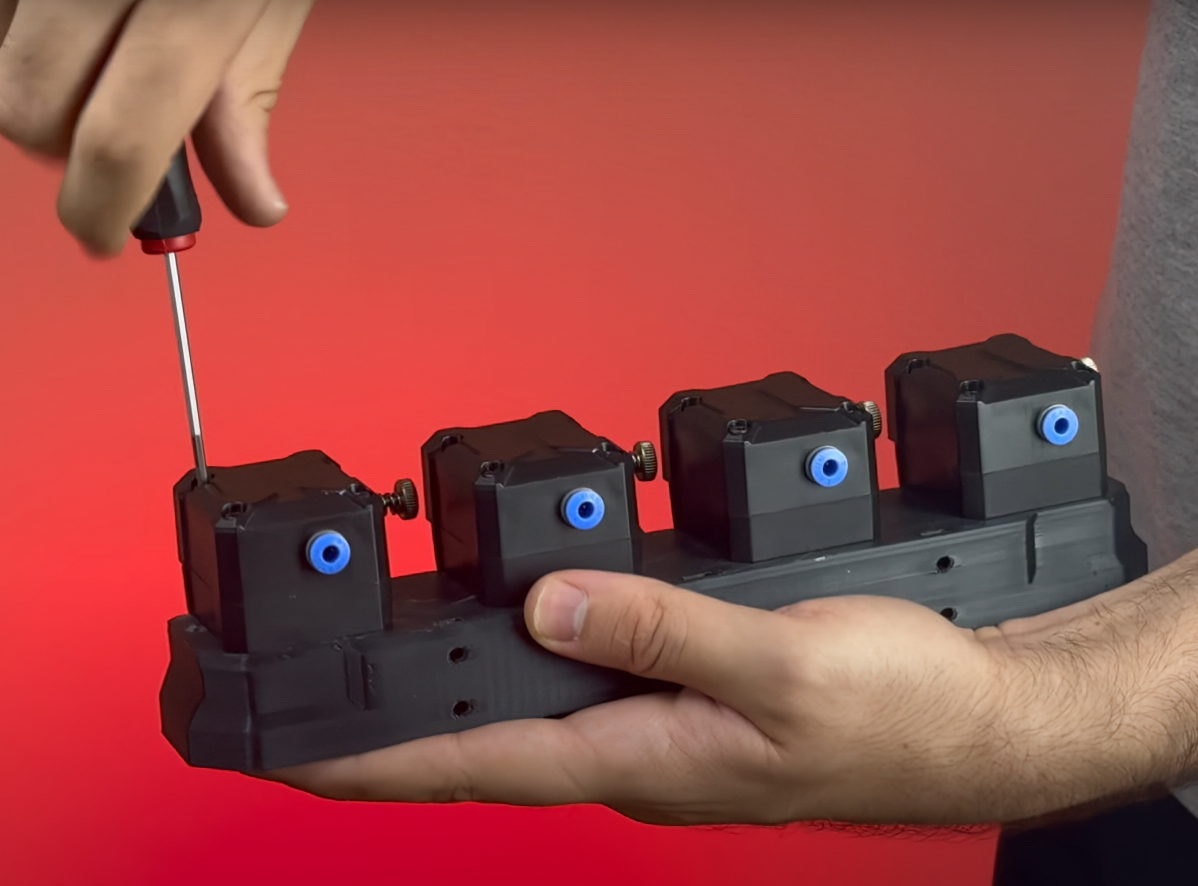
Take the CX-I extruders out of its boxes then separate the motor and extruder sections of the CX-1 extruders, which come preasammbled in the box. Take the 4-slot extruder mount, place the CX-1 extruders onto it, and secure them with screws. After all this process take the extruder block holder and assembly onto extruder block using 4 screws and secure it with screwdriver.

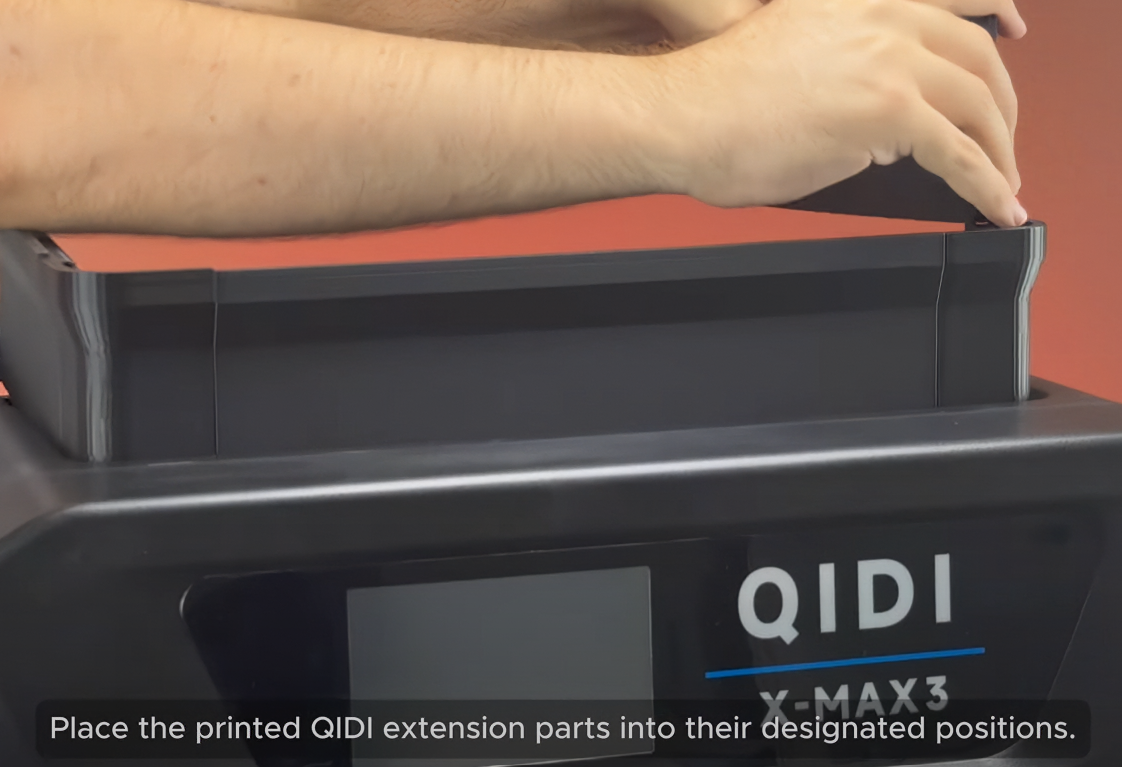
¶ 1.12) Installing The Extension Parts of QIDI
Place the printed parts into their designated positions.
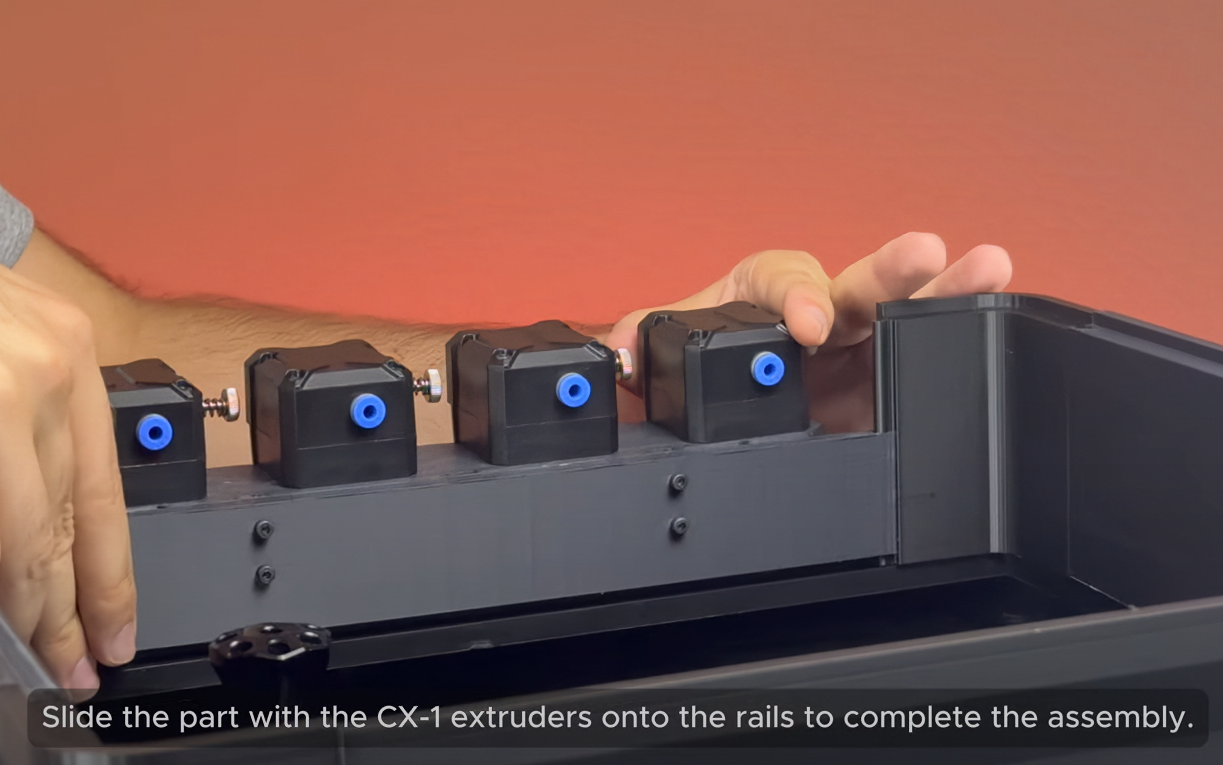
¶ 1.13) Finishing The Installation Of CX-1 Extruders Modules
Slide the part with the CX-1 extruders onto the rails to complete assembly.
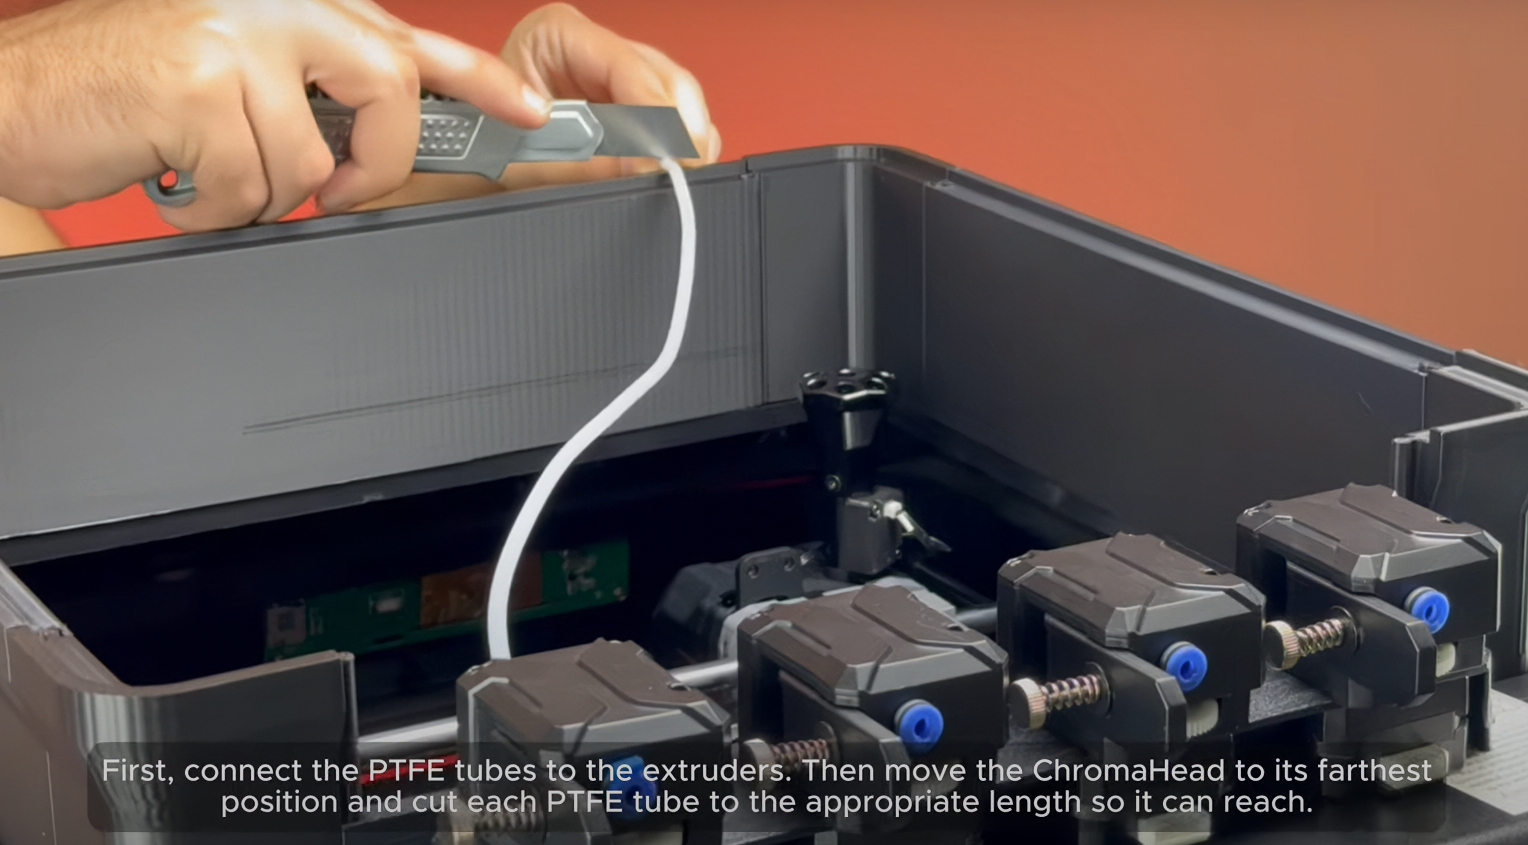
¶ 1.14) Attach The PTFE Tubes
First, connect the PTFE tubes to the extruders. Then move the ChromaHead to its farthest positions and cut each PTFE tubes to the appropriate length so it can reach.

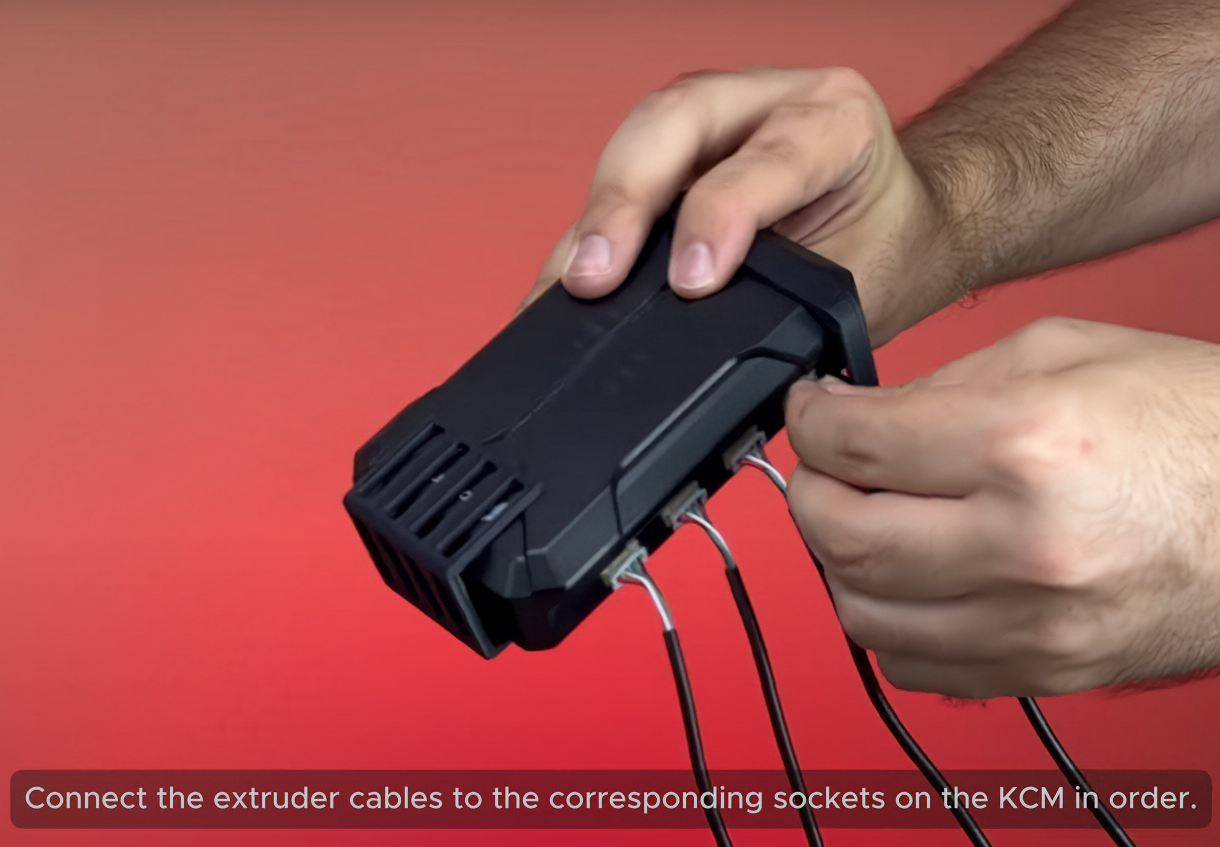
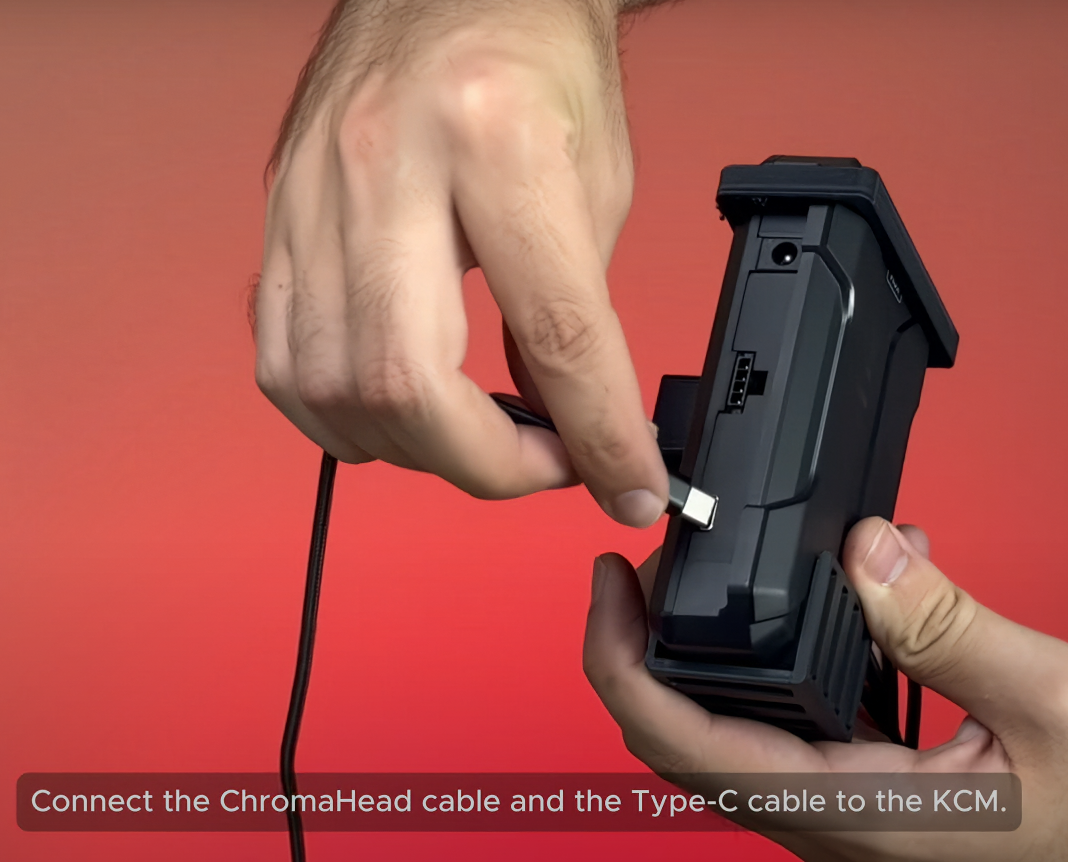
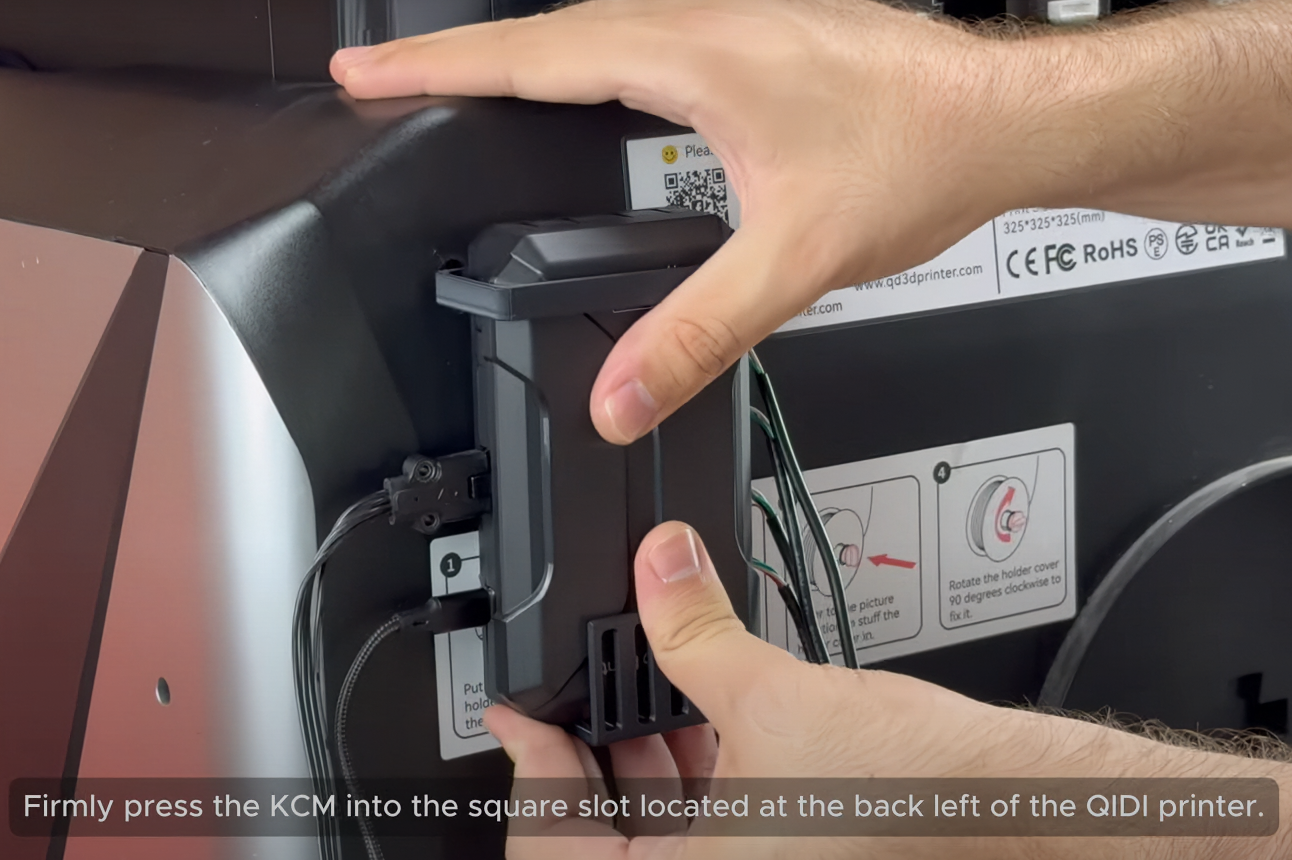
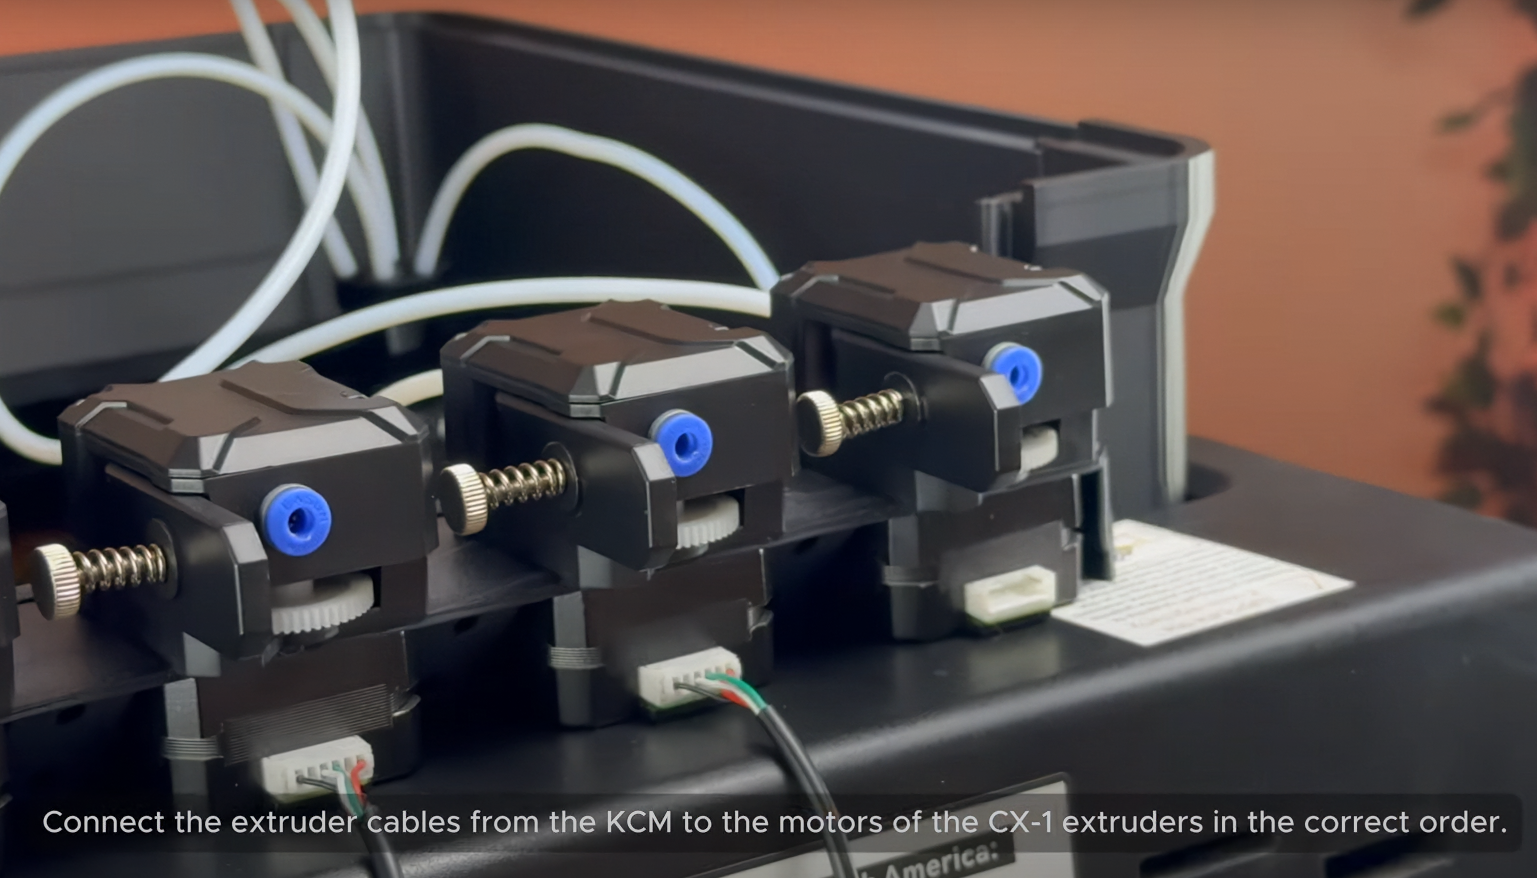
¶ 1.15) Attach The KCM Module
Connect the extruder cables to the corresponding sockets on the KCM in order. Connect the ChromaHead cable and type-c cable to the KCM. Firmly press the KCM into the square slot located at the back left of the Qidi printer. Connect the extruder cables from the KCM to the motors of the CX-1 extruders in the correct order.
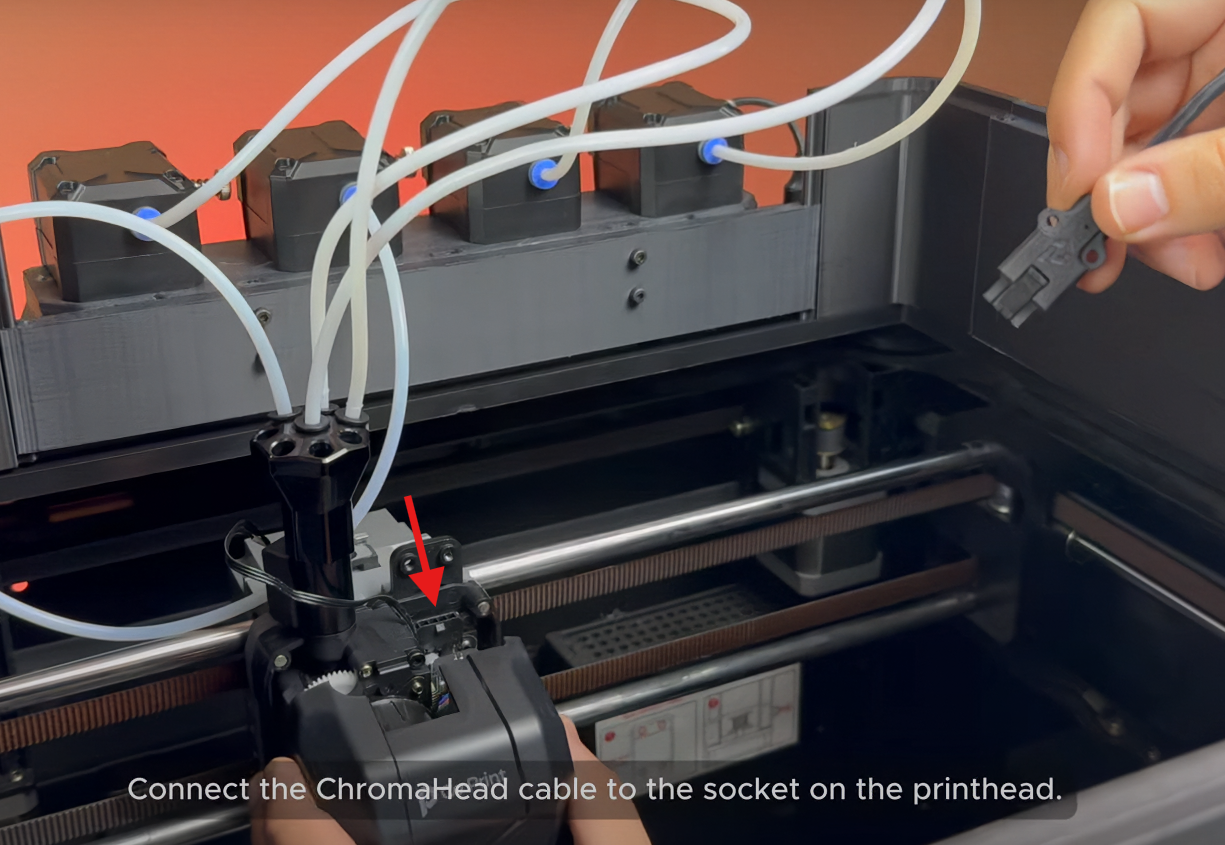
¶ 1.18) Finishing The Installation
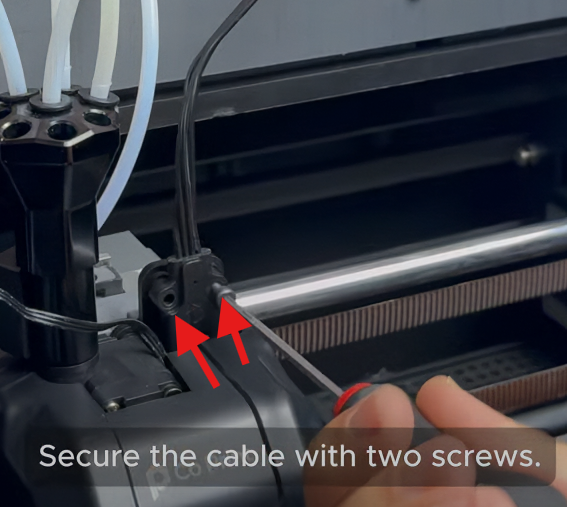
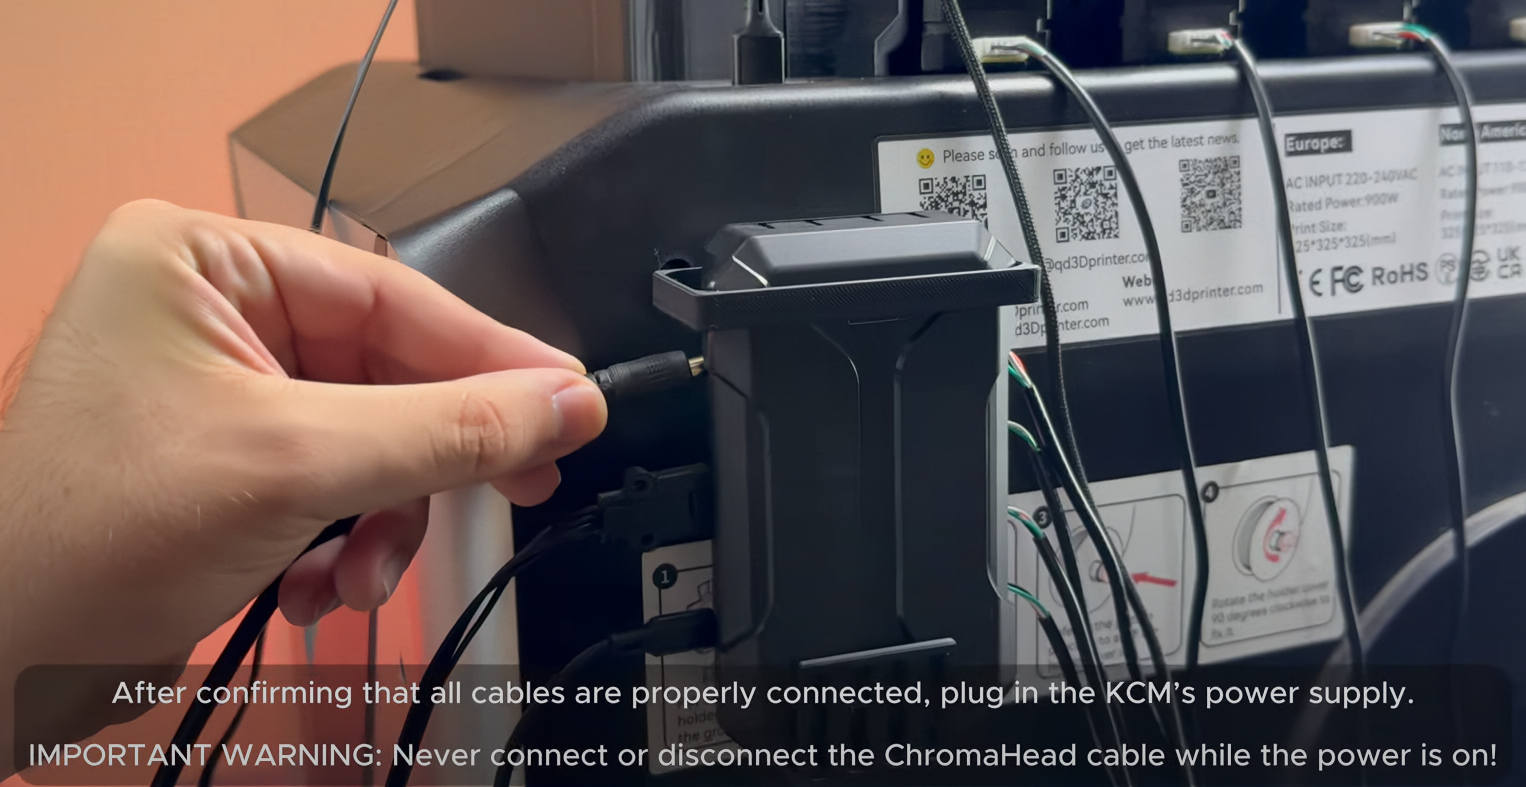
Plug the KCM's connection cable into the printer's USB port. Connect ChromaHead cable to the socket on the printhead. Secure the cable with two screws. After confirming that all cables are properly connected, plug in the KCM's power supply.
IMPORTANT WARNING: Never connect or disconnect the ChromaHead cable while the power is on!

¶ 1.19) Access Fluidd
If you are experiencing a Python-related error (such as startup or script failure after CoPrint configuration changes), this issue is typically caused by an incompatible or corrupted Python environment or mismatched dependencies in the CoPrint setup.
Please refer to the official troubleshooting guide below for the recommended solution:
https://wiki.coprint3d.com/troubleshooting/pythonproblem
1- To acces Fluid, first turn on your printer and get the printer's IP address by tapping on settings, then network.
2- Use the IP address obtained to establish an SSH connection via terminal or cmd.
Type "ssh mks@(your printer's ip)" then hit enter. The password is "makerbase".
3- Log in to KIAUH by typing "./kiauh/kiauh.sh" command.
4- Go to the Remove section and uninstall Klipper,moonraker,fluidd.
5- Go to the Install section and install the latest version of Klipper,mainsail,moonraker.
6- Go back in kiauh menu after installing klipper,moonraker and mainsail by pressing "b" and after enter. And then press "q" and after enter.
7- Access the mainsail by typing the ip address of printer to your browser.
8- Download the necessary config files. (You can find the necessary files on our GitHub page.)
9- Upload the downloaded config files to mainsail in MACHINE menu.
10- Open the 'chroma_head.cfg' file and click on the DEVICES tab located top right. Copy the path by ID usb-head and paste it into the 'serial' below '[mcu cp_Head]' then save it and restart.
11- Open the 'kcm.cfg' file and click on the DEVICES tab located at top right. Copy the path by ID labeled usb-kcm and paste it into the 'serial' below '[mcu cp_kcm]' then save it and restart again.
¶ Your printer is ready to use.
¶ 2) Post-Installation OrcaSlicer Configuration
After completing the installation, you also need to configure OrcaSlicer. We recommend downloading the latest version of OrcaSlicer for optimal compatibility. You can use the link below to get the most recent release.
OrcaSlicer Download Link - Download
-
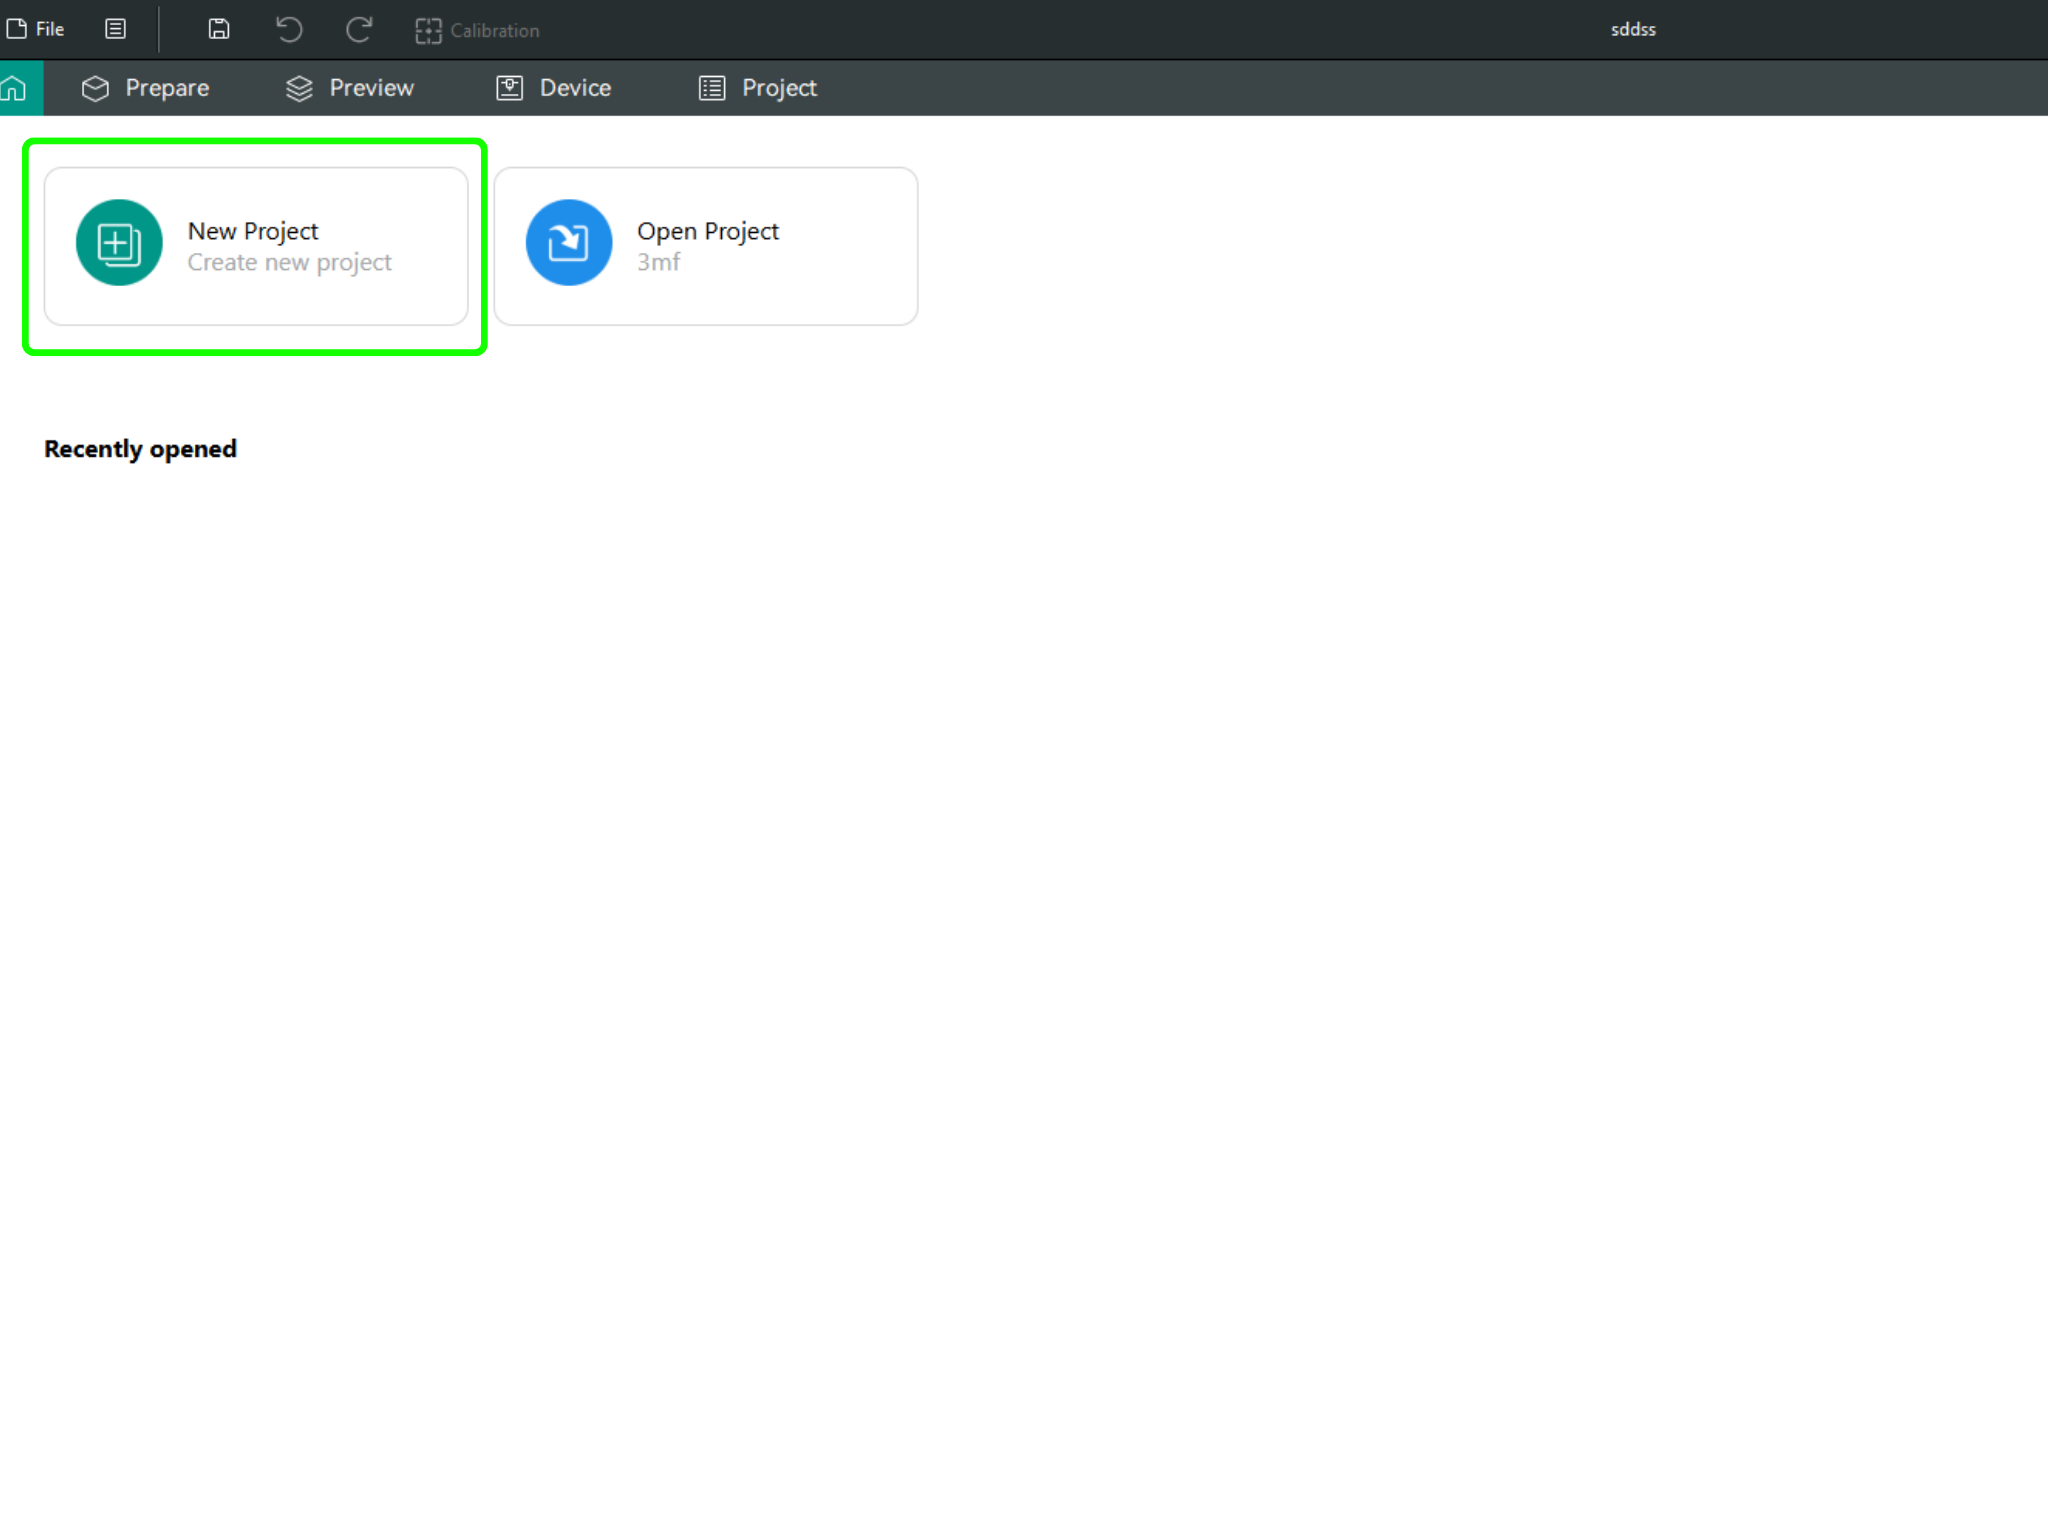
After downloading OrcaSlicer, click on “New Project”.
-
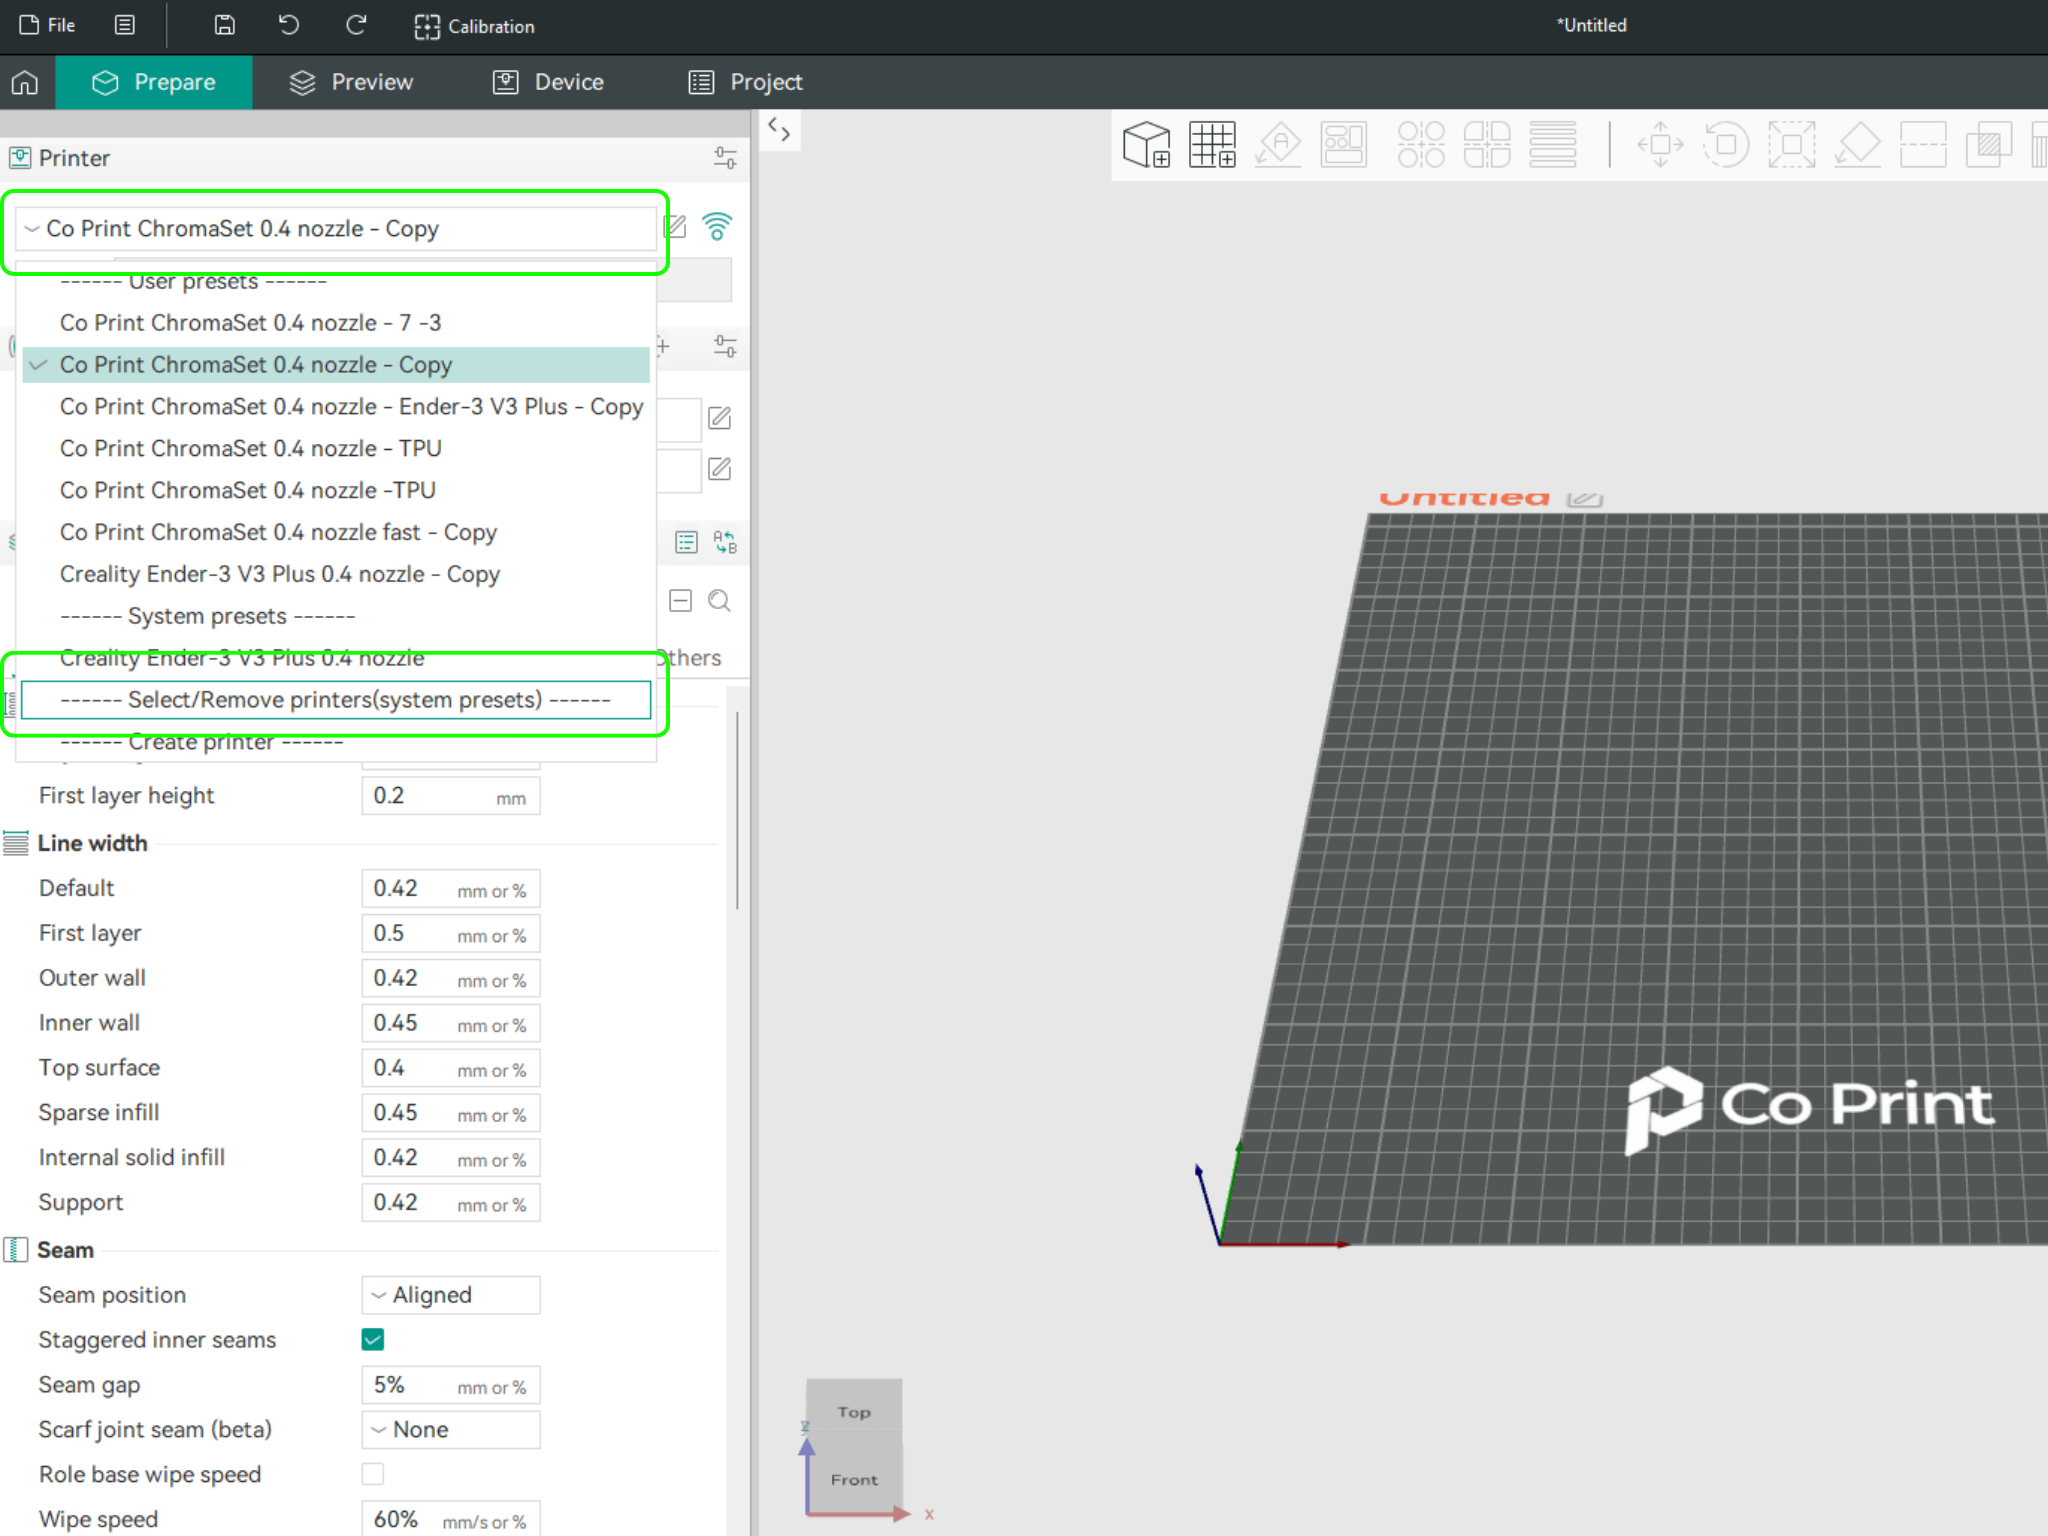
In the left menu, go to the Printers section and click on “Select/Remove printers”.
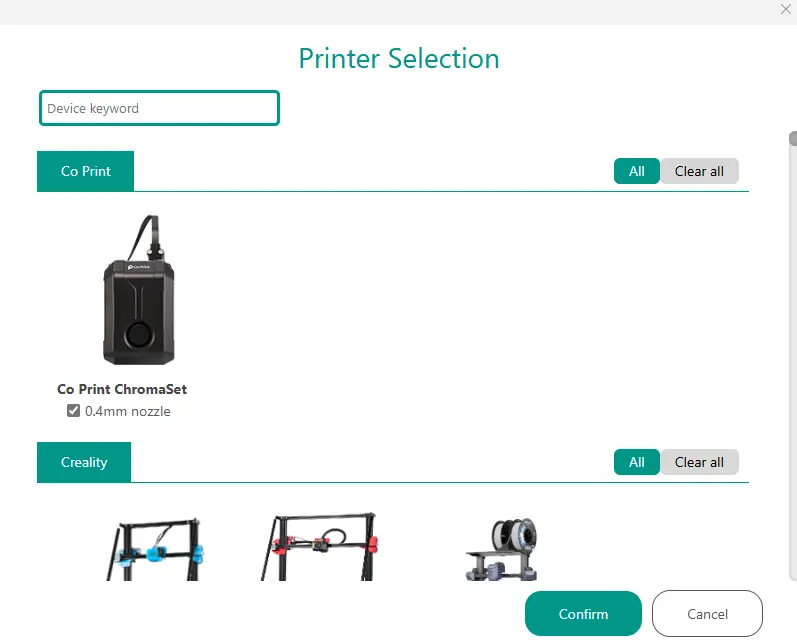
- In the opened menu, find and select Co Print. Then click "Confirm".
- After loading the settings, you need to adjust them in OrcaSlicer according to your printer’s bed size.
- You can import your model into OrcaSlicer as shown in the videos below, paint it, and start your print directly from within OrcaSlicer.