¶ Creality CR 10 Smart Pro ChromaSet Setup Guide
| Image | Information |
|---|---|
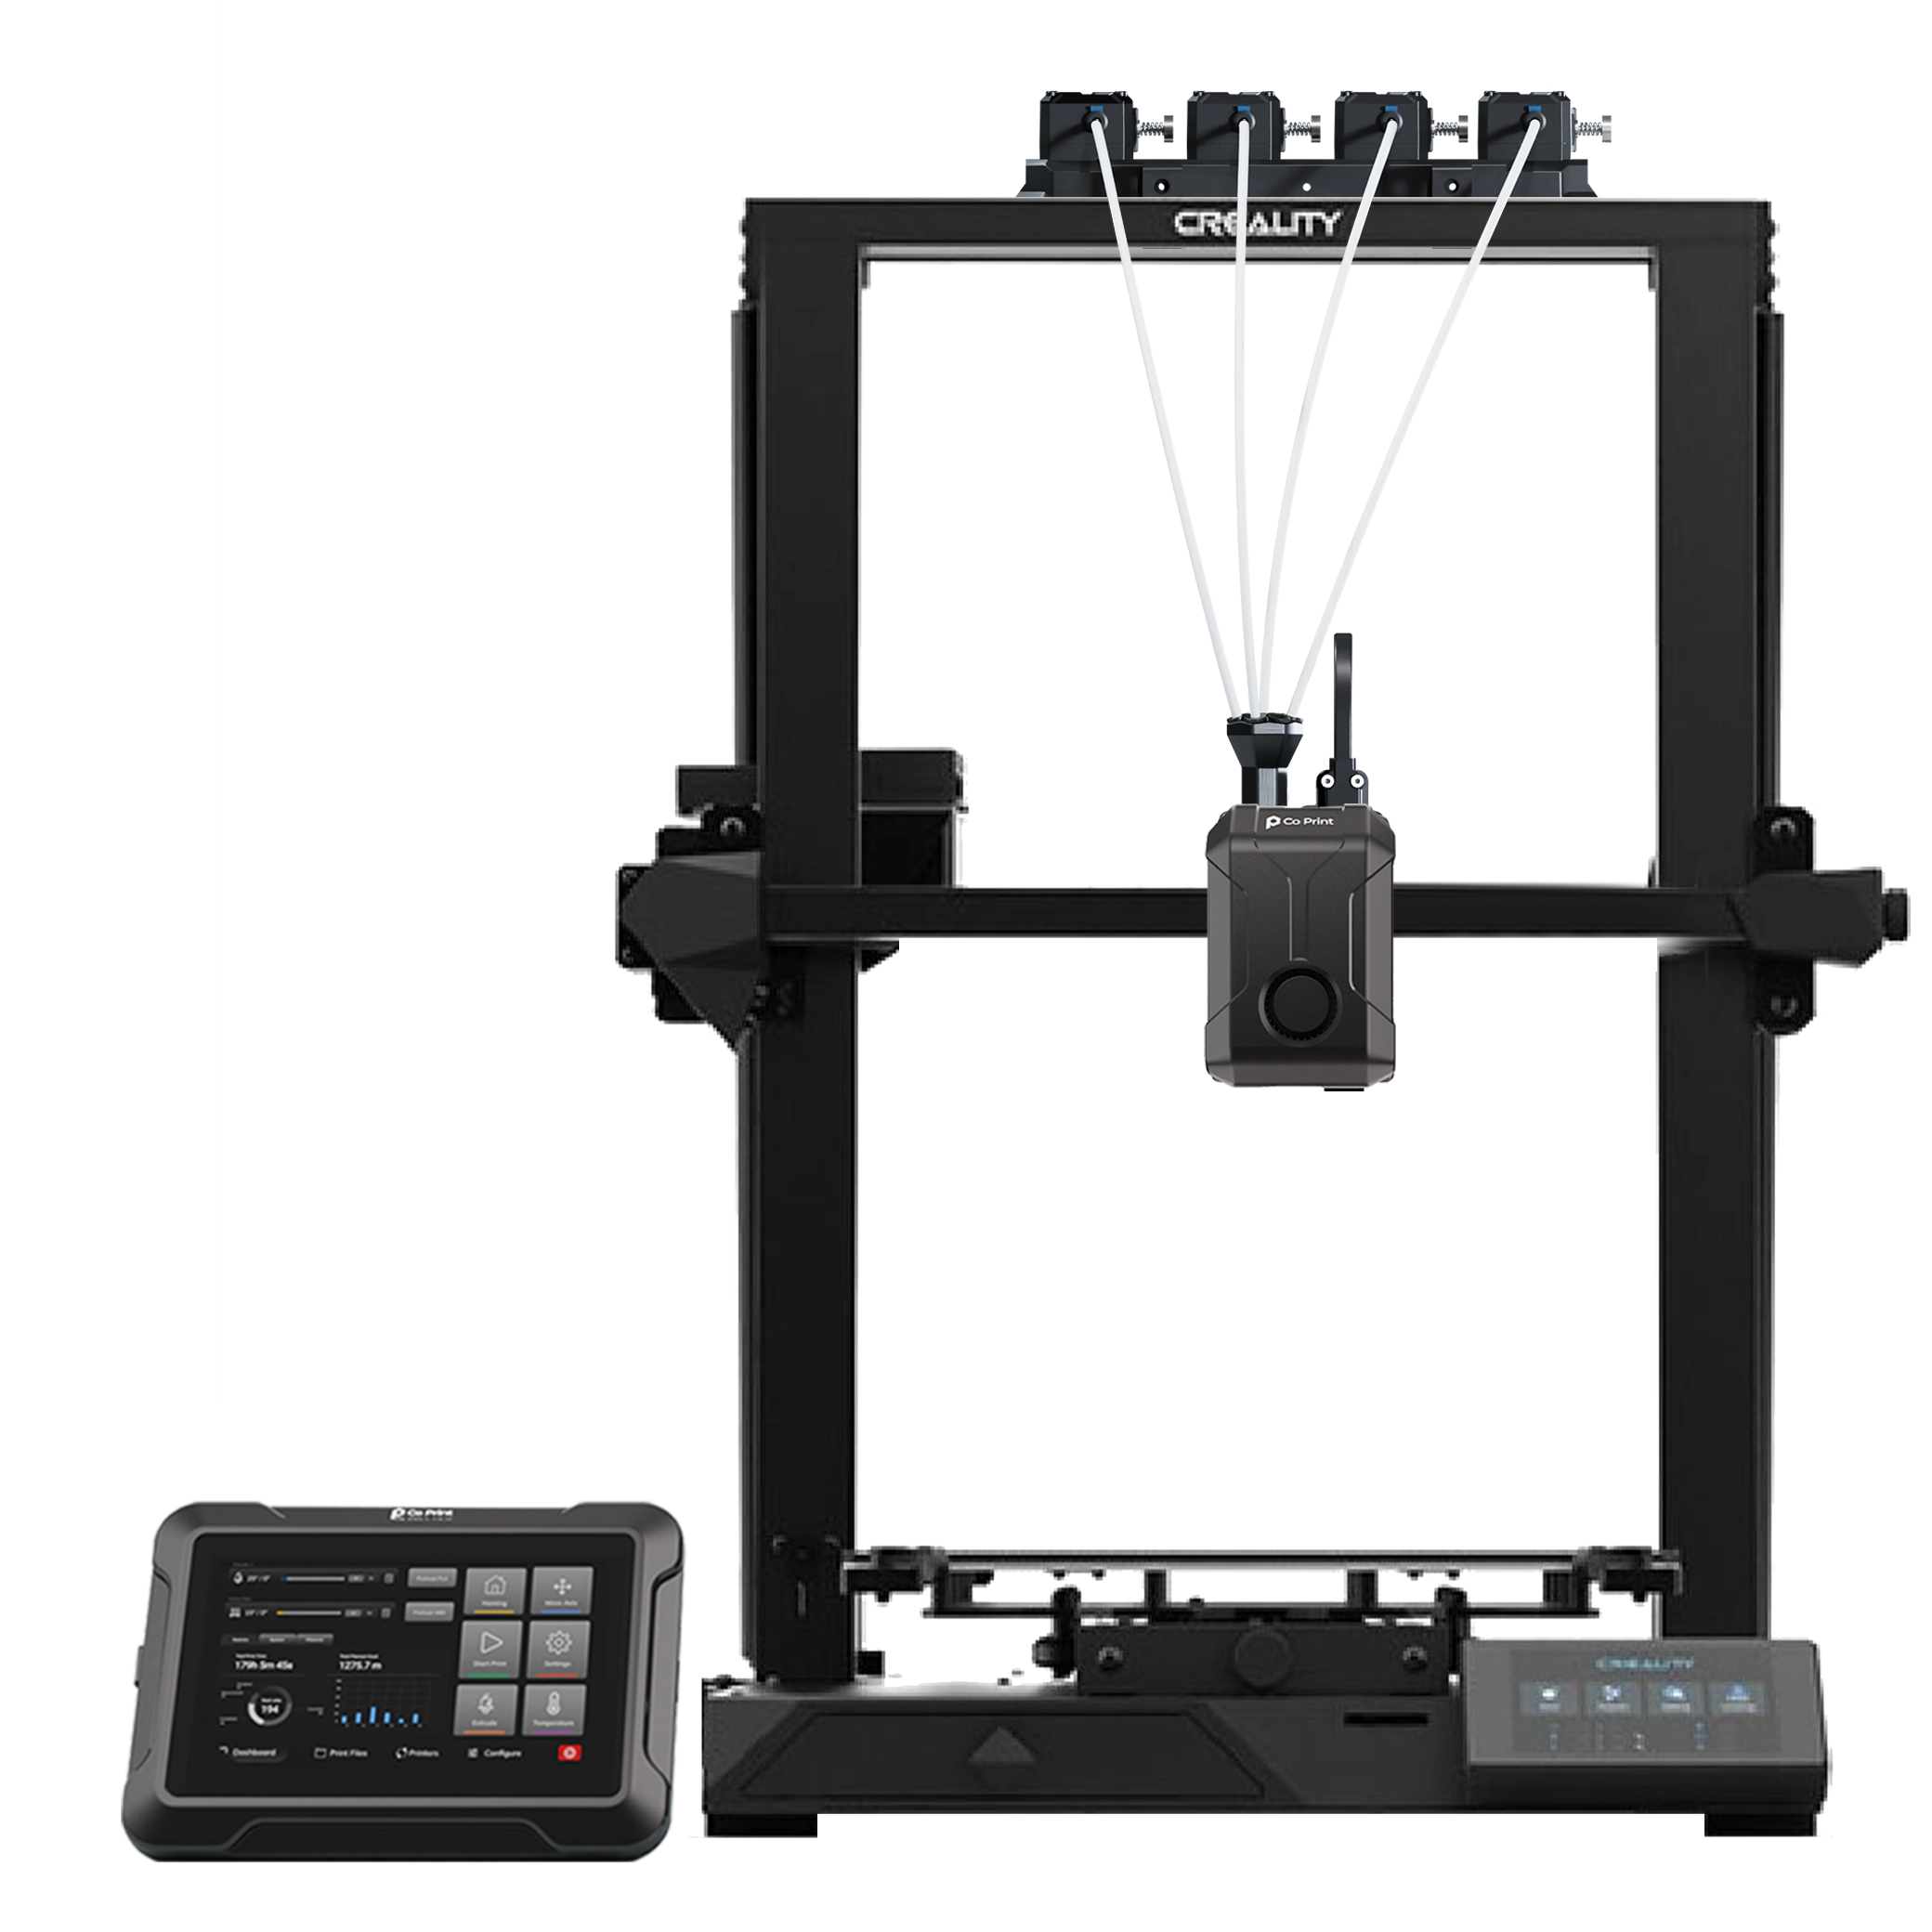 |
Welcome to the installation page for Creality CR-10 Smart Pro with ChromaSet. This guide provides step-by-step instructions for updating your printer’s firmware to be compatible with ChromaSet, downloading STL files for mechanical setup, completing the mechanical assembly, and configuring Klipper settings.. |
¶ 1) Mechanical Setup of ChromaSet on Creality CR-10 Smart Pro
Before starting the ChromaSet installation on your Creality CR-10 Smart Pro, you need to 3D print some parts for the ChromaHead and CX-I Extruder assembly.
¶ - Downloadable parts required for the installation
You can download the required STL files below.
¶ 1.1) Mechanical Setup
¶ A. ChromaHead Installation
- Disconnect the print head cable from the printer.
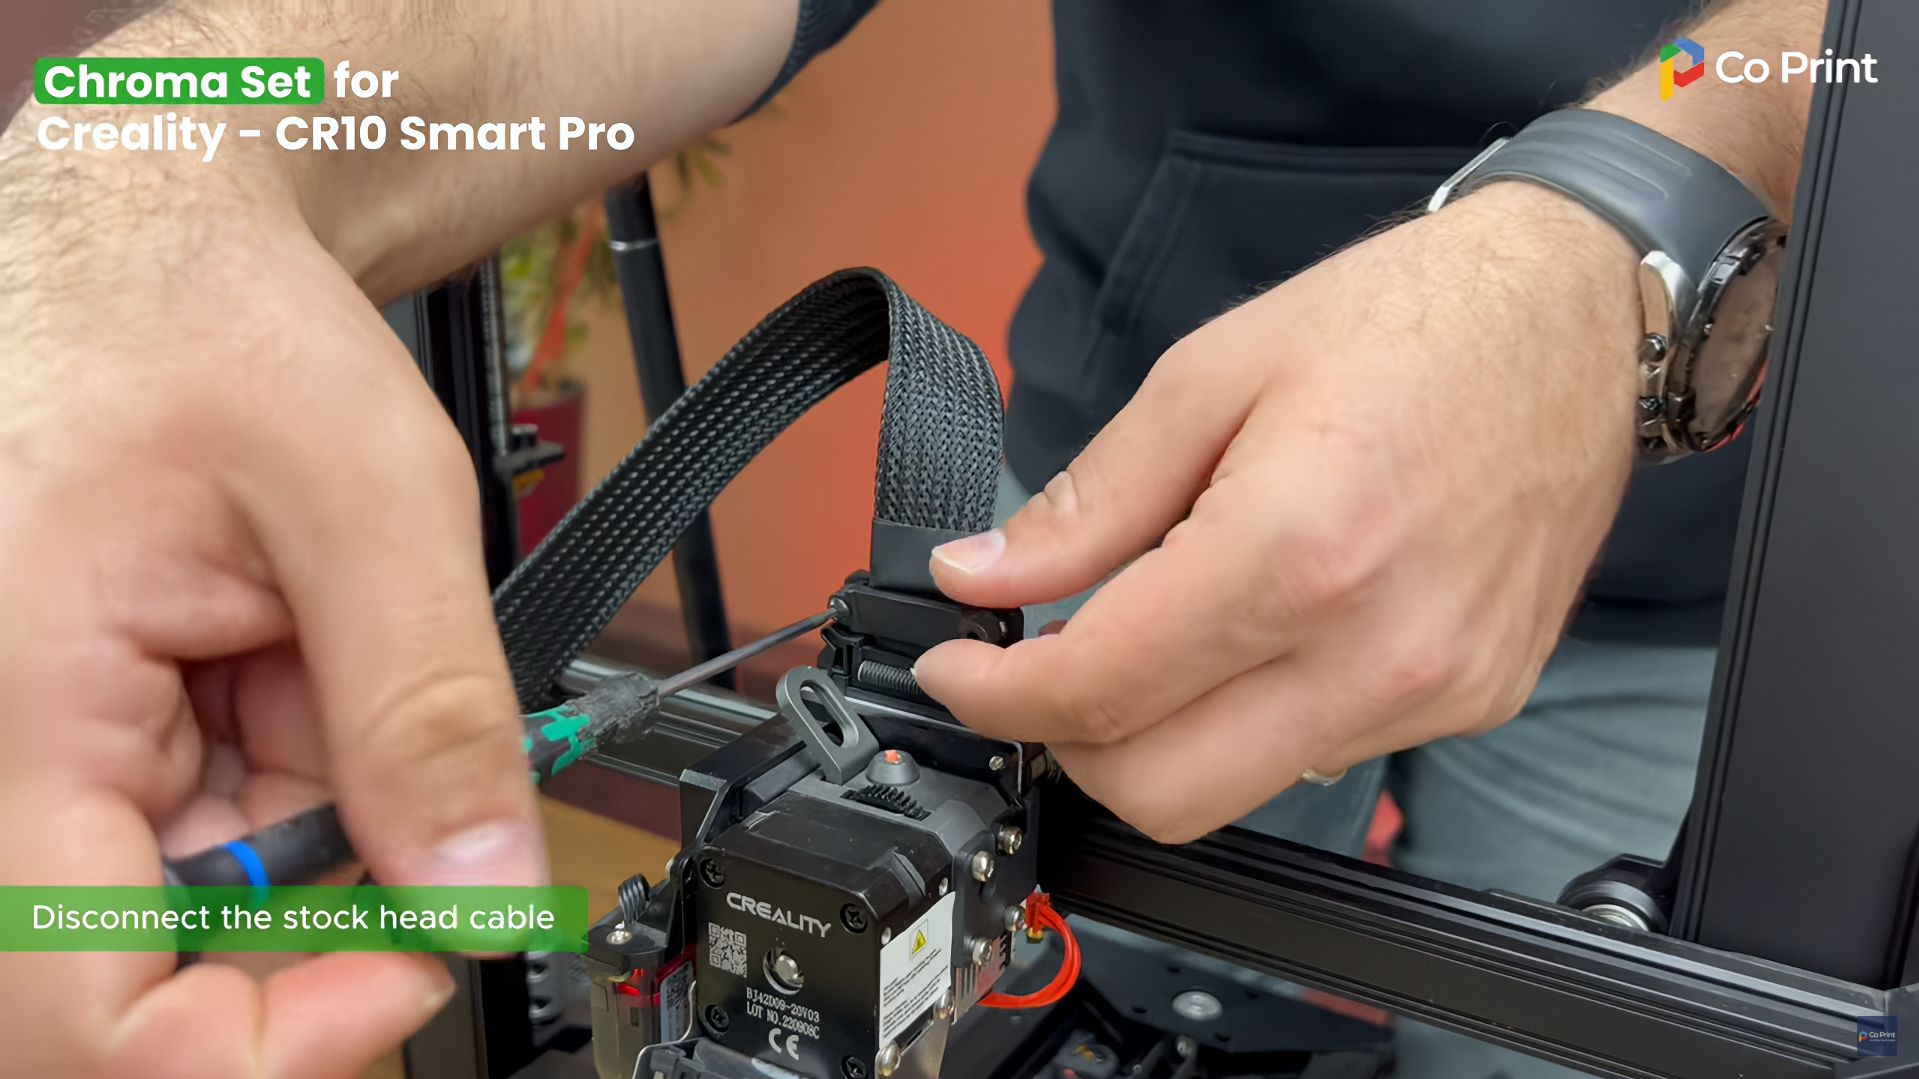
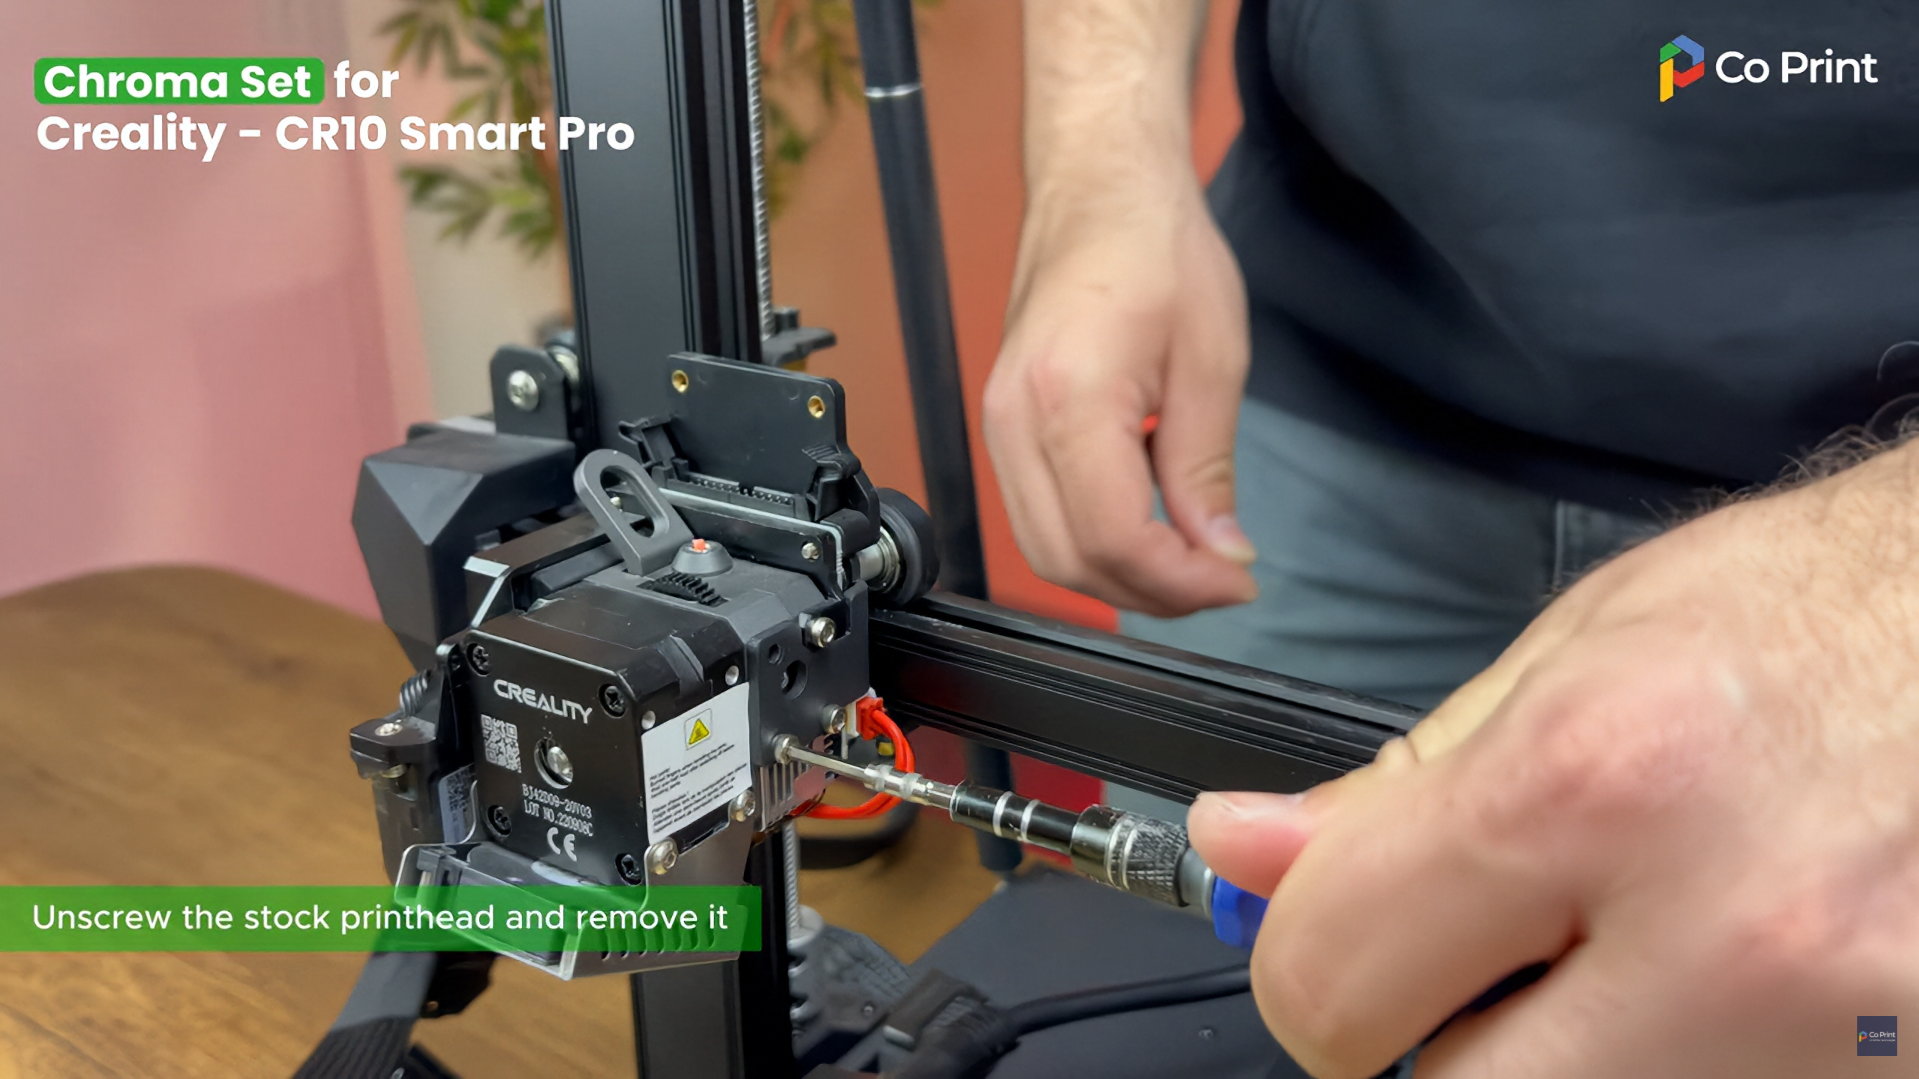
- Remove the screws on the side of the head and remove stock printhead.
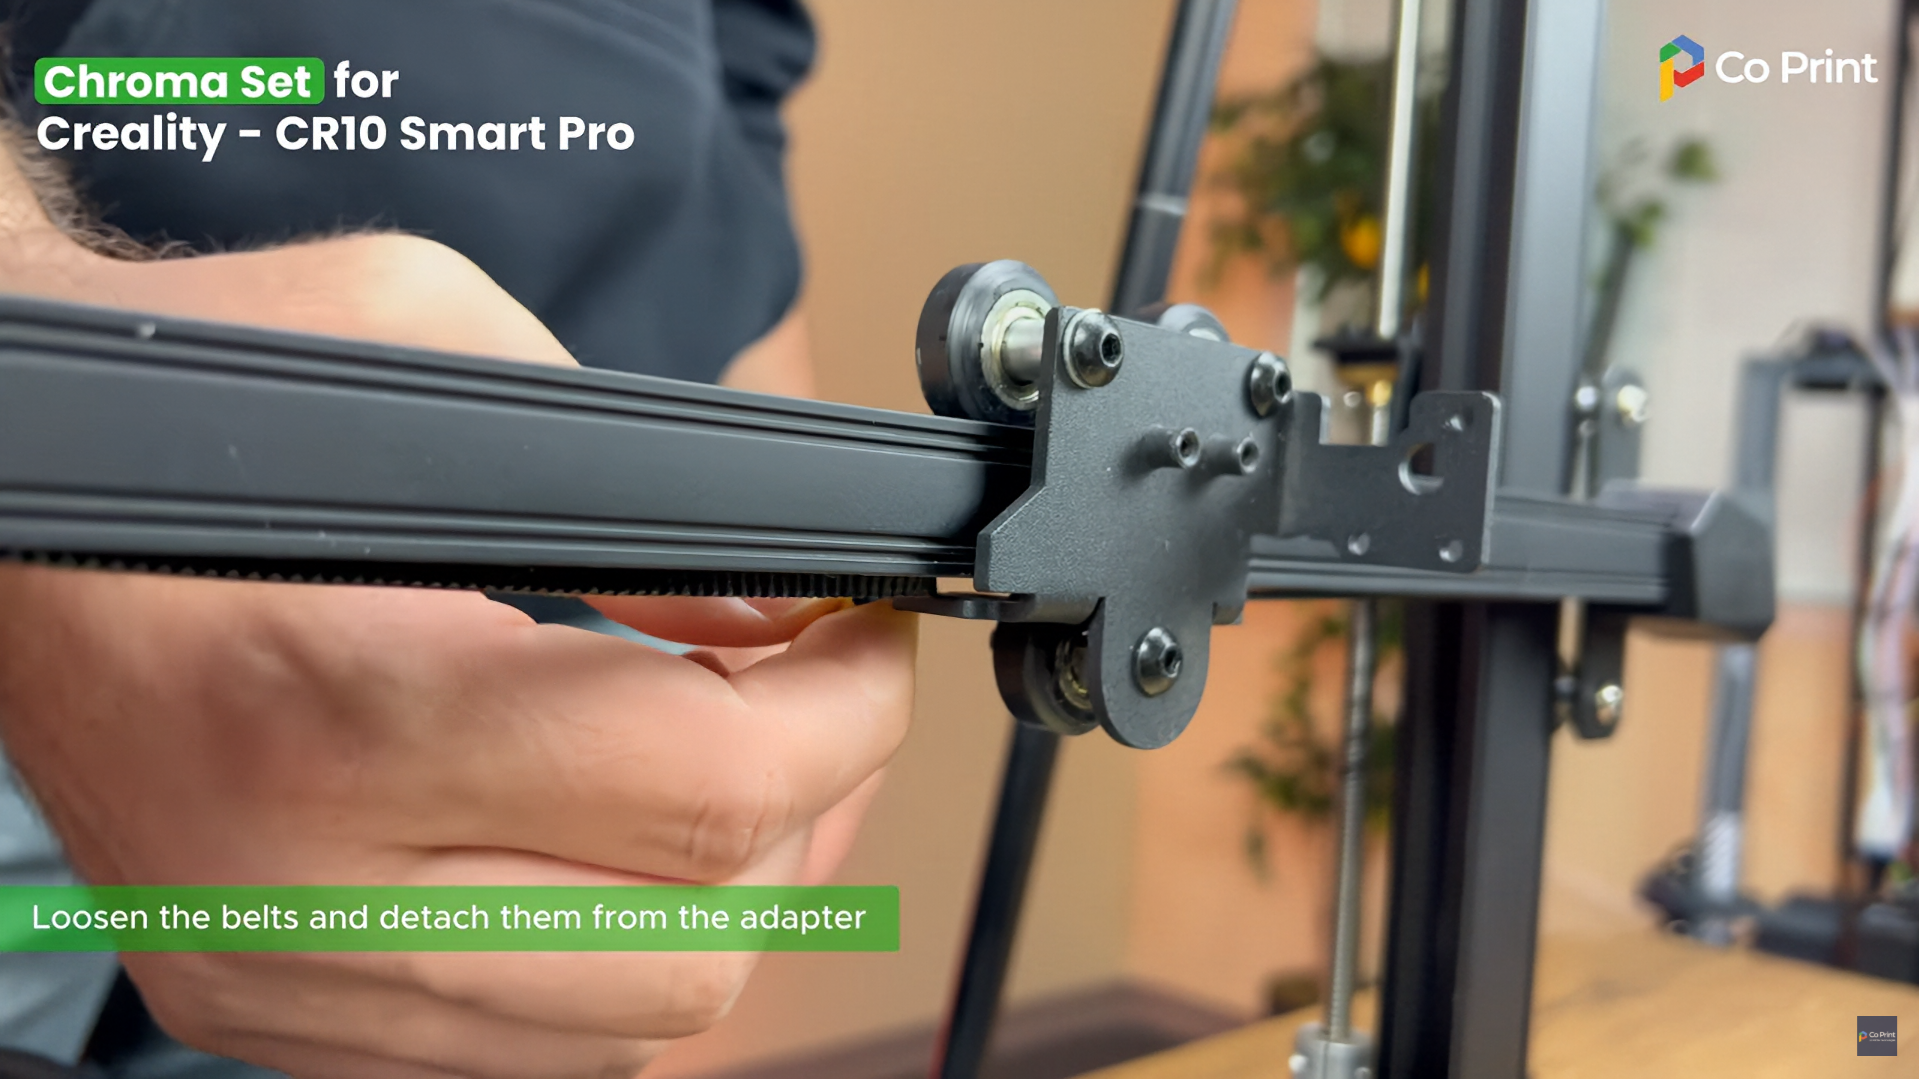
- Loosen the belt using red screw located right side of the printer and detach from the adapter.
- Mount the new part which you printed before.
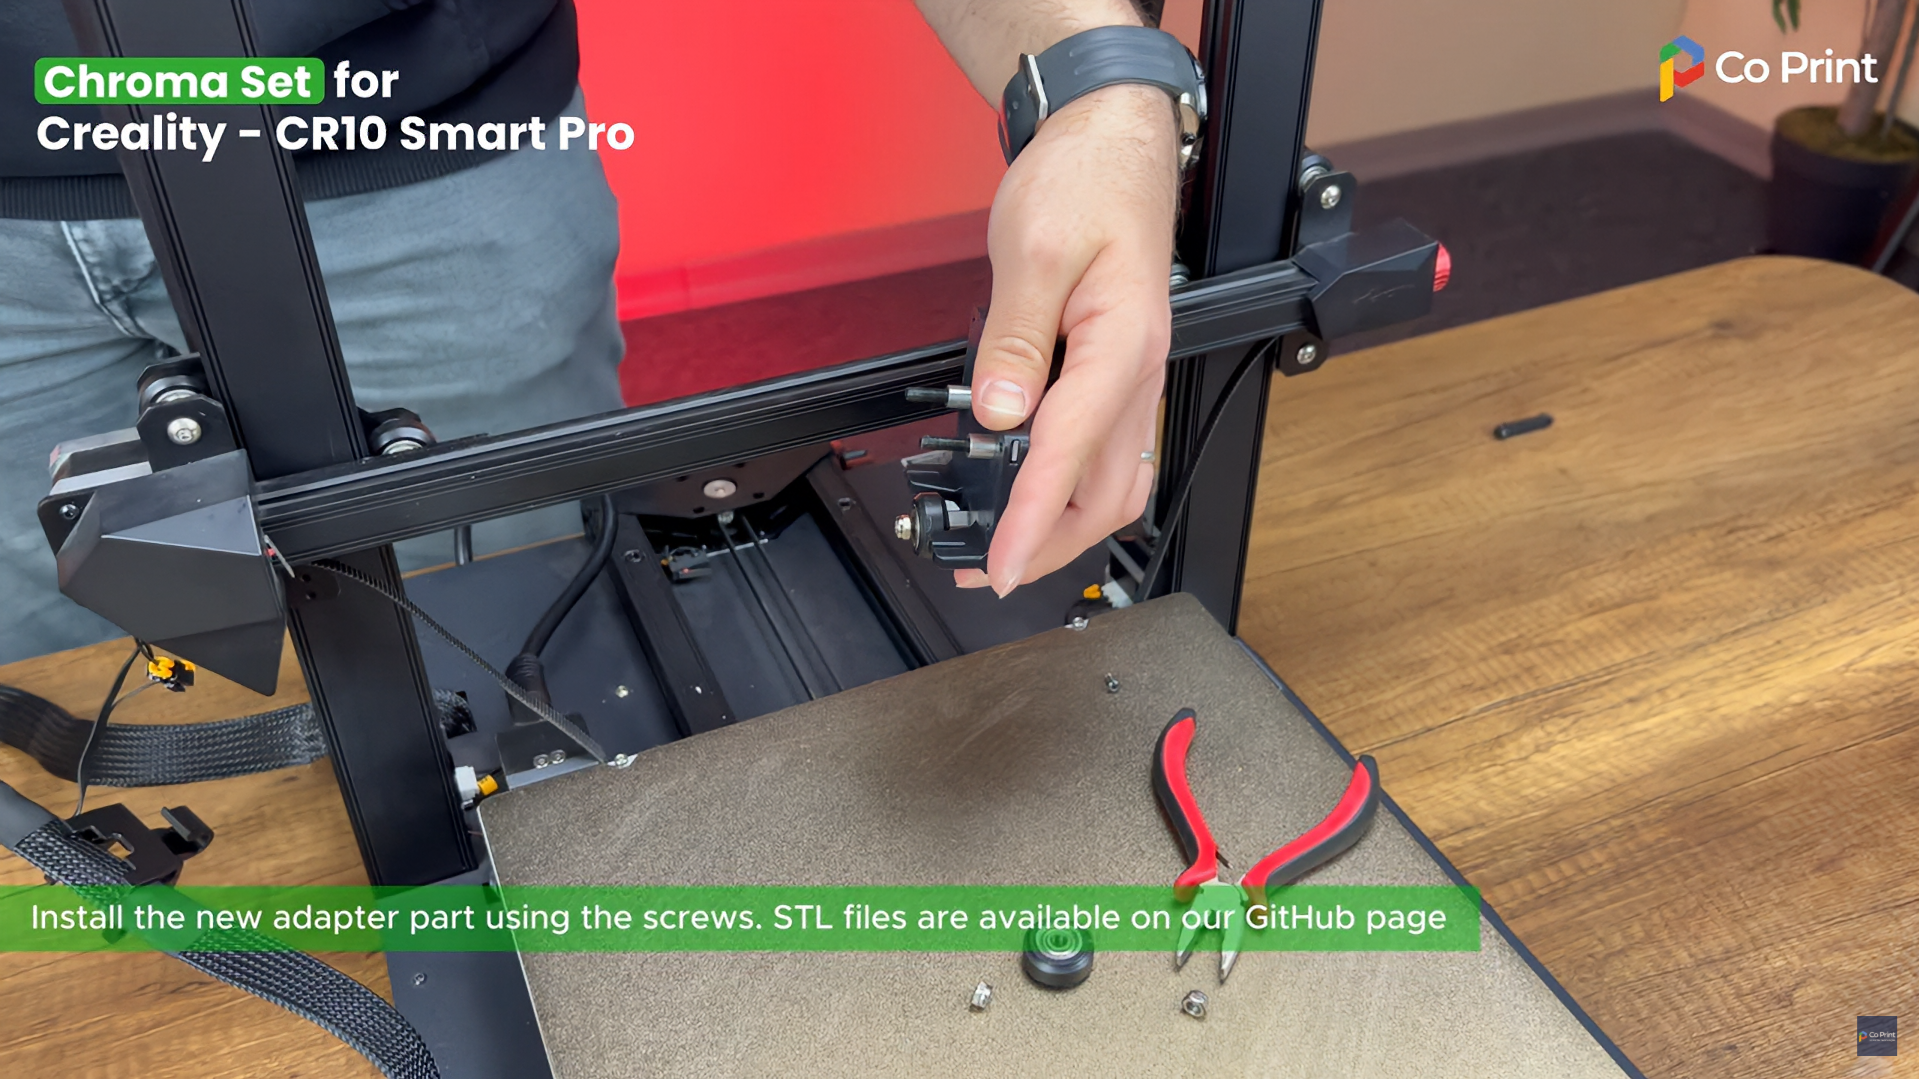
- Provide the stability with adjusting tightness of screws.
- Attach the belts to the new adapter part and tighten the belt.
- Insert the square nuts into the slots on the adapter at figured locations.
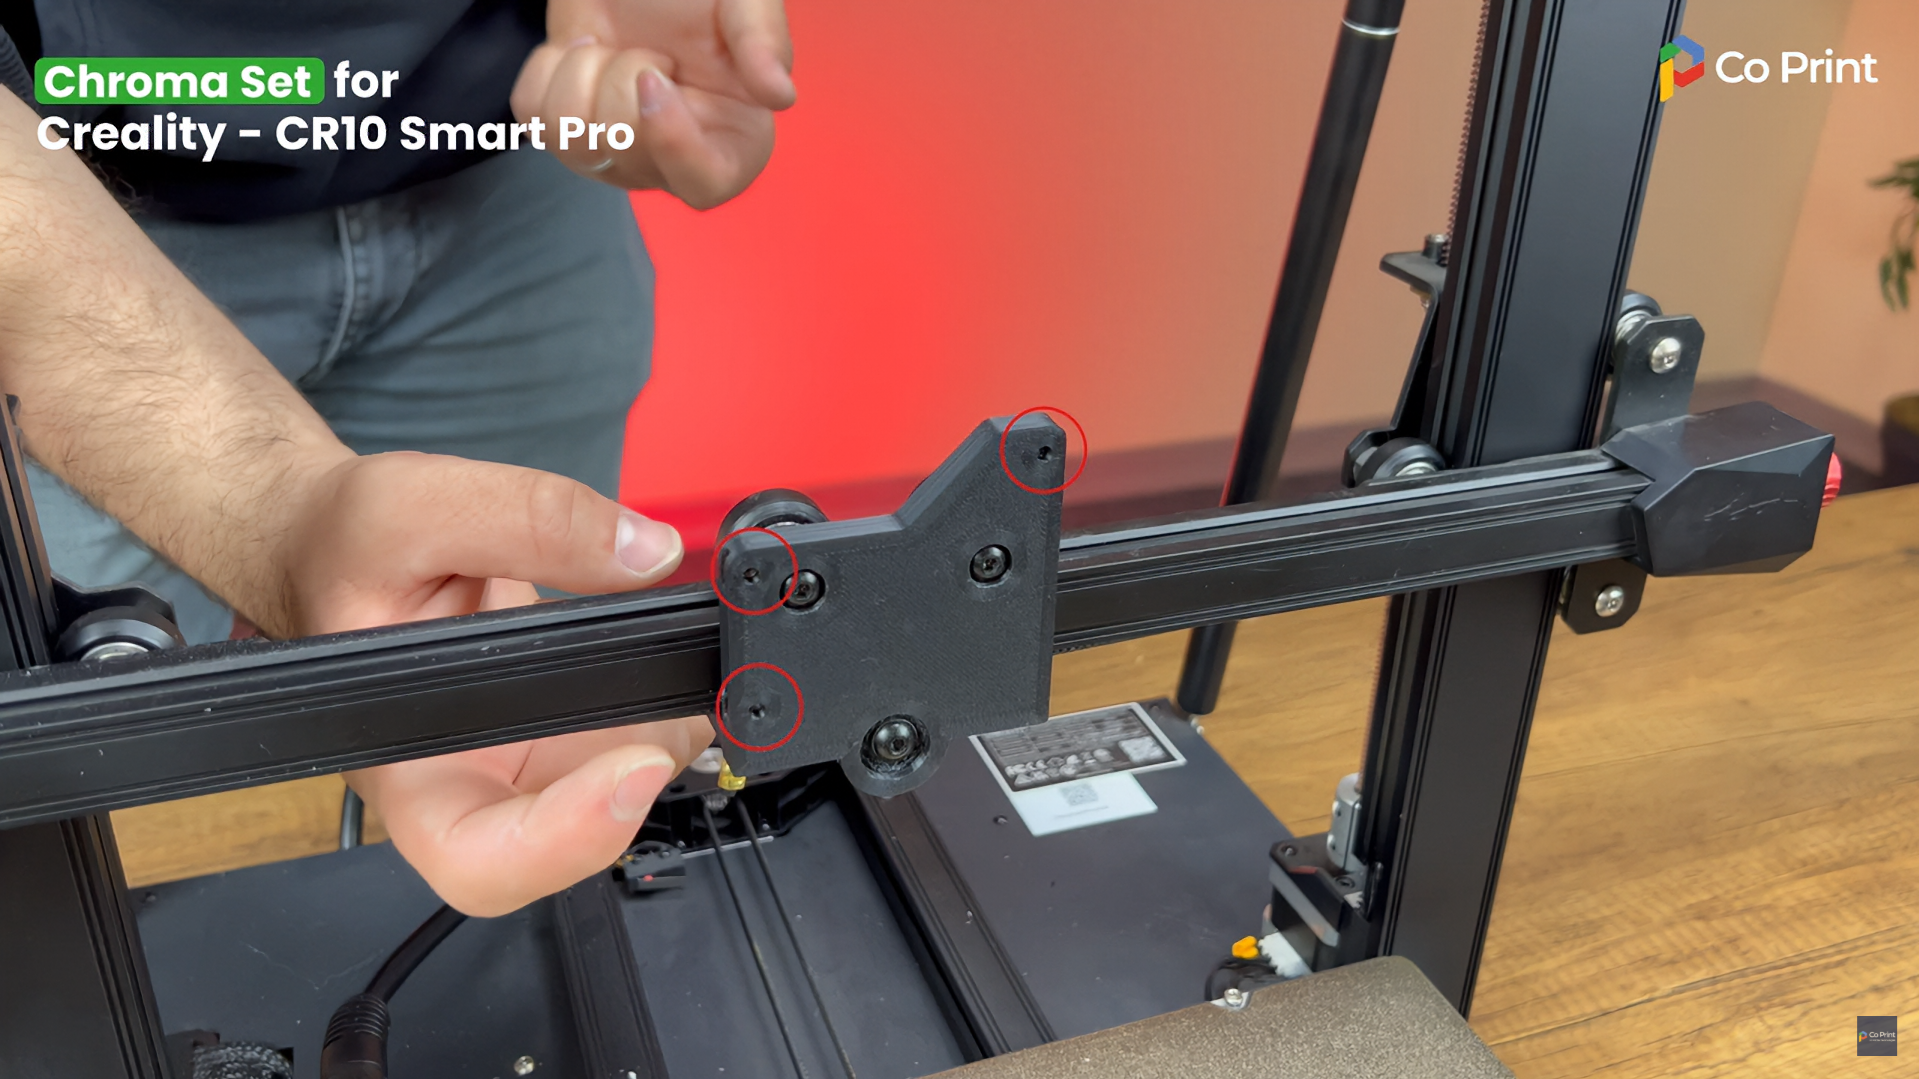
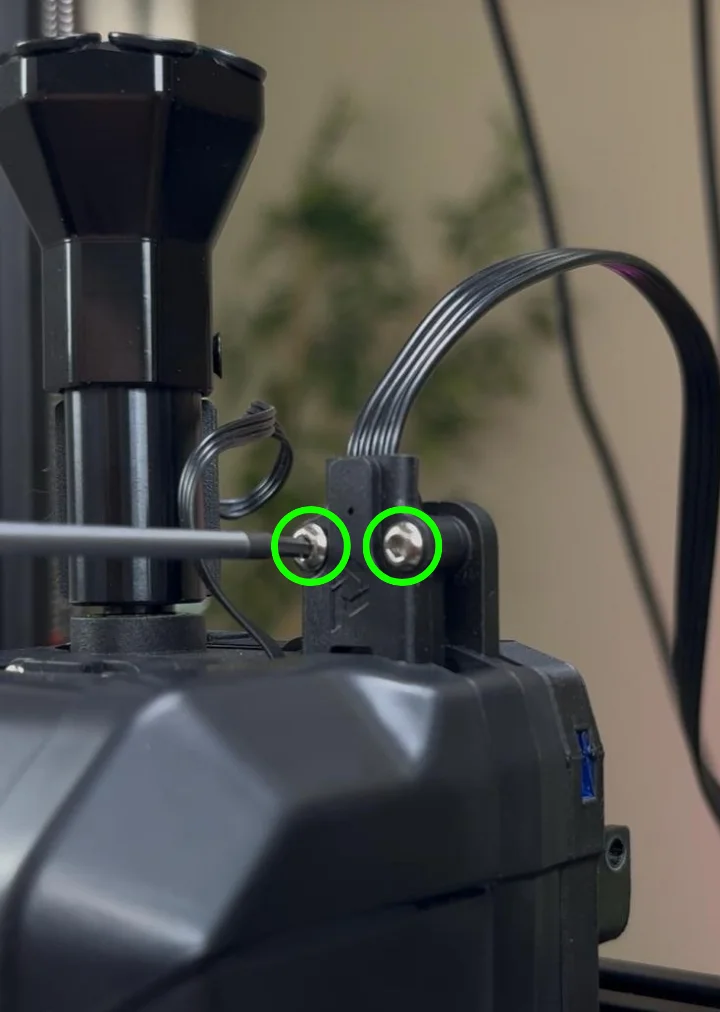
- After removing ChromaHead front cover and unpluging fan cable, mount it to adapter with 3 screws
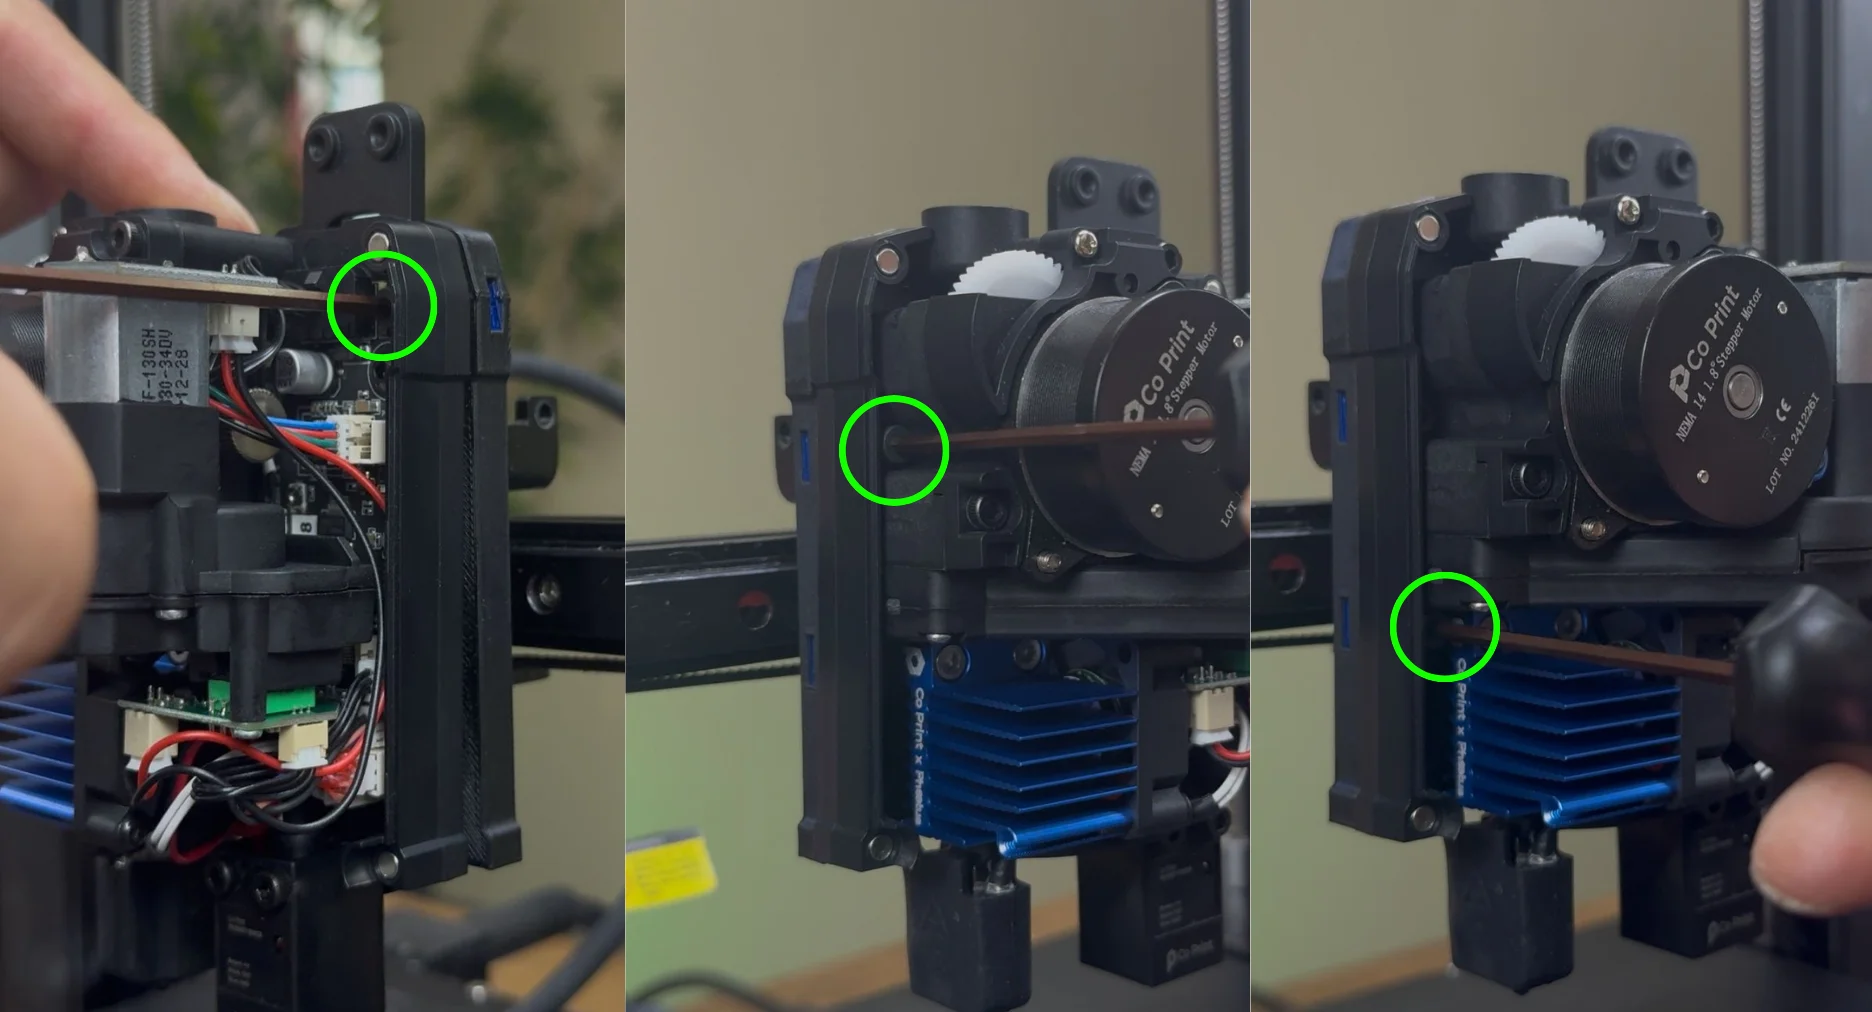
- Connect the head cable.
- Connect the 8in1 and filament sensor cable.
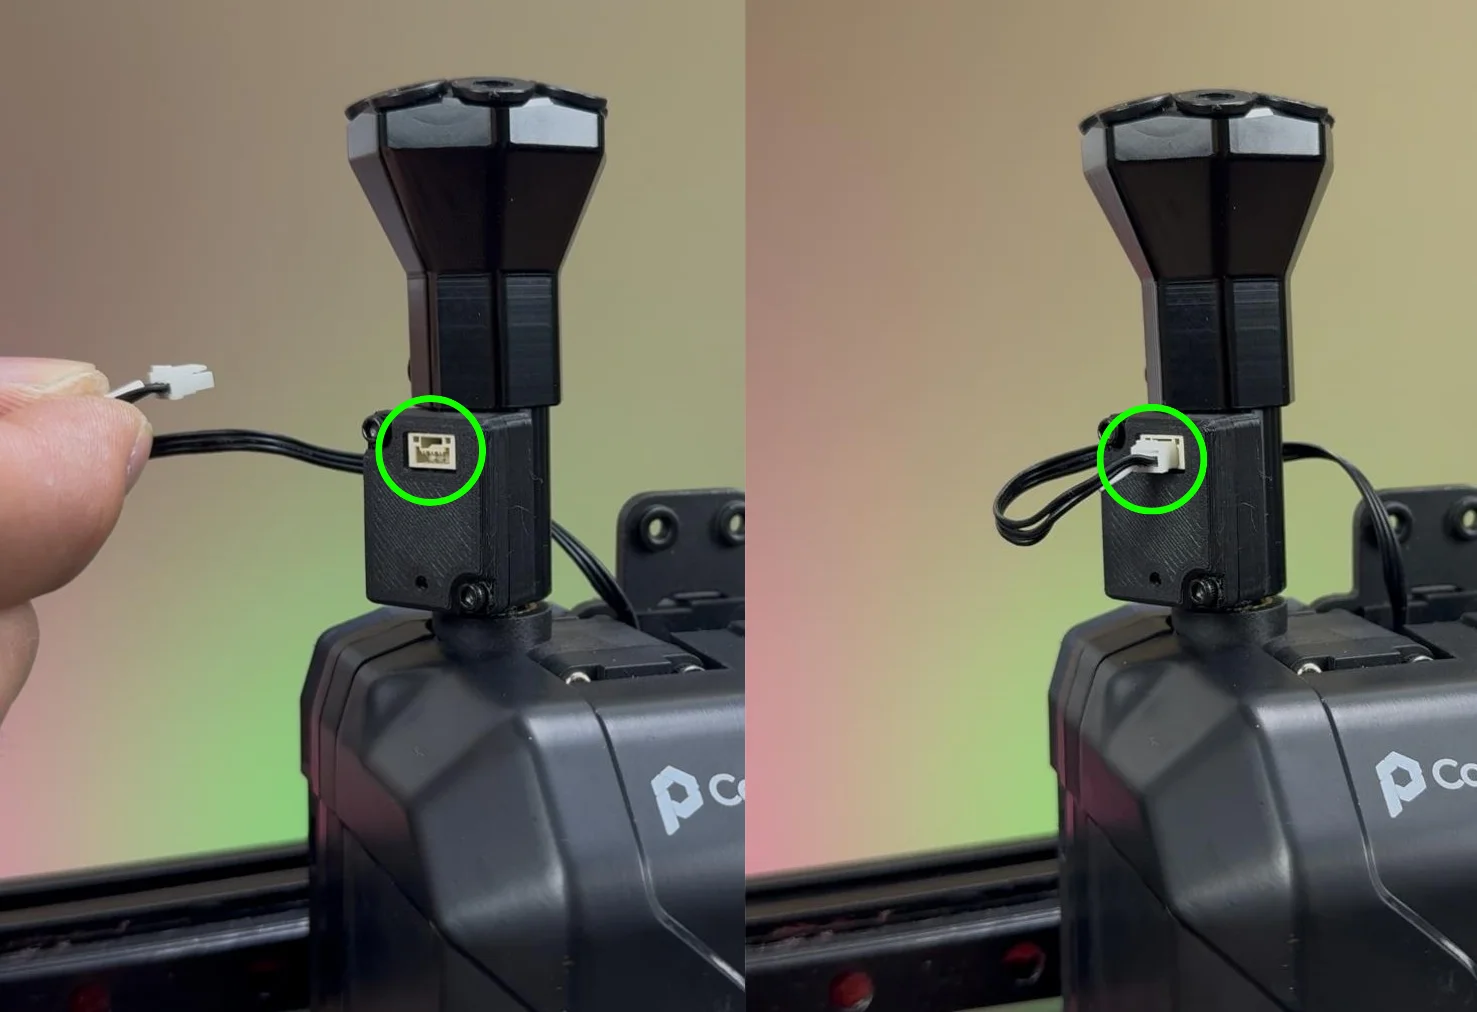
- Connect the fan cable to the front cover and reattach the cover.
¶ B. Mounting the CX-I Extruders
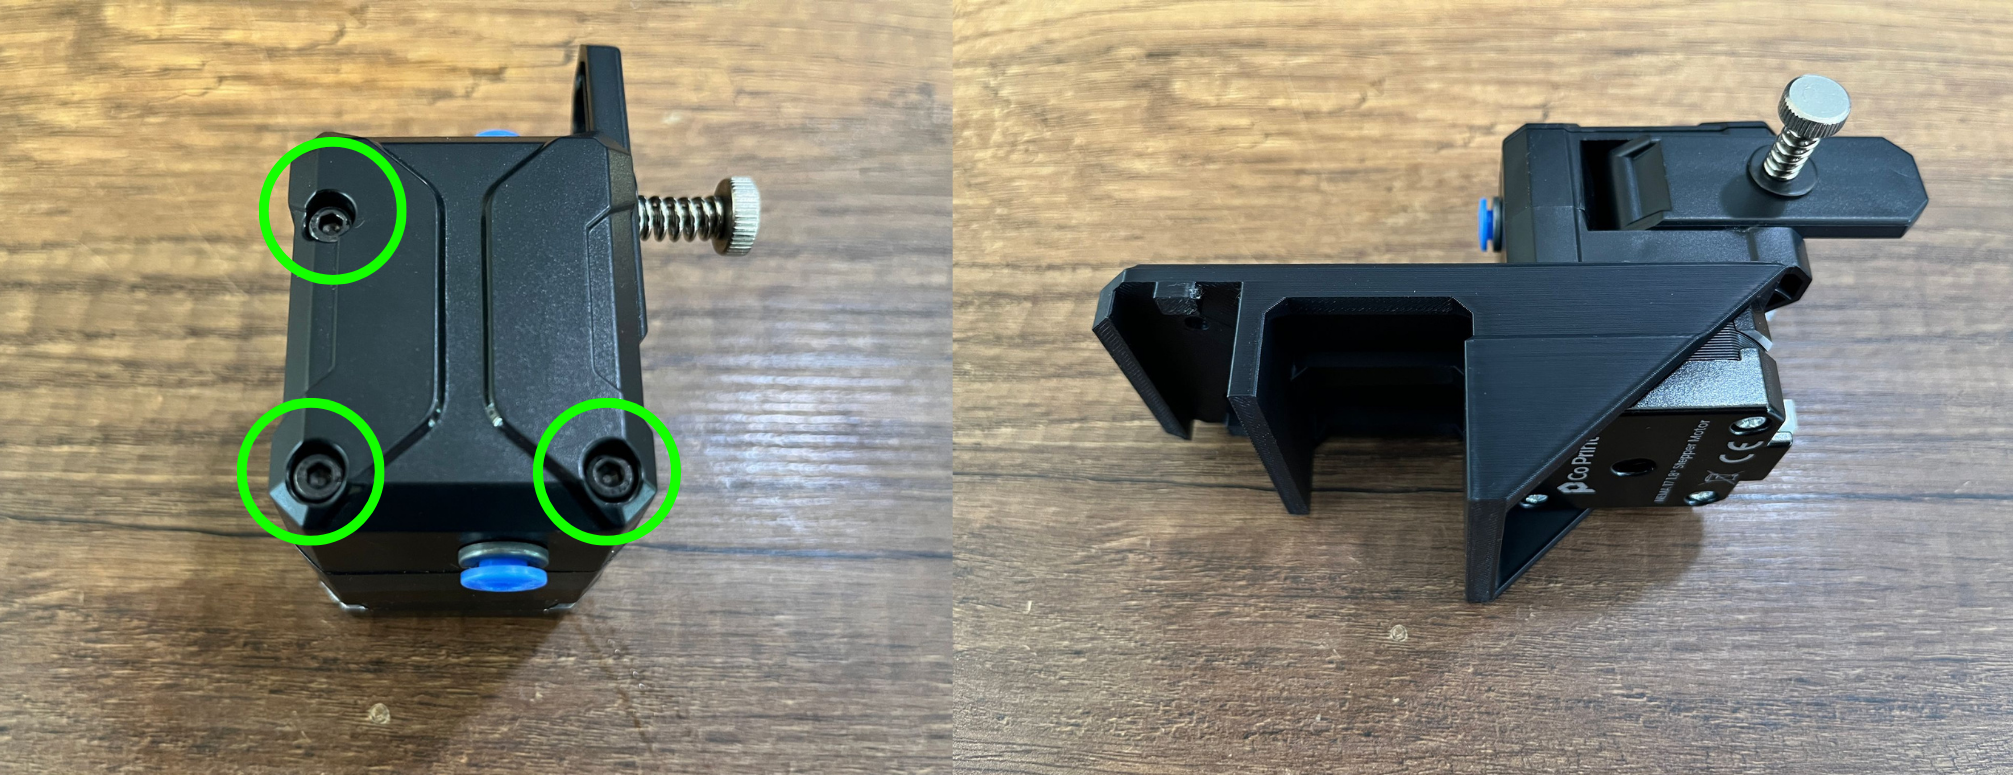
- Take the printed CX-I sigma holder and motor from the box.Remove the 3 screws on CX-I and mount the motor with the socket facing the long edge.Ensure the extruder lever faces right and tighten the screws.Repeat this process for the remaining 3 extruders.
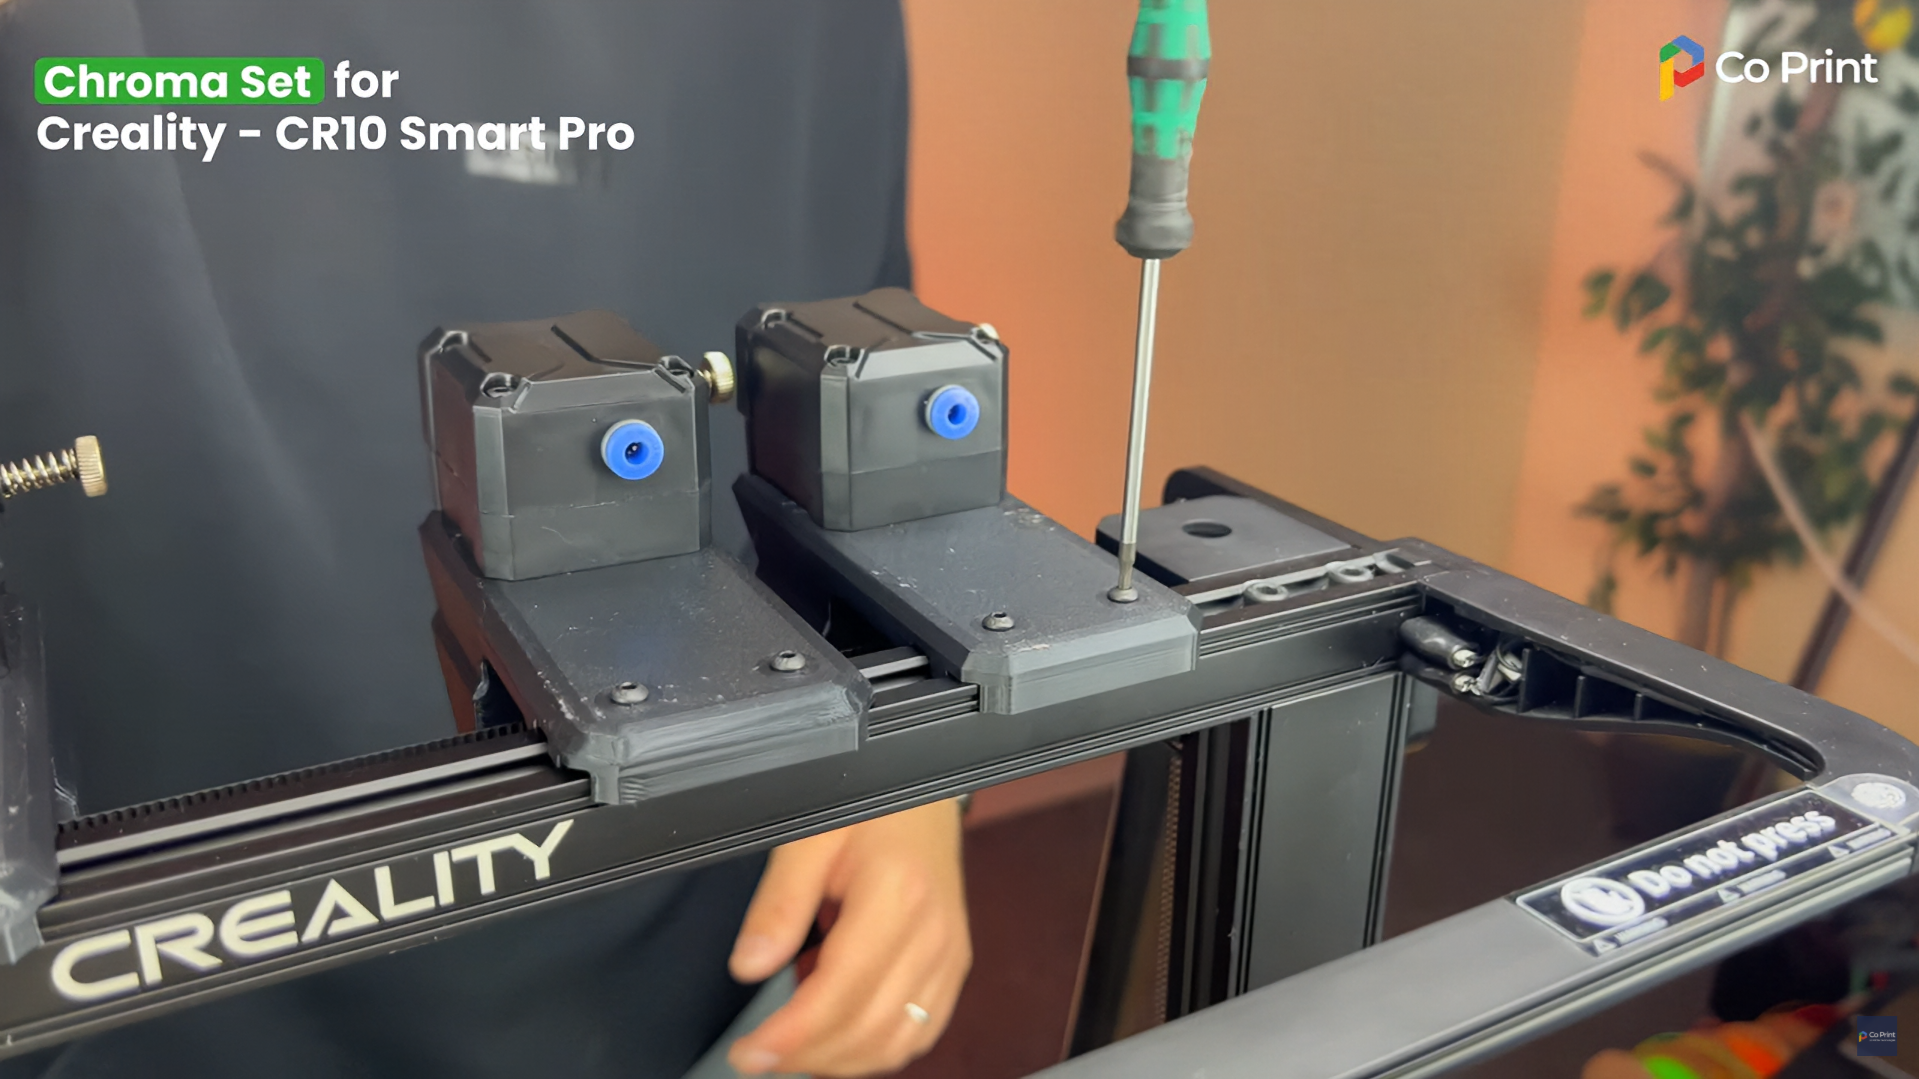
- Cut the PTFE tubes to the correct lenght and insert them
¶ C. Cable Connections
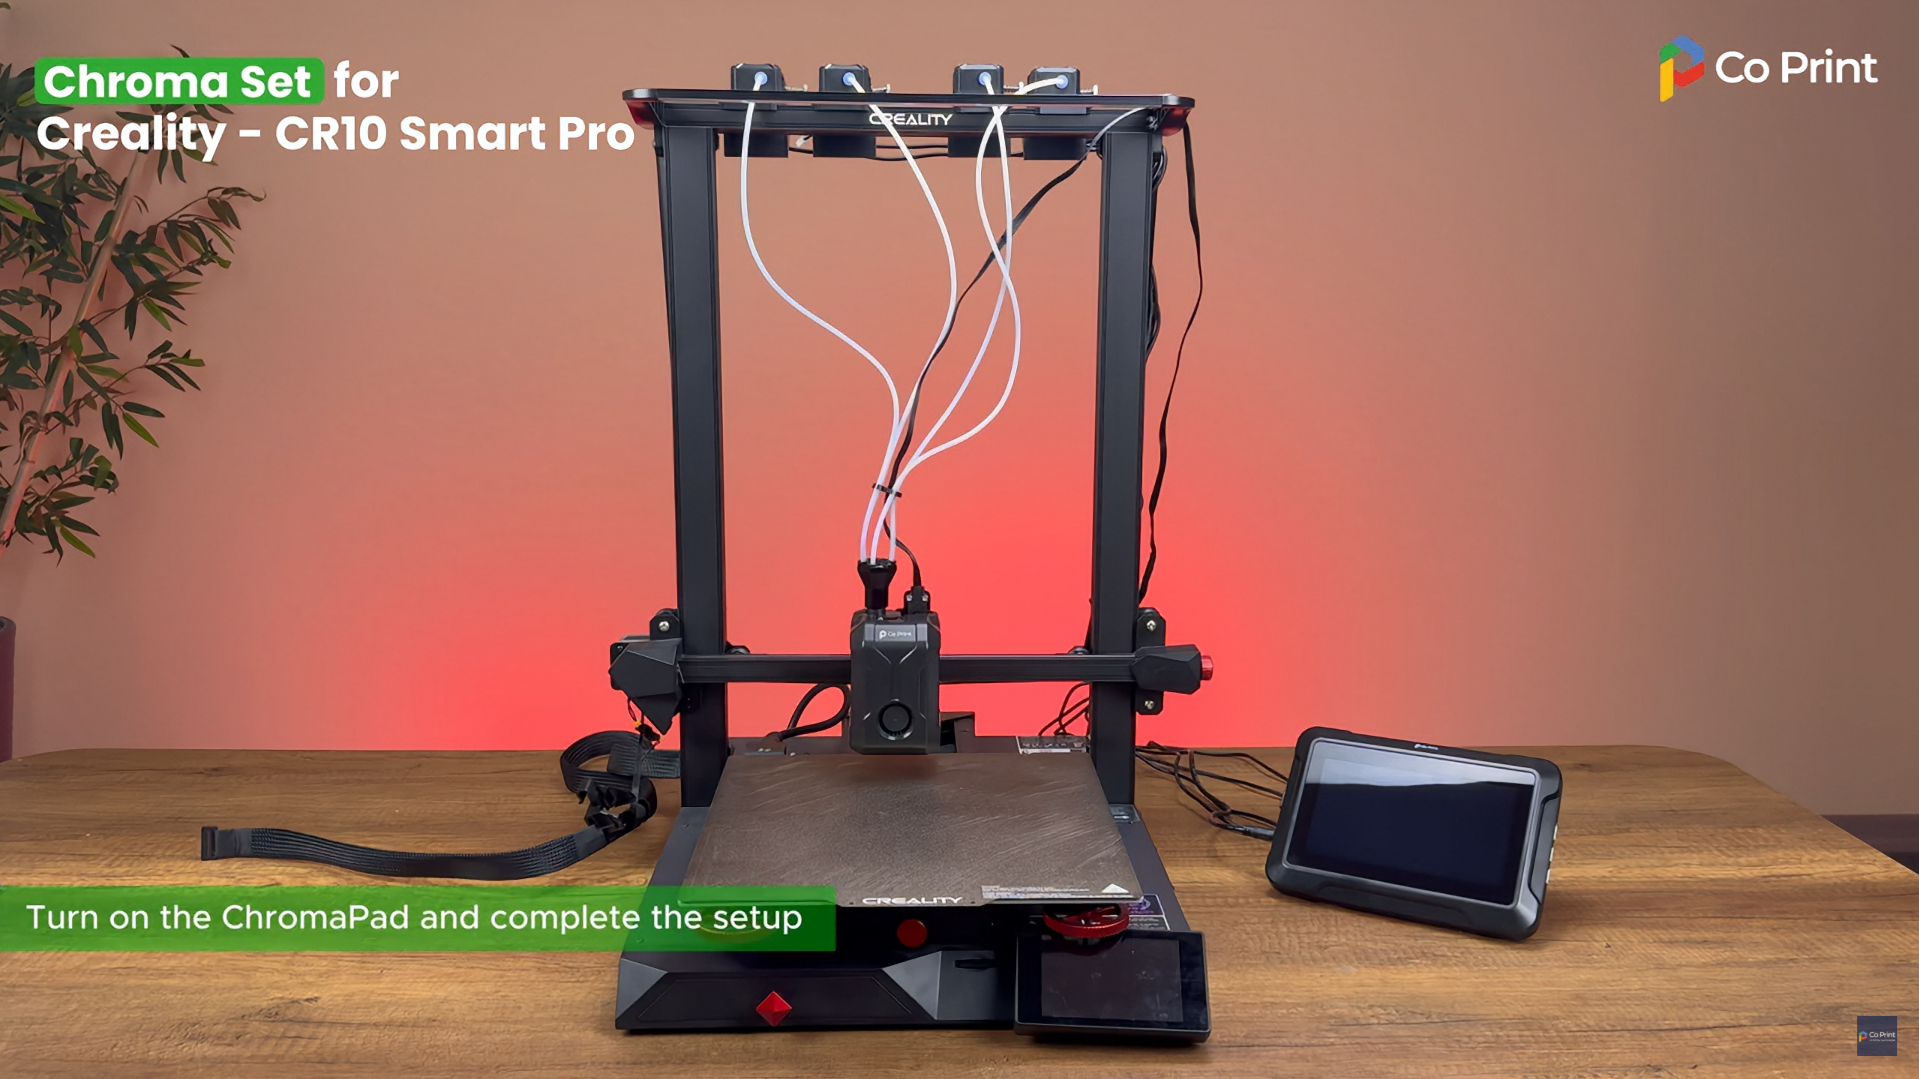
- Connect the CX-I cables and attach them to ChromaPad in sequence.
- Plug in the ChromaPad power cable, then while power is off, connect the ChromaHead cable.
¶ 2) Software Setup of ChromaPad on Creality CR 10 Smart Pro
After completing the mechanical setup of ChromaHead and CX-I Extruders, let's move on to configuring your printer with ChromaPad.
1- Select your language
2- Accept privacy policy
3- Select your timezone
4- Give your ChromaPad a name(this will be device name visible on the network)
5- Connect your wifi network
6- Update system if available
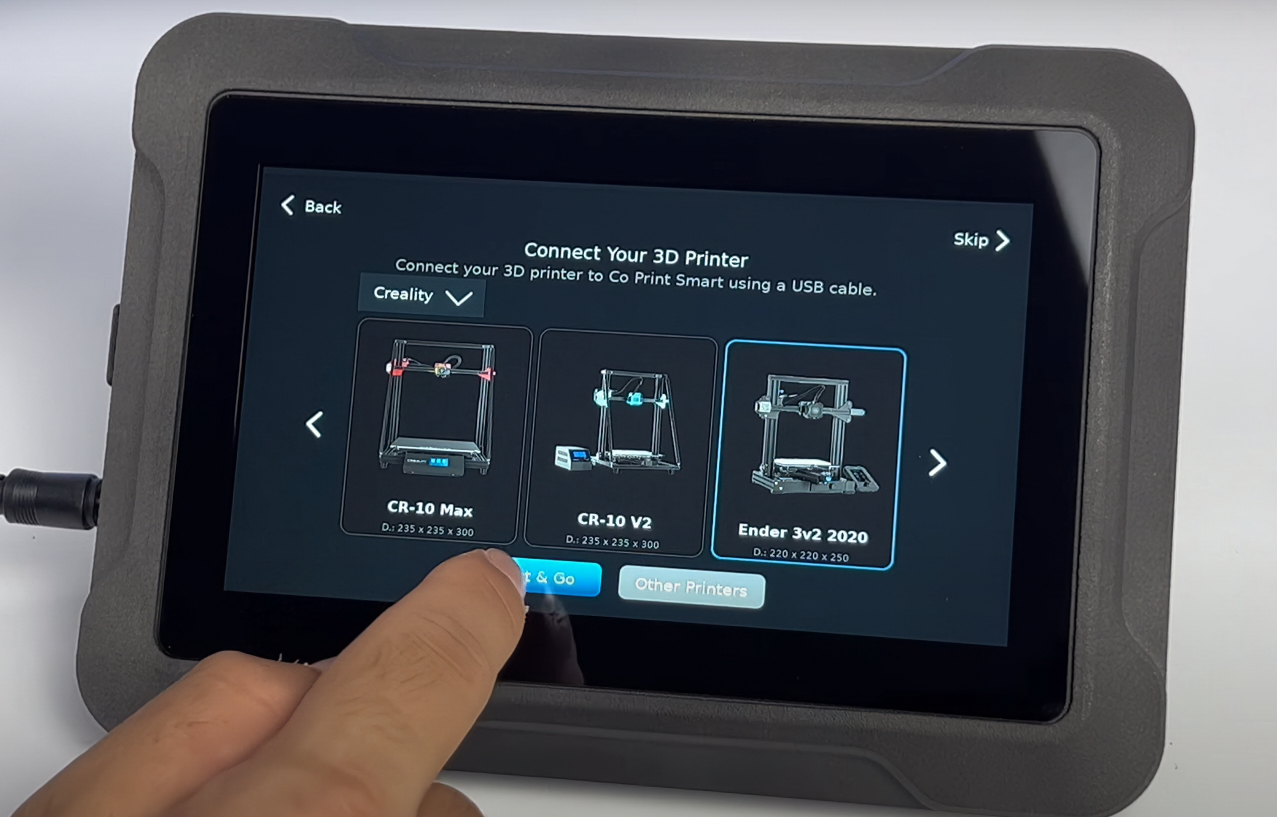
7- Skip the printer selection screen when appears
8- Remove the SD card from the printer and insert it into your computer
9- Download the linked .bin file and copy it to the SD card
10- Insert the sd card back into the printer and power it on to flash the firmware
11- On the ChromaPad, go to "Printers" and select 1. printer then click "I had setuped"
12- Find your IP address under "network"
13- Enter the IP adress in your browser to open Mainsail
14- Go to "machine" section and copy these files there after downloading
15- Connect the ChromaPad to the printer and turn back to Mainsail
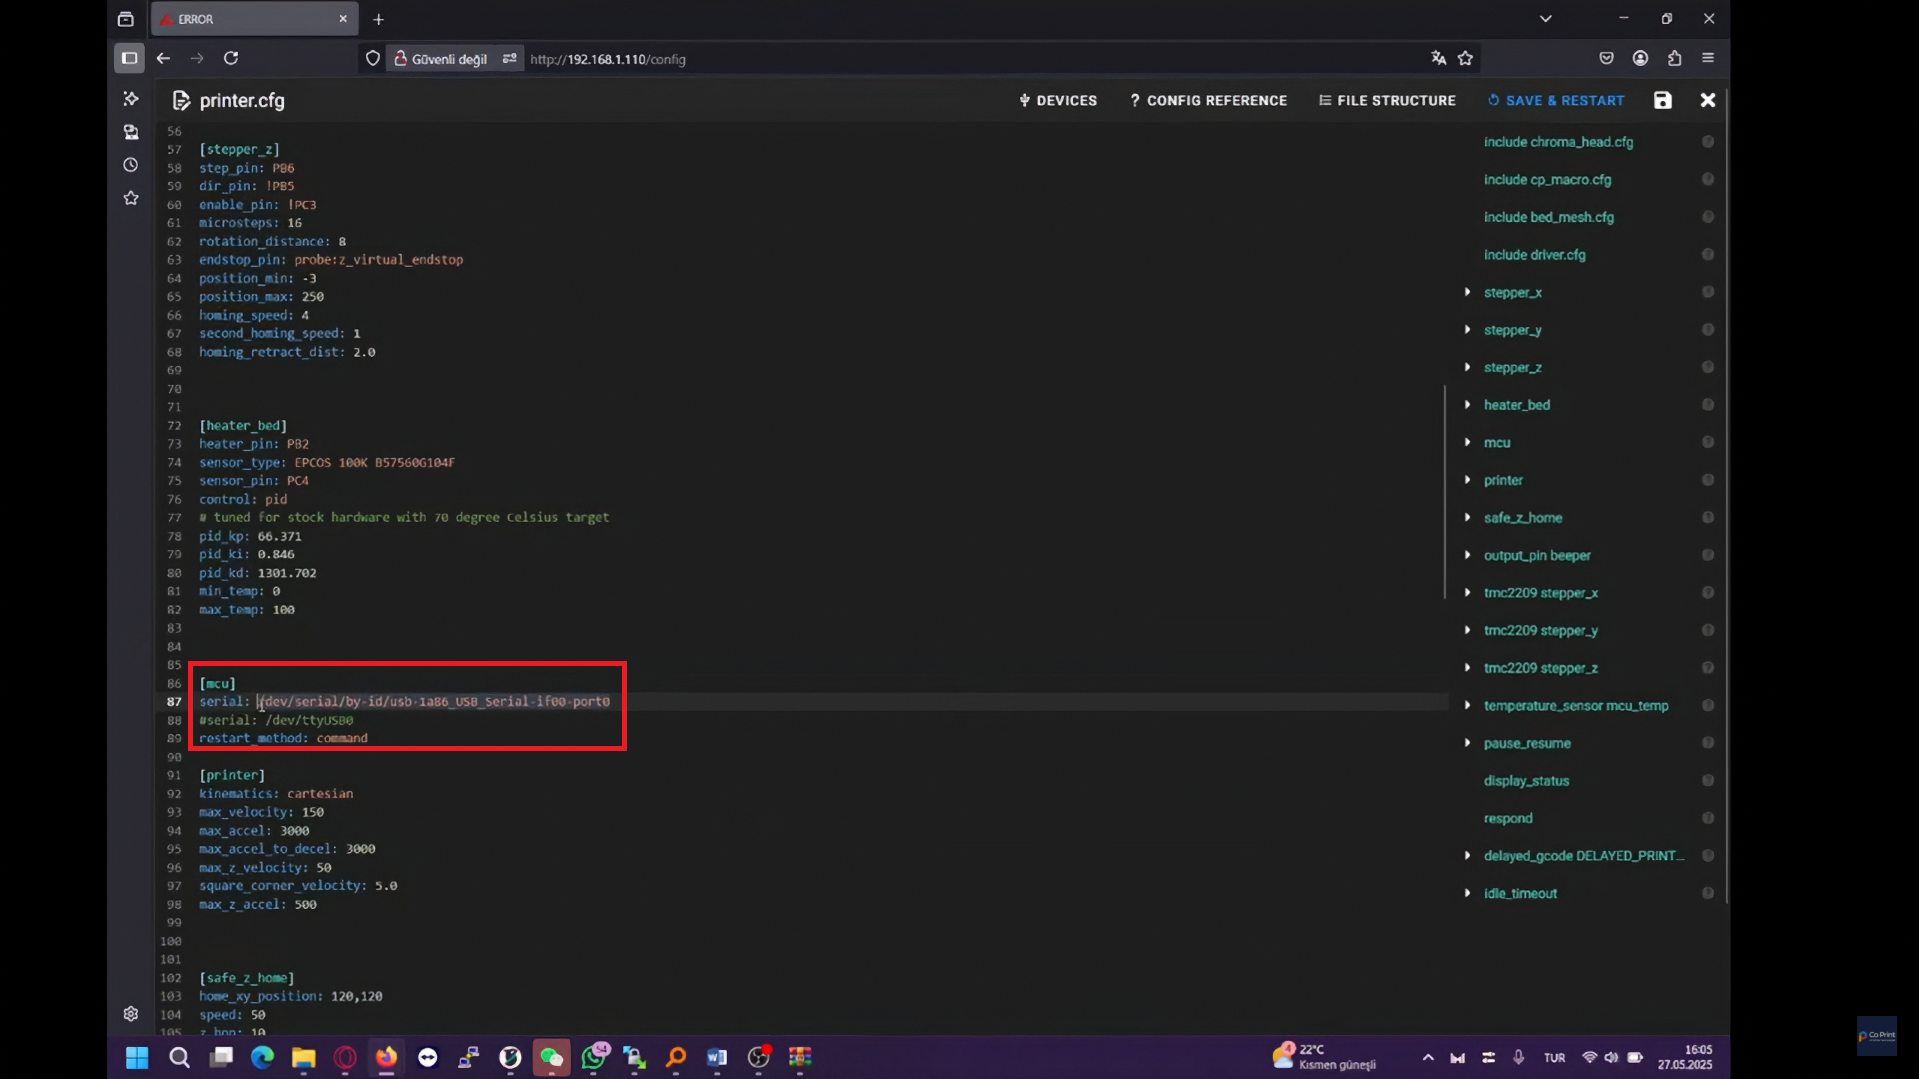
16- Click on the "printer.cfg" file. Then click the "DEVICES" button to identify the Printer’s serial path. Copy the correct serial path and paste it into the "serial:" field. After that, click "SAVE & RESTART" and exit the file.
¶ Your printer is ready to use.

¶ 3) Post-Installation OrcaSlicer Configuration
After completing the installation, you also need to configure OrcaSlicer. We recommend downloading the latest version of OrcaSlicer for optimal compatibility. You can use the link below to get the most recent release.
OrcaSlicer Download Link - Download
-
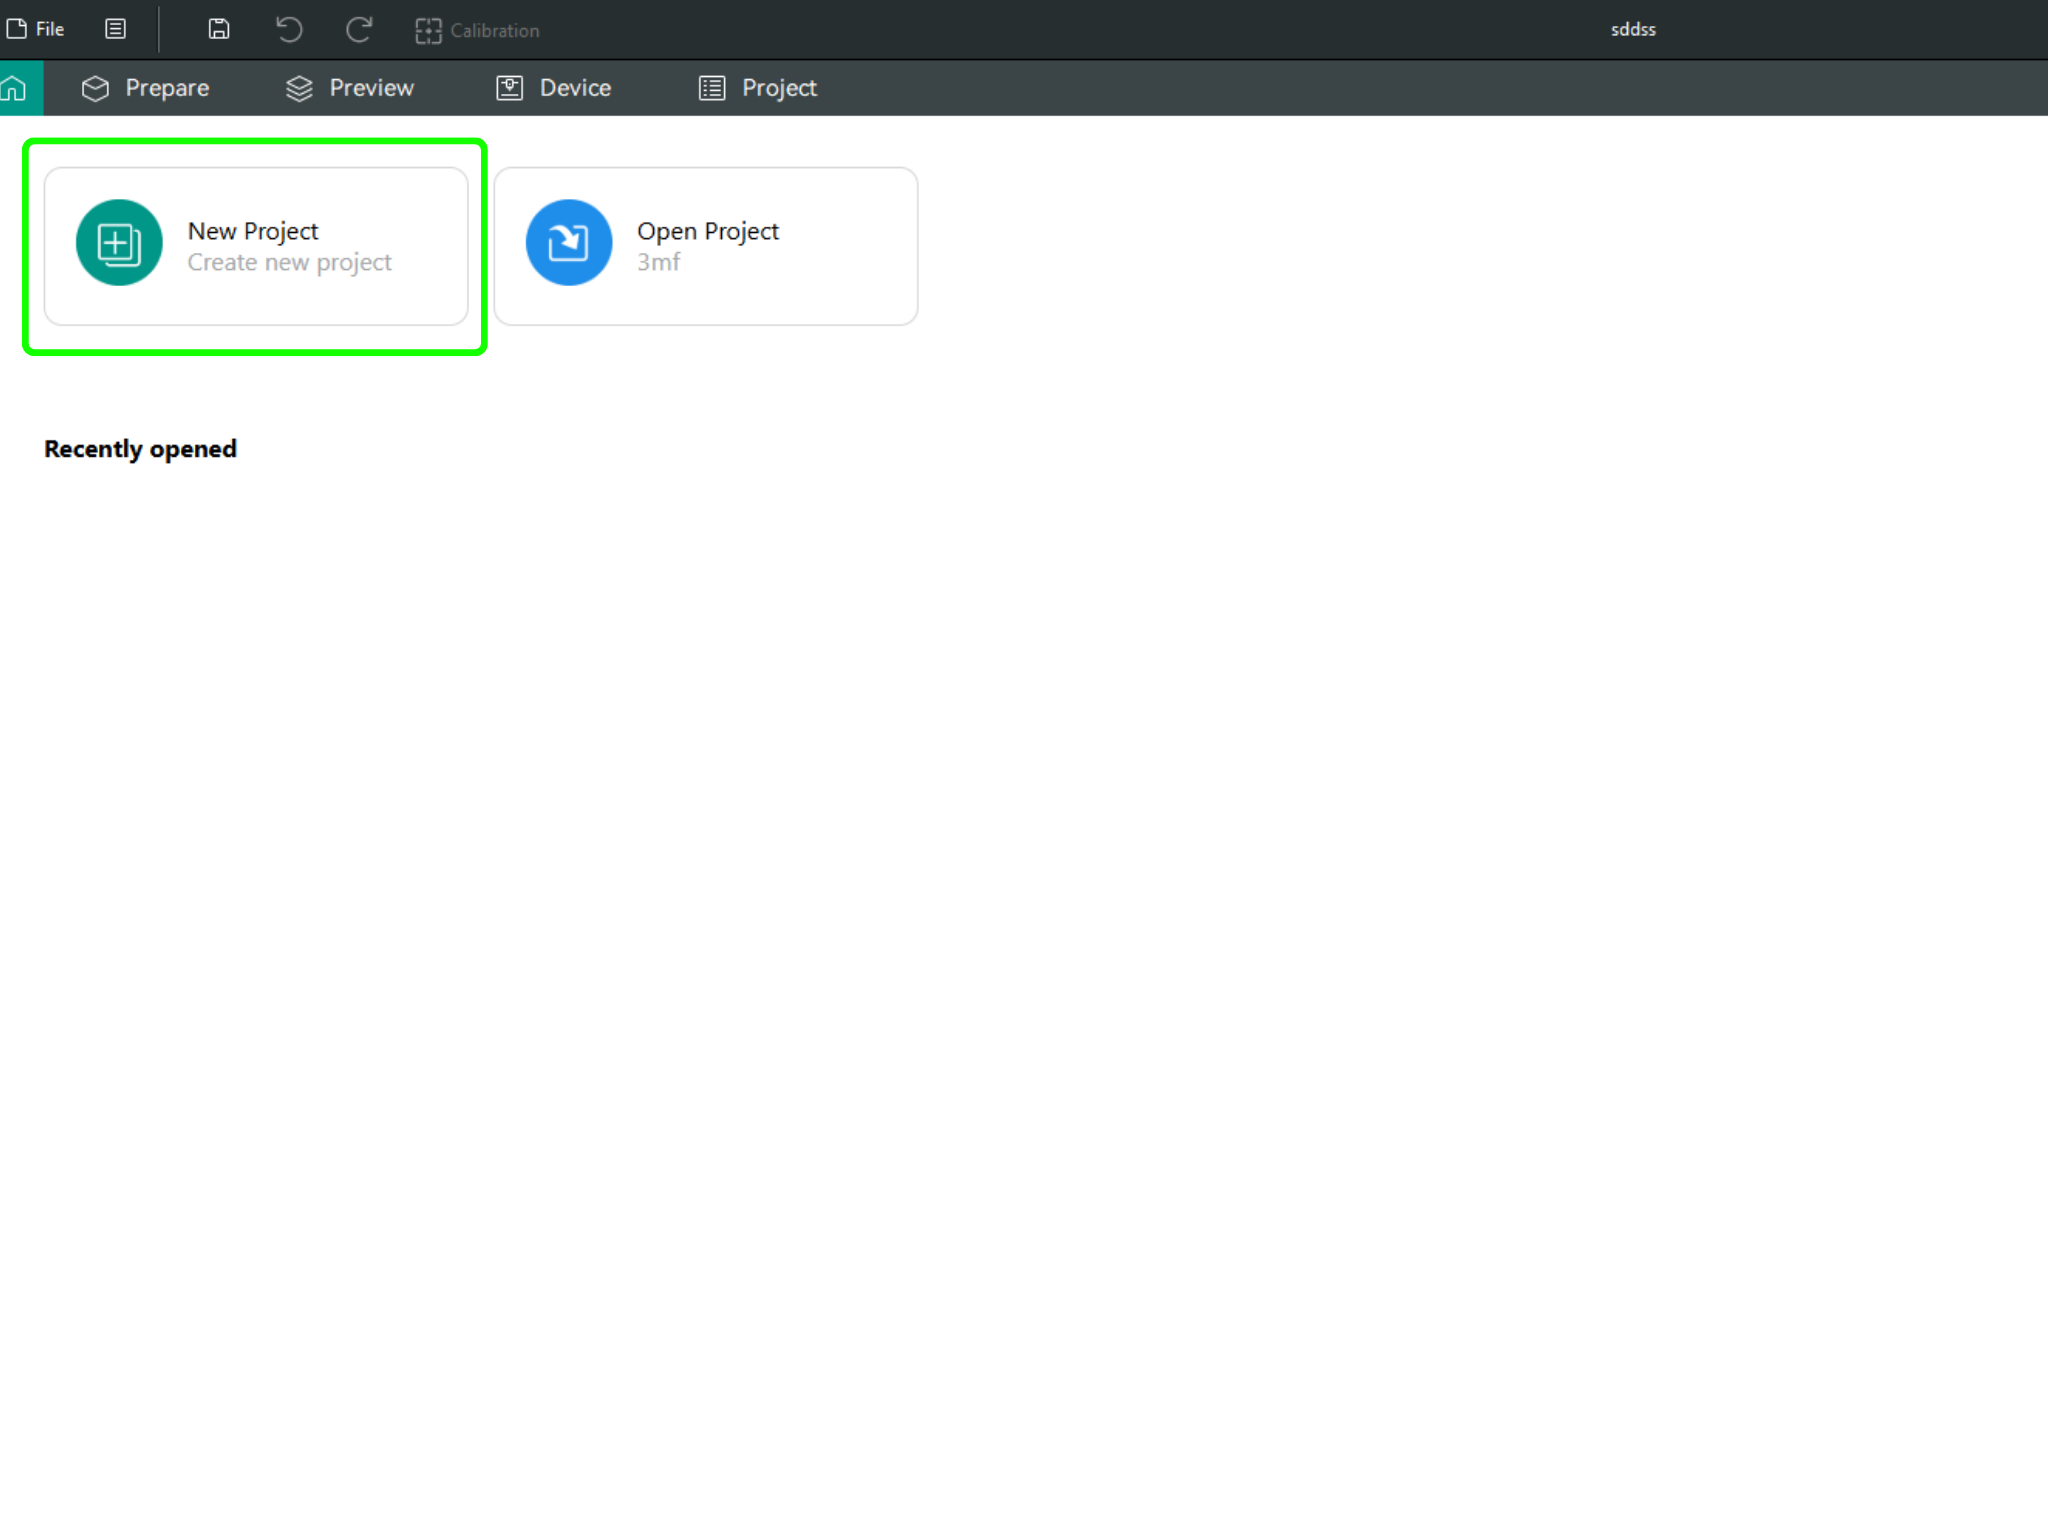
After downloading OrcaSlicer, click on “New Project”.
-
In the left menu, go to the Printers section and click on “Select/Remove printers”.
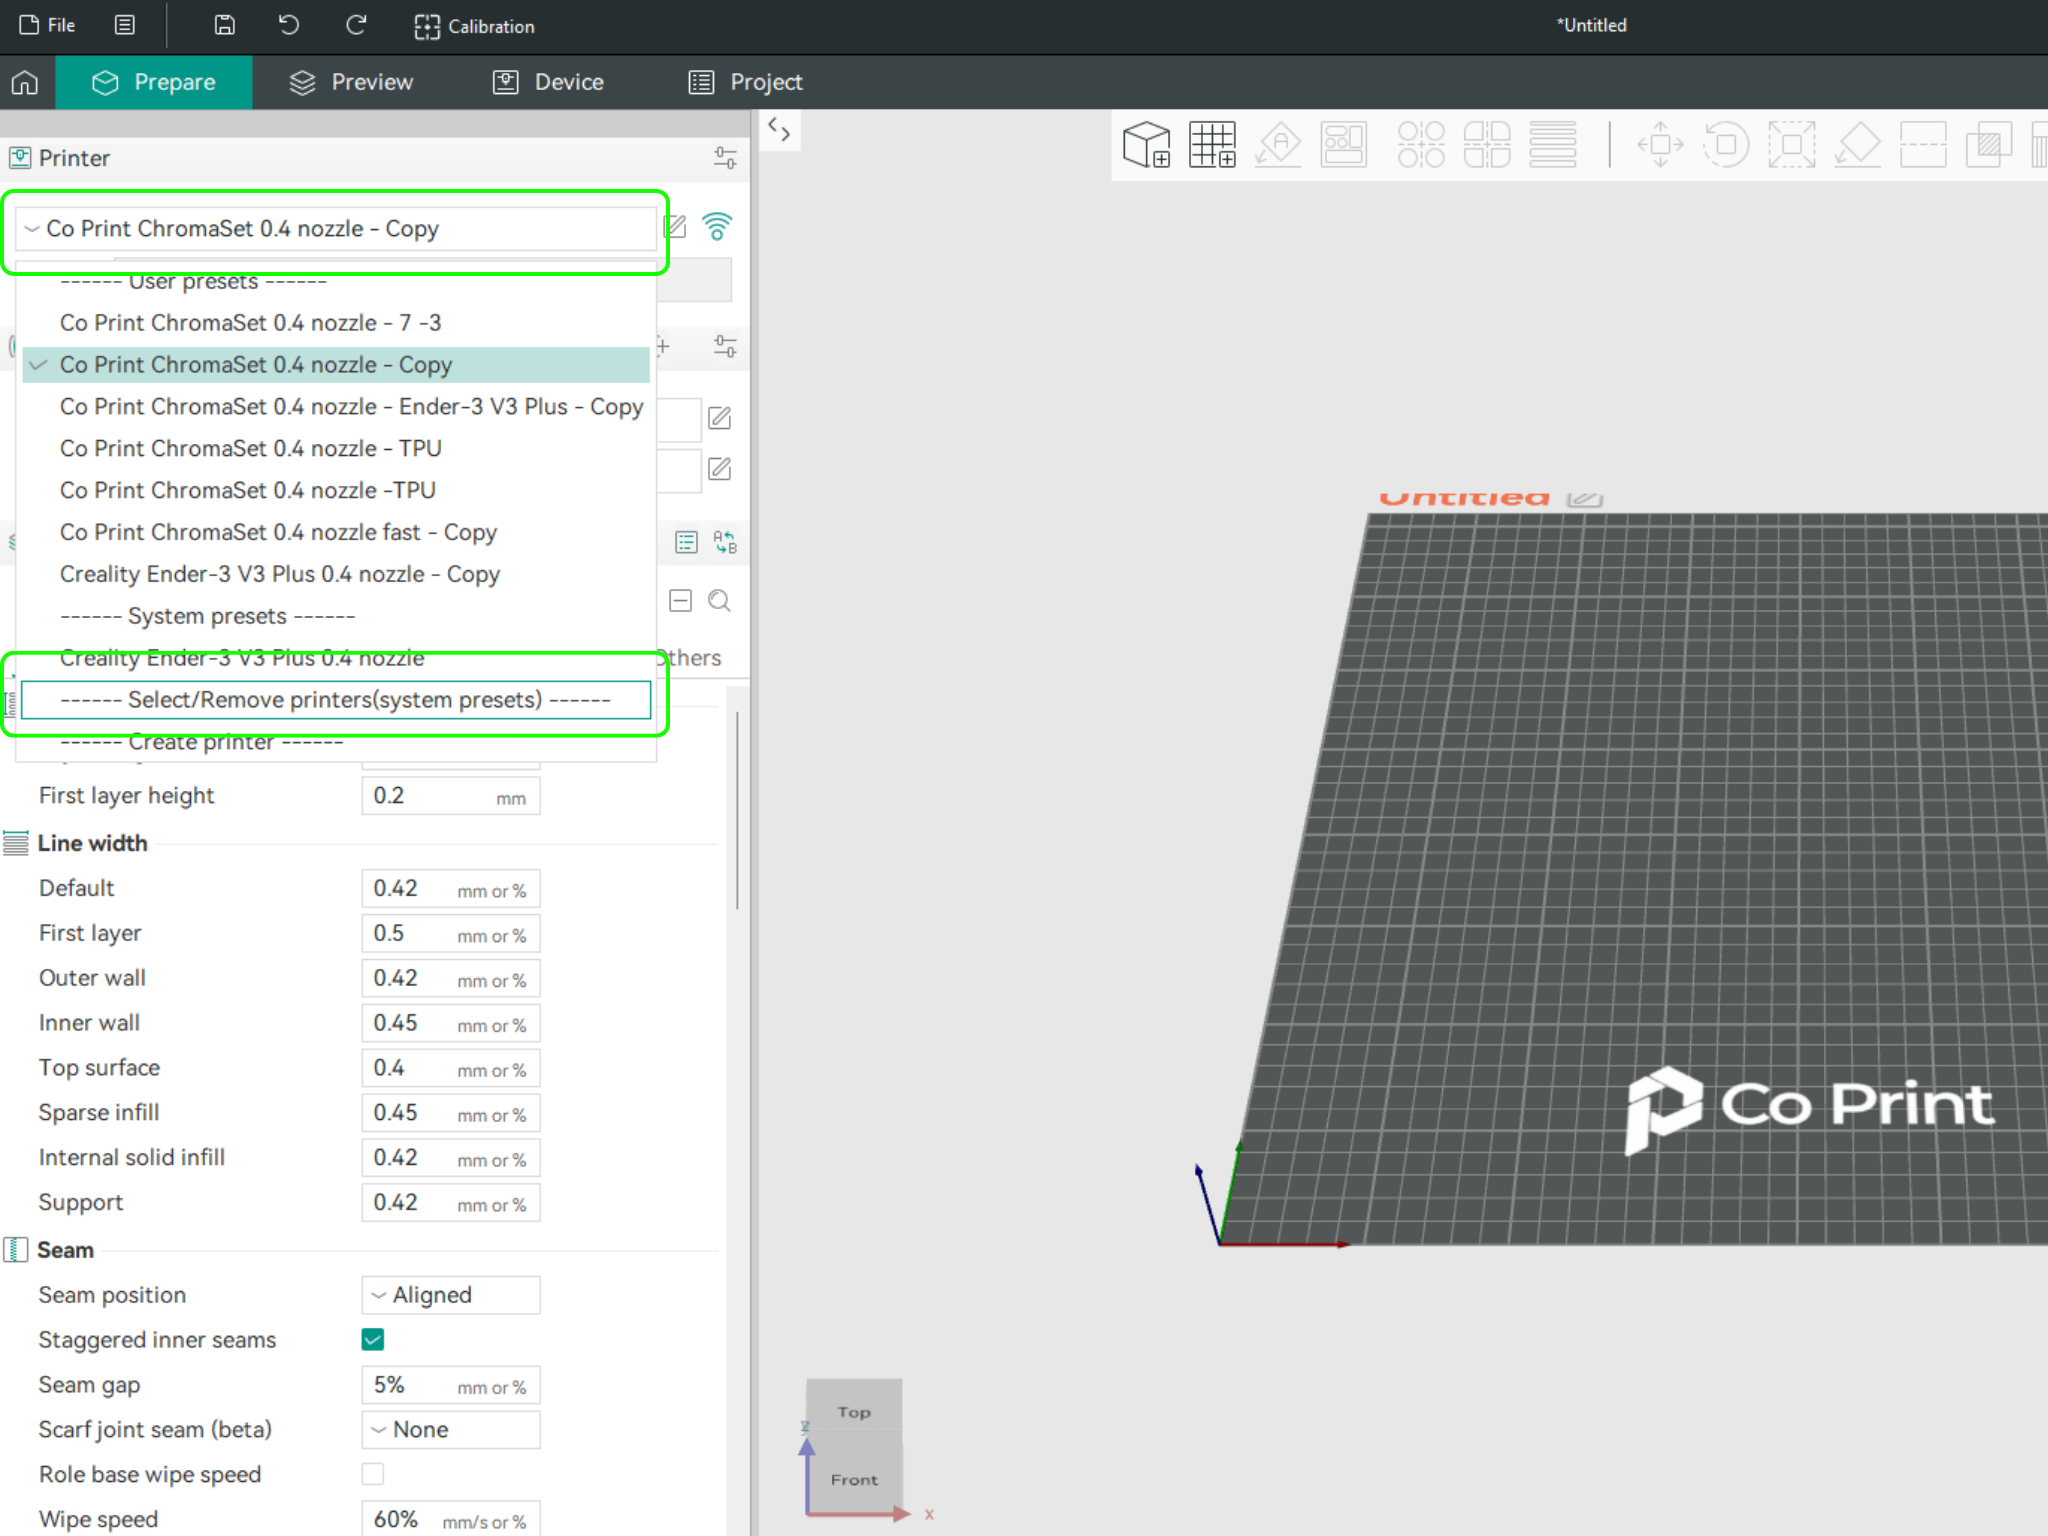
- In the opened menu, find and select Co Print. Then click "Confirm".
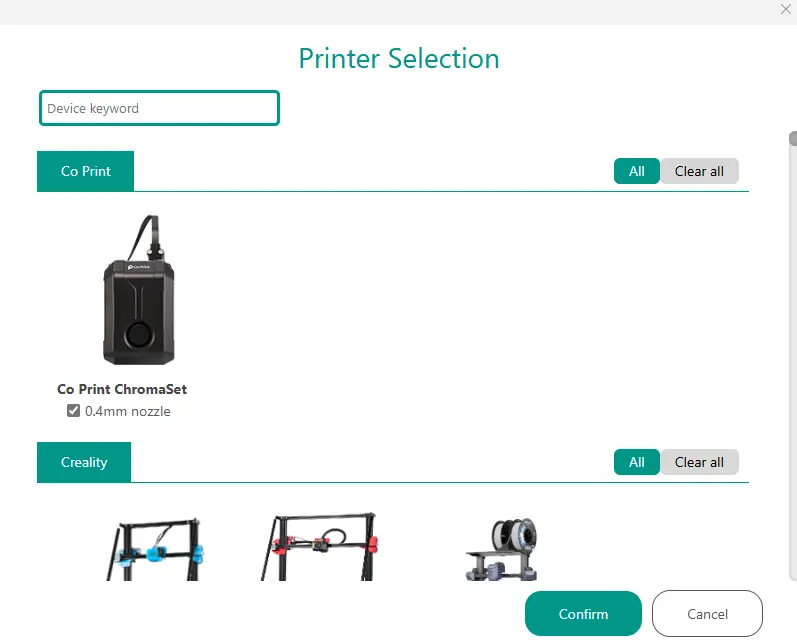
- After loading the settings, you need to adjust them in OrcaSlicer according to your printer’s bed size.
- You can import your model into OrcaSlicer as shown in the videos below, paint it, and start your print directly from within OrcaSlicer.