¶ Creality Ender 3 Pro - ChromaSet Upgrade Guide
| Image | Information |
|---|---|
 |
Welcome to the installation page for Creality Ender 3 Pro with ChromaSet. This guide will help you update your printer's firmware to ensure compatibility with ChromaSet, how to mount ChromaHead and CX-I Extruders on printer, complete the mechanical setup, and configure the ChromaPad settings. By following these steps, you will successfully complete the installation process. |
¶ - Downloadable parts required for the installation
You can download the required STL files below.
¶ Mechanical Setup of ChromaHead and CX-I Extruders
¶ Mechanical Setup of ChromaSet
¶ 1. Remove the Stock Print Head
Remove the stock print head from the Ender 3 Pro, including the carriage it is mounted on. However, set aside the screws and wheels from the carriage — these will be reused to install the ChromaHead mounting carriage.
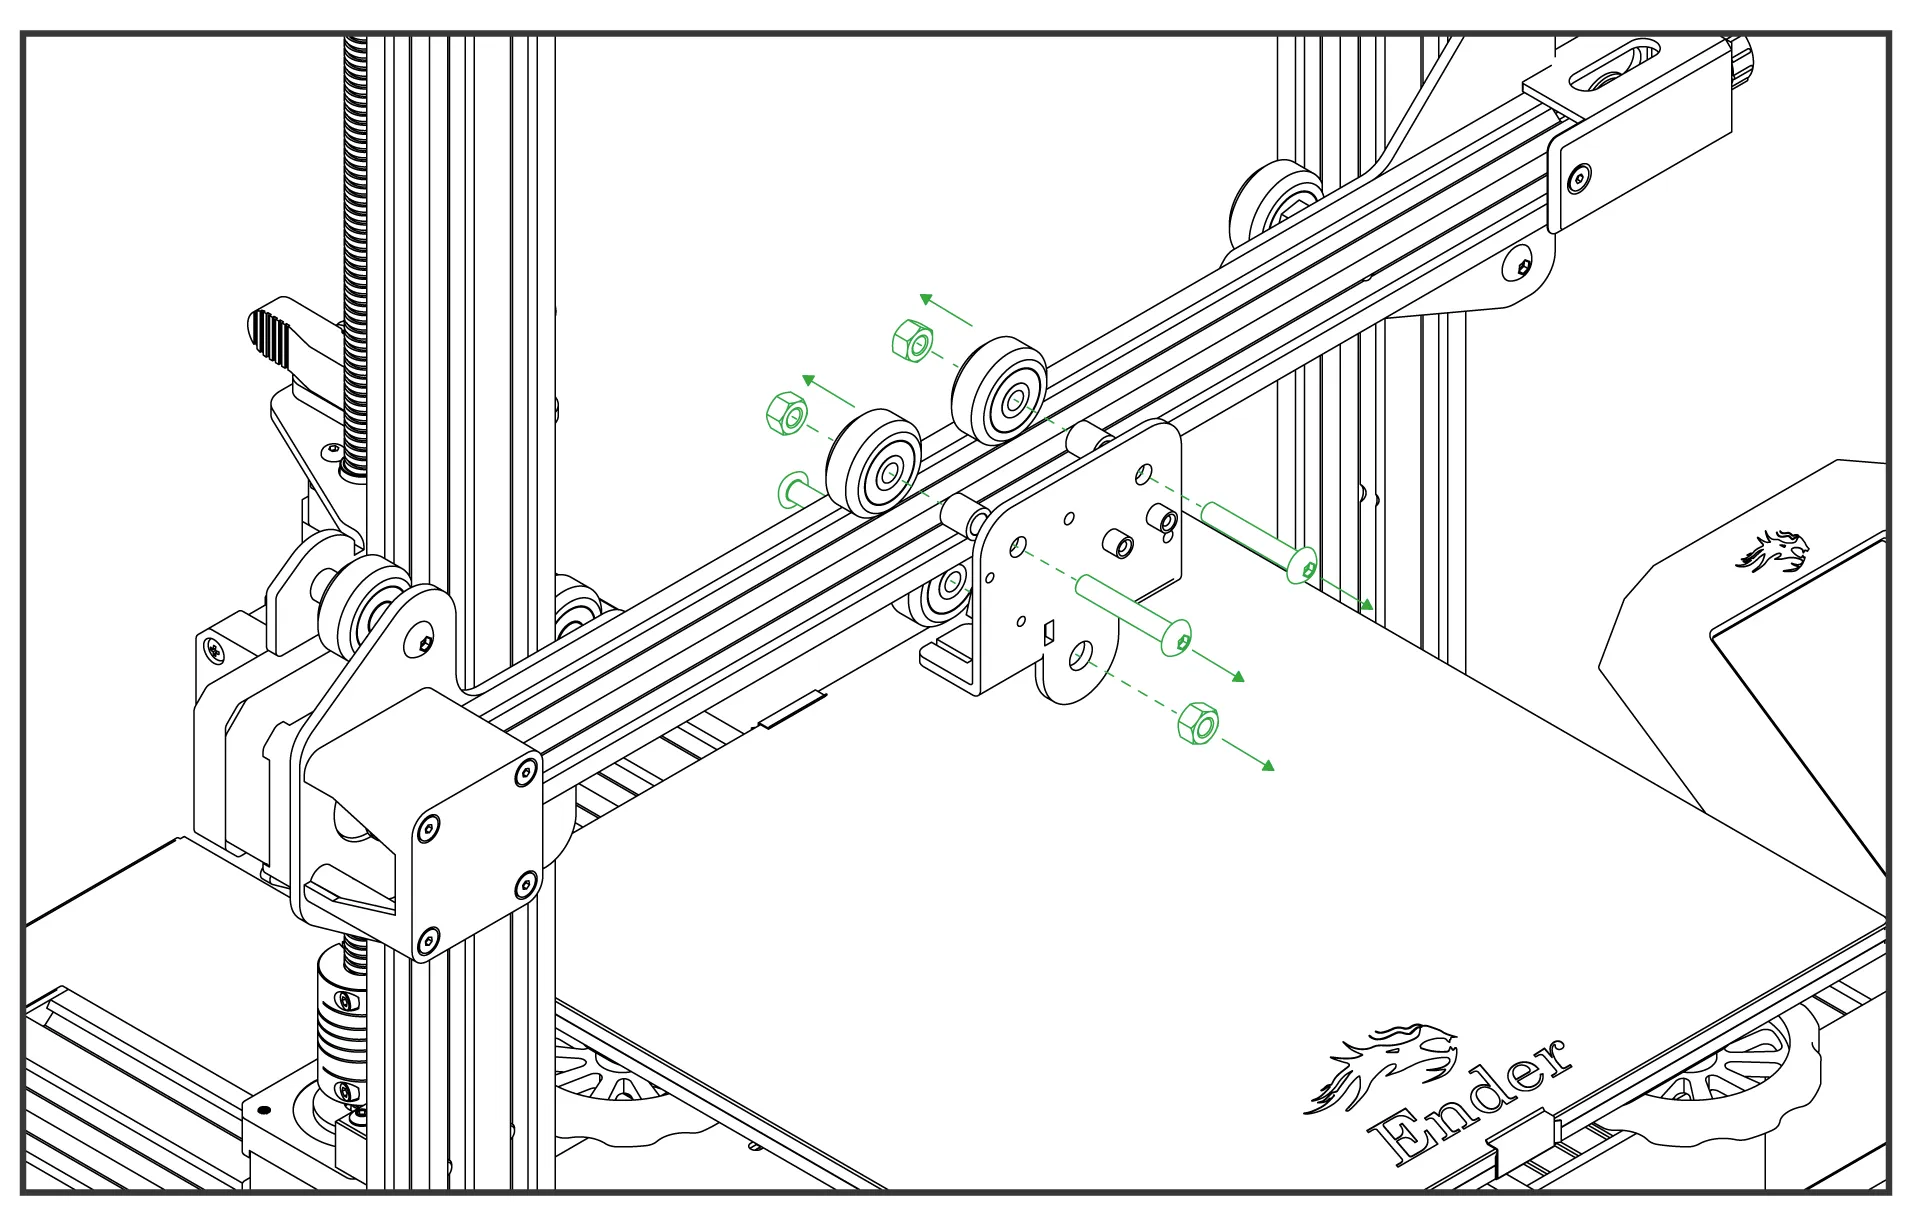
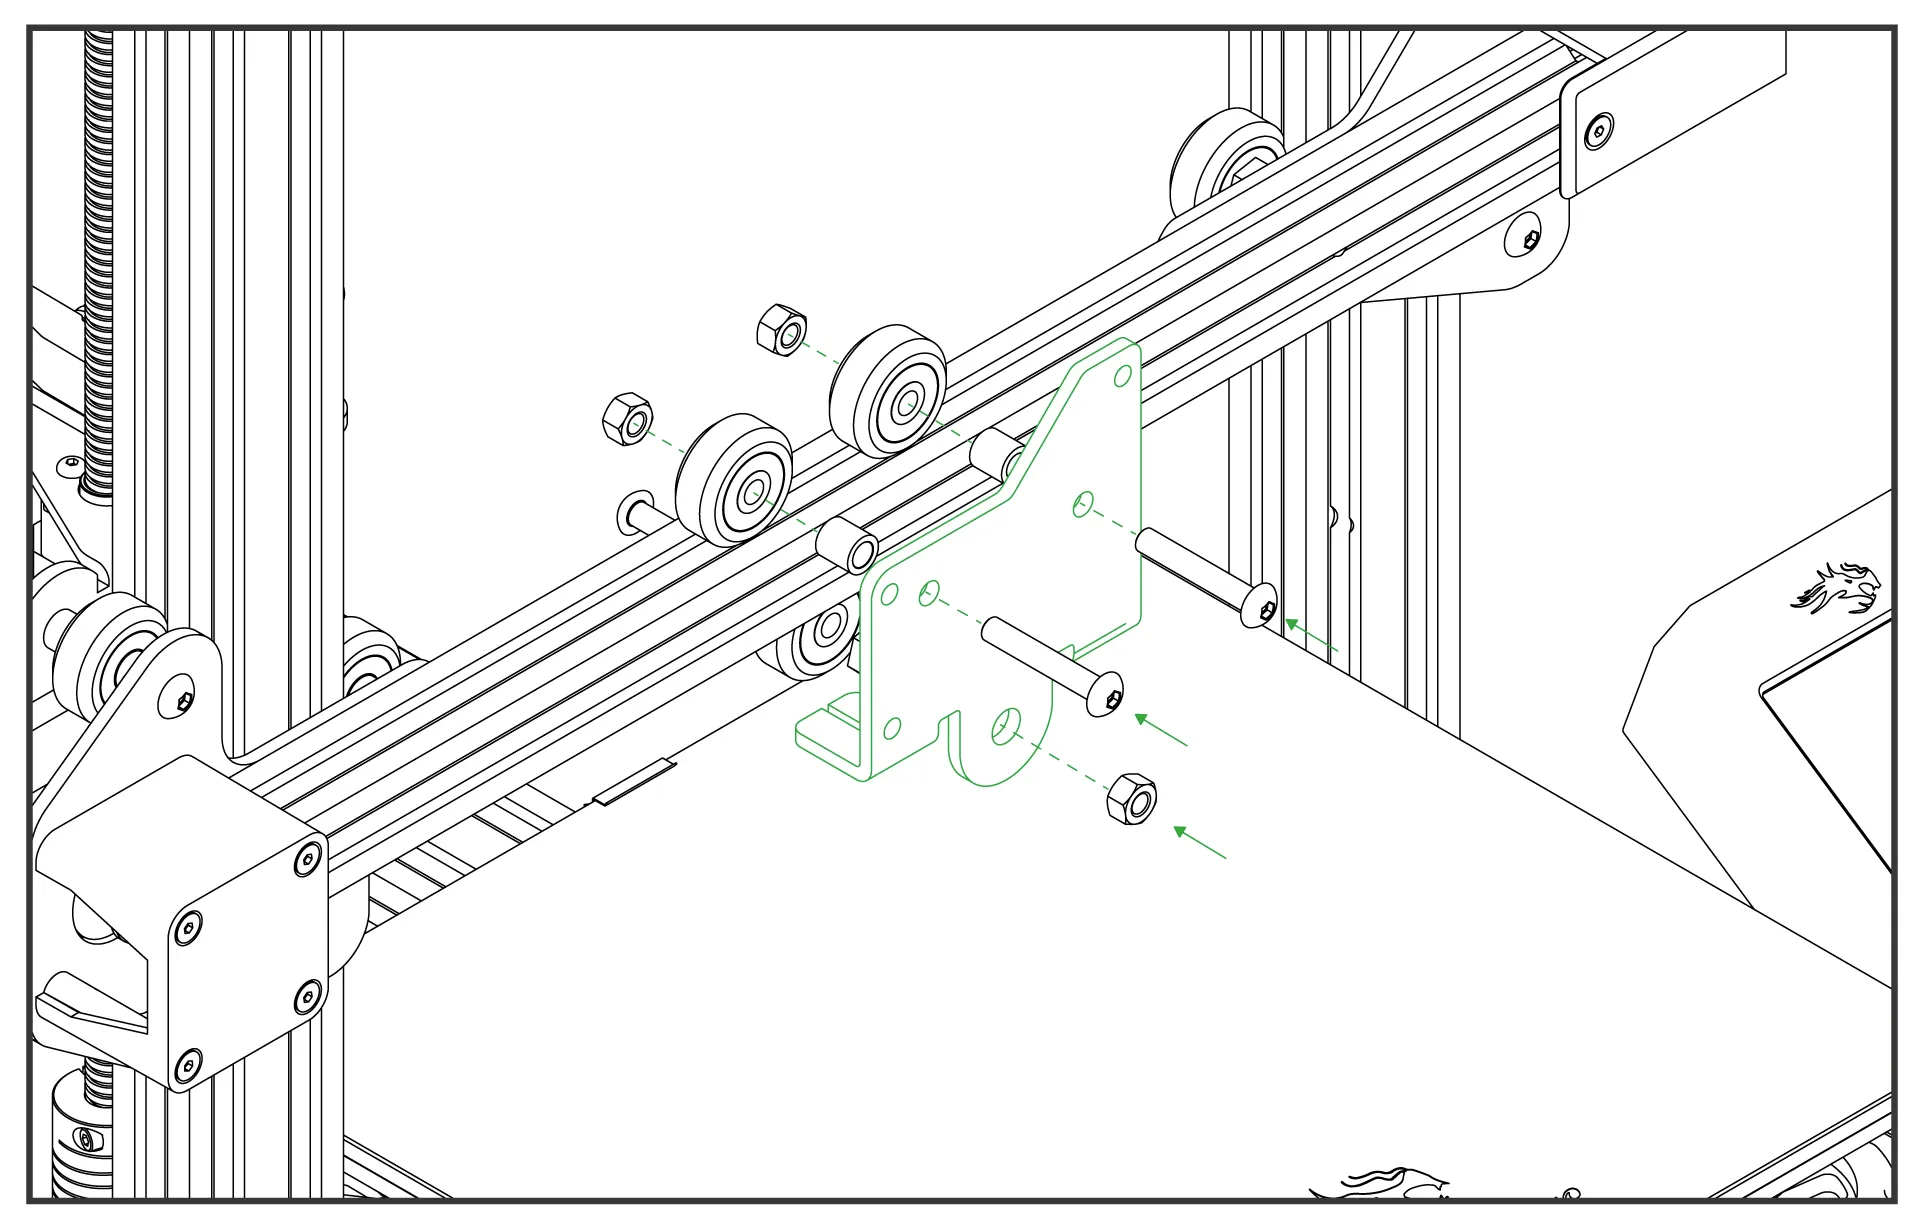
¶ 2. Attach the ChromaHead Carriage
Mount the carriage piece included with the ChromaHead onto the rail using the existing wheels and stock screws.
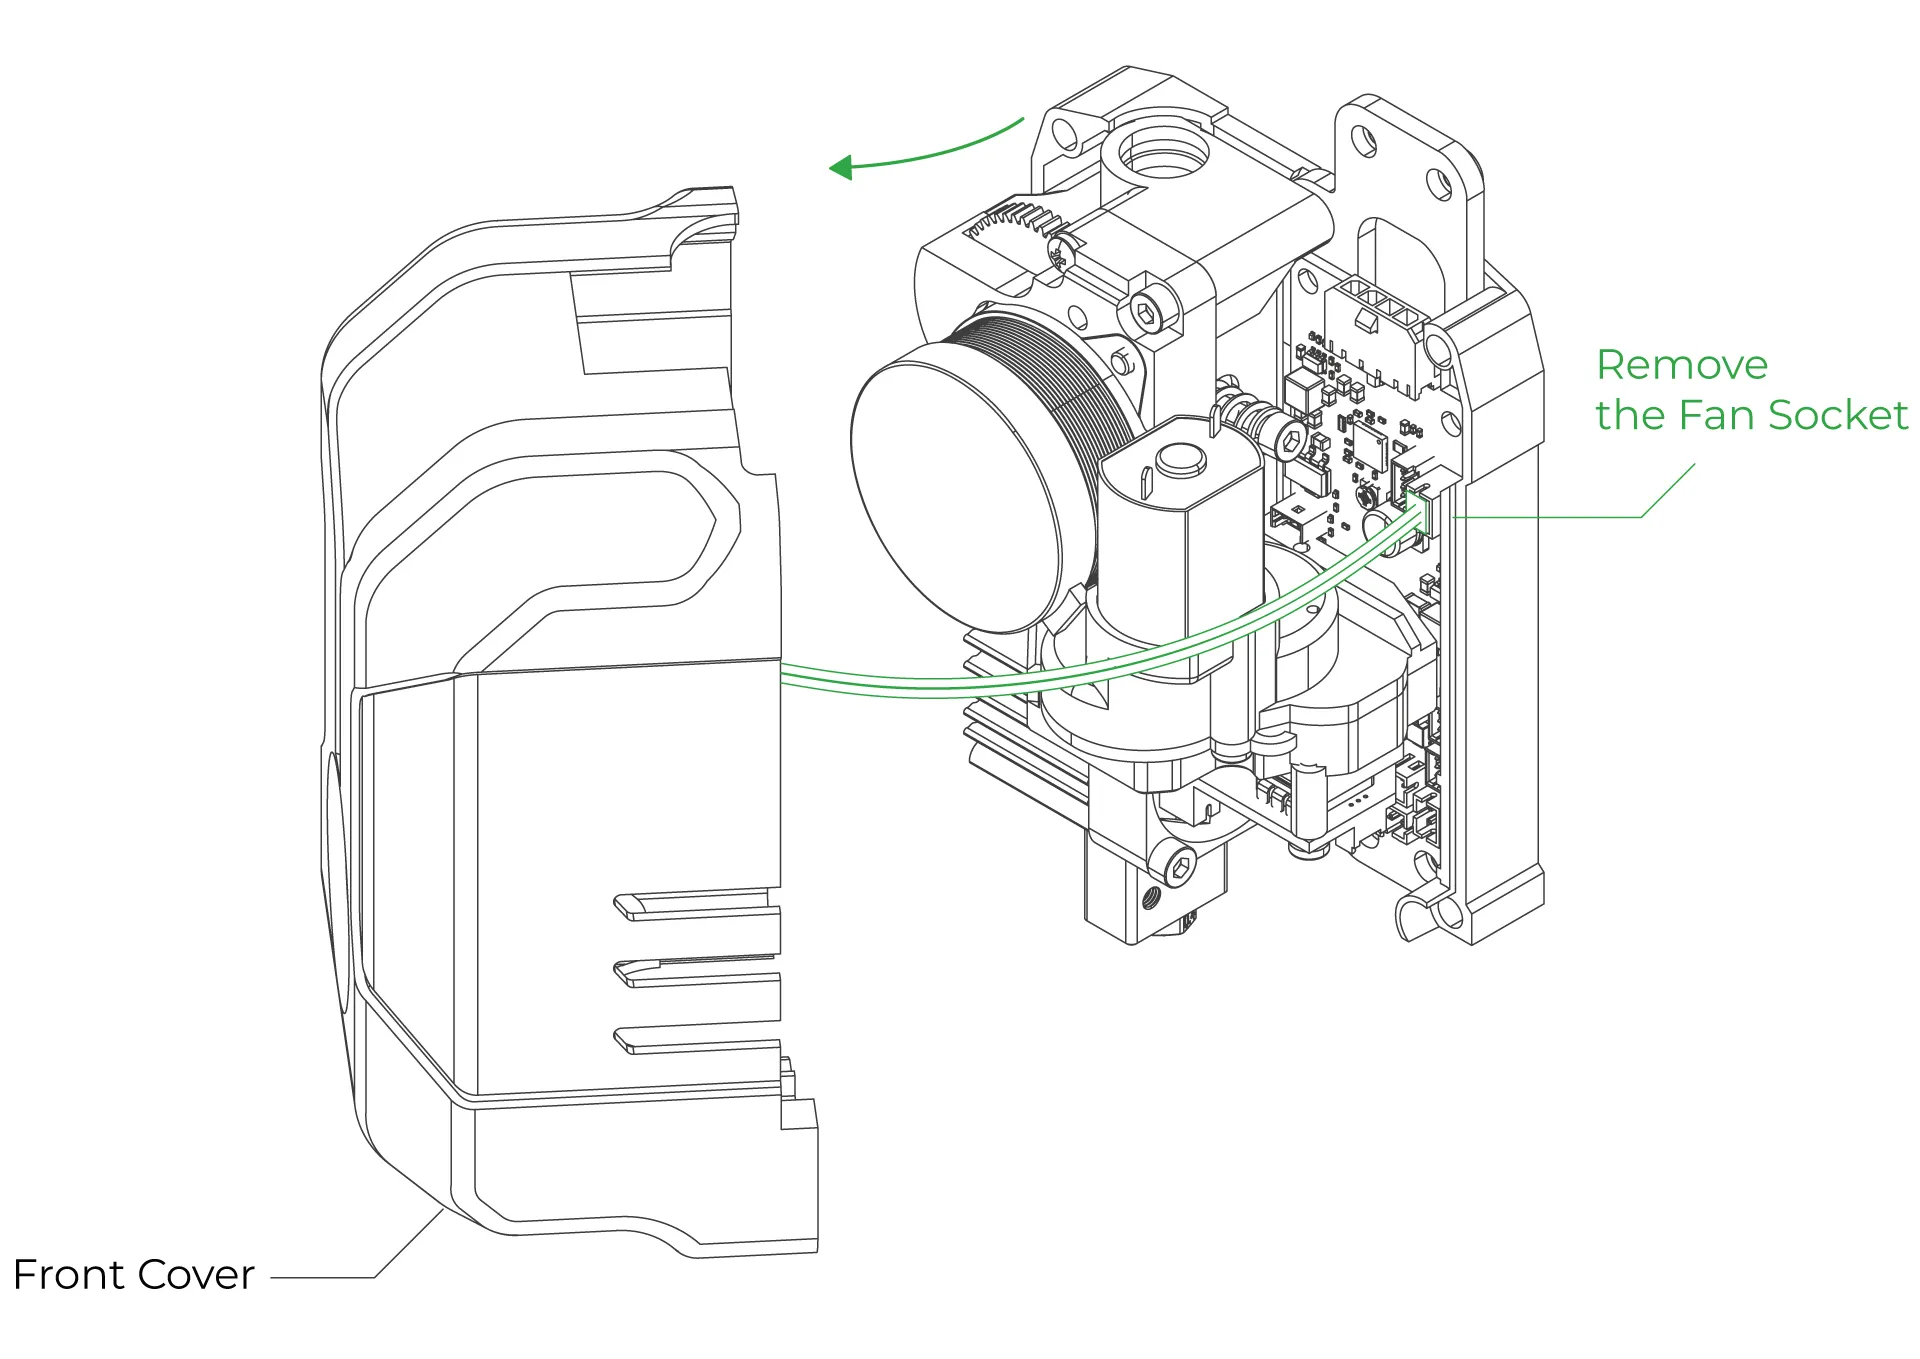
¶ 3.Remove the Front Cover of the ChromaHead
The connection screws for the ChromaHead's adapter part are located inside the front cover. Therefore, the front cover needs to be removed for installation.
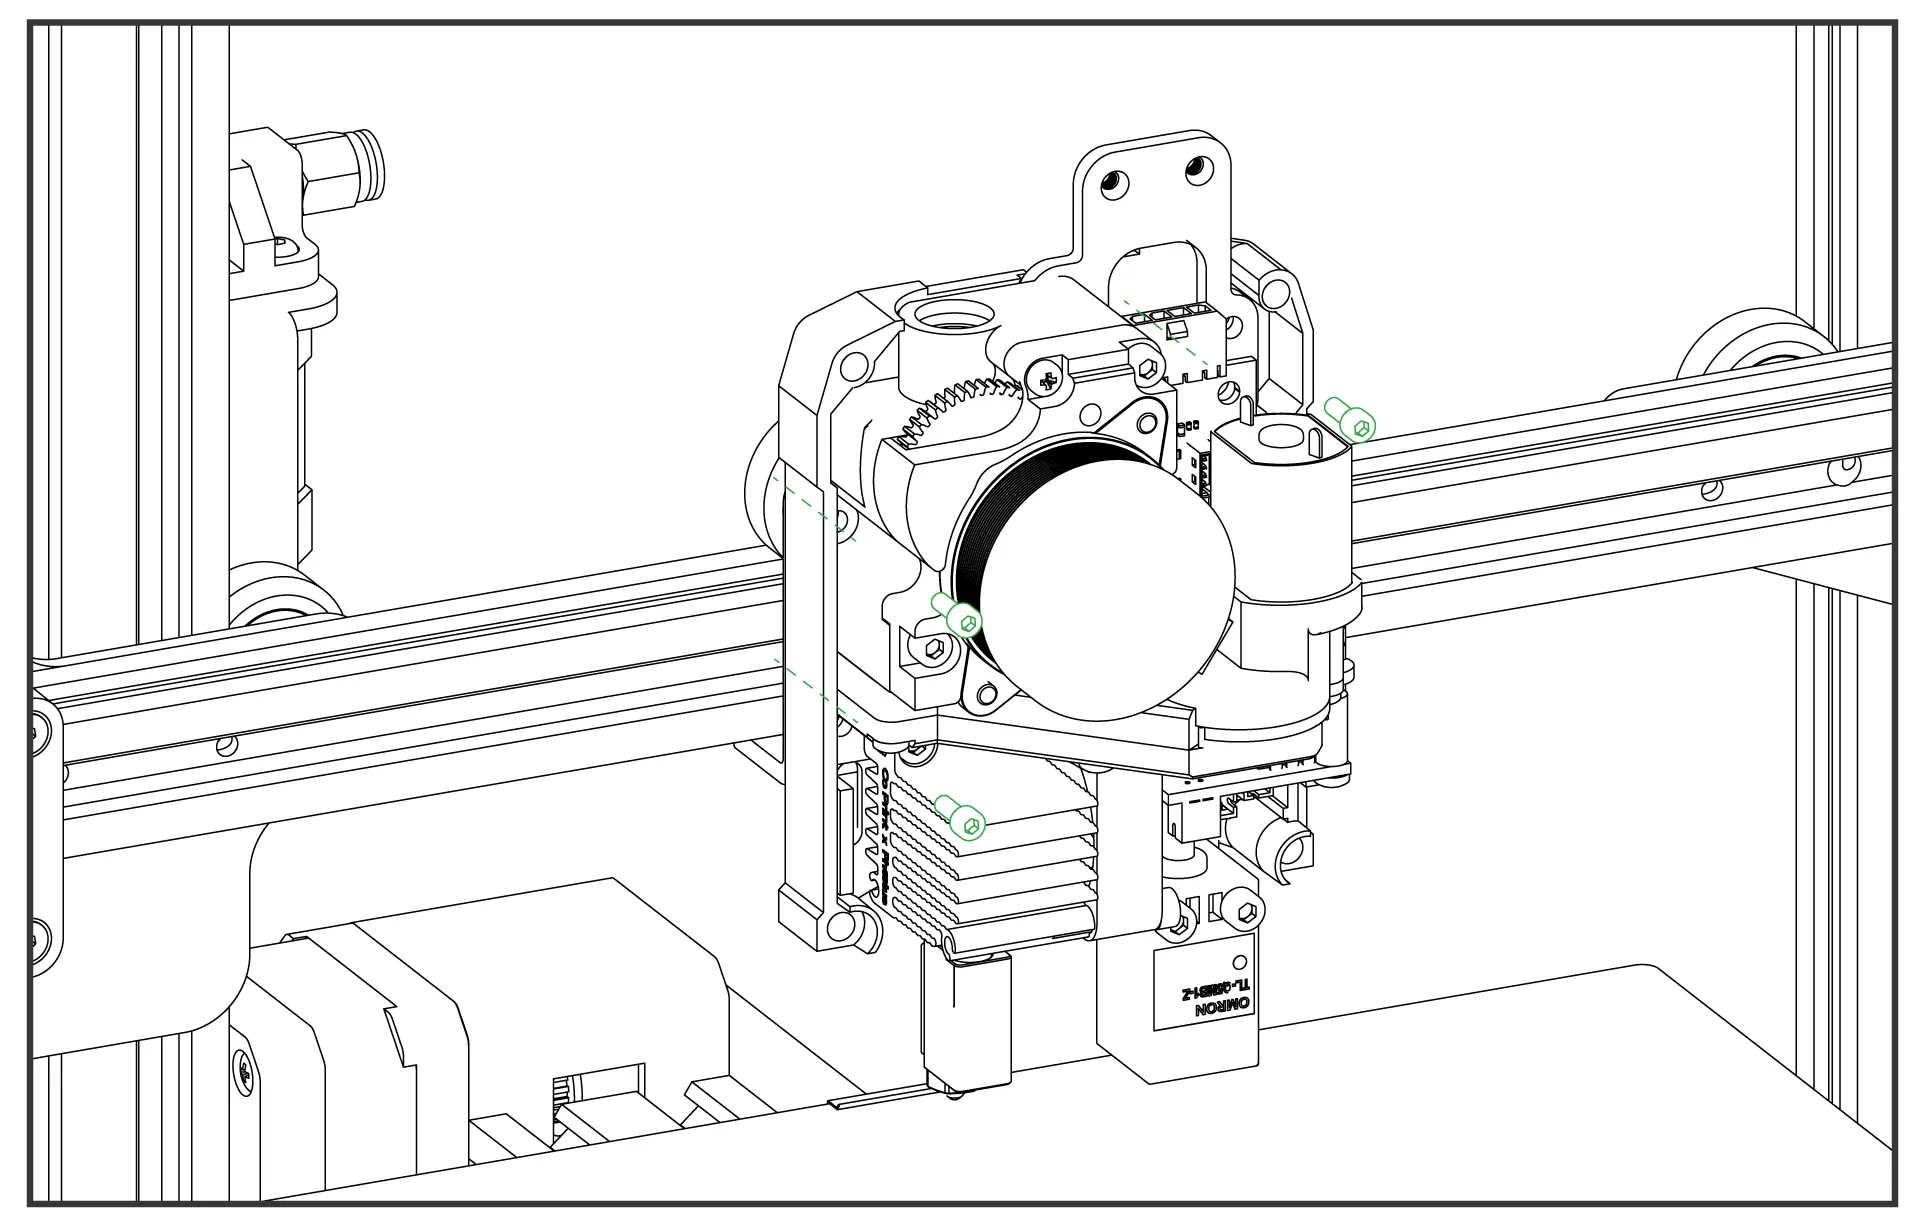
¶ 4. Attach the ChromaHead to the Carriage
Align the ChromaHead with the carriage and secure it using the three screws included in the box. Tighten the screws at the three indicated points.
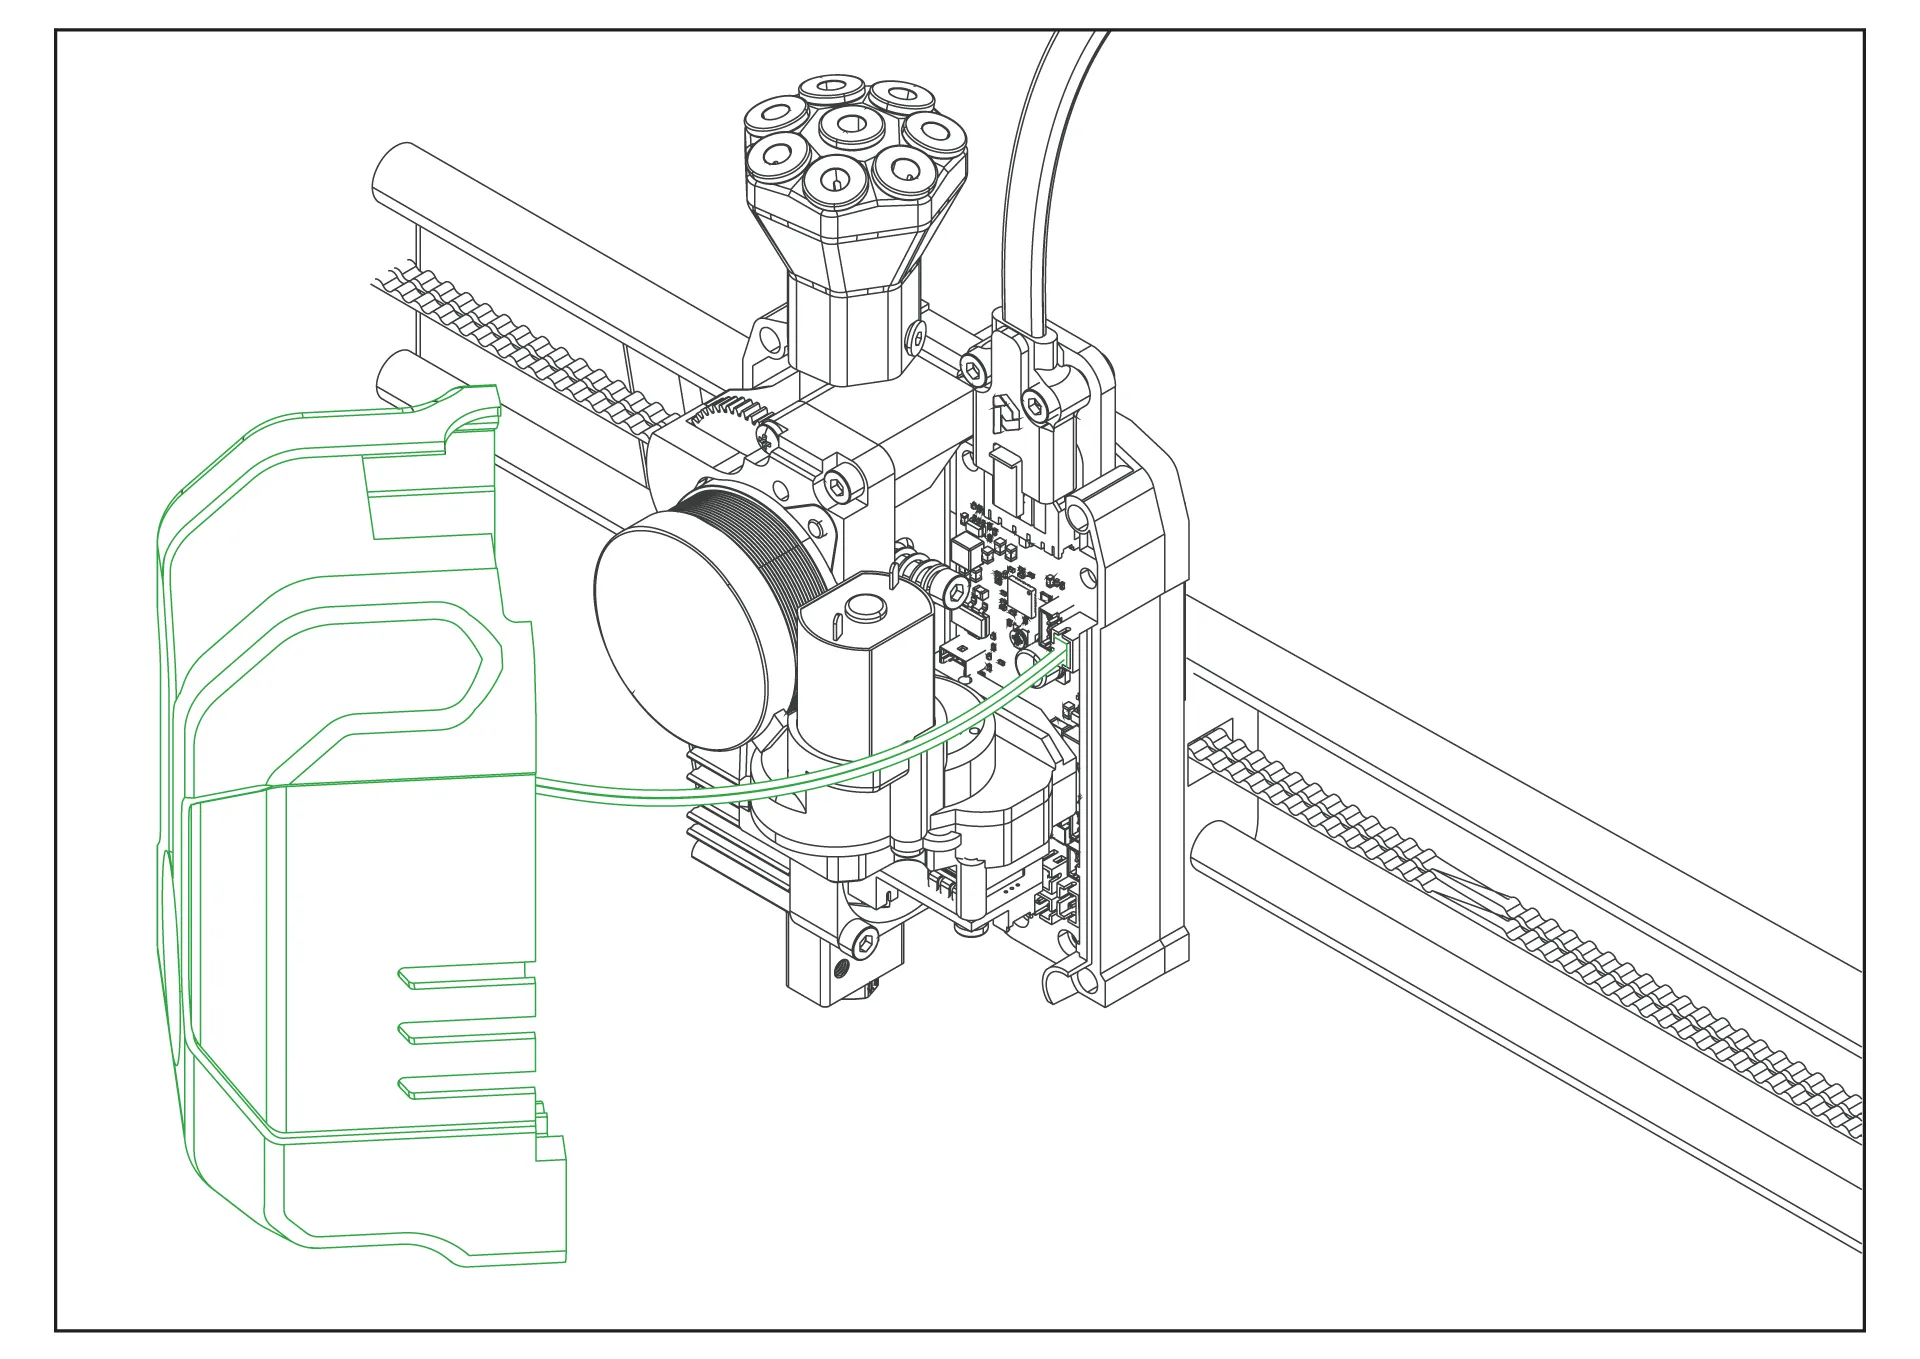
¶ 5.Head connection cable and the 8-in-1 kit mounting
Connect the head connection cable as shown in the image and make sure it is secured in place using the fastening screws. Then, rotate the 8-in-1 module and install it as shown in the image. Ensure it is tightly secured and doesn't move.
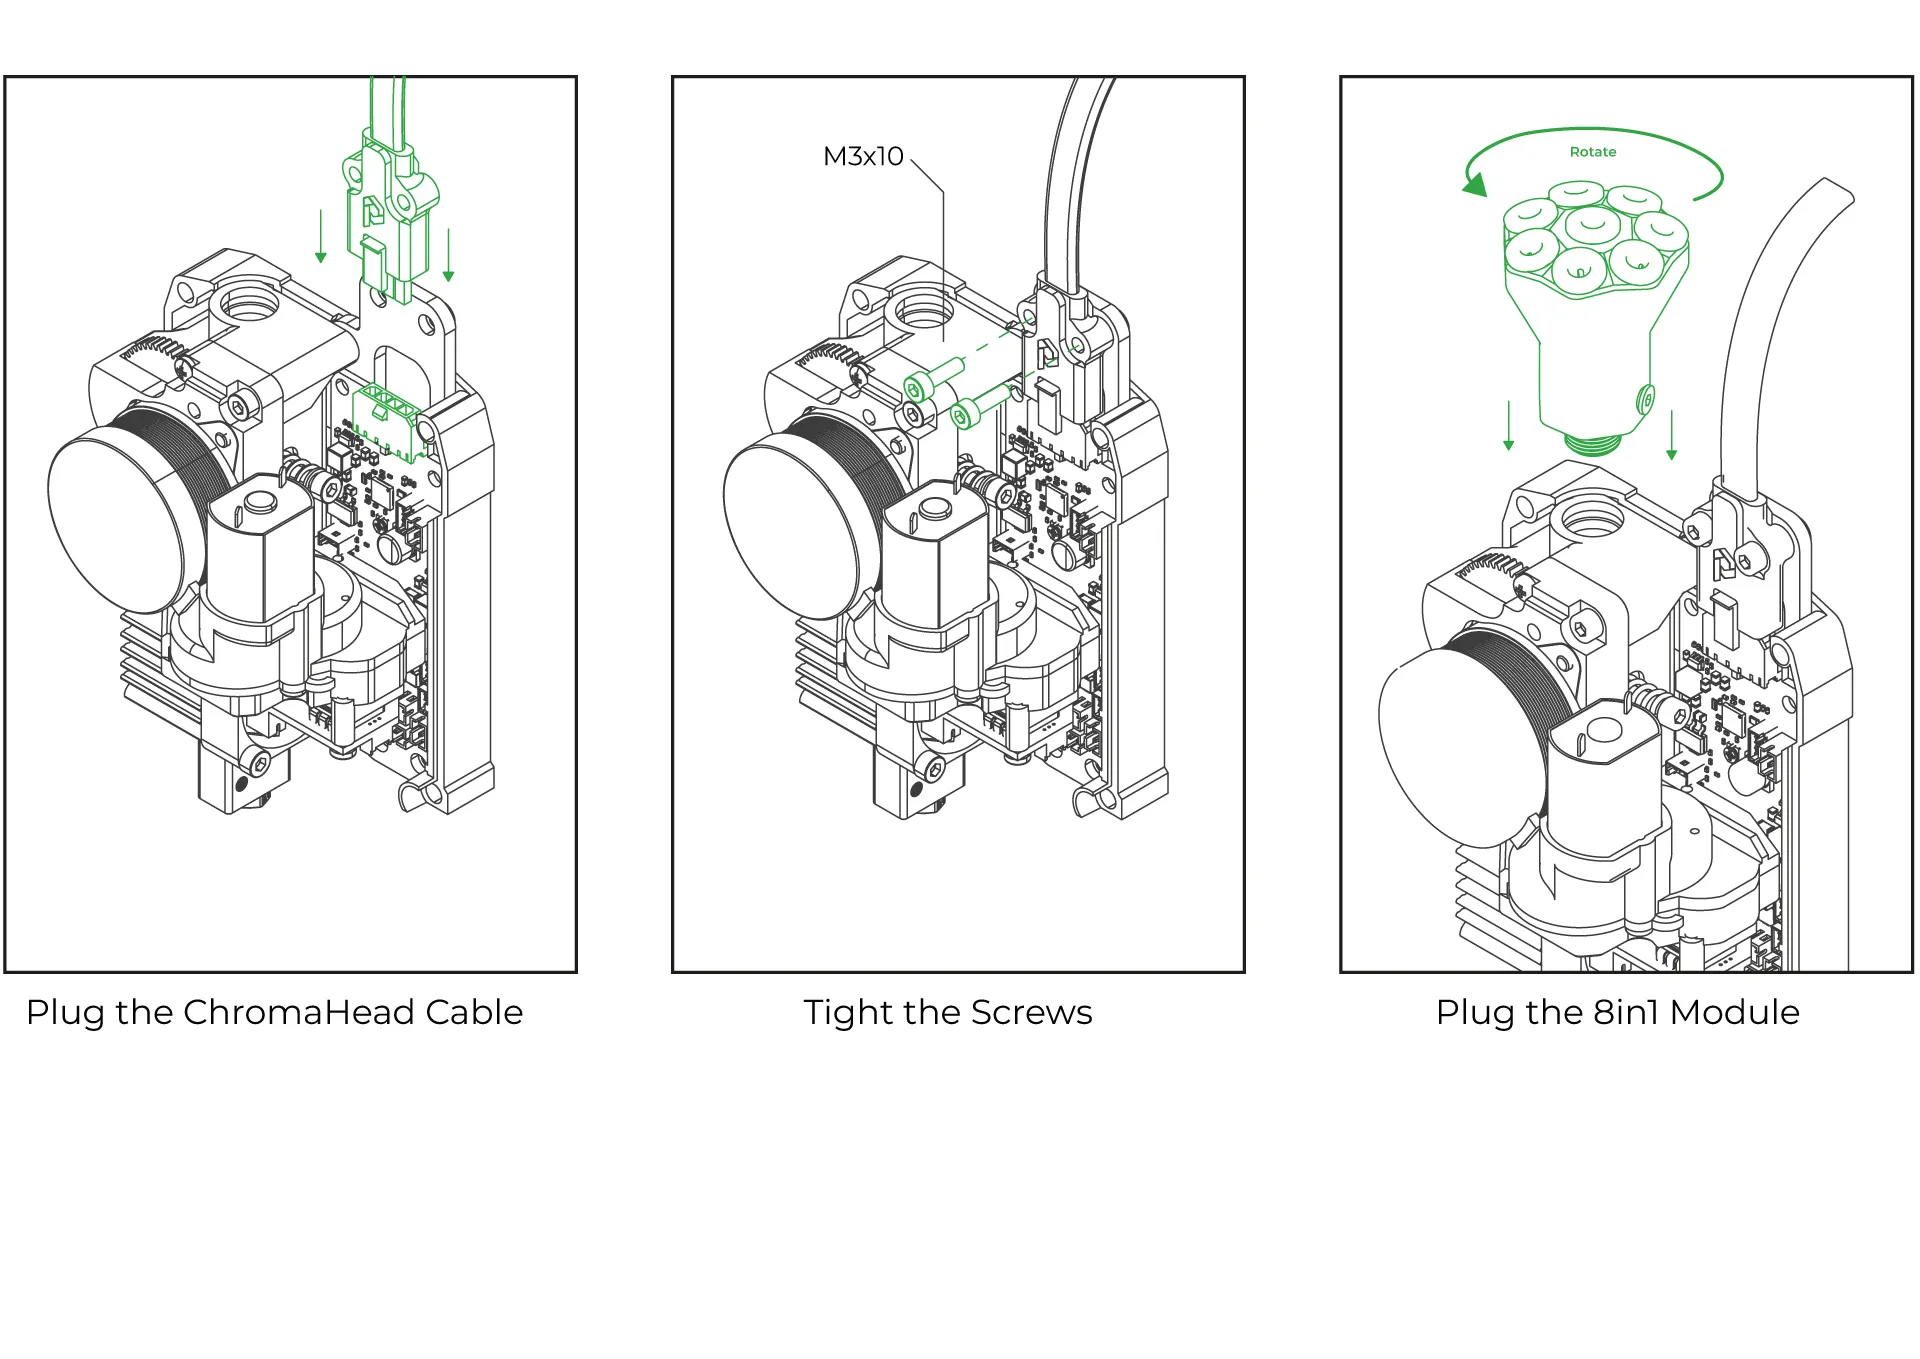
¶ 6.Close the front cover of the ChromaHead
The ChromaHead installation is complete. Reconnect the cooling fan cable from the front cover to the designated spot on the control board, and then close the cover.
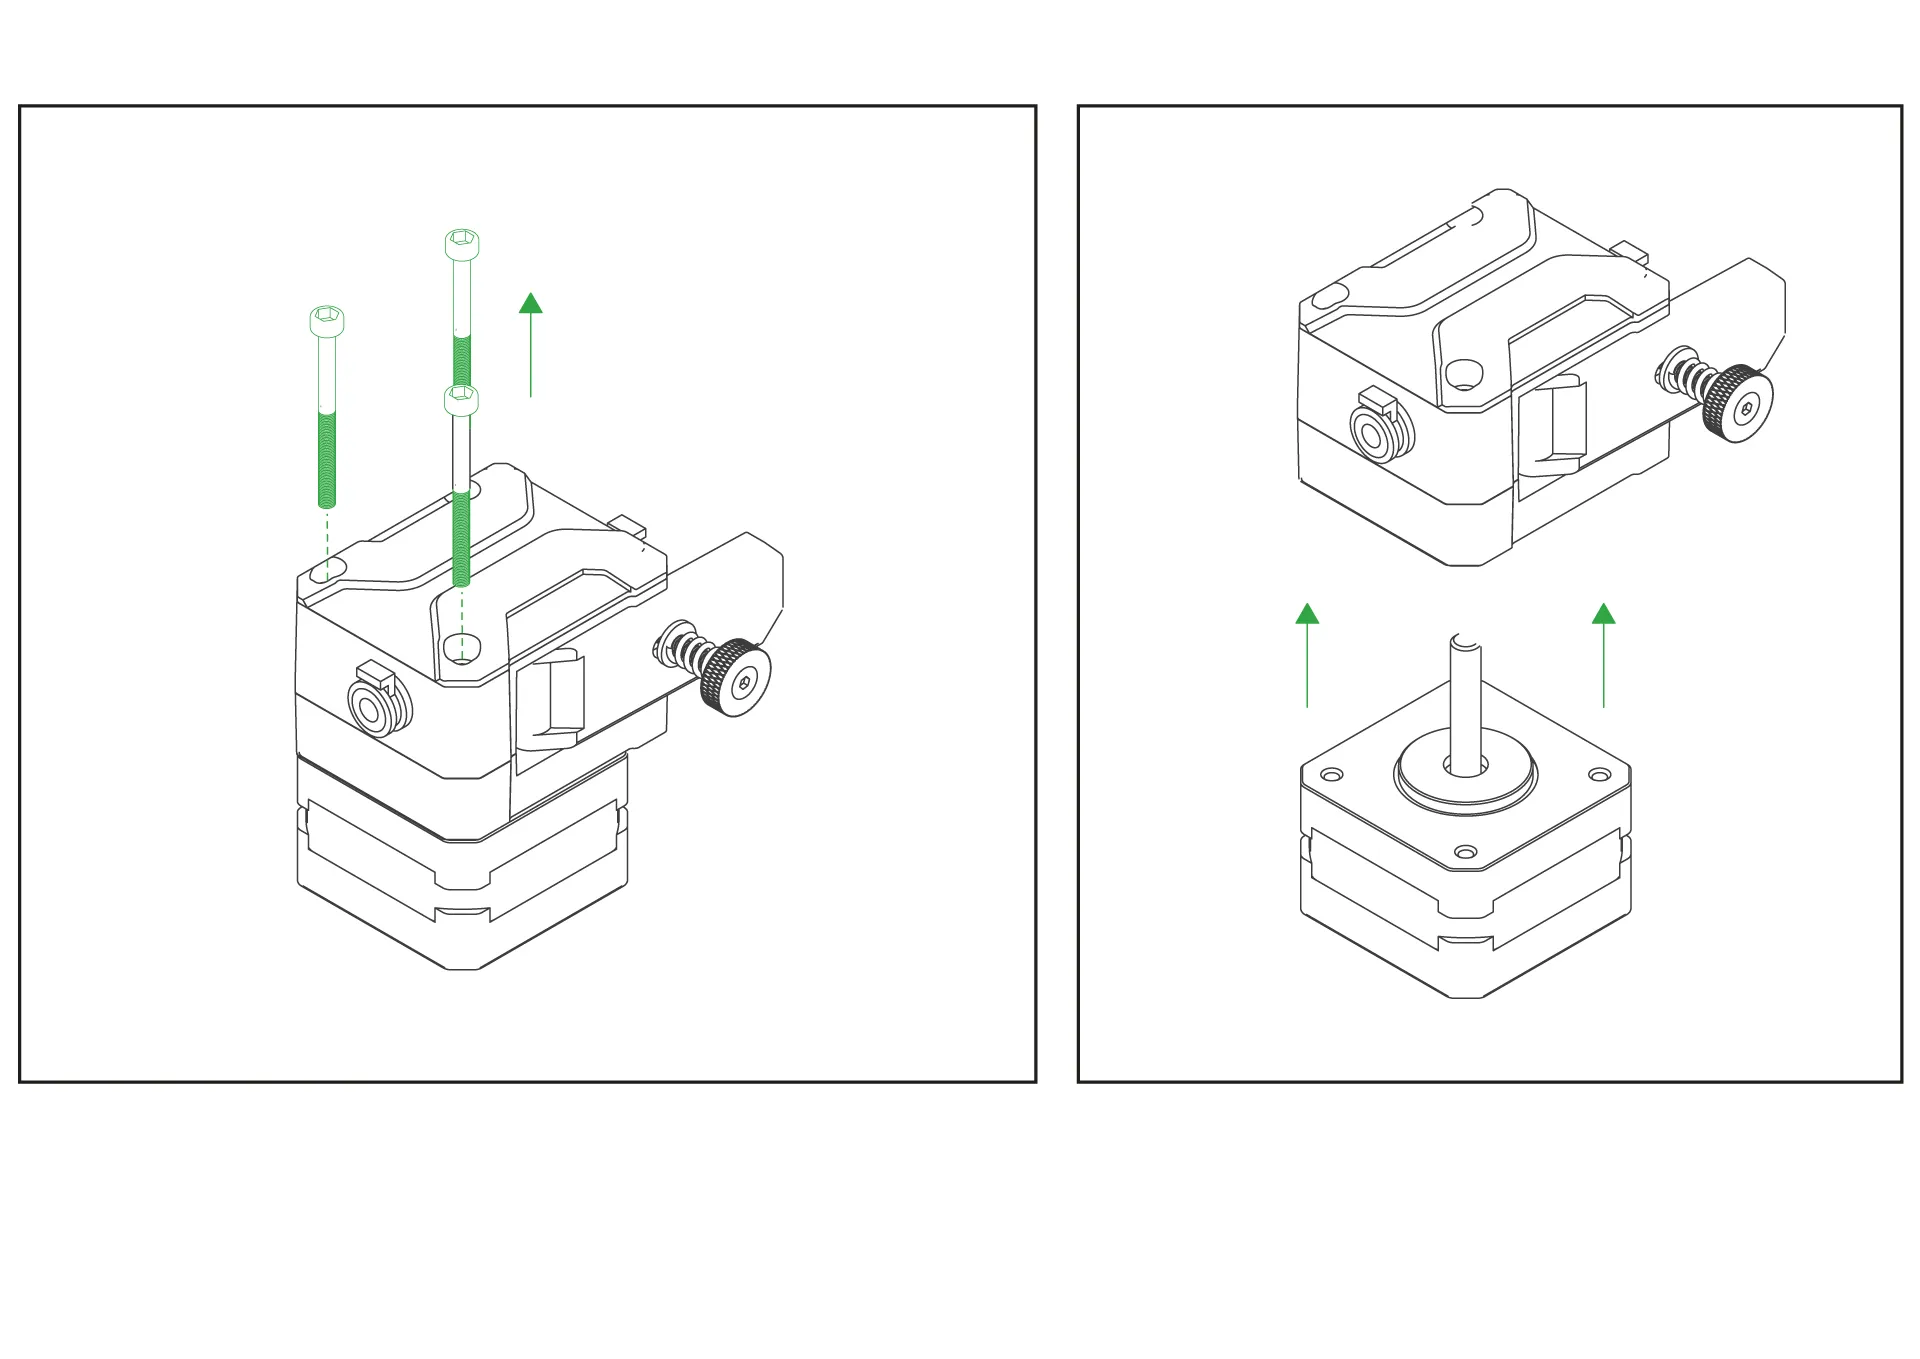
¶ 7.CX-I Extruders Installation
The CX-I Extruders come pre-assembled with the motor and plastic components inside the box. However, in order to mount them onto the extruder holder, the motor and extruder sections need to be separated. To do this, remove the 3 screws on the top of the extruder and separate the motor from the extruder section.
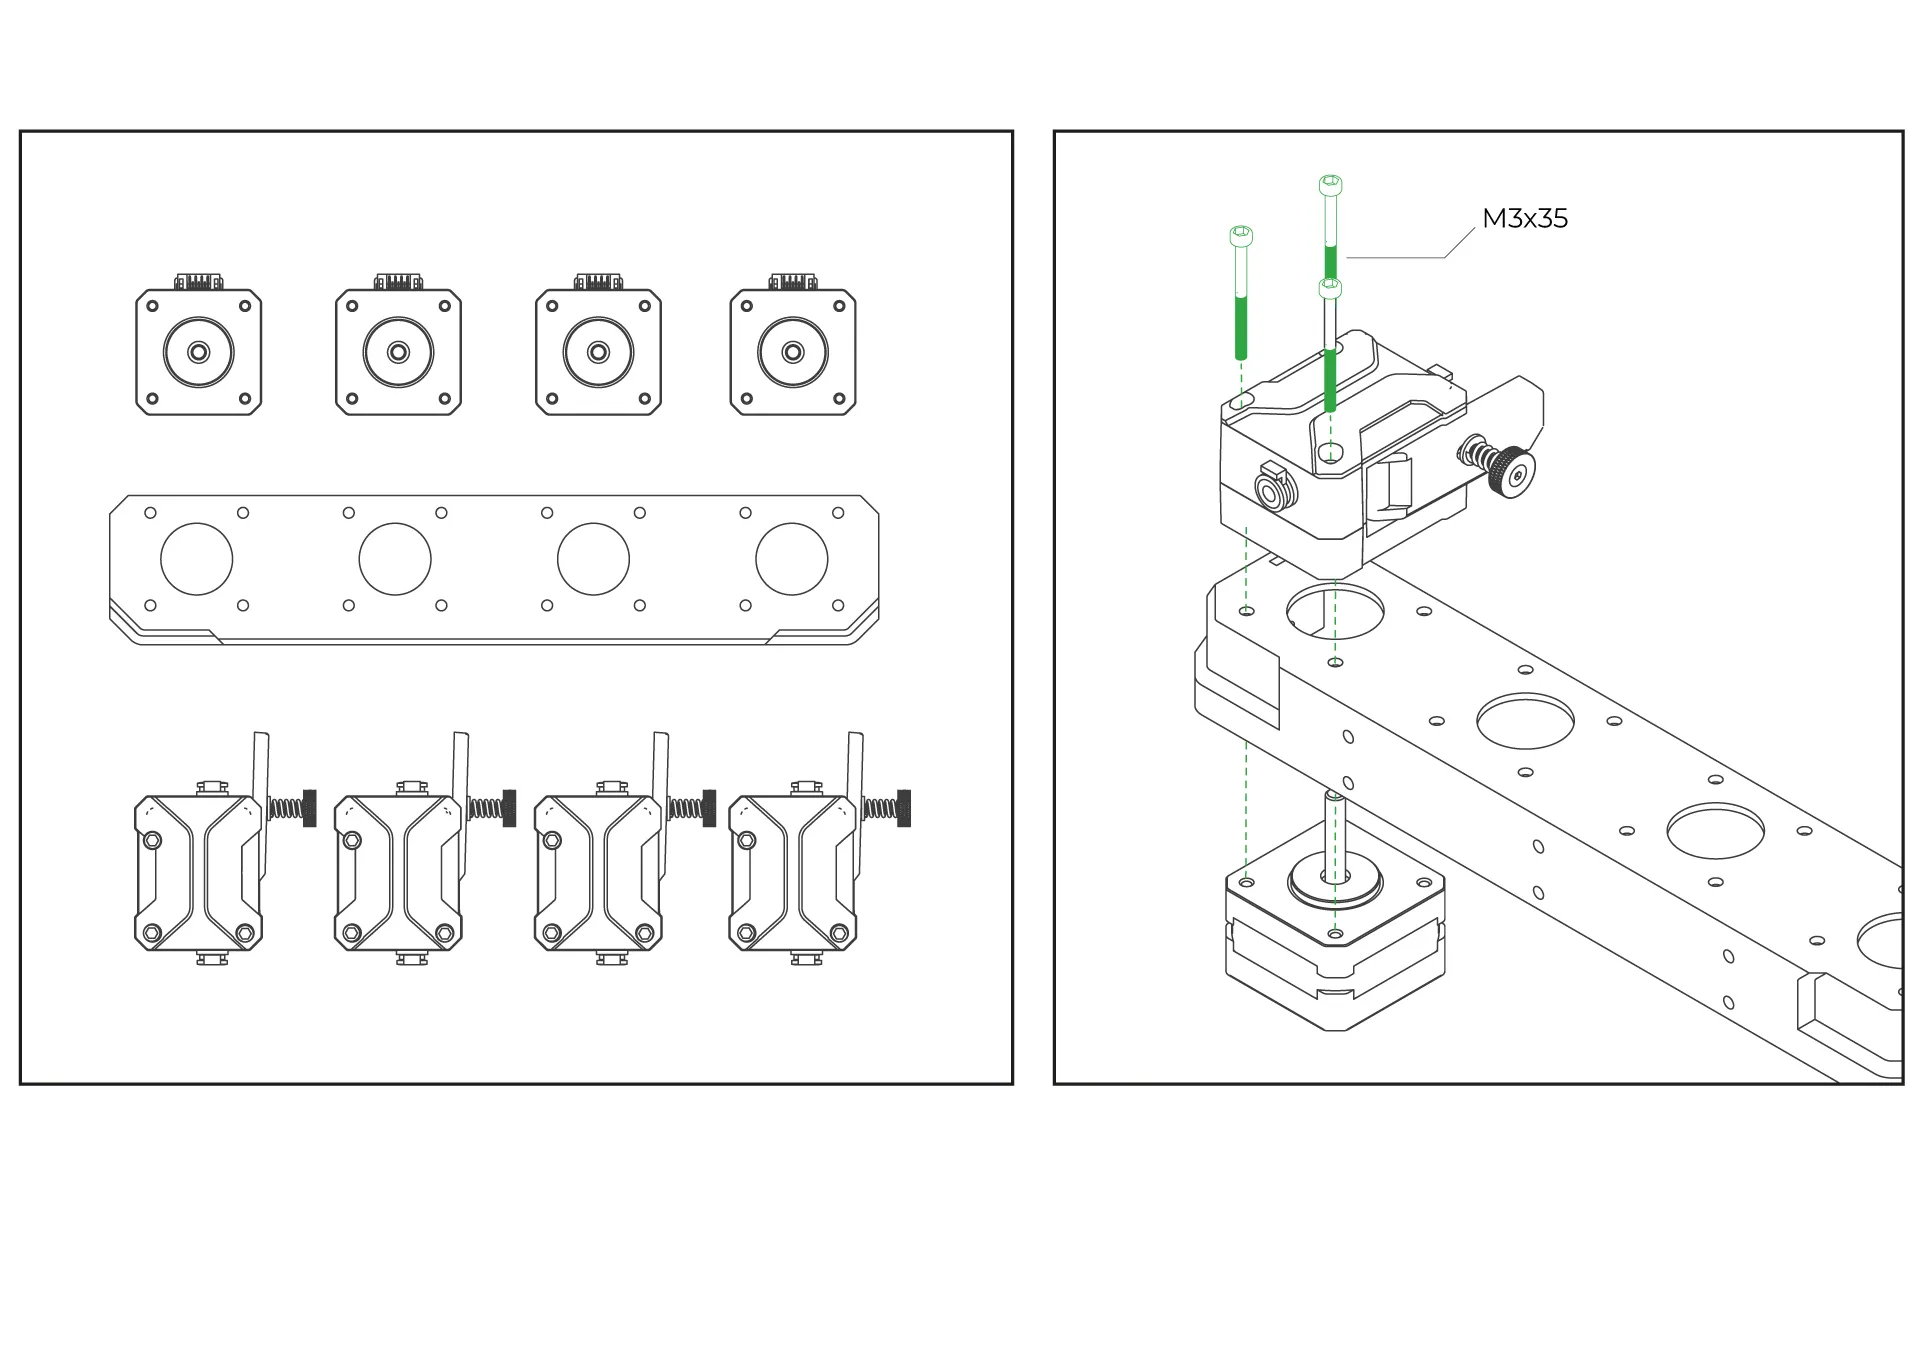
¶ 8. Place the extruders onto the extruder holder.
Place the extruder on the top side of the printable CX-I holder you downloaded. Position the stepper motor on the bottom side, and then securely fasten the extruder using the three screws on it to complete the assembly.
¶ ChromaPad Setup on Creality Ender 3 Pro
After completing the mechanical setup of ChromaHead and CX-I Extruders, let's move on to configuring your printer with ChromaPad.
¶ 1. Select your language
¶ 2. Accept privacy policy
¶ 3. Select your timezone
¶ 4. Give your ChromaPad a name(this will be device name visible on the network)
¶ 5. Connect your wifi network
¶ 6. Update system if available
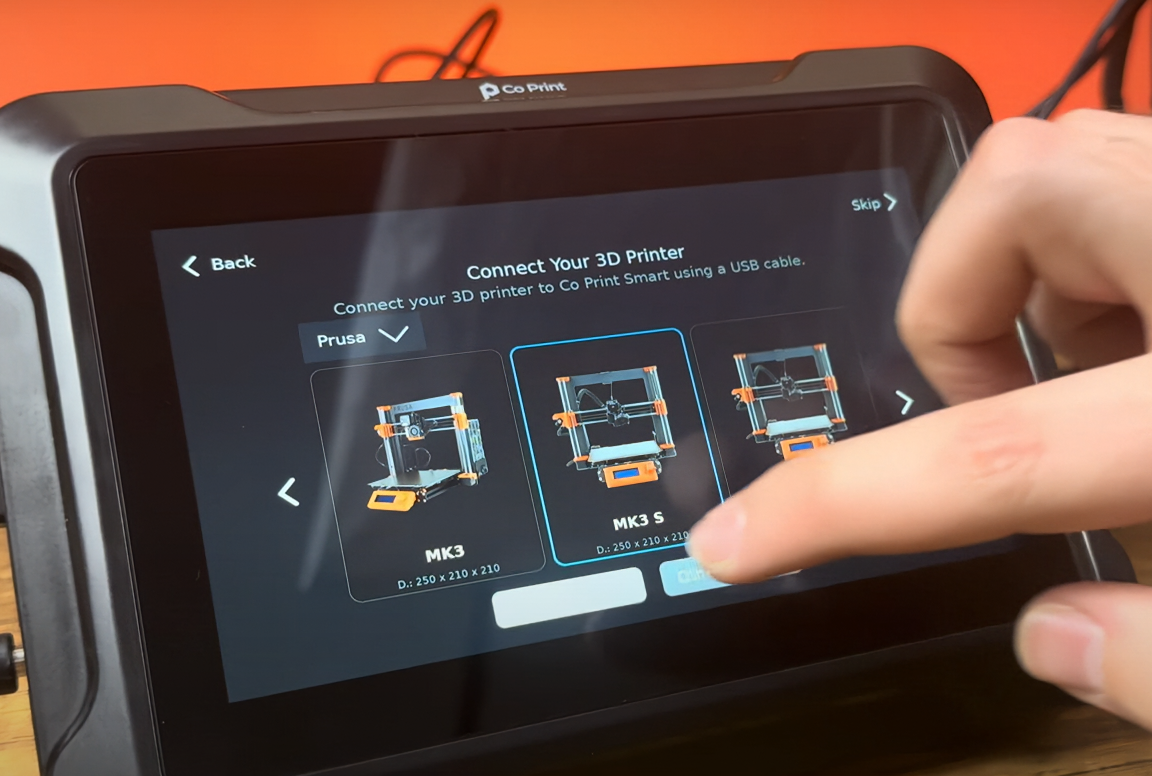
¶ 7. Select Ender 3 Pro model under the Creality brand
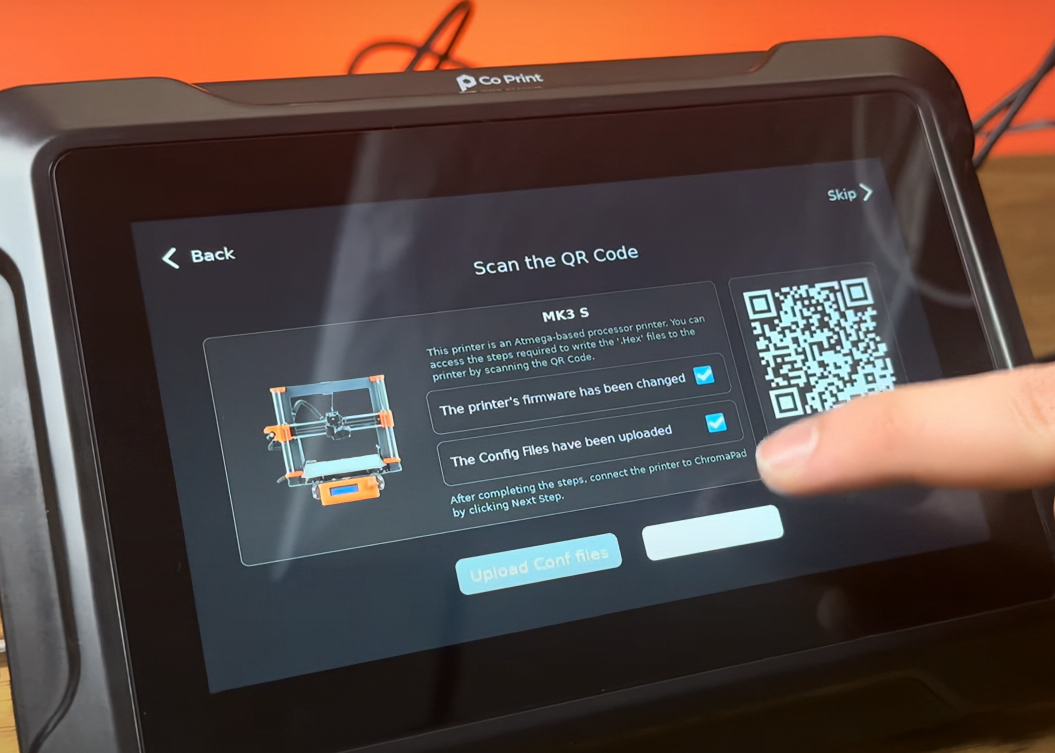
8- confirm both options shown for the setup steps and click next
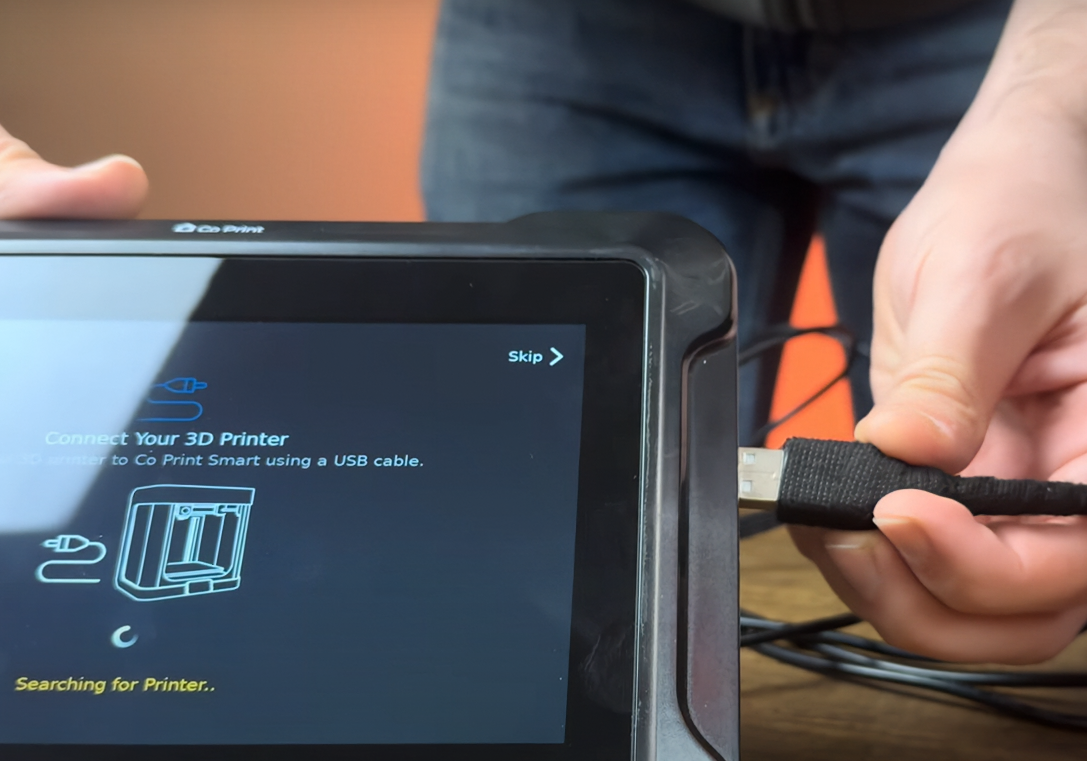
9- Connect the 3D printer to the ChromaPad. Use the usb cable for establish the connection

¶ 1.13) Access Mainsail
1- To access Mainsail, get the ChromaPad's IP address.
2- Use the IP address obtained to establish an SSH connection via terminal or cmd.
Type "ssh cp@(ChromaPad's ip)" then hit enter. The password is "coprint".
3- Log in to KIAUH by typing "./kiauh/kiauh.sh" command.
4- Go to the [Build + Flash] section which is in Advanced section.
(Main Menu-->Advanced-->Build+Flash)
5- Go to Micro-controller Architecture section and be sure that Atmega AVR selected. Also go to Processor model section and be sure that atmega2560 selected. Wait for the process finish.
6- Type 1 (Regular flashing method) and type 1 again (USB) after that type the appropriate number which indicates your printer's brand. Wait for process finish.
7- Download the necessary config files. (You can find the necessary files on our GitHub page.)
9- Upload the downloaded config files to mainsail in MACHINE menu.
10- Open the 'printer.cfg' file and click on the DEVICES tab located top right. Copy the usb path by hardware for your printer under the usb-Creality and paste it into the 'serial' below '[mcu]' then save it and restart.
¶ Your printer is ready to use.
¶ 2) Post-Installation OrcaSlicer Configuration
After completing the installation, you also need to configure OrcaSlicer. We recommend downloading the latest version of OrcaSlicer for optimal compatibility. You can use the link below to get the most recent release.
OrcaSlicer Download Link - Download
-
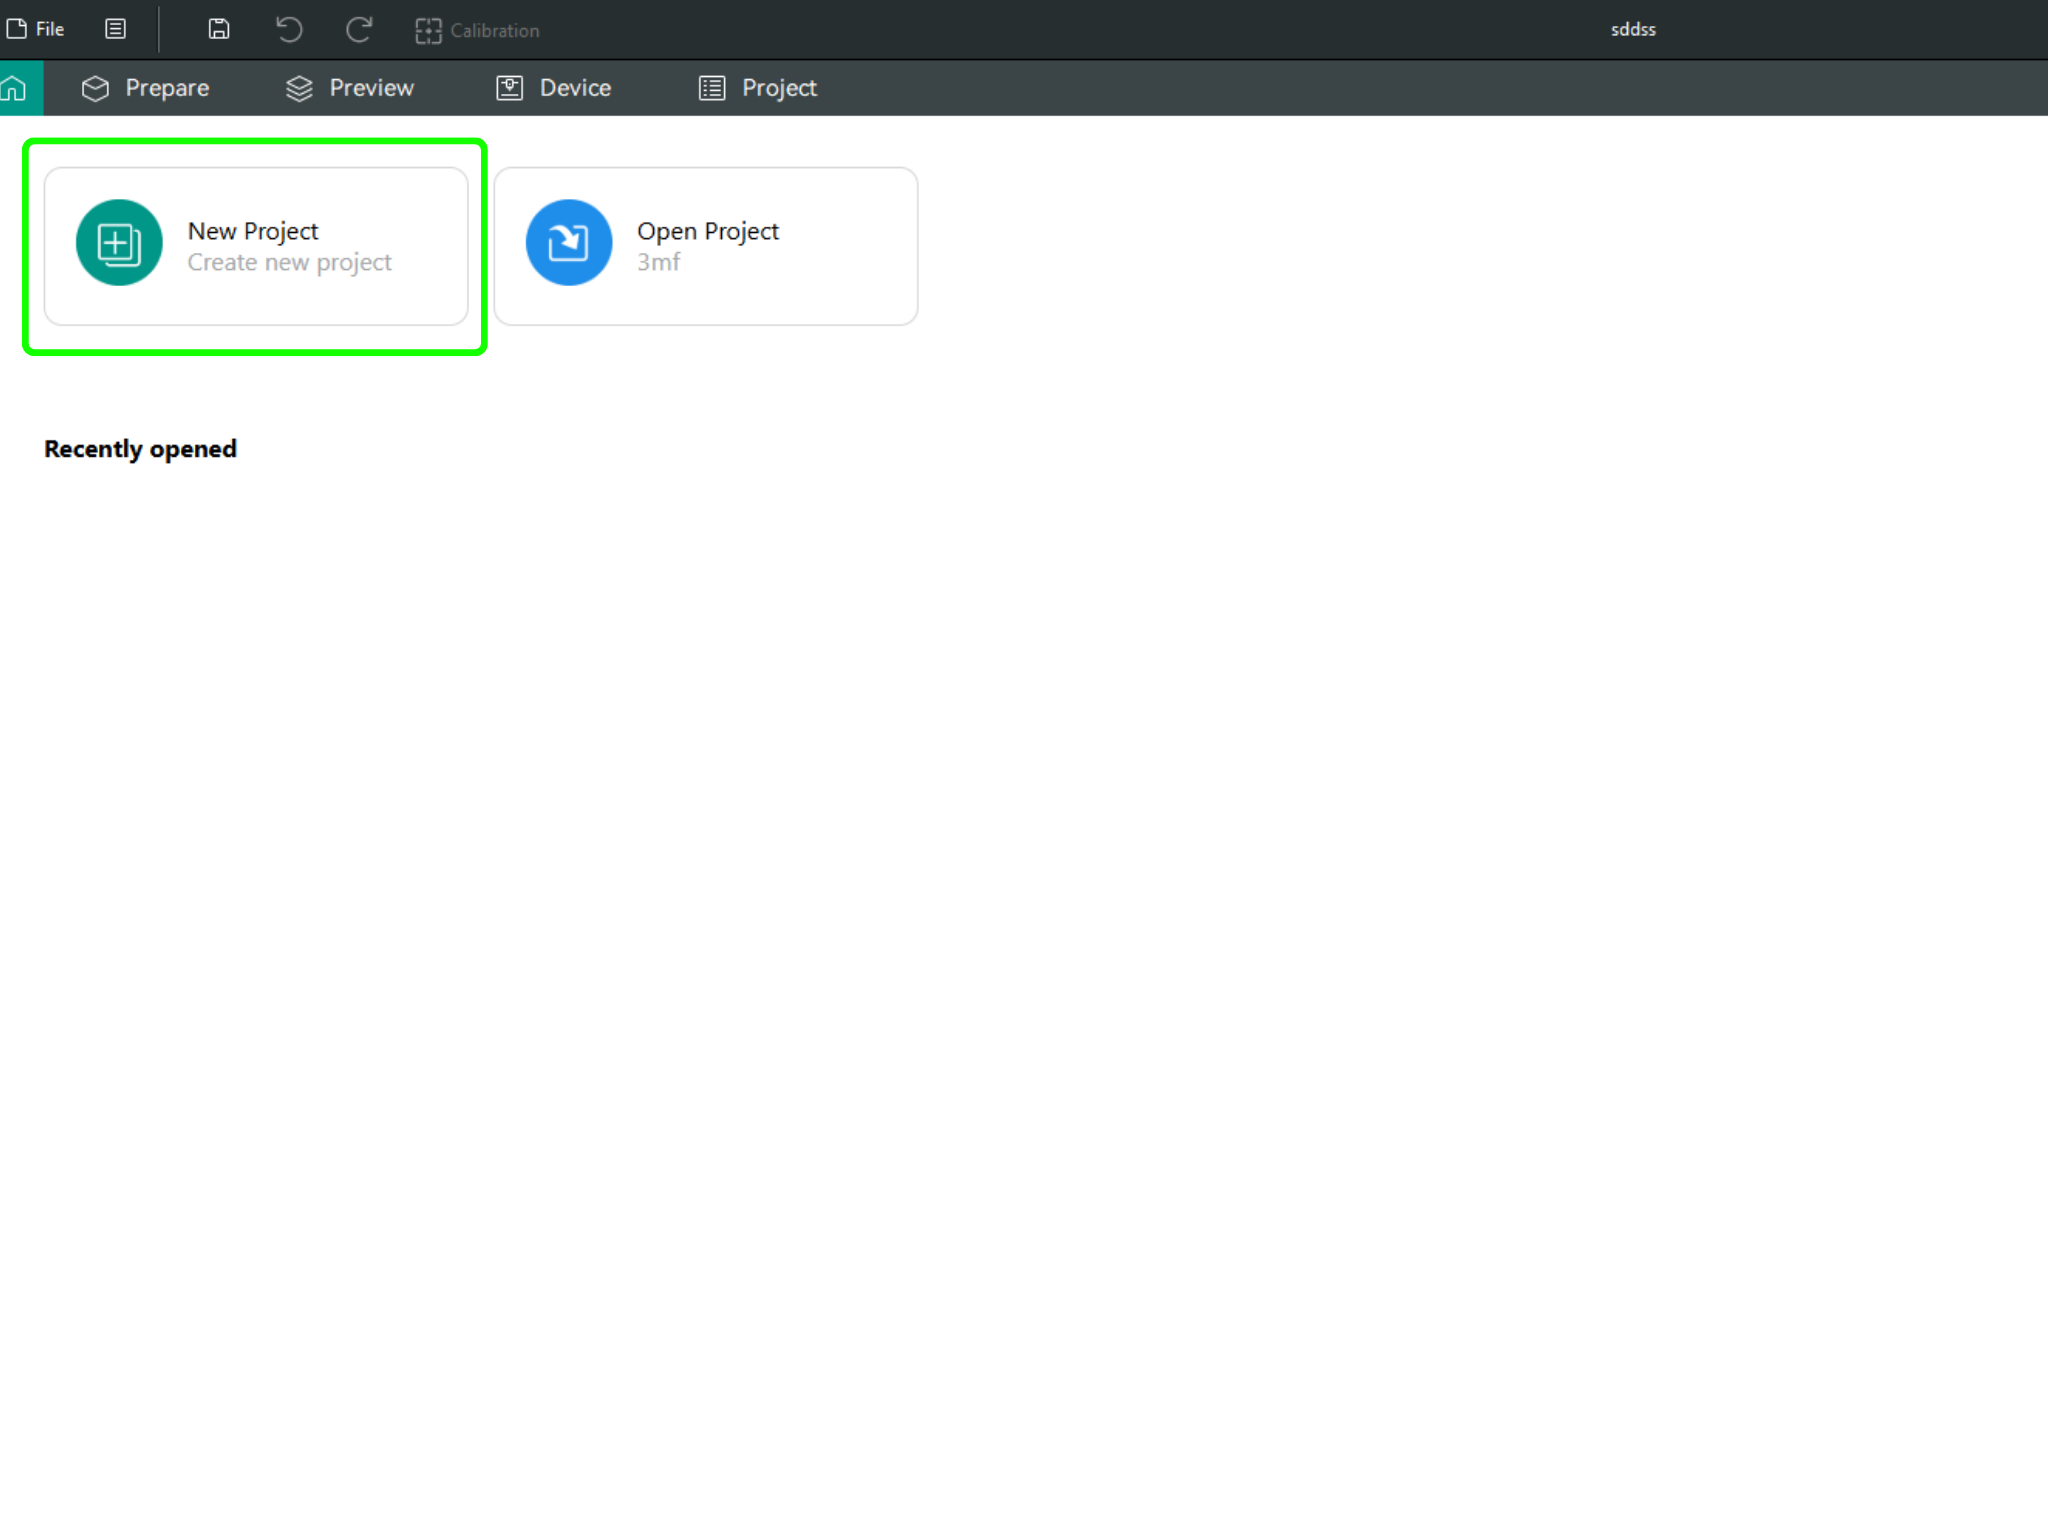
After downloading OrcaSlicer, click on “New Project”.
-
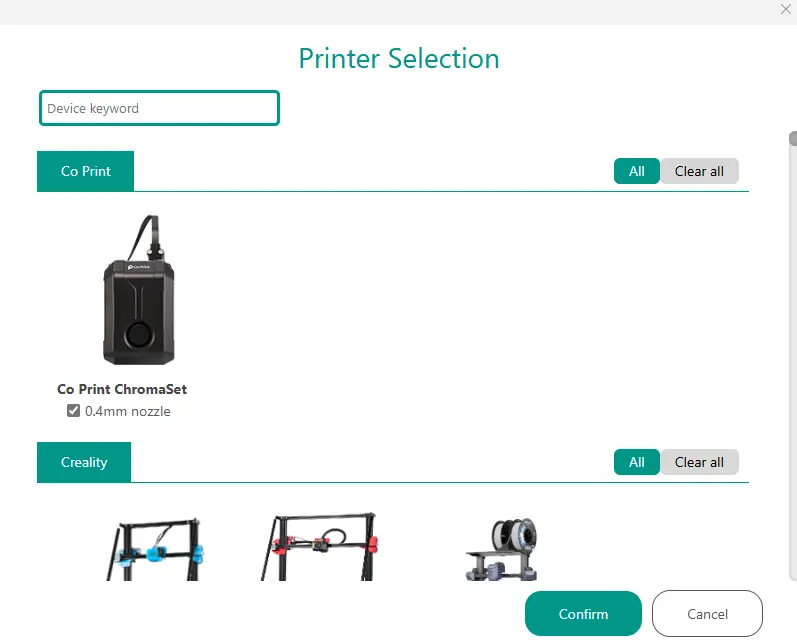
In the left menu, go to the Printers section and click on “Select/Remove printers”.
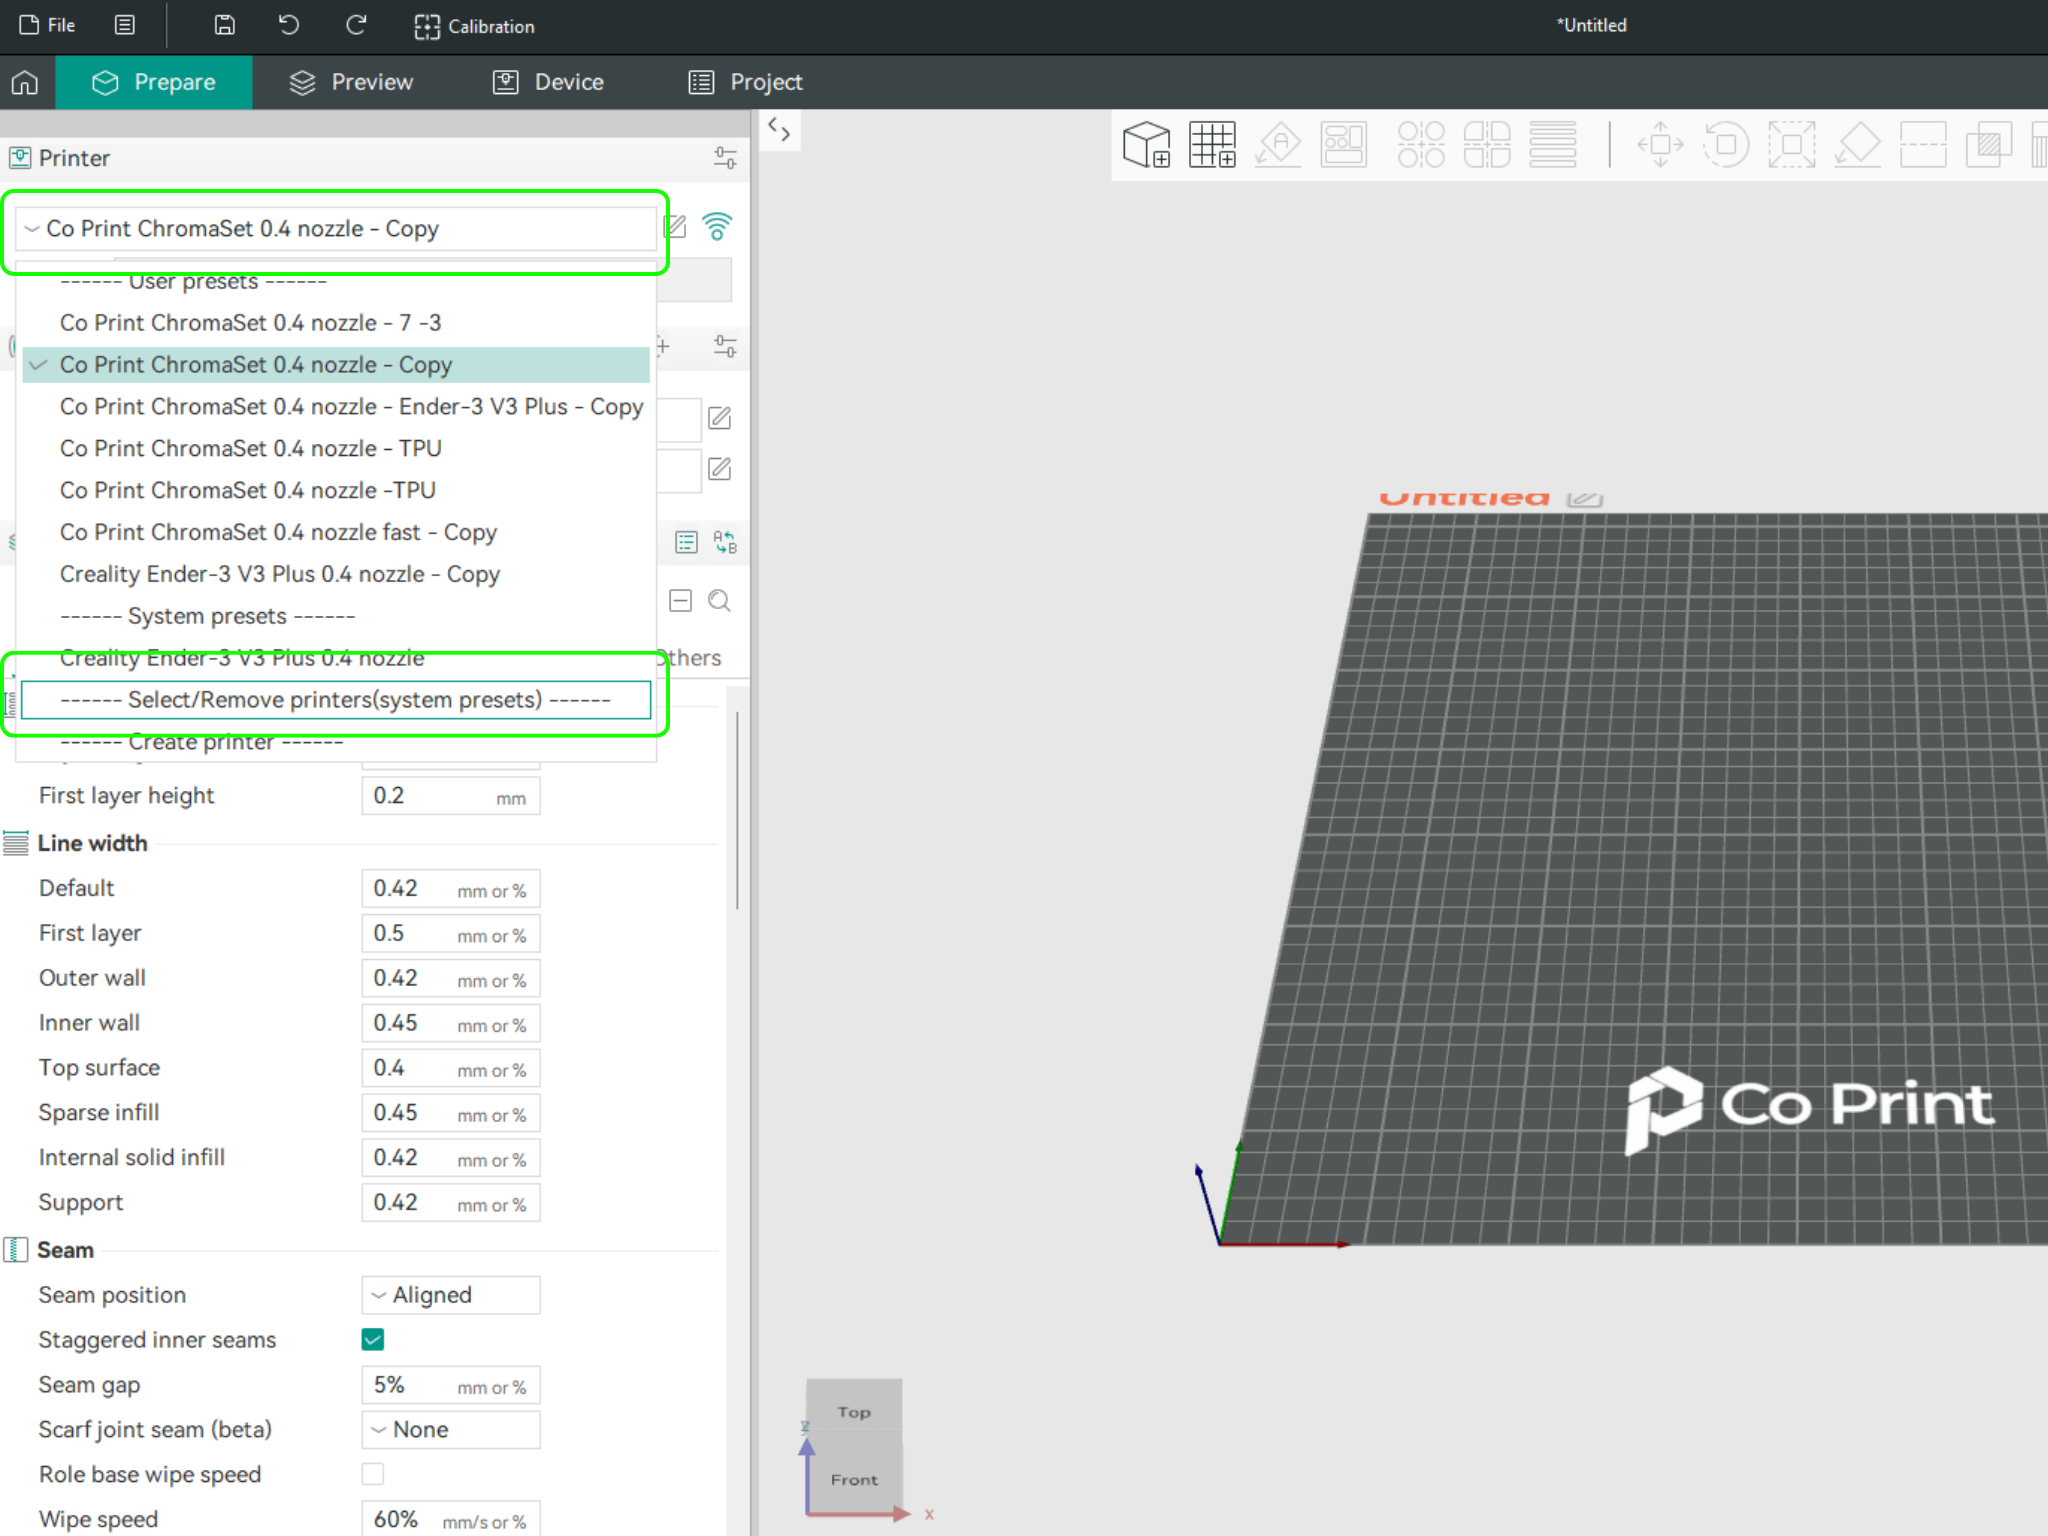
- In the opened menu, find and select Co Print. Then click "Confirm".
- After loading the settings, you need to adjust them in OrcaSlicer according to your printer’s bed size.
- You can import your model into OrcaSlicer as shown in the videos below, paint it, and start your print directly from within OrcaSlicer.