¶ Creality Ender 3 V2 Neo - ChromaSet Upgrade Guide
| Image | Information |
|---|---|
 |
Welcome to the installation page for Creality Ender 3 V2 Neo with ChromaSet. This guide will help you update your printer's firmware to ensure compatibility with ChromaSet, how to mount ChromaHead and CX-I Extruders on printer, complete the mechanical setup, and configure the ChromaPad settings. By following these steps, you will successfully complete the installation process. |
¶ - Downloadable parts required for the installation
You can download the required STL files below.
¶ Mechanical Setup of ChromaHead and CX-I Extruders
¶ Mechanical Setup of ChromaSet
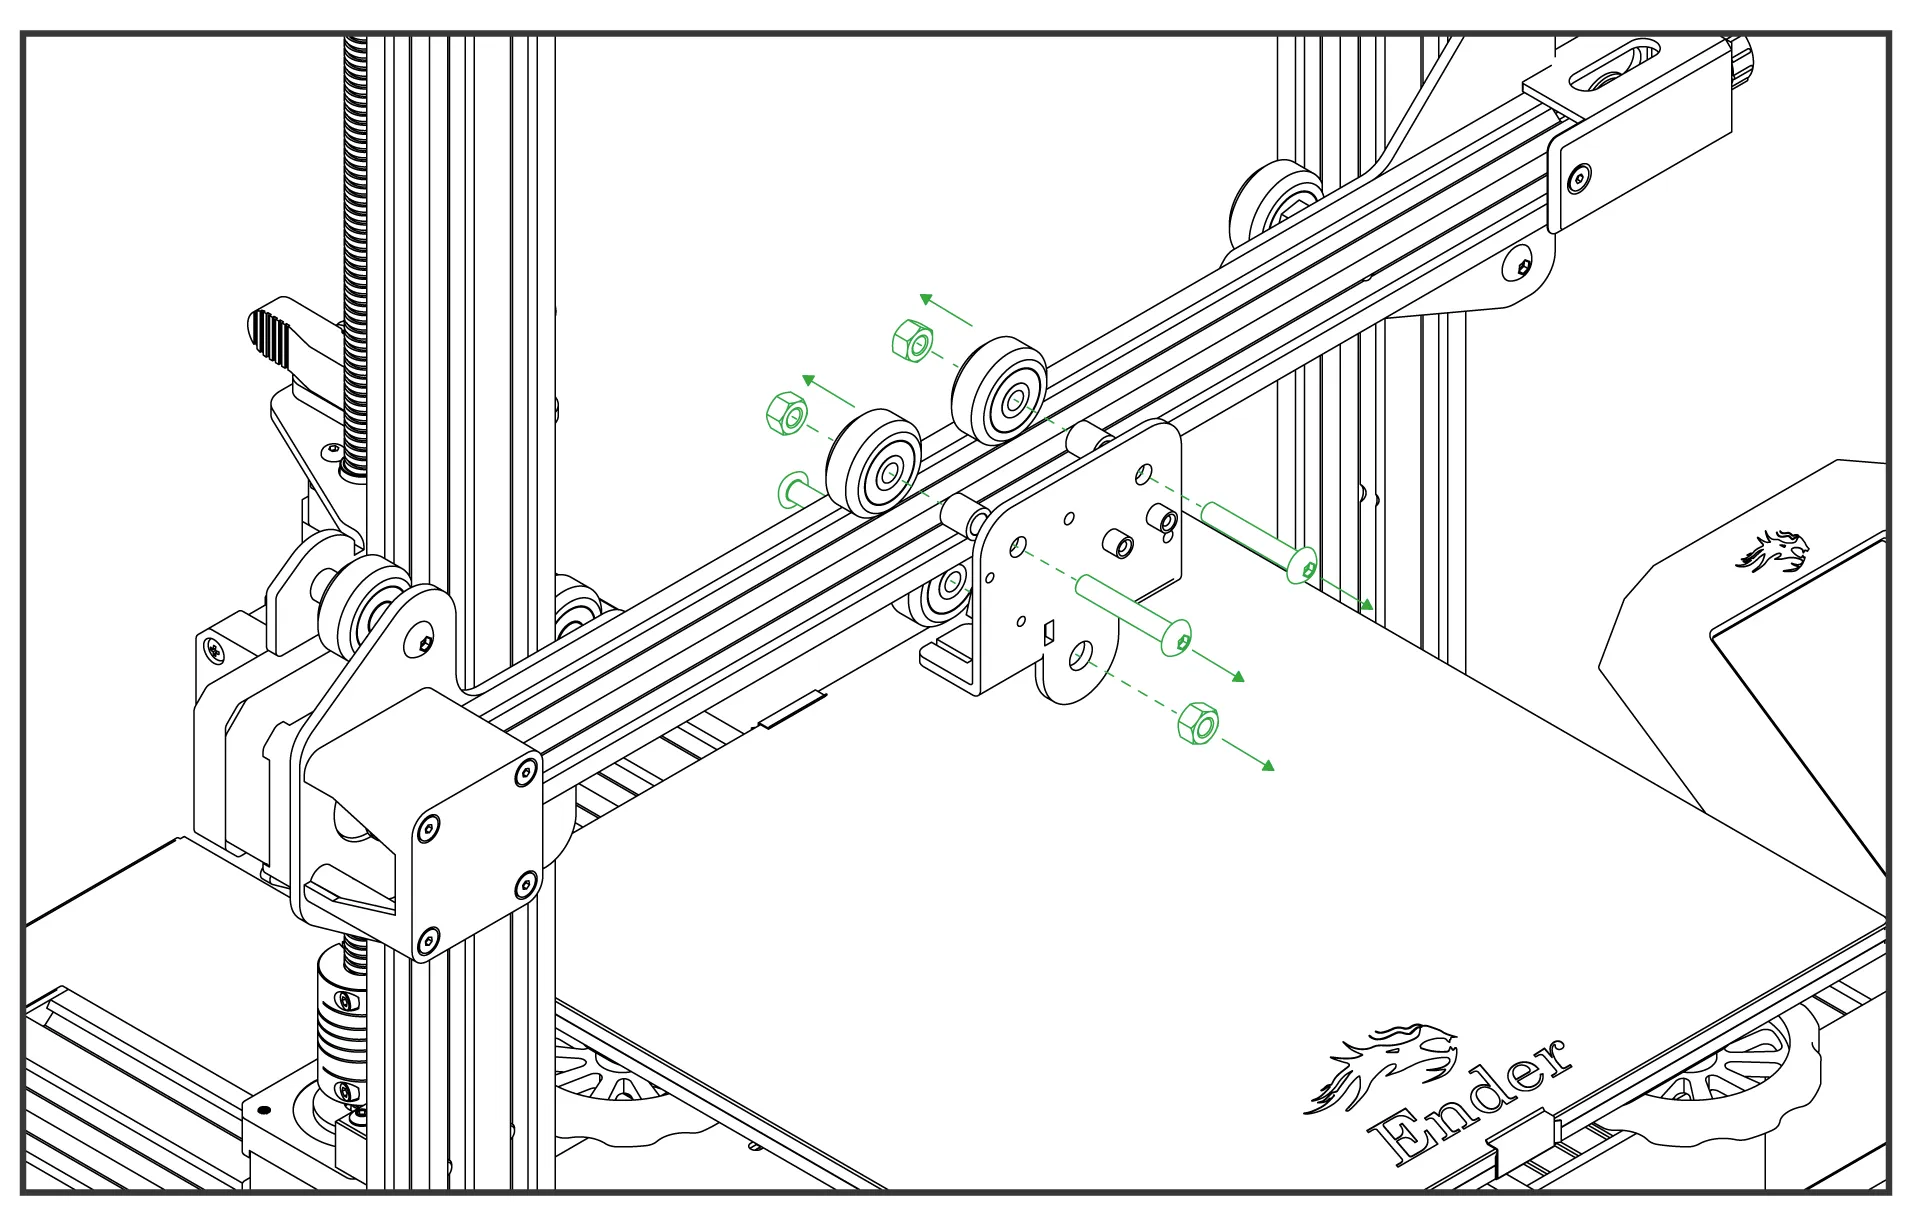
¶ 1. Remove the Stock Print Head
Remove the stock print head from the Ender 3 V2 Neo, including the carriage it is mounted on. However, set aside the screws and wheels from the carriage — these will be reused to install the ChromaHead mounting carriage.
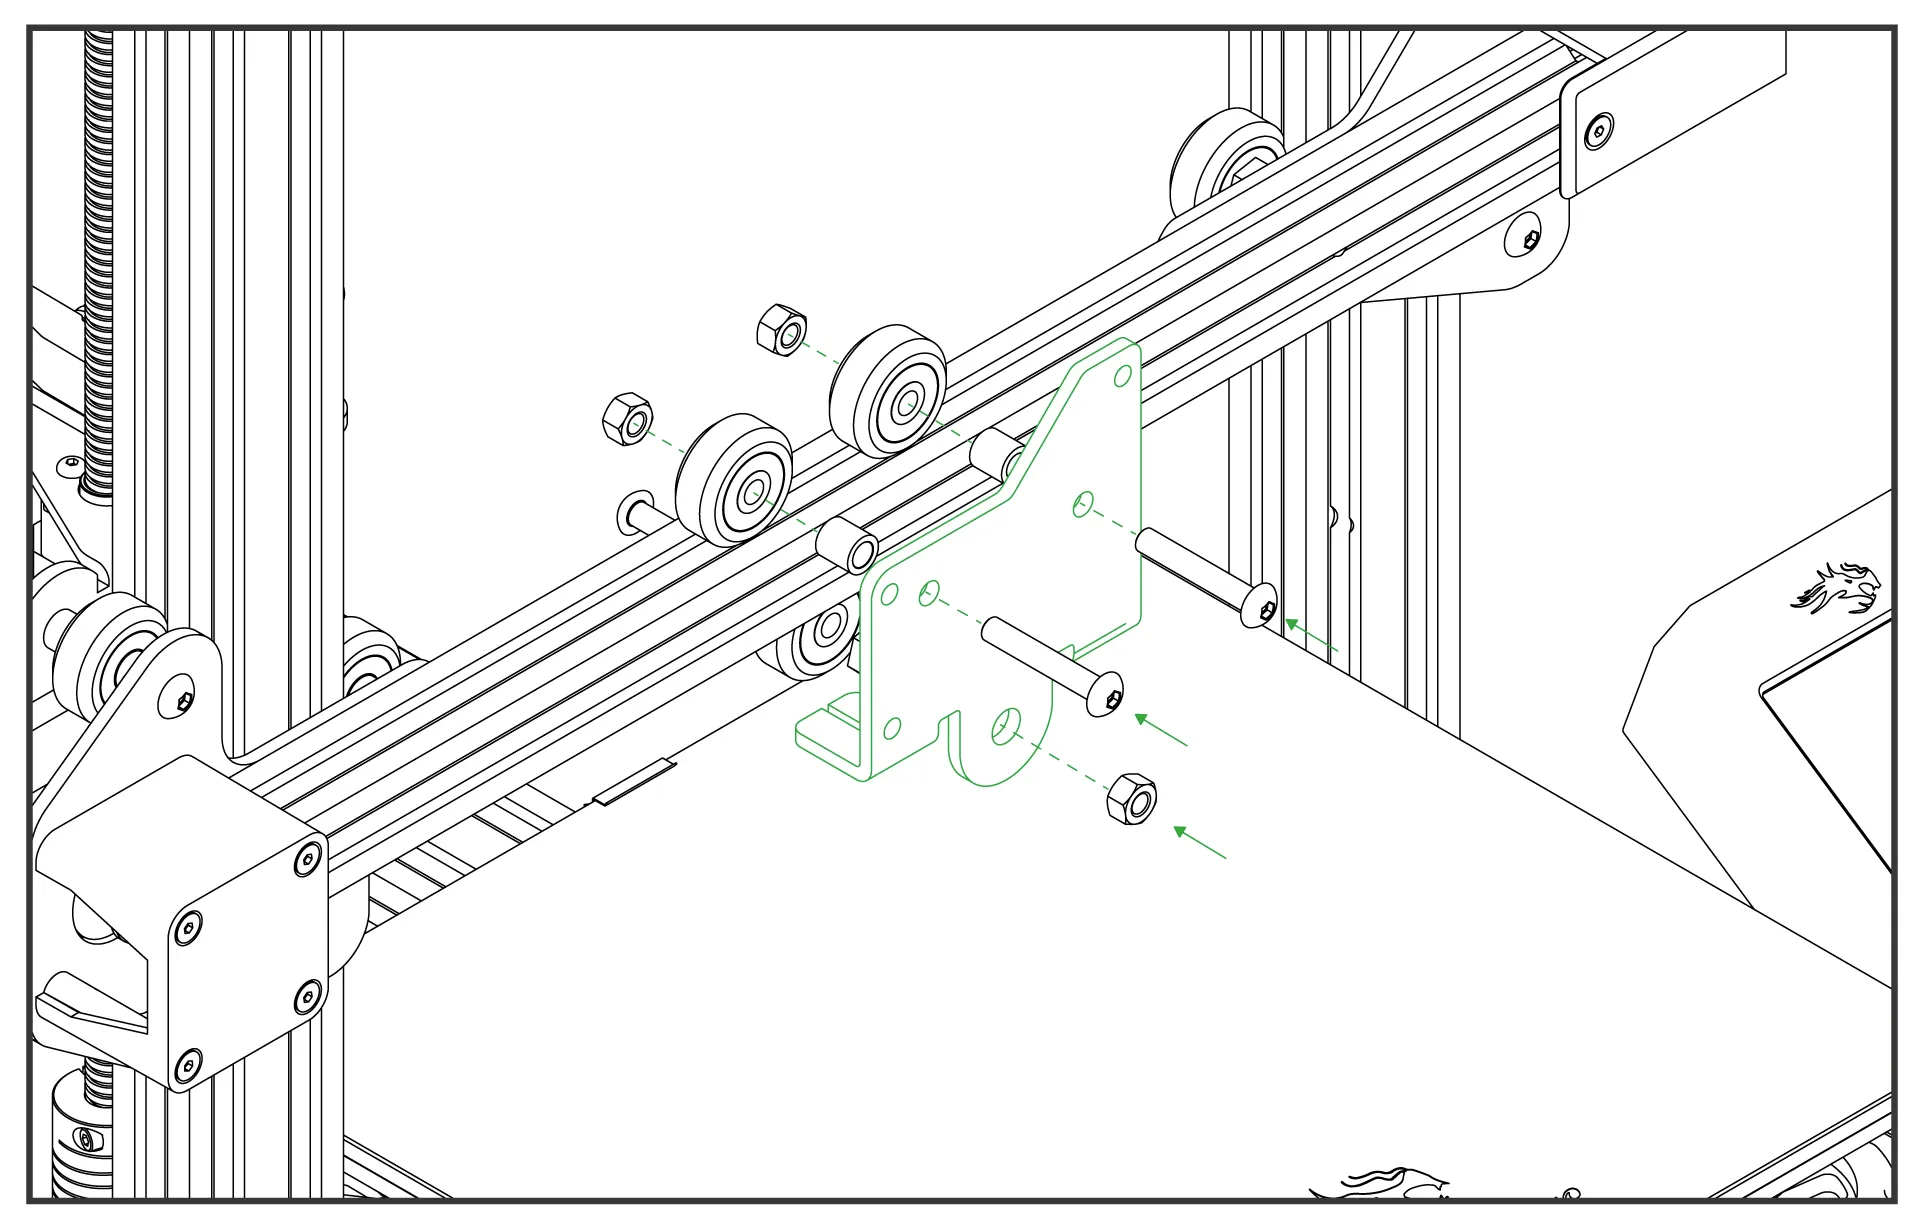
¶ 2. Attach the ChromaHead Carriage
Mount the carriage piece included with the ChromaHead onto the rail using the existing wheels and stock screws.
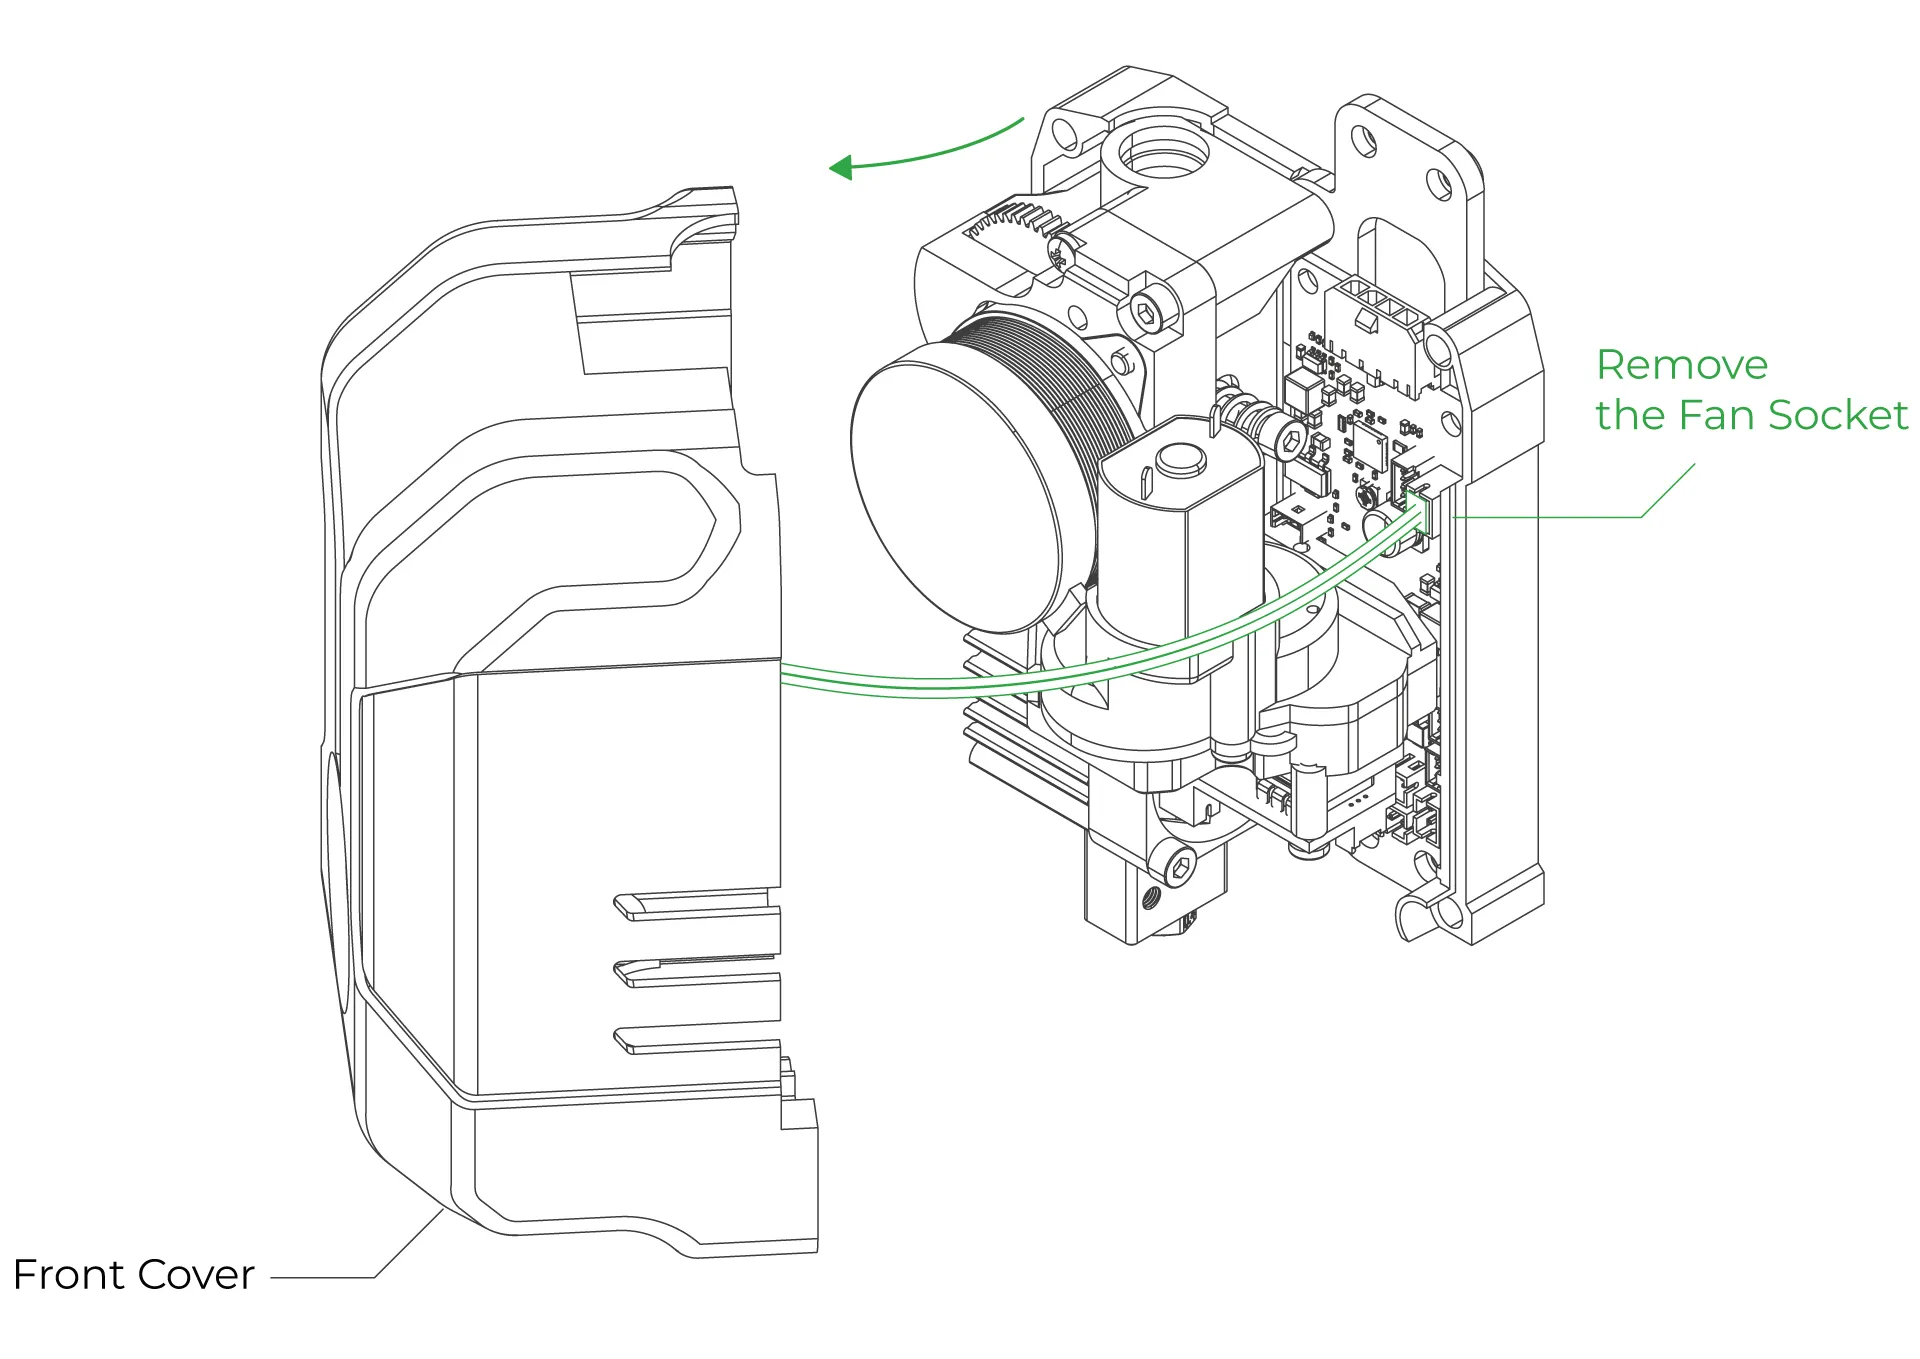
¶ 3. Remove the Front Cover of the ChromaHead
The connection screws for the ChromaHead's adapter part are located inside the front cover. Therefore, the front cover needs to be removed for installation.
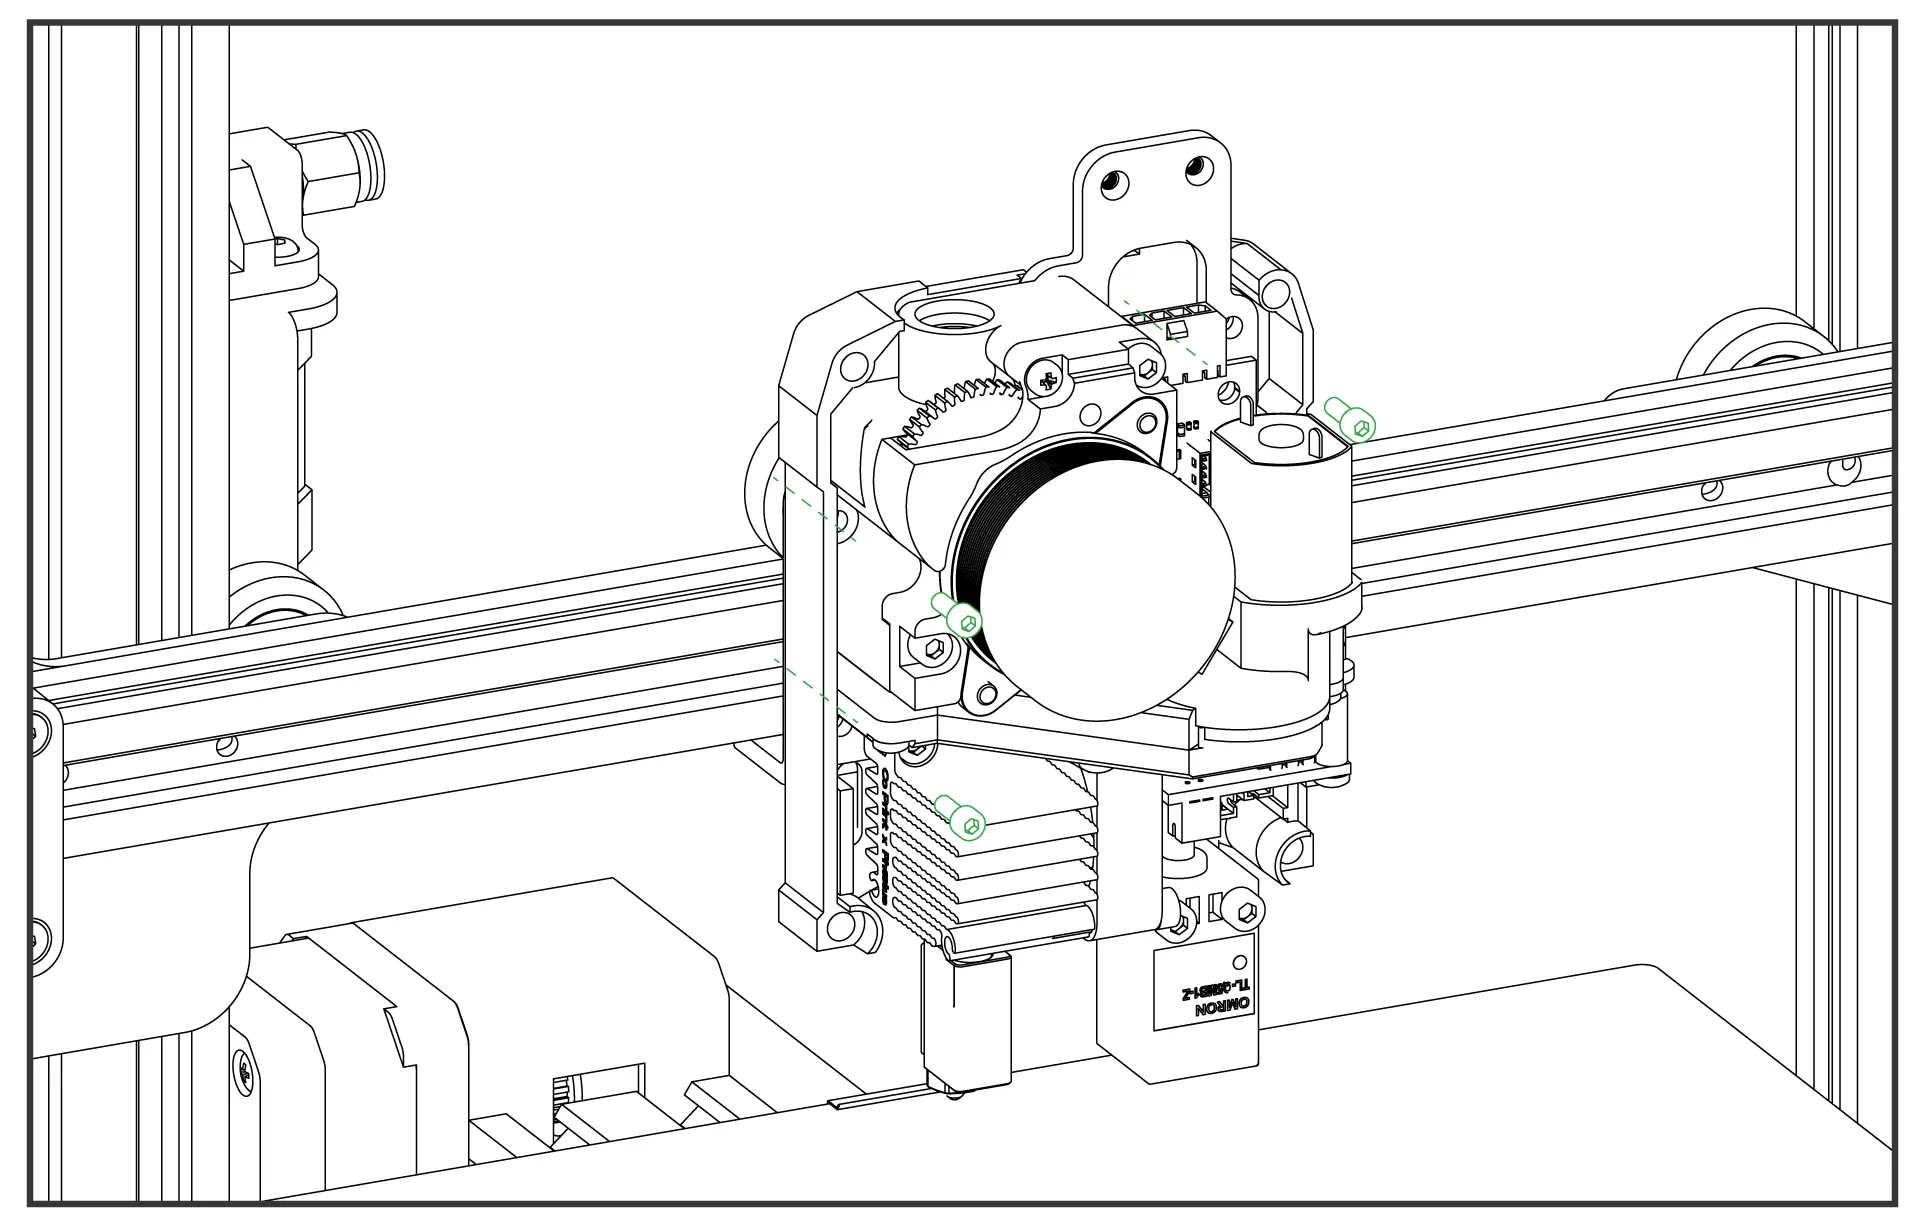
¶ 4. Attach the ChromaHead to the Carriage
Align the ChromaHead with the carriage and secure it using the three screws included in the box. Tighten the screws at the three indicated points.
¶ 5.Head connection cable and the 8-in-1 kit mounting
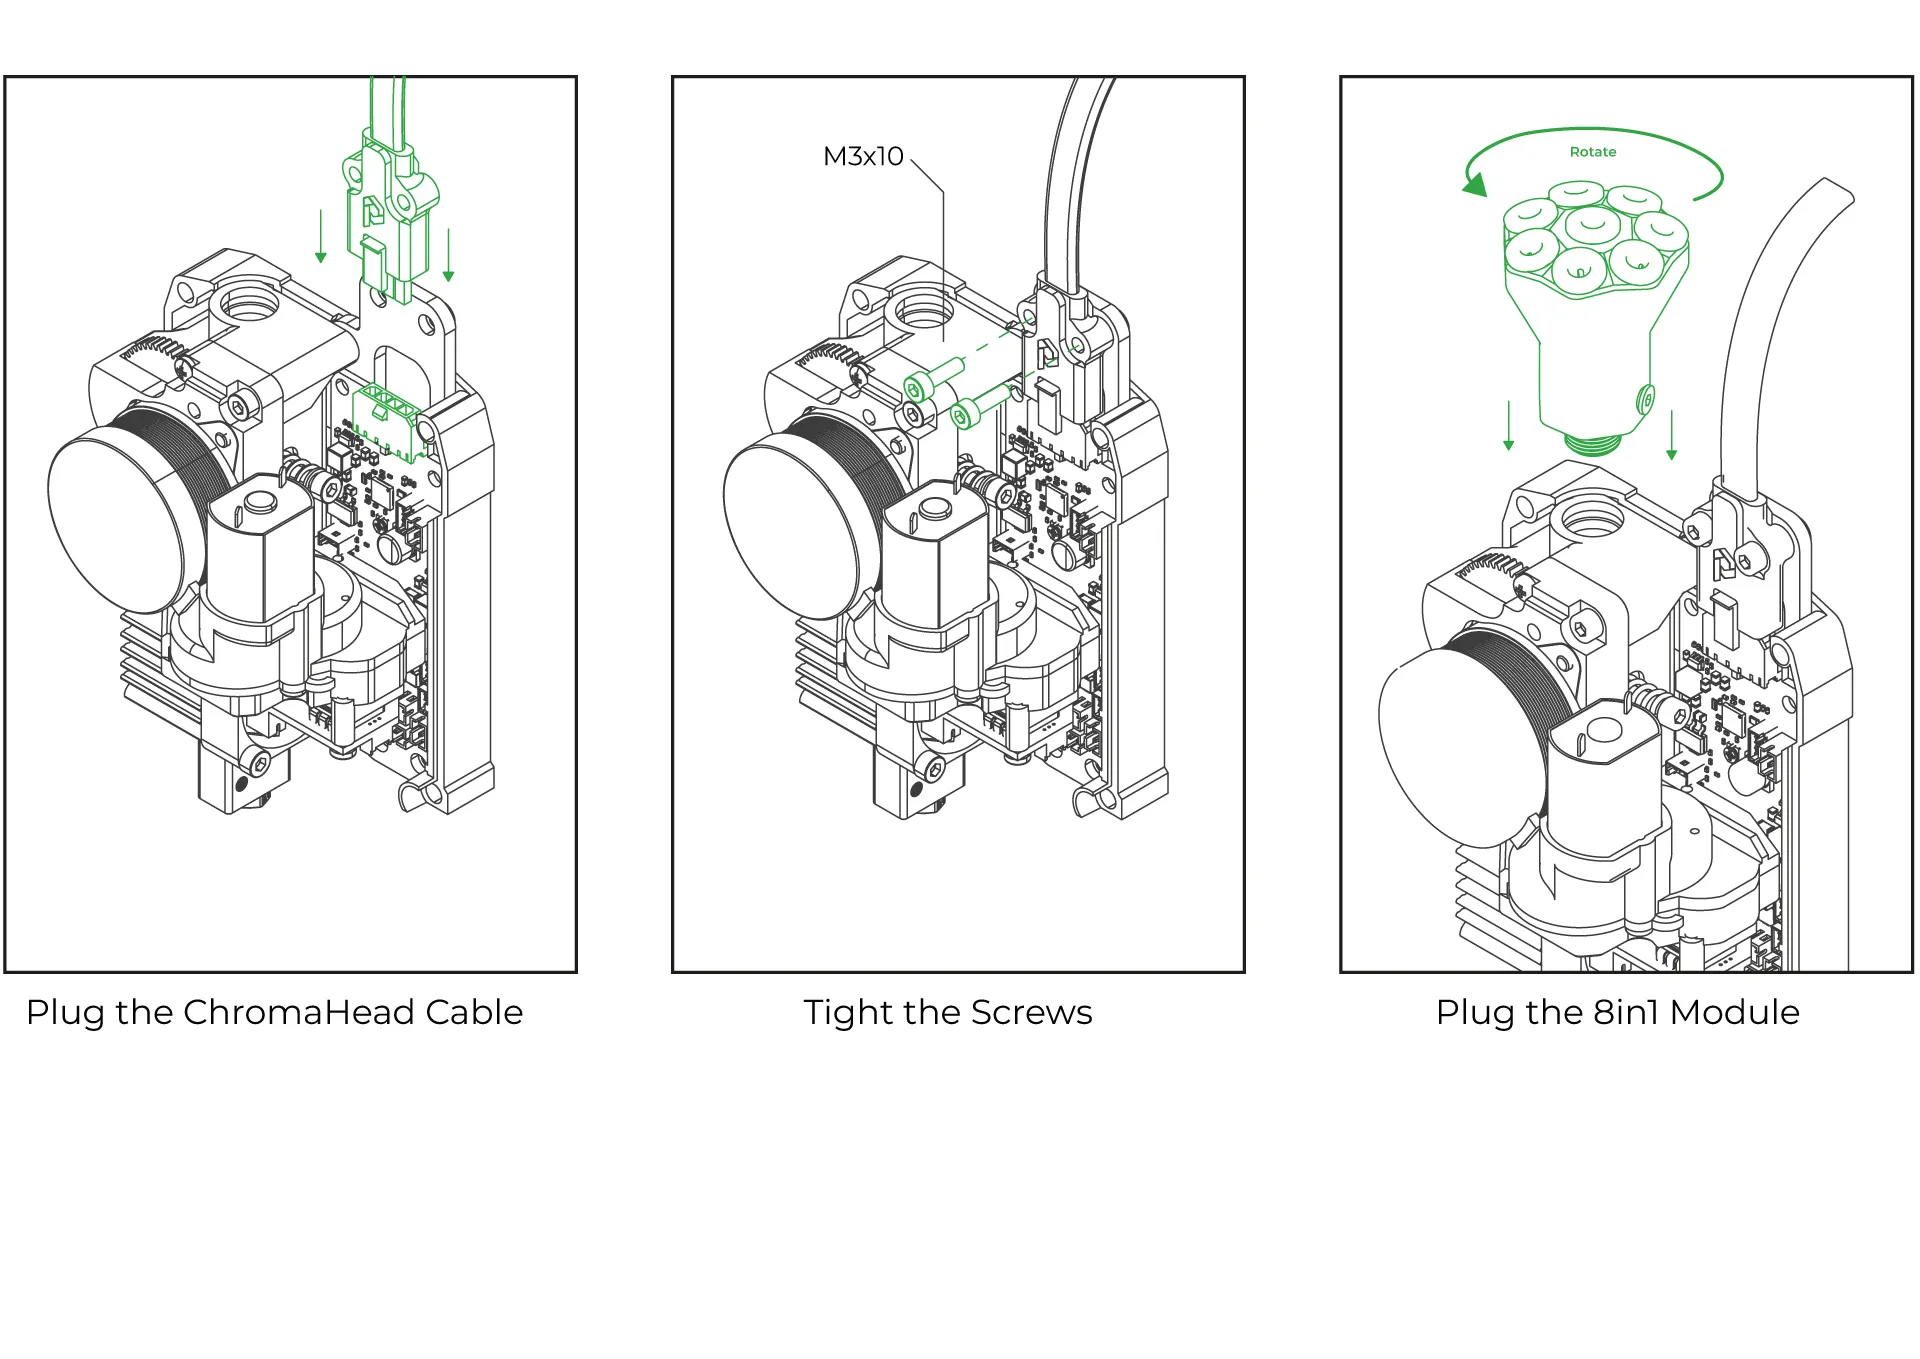
Connect the head connection cable as shown in the image and make sure it is secured in place using the fastening screws. Then, rotate the 8-in-1 module and install it as shown in the image. Ensure it is tightly secured and doesn't move.
¶ 6.Close the front cover of the ChromaHead
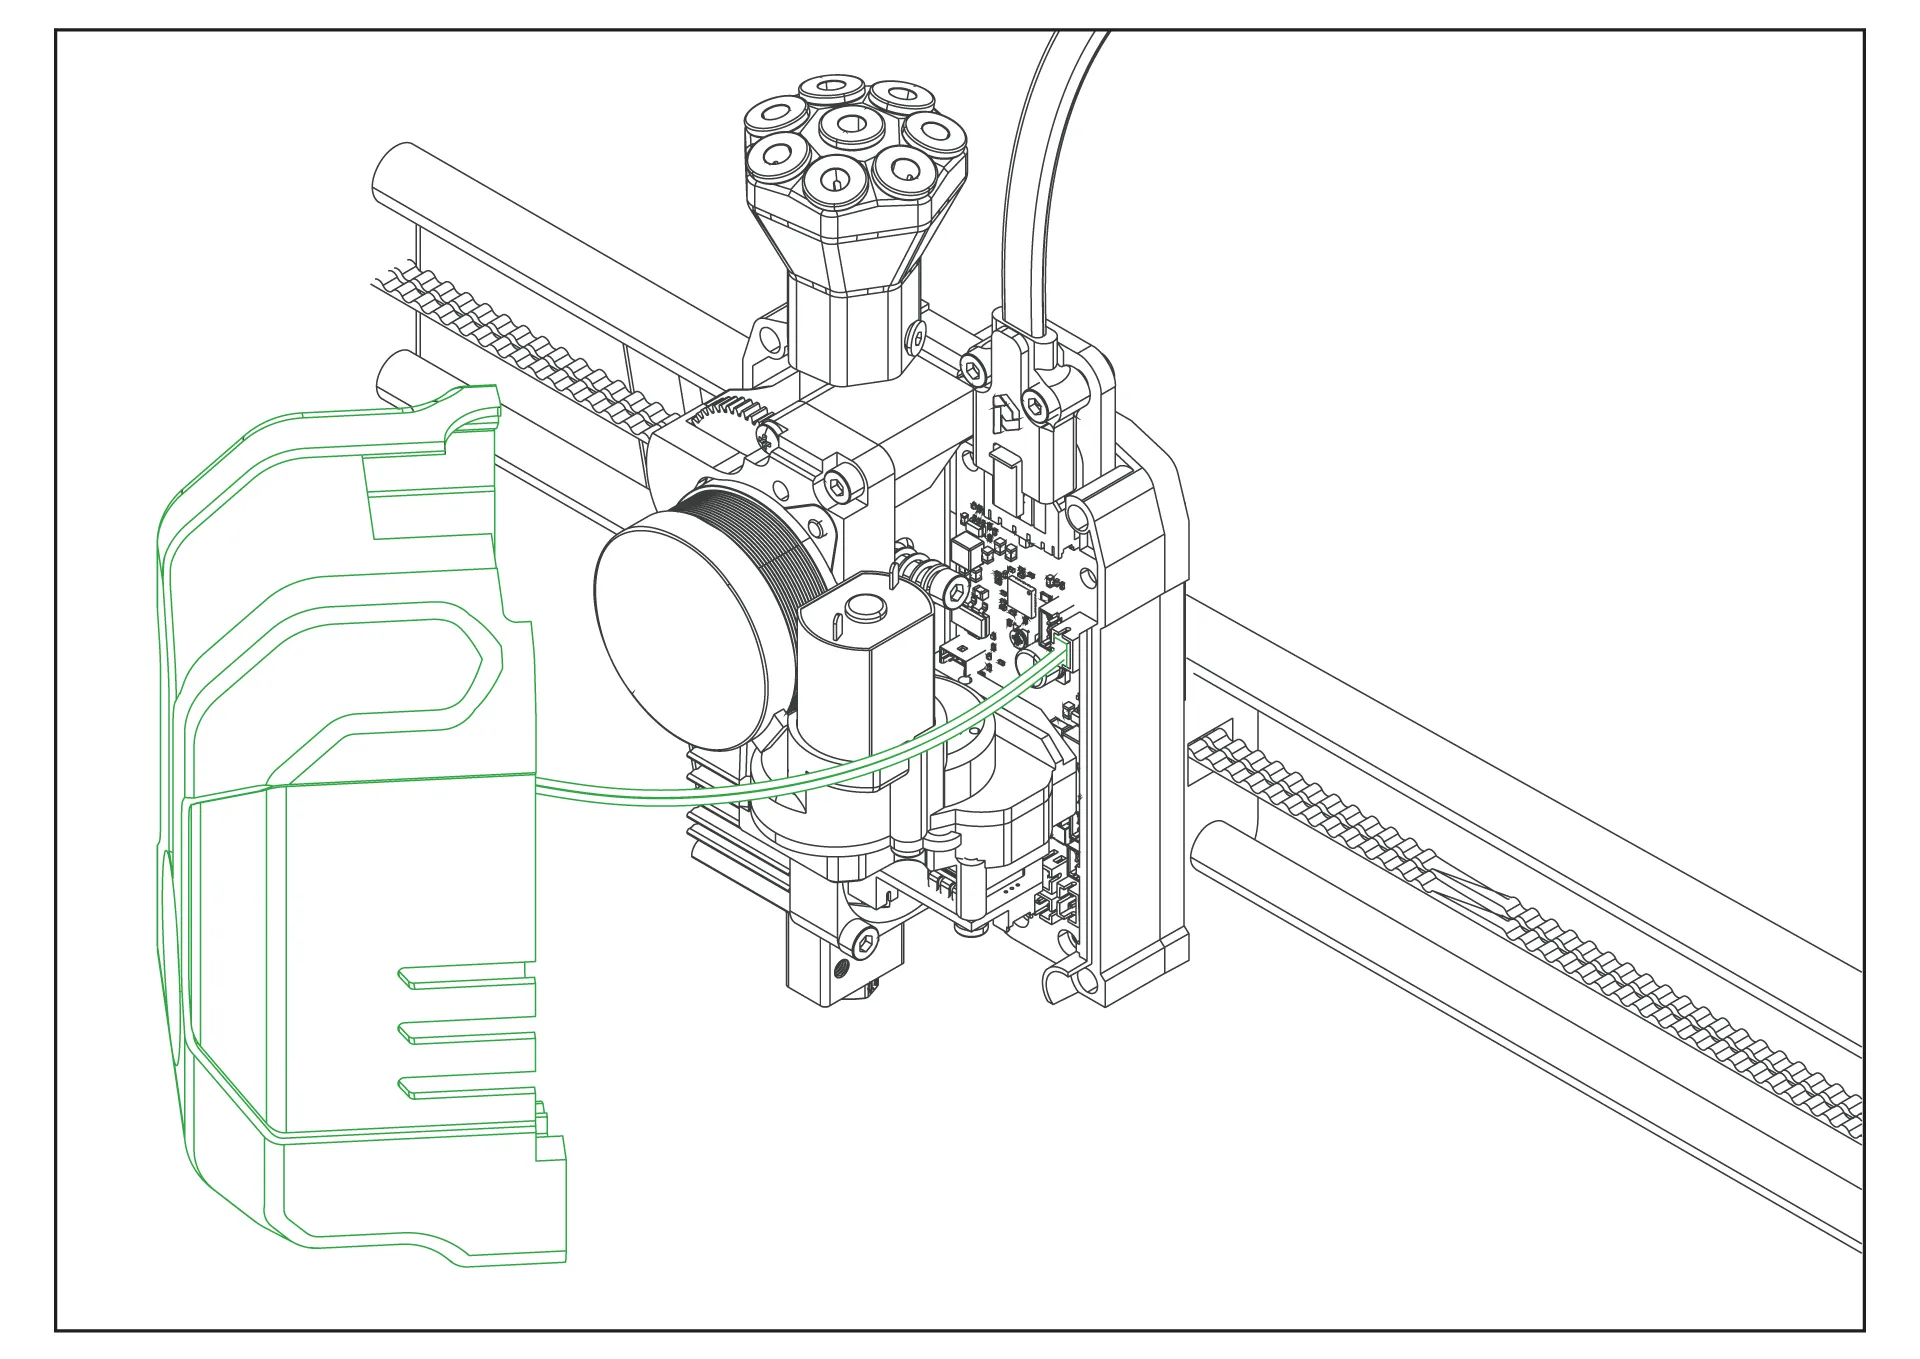
The ChromaHead installation is complete. Reconnect the cooling fan cable from the front cover to the designated spot on the control board, and then close the cover.
¶ 7.CX-I Extruders Installation
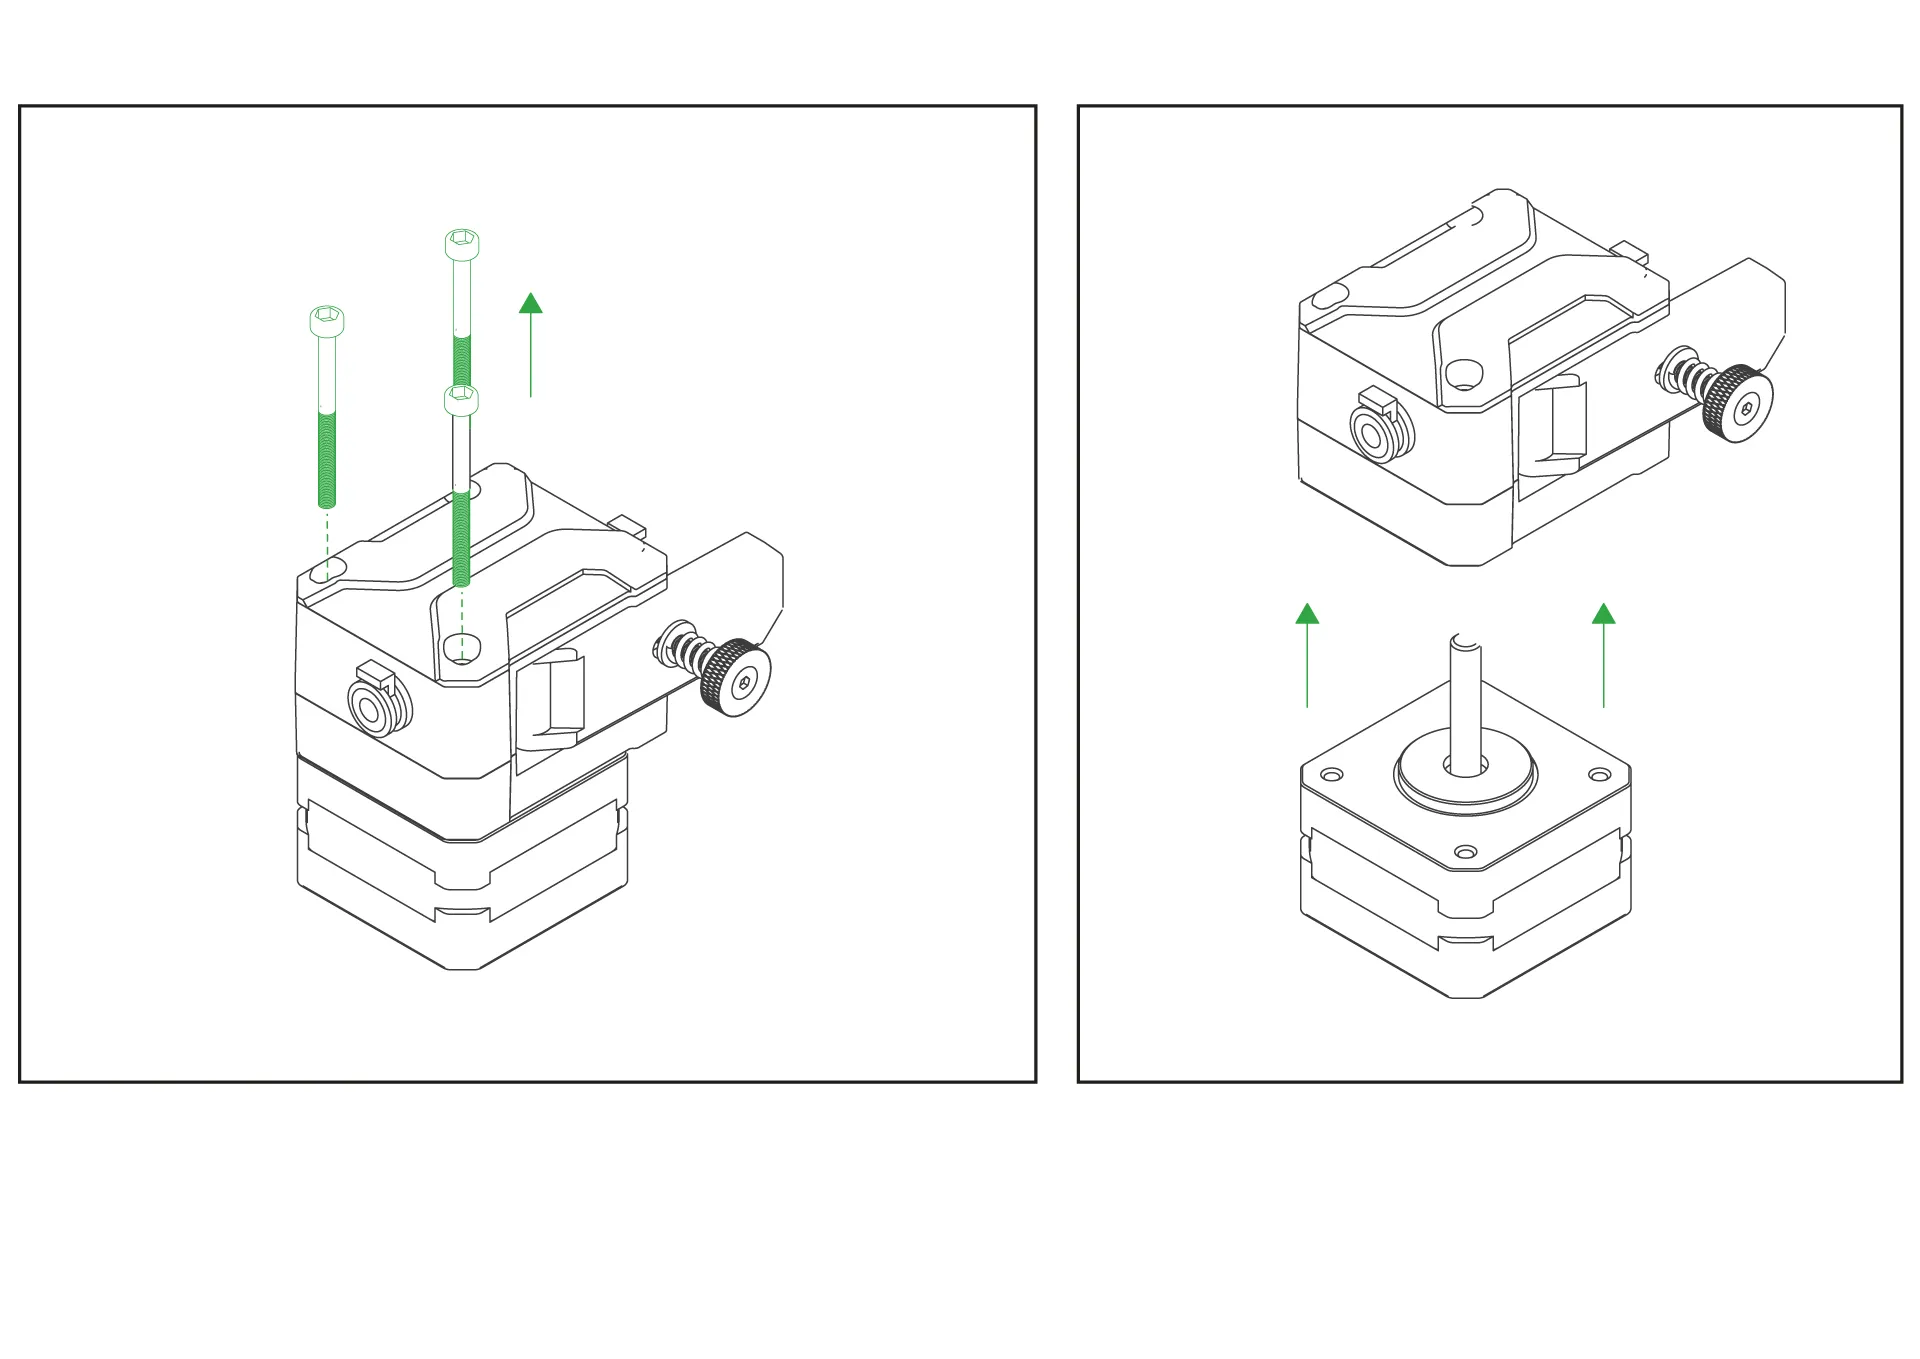
The CX-I Extruders come pre-assembled with the motor and plastic components inside the box. However, in order to mount them onto the extruder holder, the motor and extruder sections need to be separated. To do this, remove the 3 screws on the top of the extruder and separate the motor from the extruder section.
¶ 8. Place the extruders onto the extruder holder.
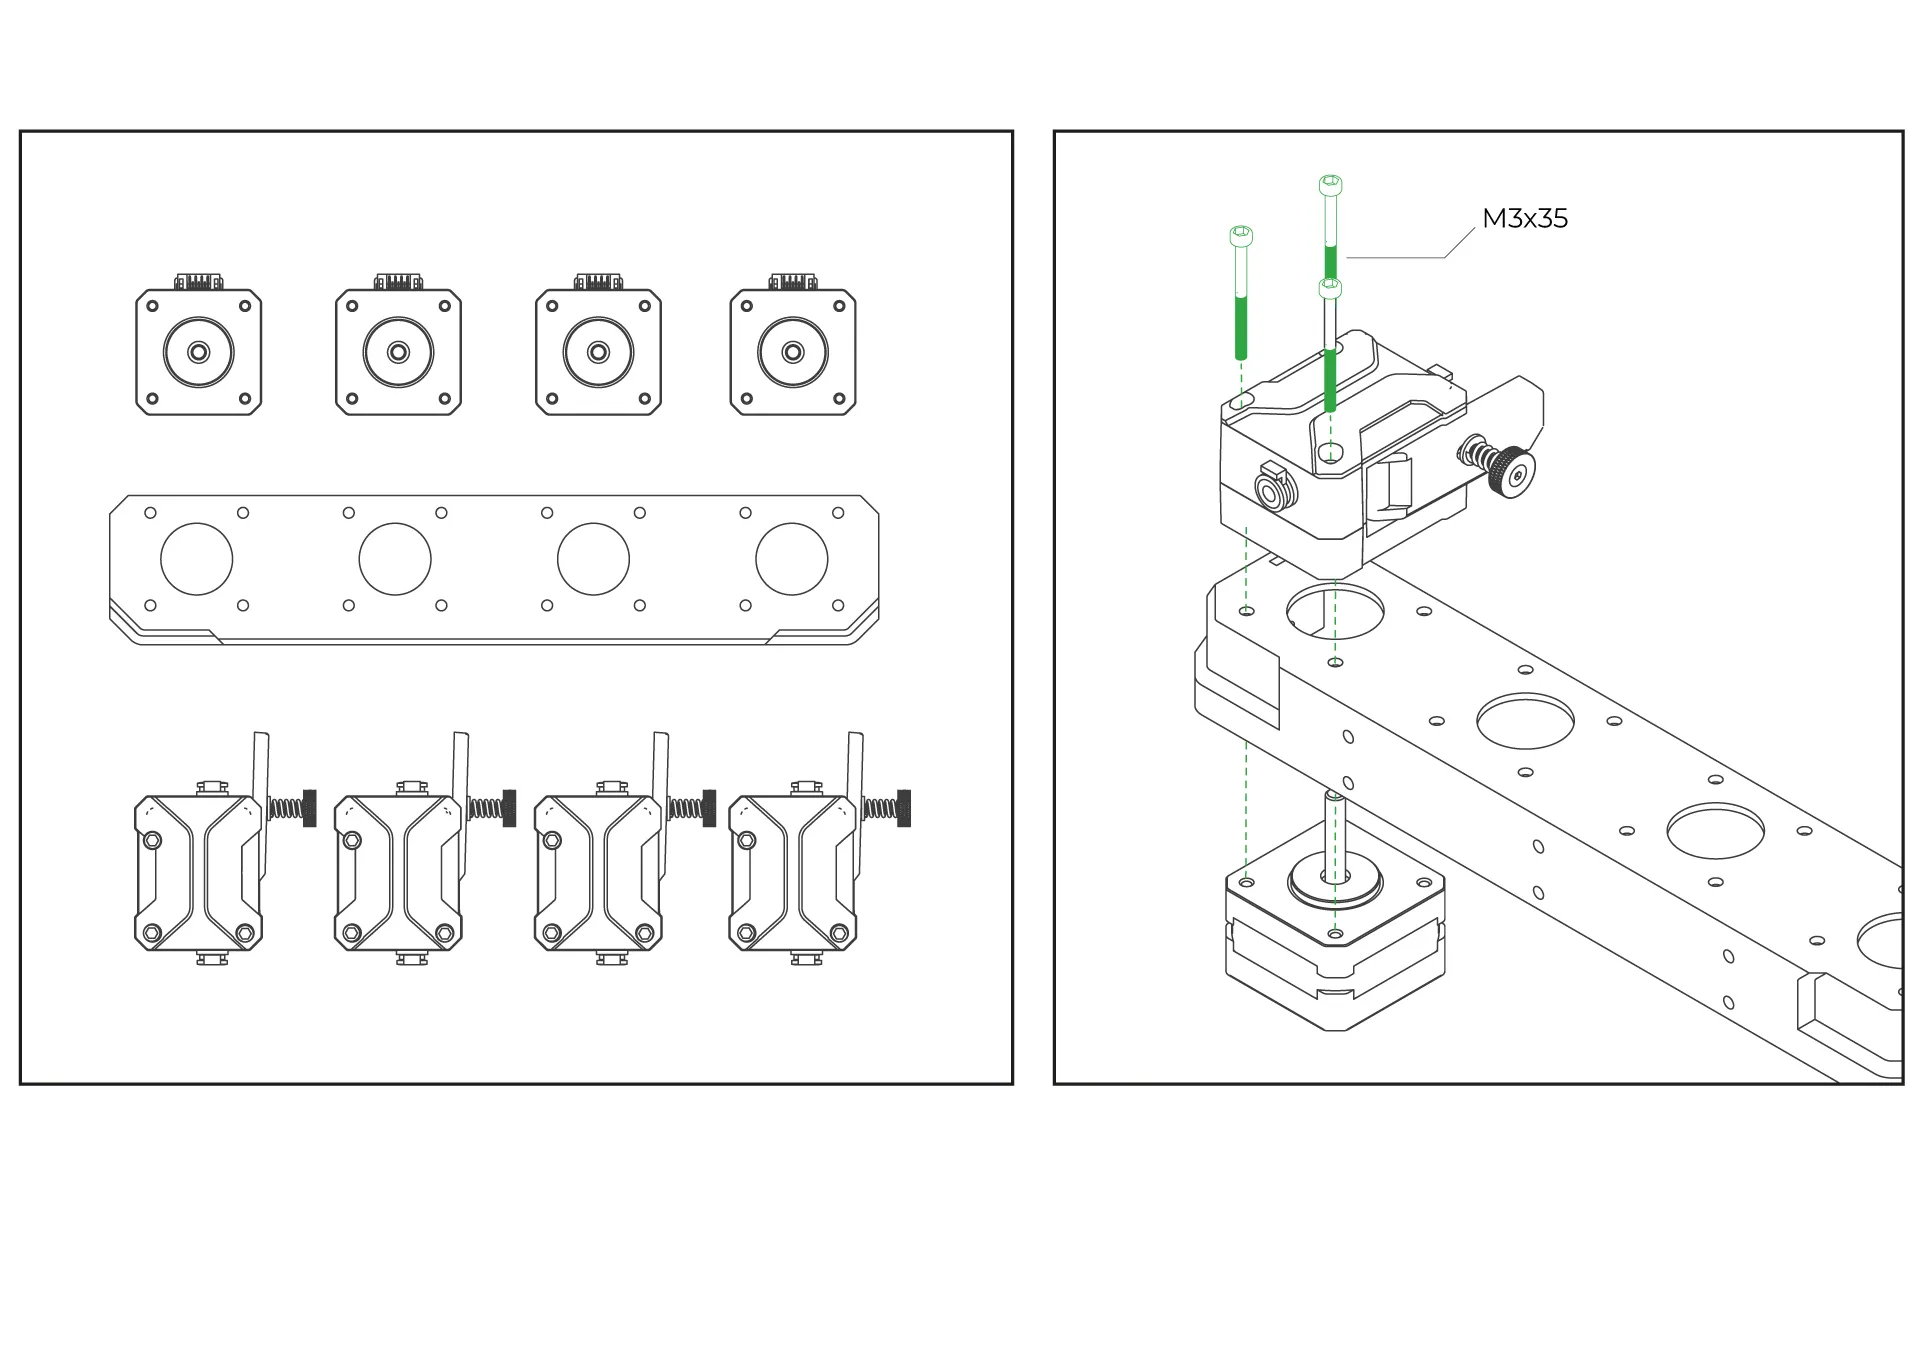
Place the extruder on the top side of the printable CX-I holder you downloaded. Position the stepper motor on the bottom side, and then securely fasten the extruder using the three screws on it to complete the assembly.
¶ ChromaPad Setup on Creality Ender 3 V2 Neo
If you have a ChromaBox, skip this step and proceed to the ChromaBox Setup section.
After completing the mechanical setup of ChromaHead and CX-I Extruders, let's move on to configuring your printer with ChromaPad.
1- Select your language
2- Accept privacy policy
3- Select your timezone
4- Give your ChromaPad a name(this will be device name visible on the network)
5- Connect your wifi network
6- Update system if available
7- Select Ender 3 V2 Neo model under the Creality brand
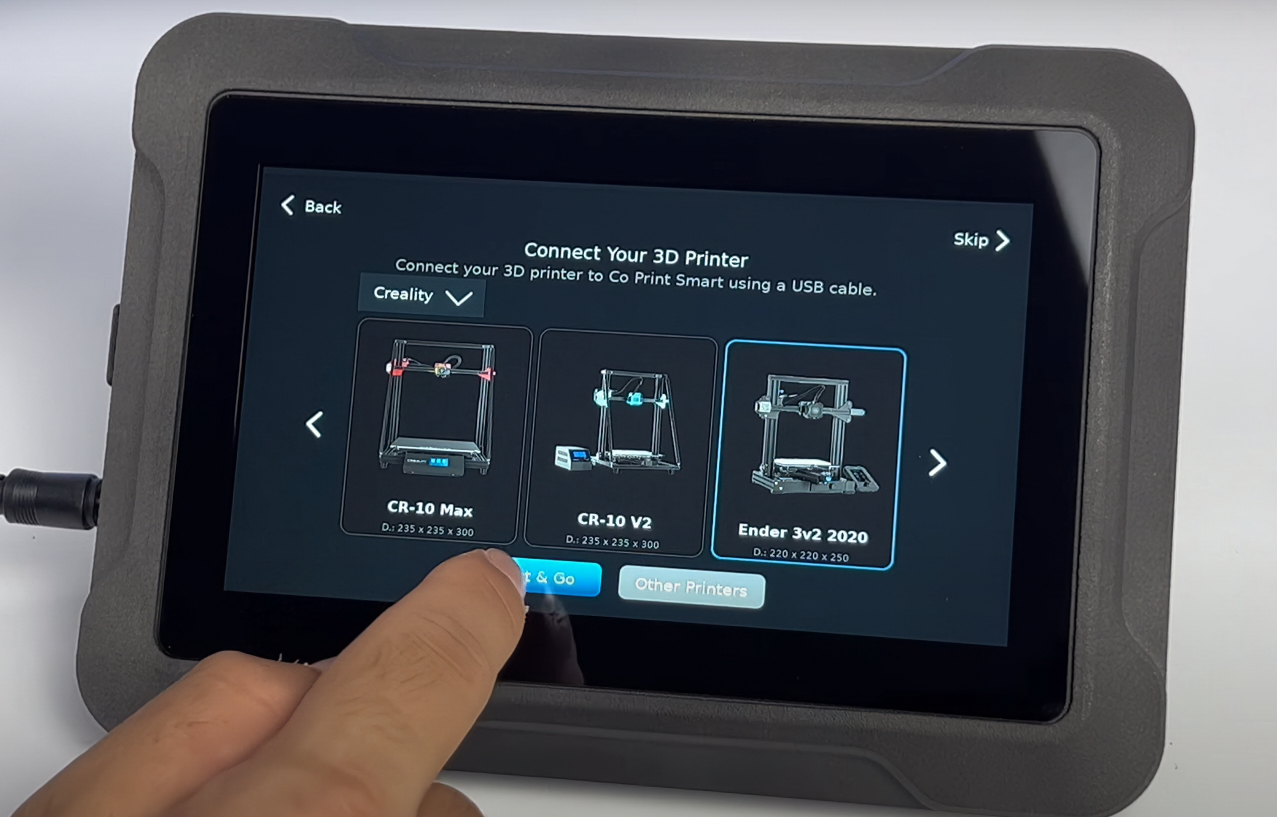
8- Confirm both options shown for the setup steps and click next
9- Remove the sd card from printer and insert to the ChromaPad and write to the sd card
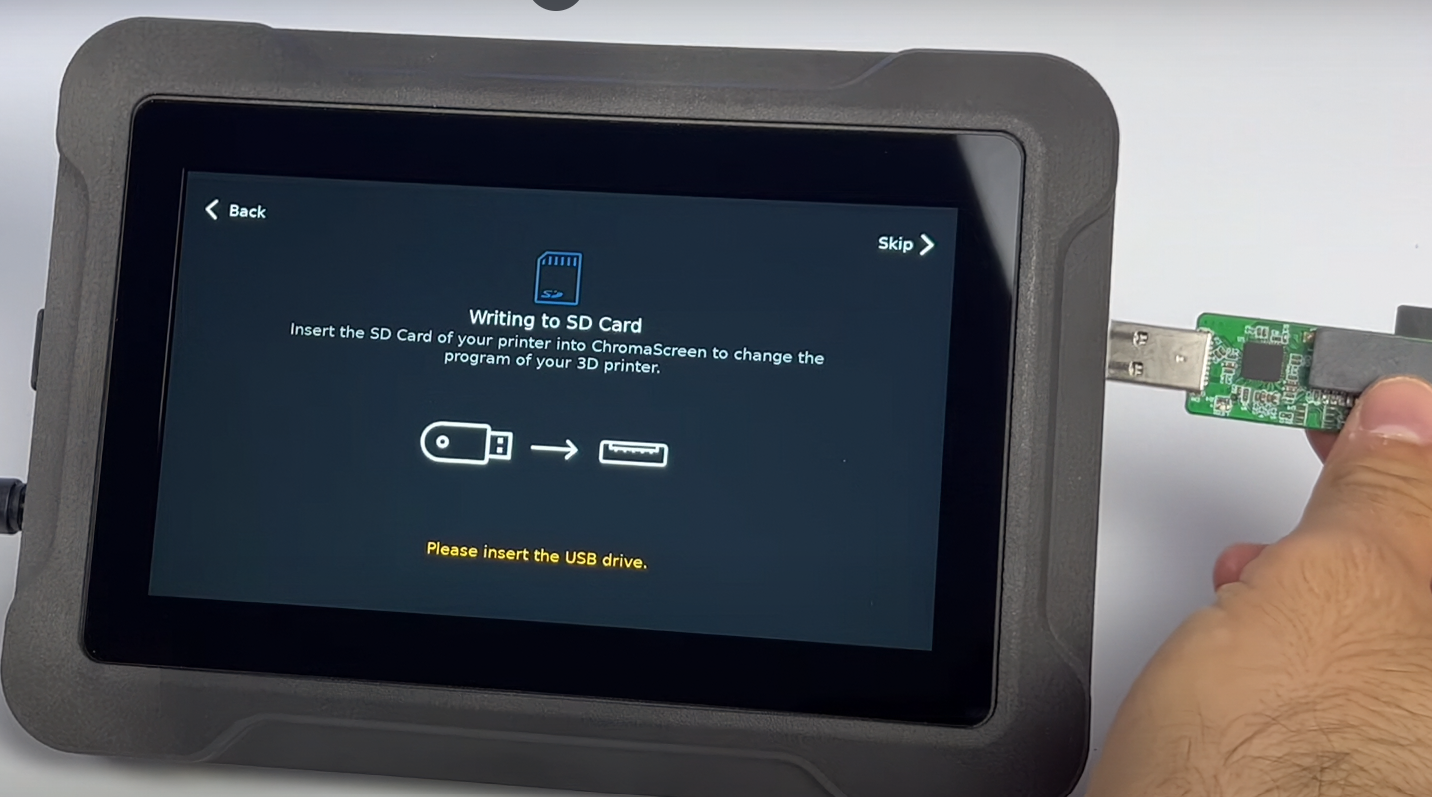
10- After the writing process complete, remove the sd card and insert to the printer.
11- Re-power the printer and connect the printer to the ChromaPad using usb cable.
12- Choose usb-0:1.1.1:1.0 and complete setup.
13- Connect the ChromaHead and CX-1 extruders cables.
¶ ChromaBox Setup on Creality Ender 3 V2 Neo
¶ 1.3) Creality Ender 3 V2 Neo Klipper Installation
- First, download the .bin firmware file for Ender V2 Neo from our GitHub page. GitHub page.)
- Copy the downloaded file to the SD card of your printer. If your printer is already on, turn it off and then back on to begin the flashing process.
- If the screen remains blank and no text appears, it means Klipper was installed successfully.
¶ 1.4) ChromaBox WIFI Installation
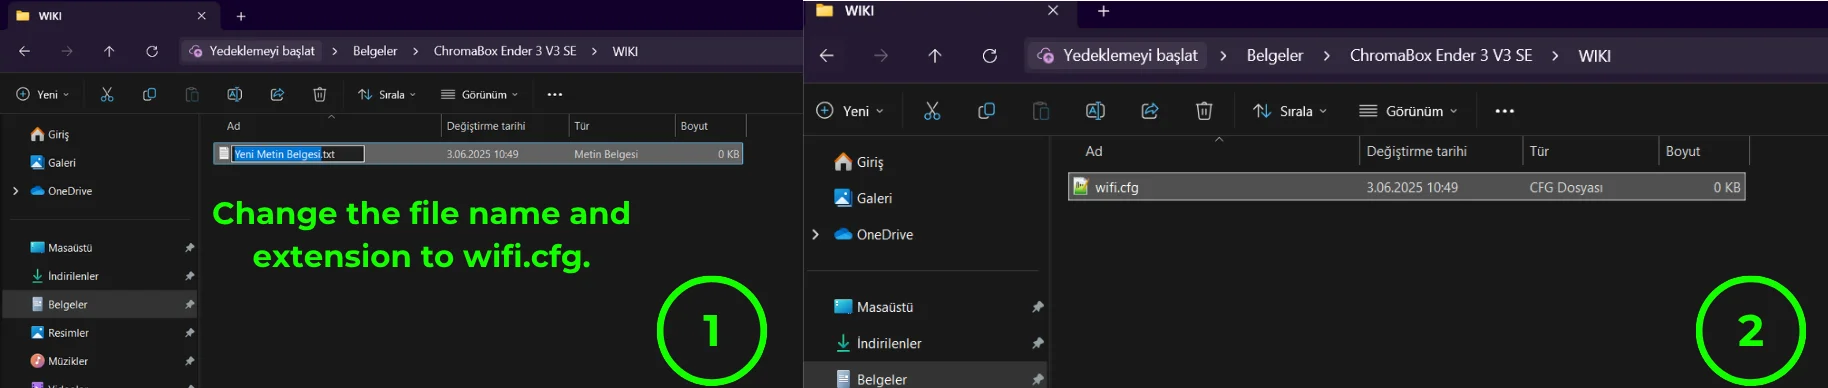
- To connect ChromaBox to Wi-Fi, we need to create a configuration file named wifi.cfg.
- On your computer, right-click and select “New > Text Document” to create a new file.
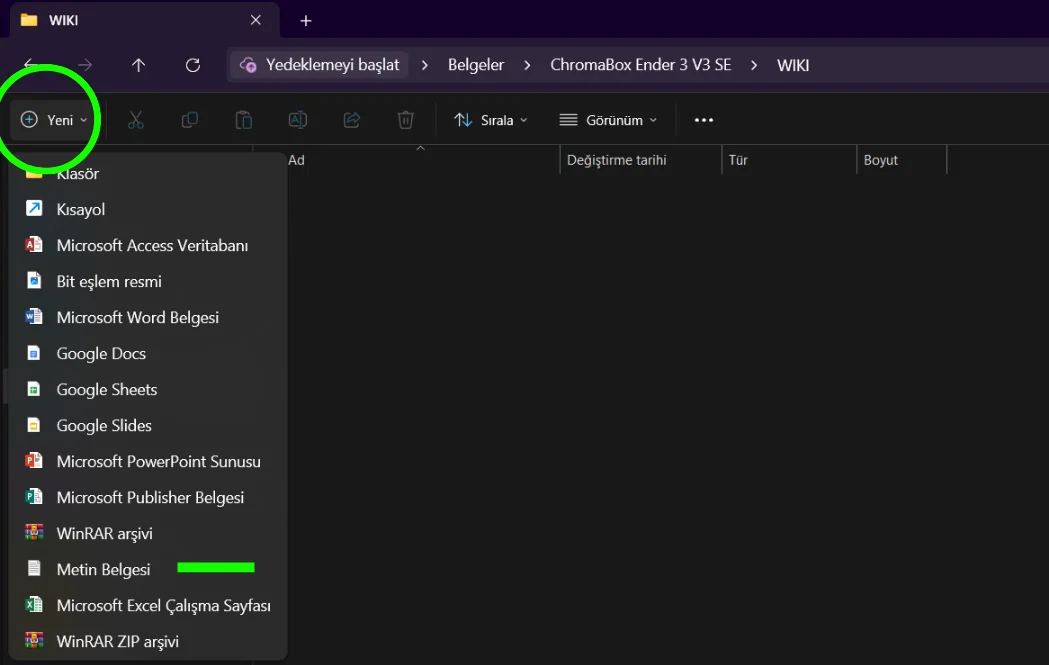
- Rename the file to wifi.cfg, ensuring the extension is .cfg.
- Open the file and enter the following lines:
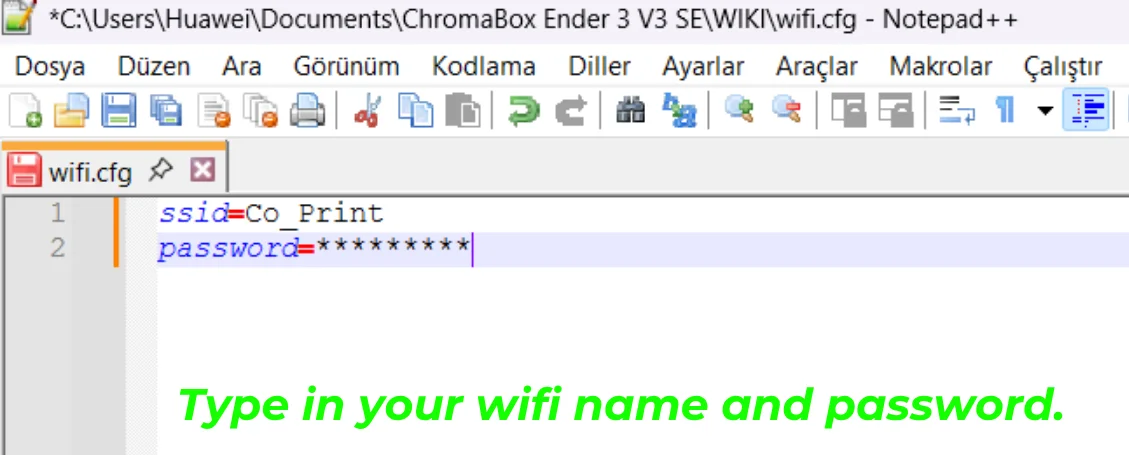
- ssid=
- password=
- Enter your Wi-Fi network name in the ssid= field and your password in the password= field. Make sure the Wi-Fi name does not contain any spaces.
- Save and close the file.
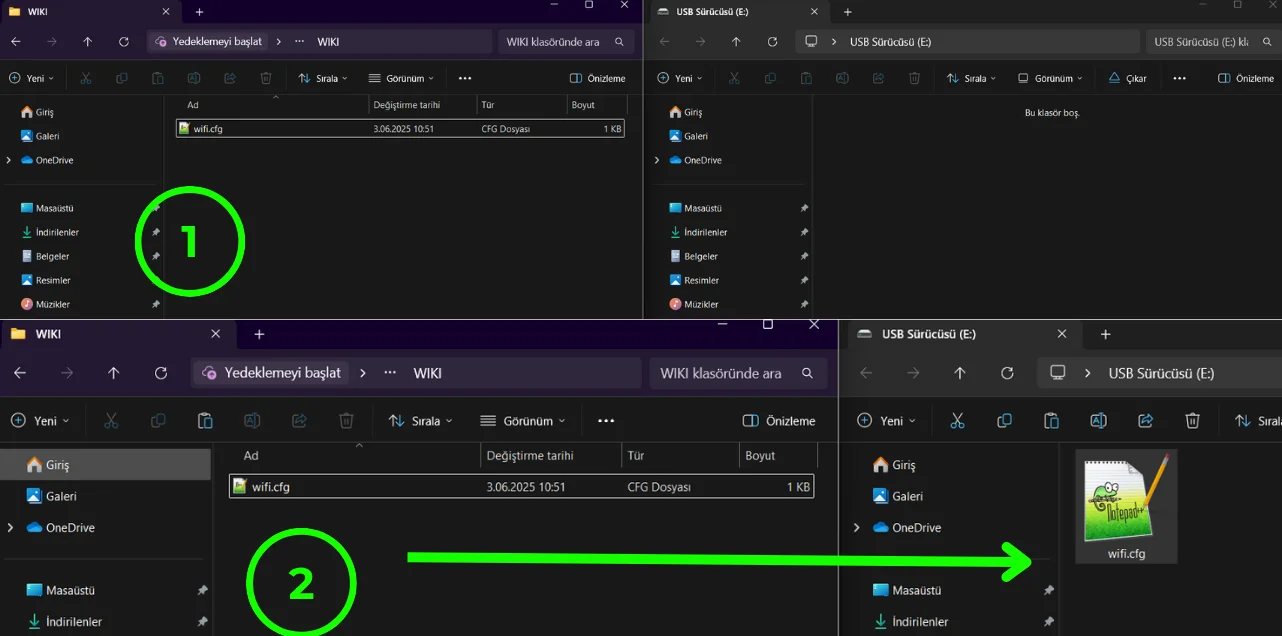
- Insert a USB flash drive into your computer.
- Copy the wifi.cfg file into the USB flash drive.
- Connect power to the ChromaBox using the adapter provided in the box.
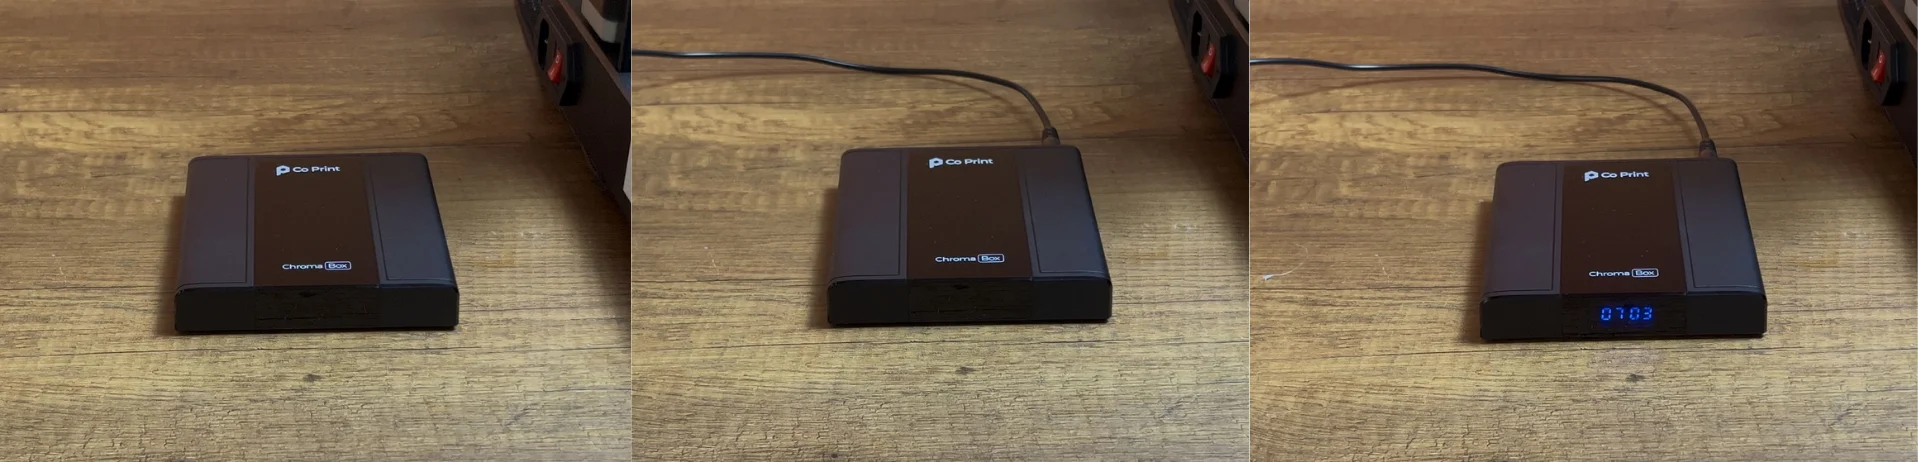
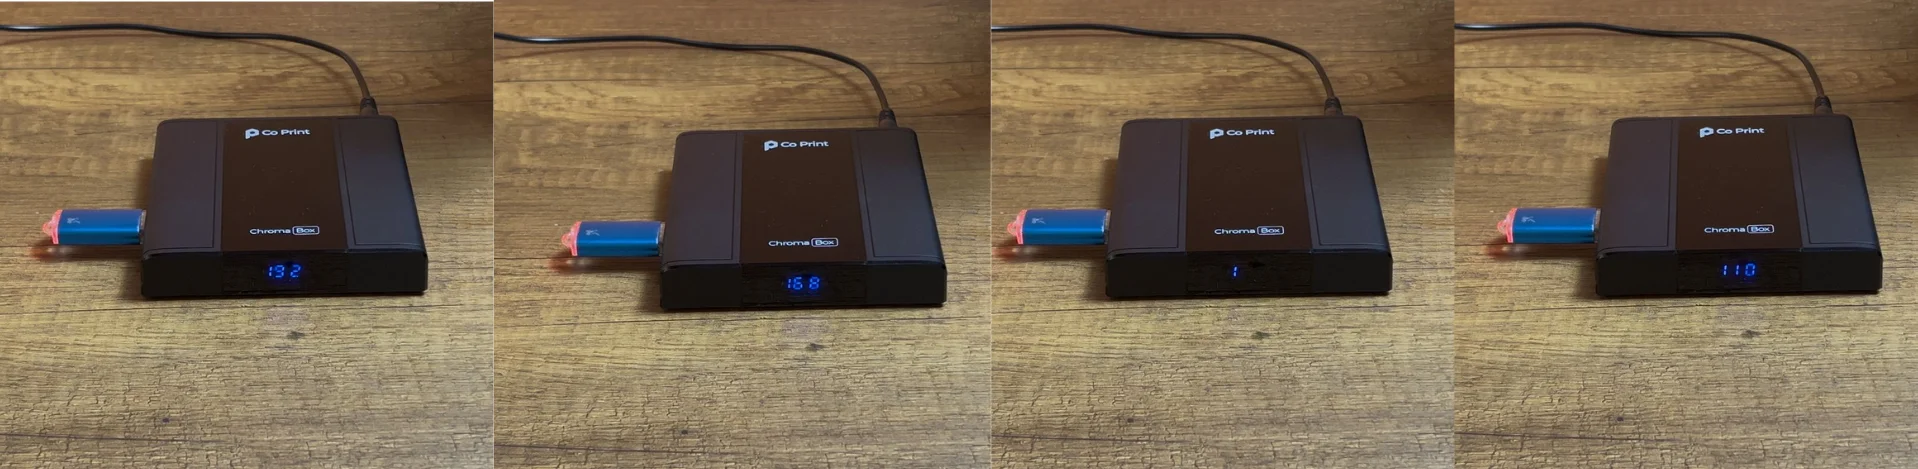
- Once the lights on the ChromaBox are on, plug the USB drive into the ChromaBox.
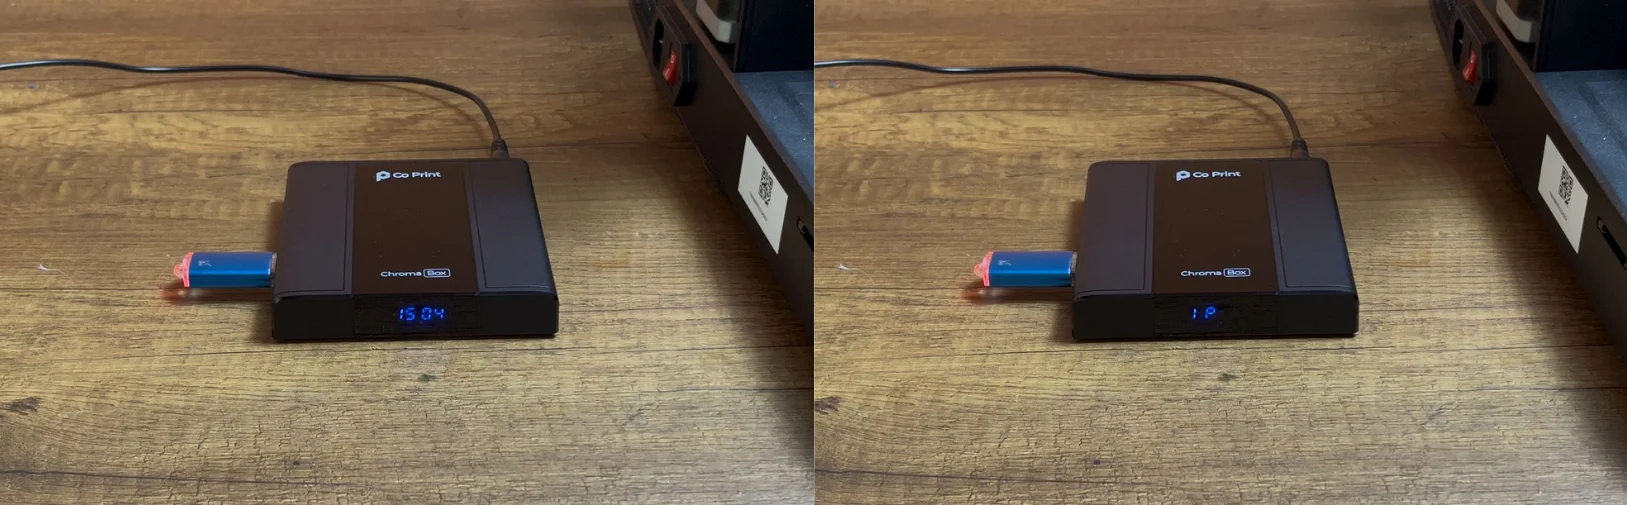
- The ChromaBox will automatically read the wifi.cfg file, and its IP address will appear on the front screen.
¶ 1.5) Chroma Set Lite Setup
Once the Wi-Fi setup is complete and the IP address is visible on the ChromaBox screen, turn off the power of the ChromaBox.
- Remove the USB flash drive from the ChromaBox. Since the Wi-Fi settings are now saved, the connection will remain active.
- Connect the KCM USB cable to the ChromaBox.
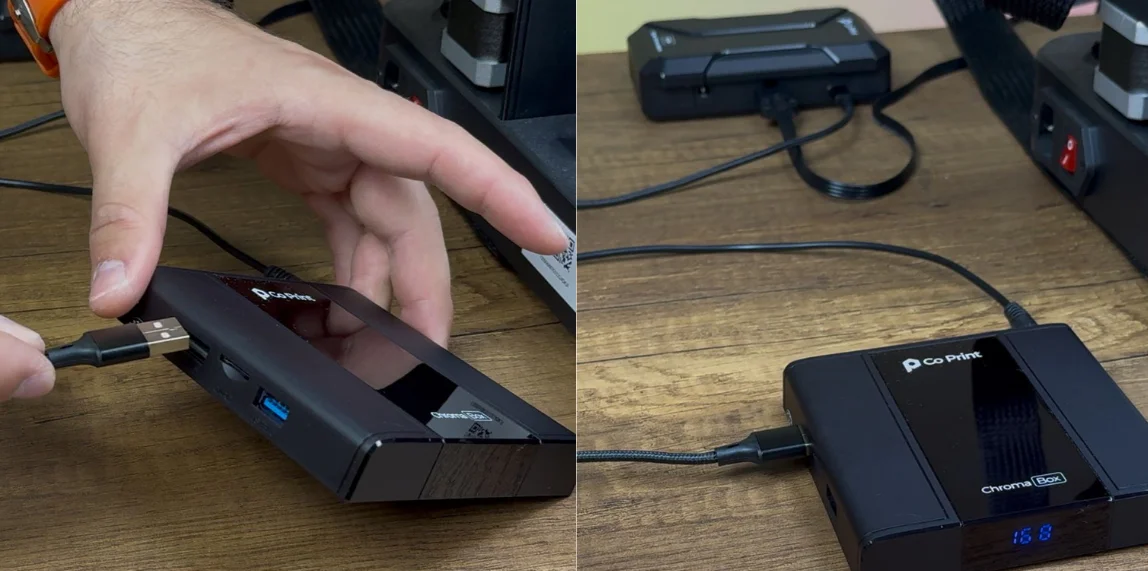
- Connect the printer's USB cable to the ChromaBox.
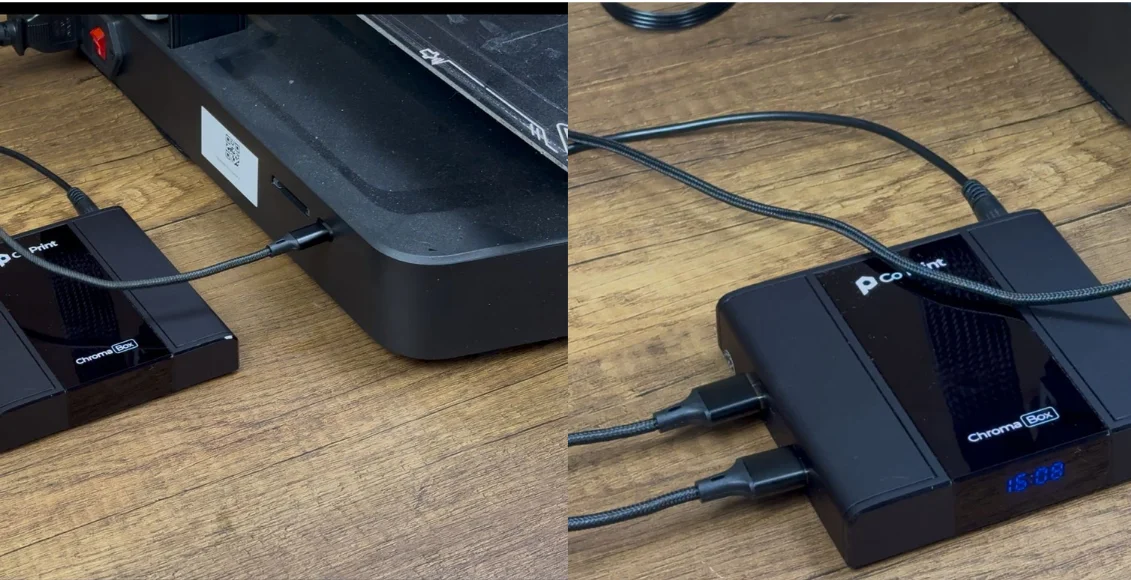
After completing these steps, you can power on both the ChromaBox and the KCM module.
¶ Editing Configuration Files and Setting Up Serial Paths
After successfully completing the Software-side Setup, the next step is to edit the configuration files and set up the serial paths for the ChromaHead and KCM module included in the Chroma Set Lite.
¶ 1.6) Editing Configuration Files
To access the configuration files we have published for the Ender V2 Neo, please use the link below.
Creality Ender 3 V2 Neo Config Files - Download
At this stage, you may encounter errors in the Mainsail interface. Please ignore these errors and continue following the setup steps.
- To edit the configuration files, first enter the Chroma Box’s IP address into your web browser to access the Mainsail control interface.
- In the left menu, click on the "MACHINE" section.
- In the "Config Files" section under "MACHINE", click the "Upload File" button and upload the configuration files you have downloaded.
The required configuration files for the Creality Ender V2 Neo are as follows:
- printer.cfg
- moonraker.conf
- kcm.cfg
- chroma_head.cfg
- cp_macro.cfg
- input_shaper.cfg
- bed_mesh.cfg
Note: If you have an ECM and want to print with 8 colors, remove the # at the beginning of the following line in printer.cfg and download the additional ecm_1.cfg configuration file.
#[include ecm_1.cfg]
After making sure that none of these files are missing, we can now proceed to configure the serial connections for the KCM module and the ChromaHead.
¶ 1.7) Setting Up Serial Paths
Do not plug in the power cable to the KCM module while the KCM and ChromaHead cables are disconnected!
Also, do not disconnect the KCM or ChromaHead cables while the power is connected!
- For a more stable and reliable setup, first connect the KCM module to the printer using a Type-C to USB cable.
- Next, connect the ChromaHead cable to the KCM module as well.
- While the KCM module is connected to the printer via USB and the ChromaHead cable is properly connected between the KCM and the ChromaHead, plug in the power cable to the KCM module.
- From the Mainsail interface, click on "MACHINE" and then open the kcm.cfg file from the config files section.
- Click the "DEVICES" button to identify the serial path of the KCM. Copy the correct path and paste it into the "serial:" field. Then, click "SAVE & RESTART" and exit the file.
- Click on the "chroma_head.cfg" file. Then click the "DEVICES" button to identify the ChromaHead’s serial path. Copy the correct serial path and paste it into the "serial:" field. After that, click "SAVE & RESTART" and exit the file.
- Once the system is powered on, check the "Extruder" temperature. If it displays a value over 100°C, it means the serial paths have been entered incorrectly.
⚠️ Two different serial paths must appear for the ChromaHead and the KCM. Make sure they are not the same — otherwise, the system will fail to start.
- Paste the newly identified serial path into the serial: field inside the chroma_head.cfg file.Then click "SAVE & RESTART" and exit the file.
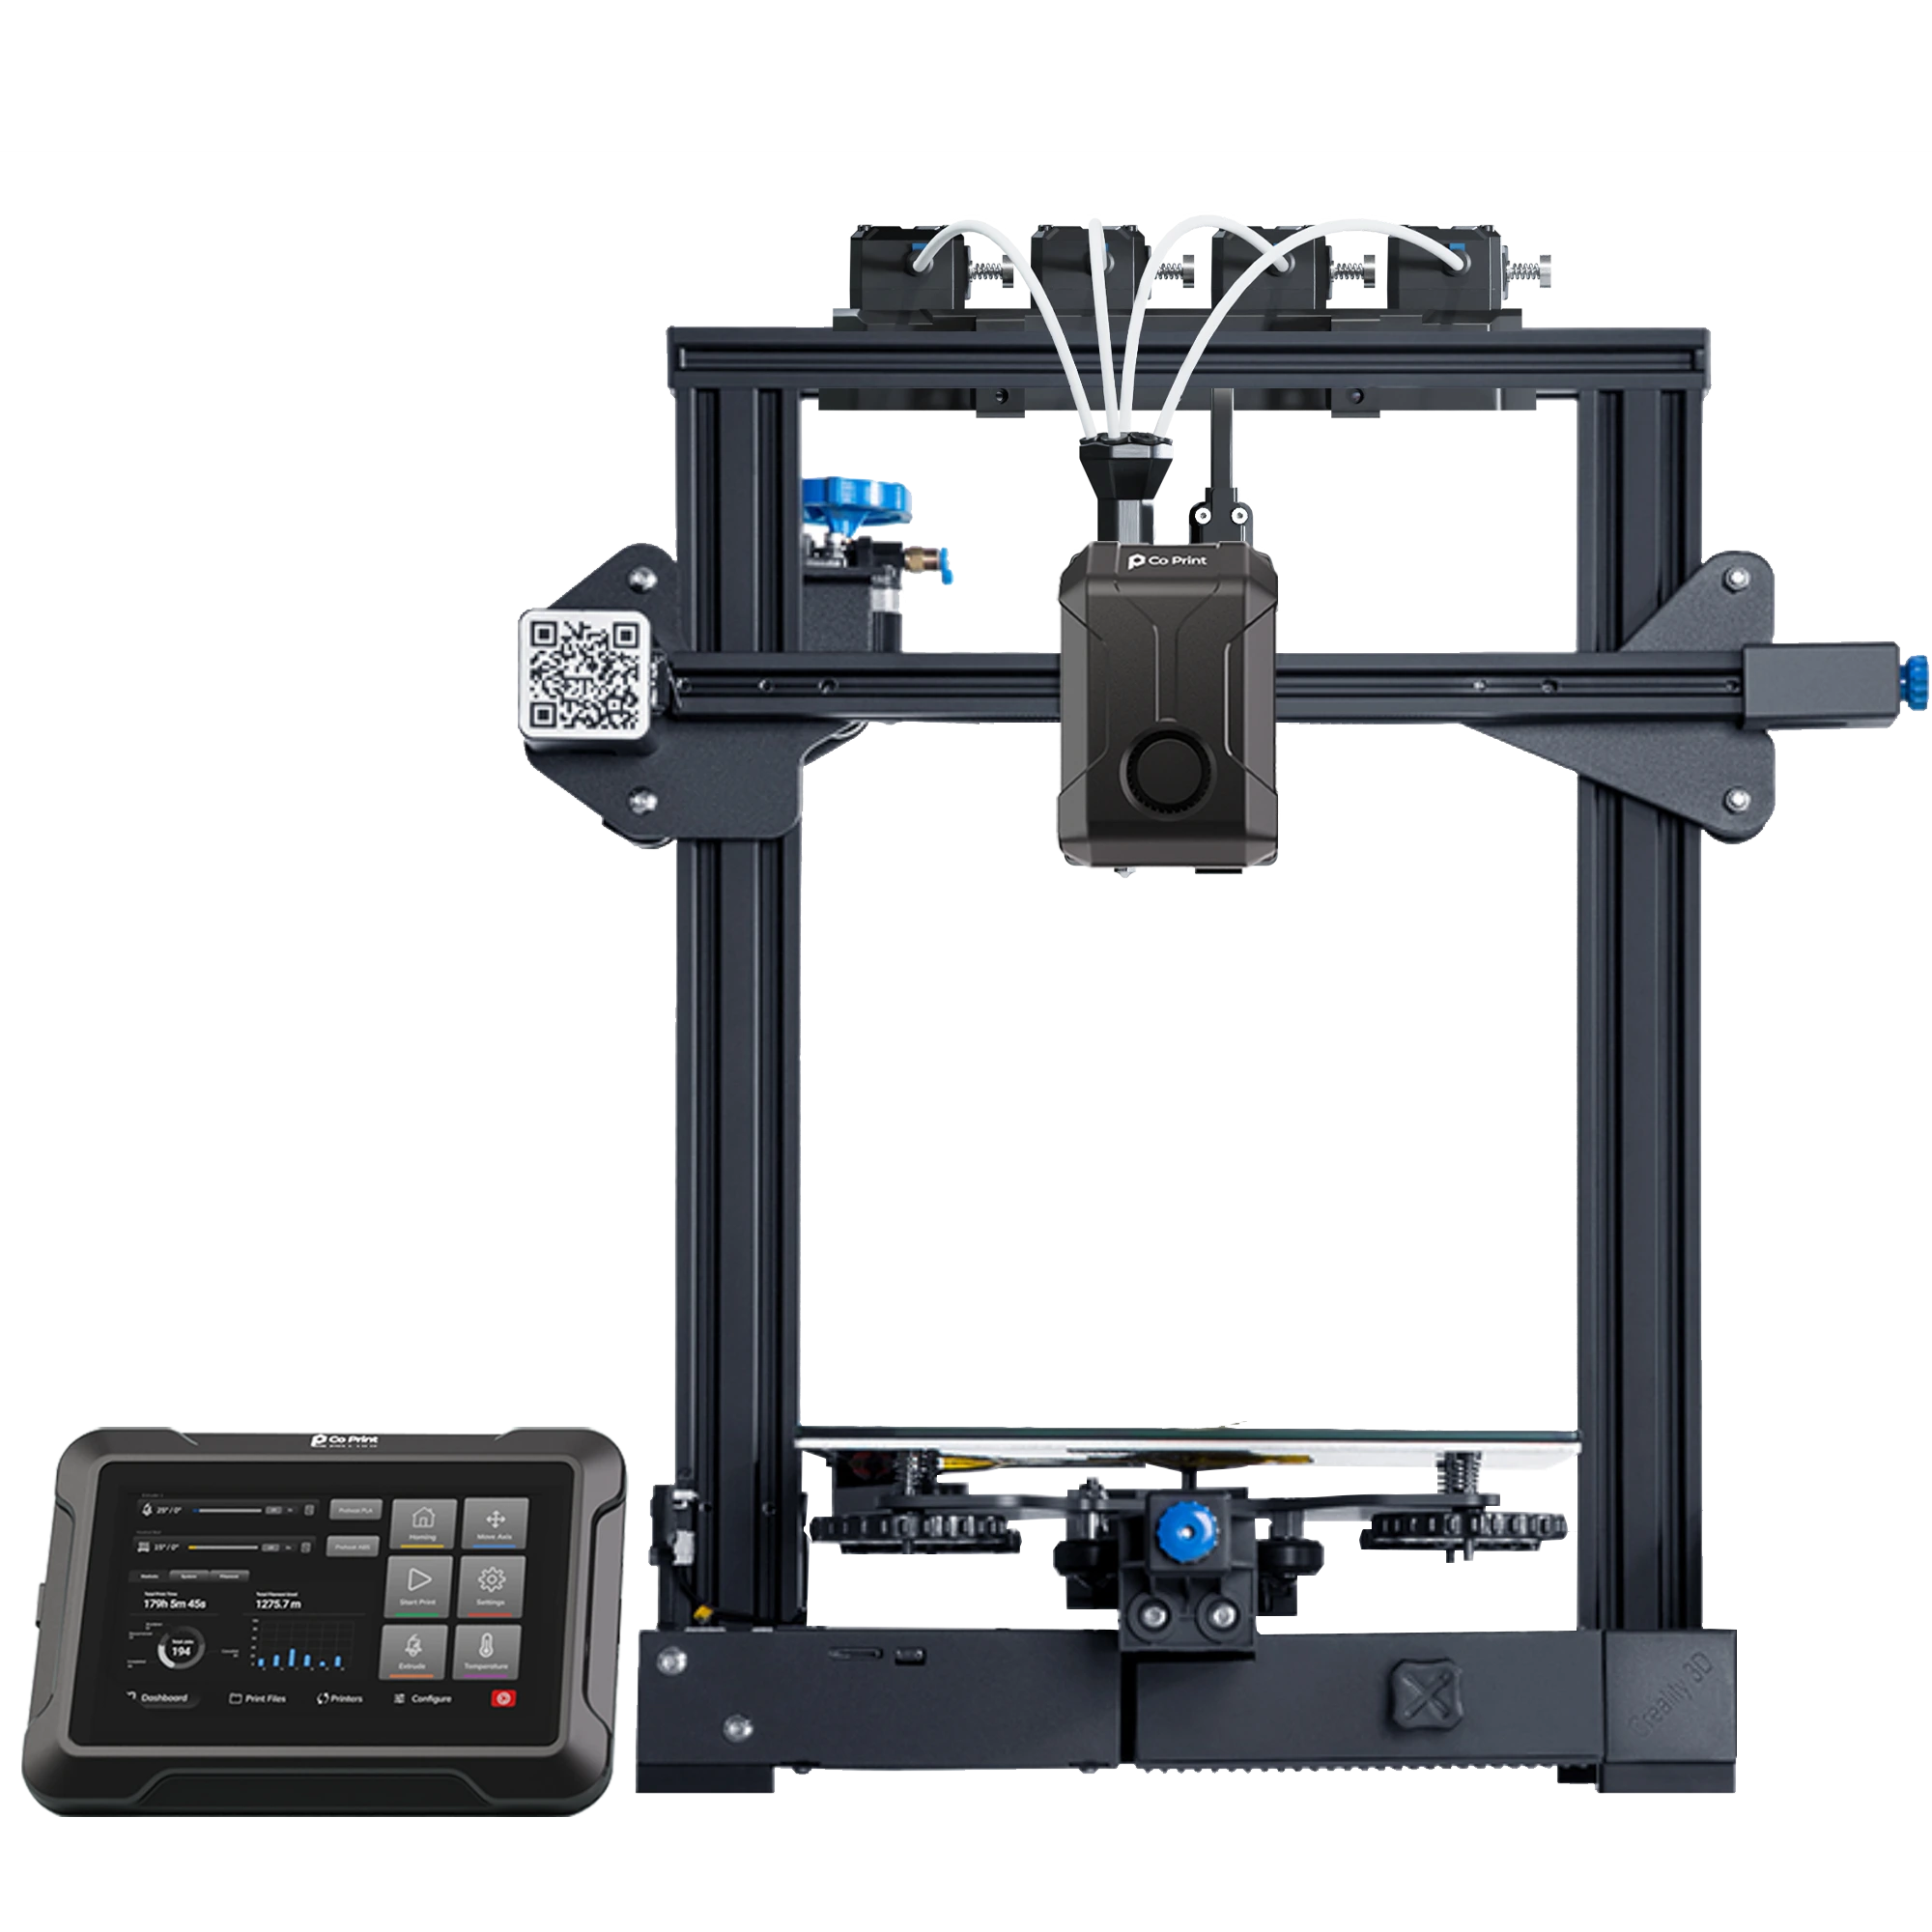
¶ Your printer is ready to use.
¶ 2) Post-Installation OrcaSlicer Configuration
After completing the installation, you also need to configure OrcaSlicer. We recommend downloading the latest version of OrcaSlicer for optimal compatibility. You can use the link below to get the most recent release.
OrcaSlicer Download Link - Download
-
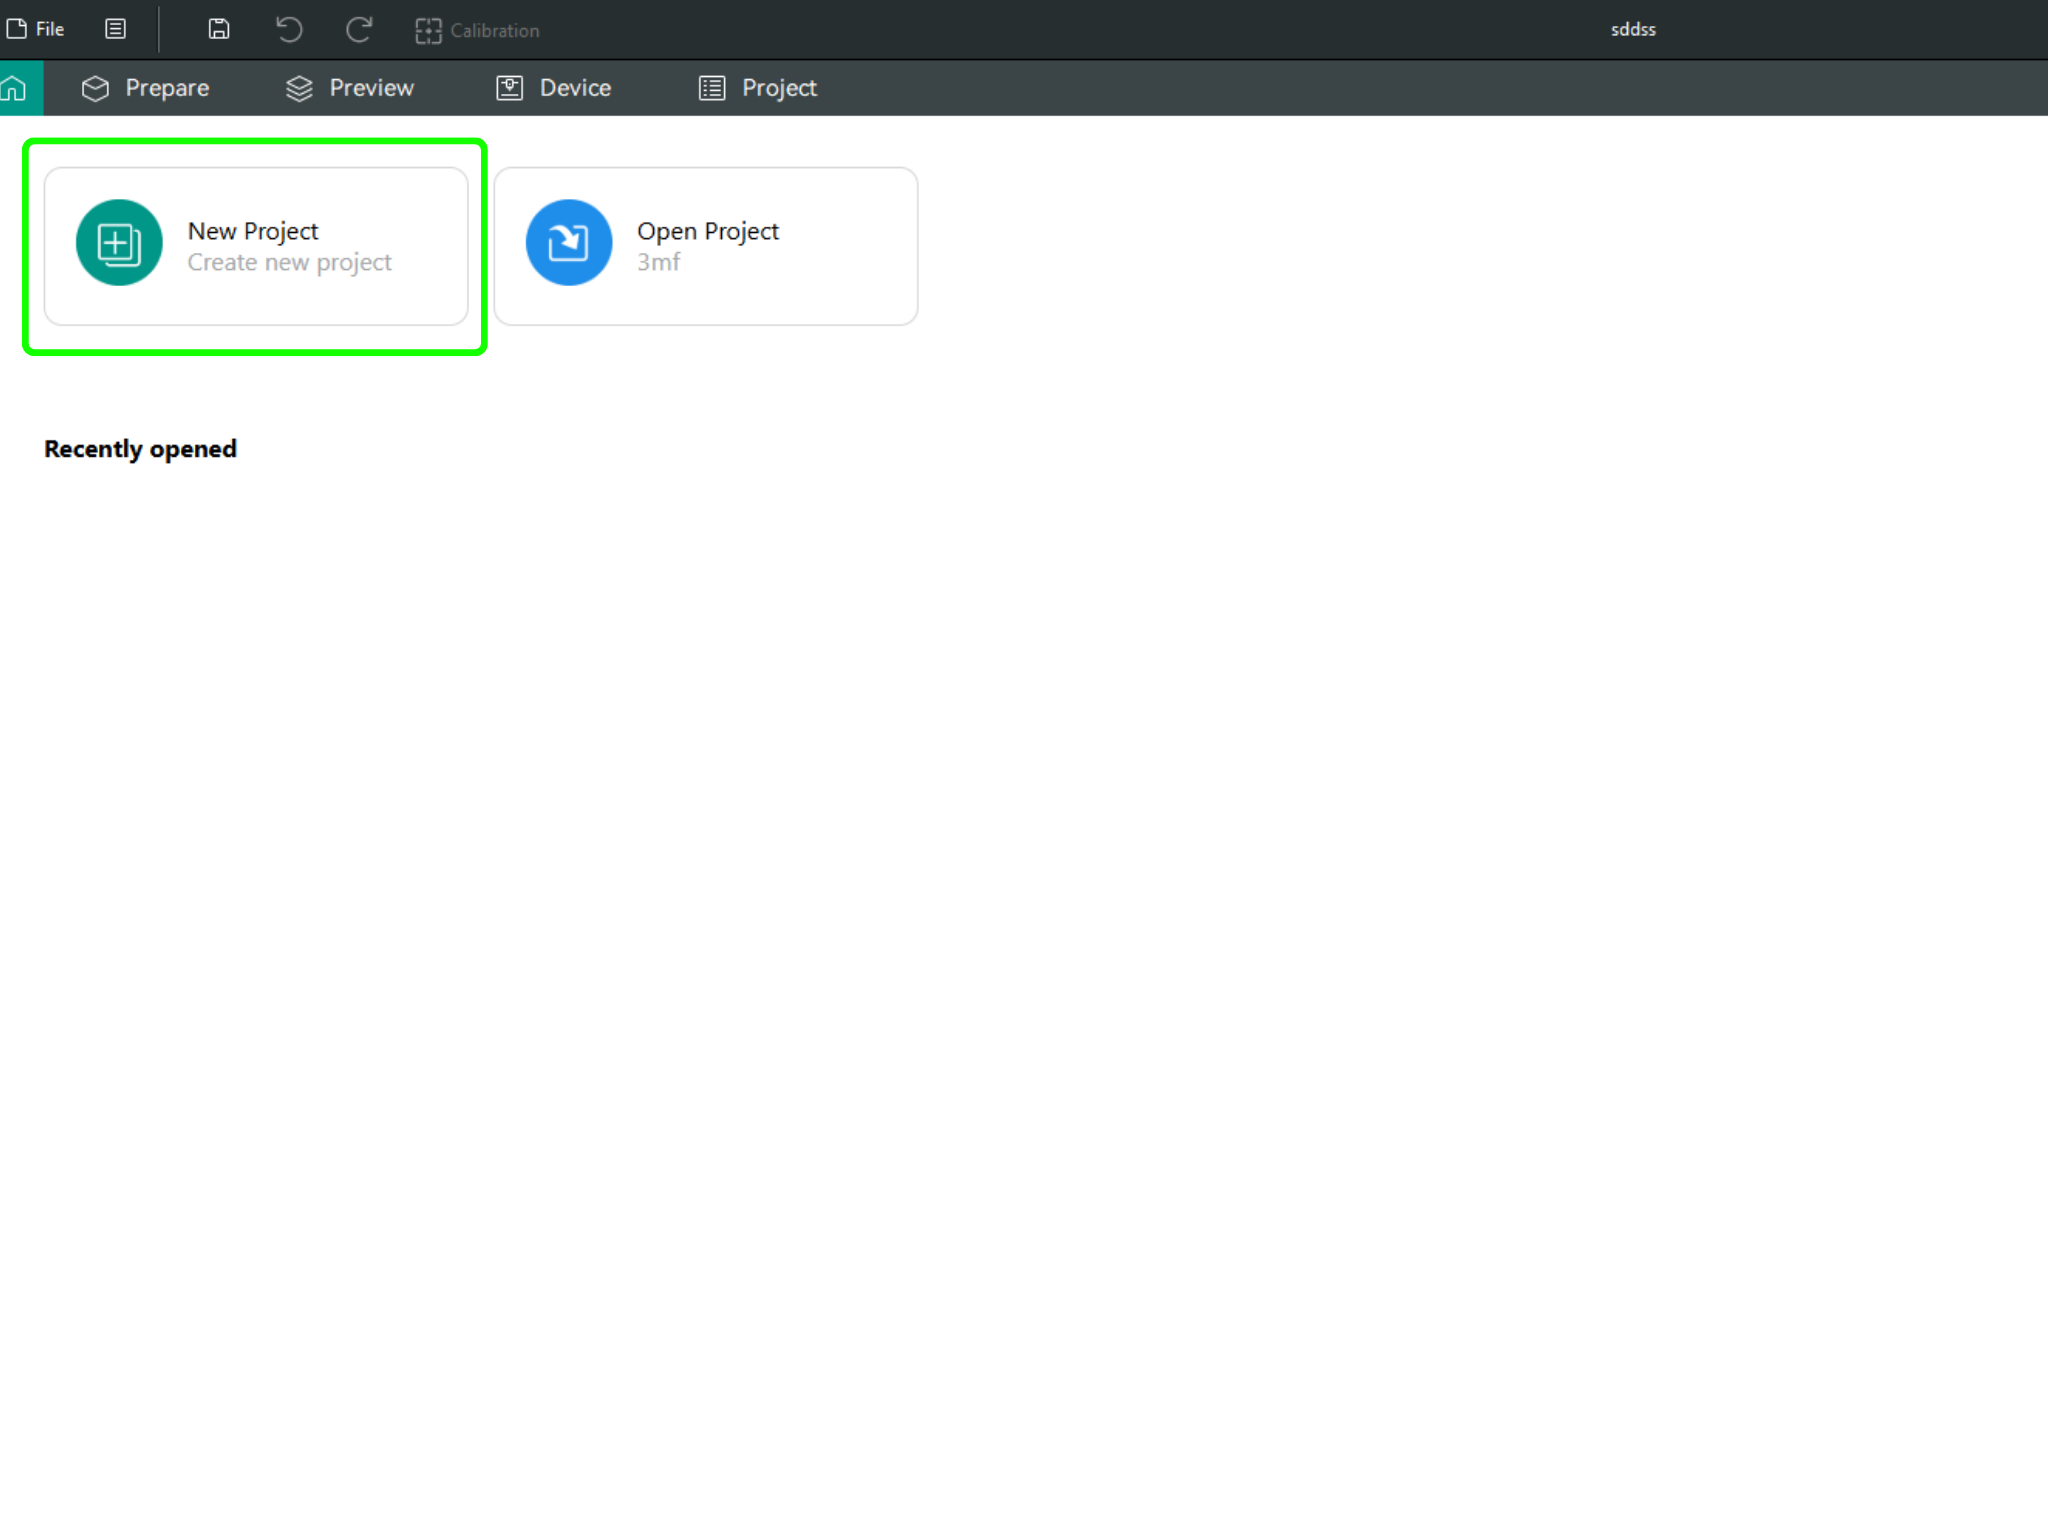
After downloading OrcaSlicer, click on “New Project”.
-
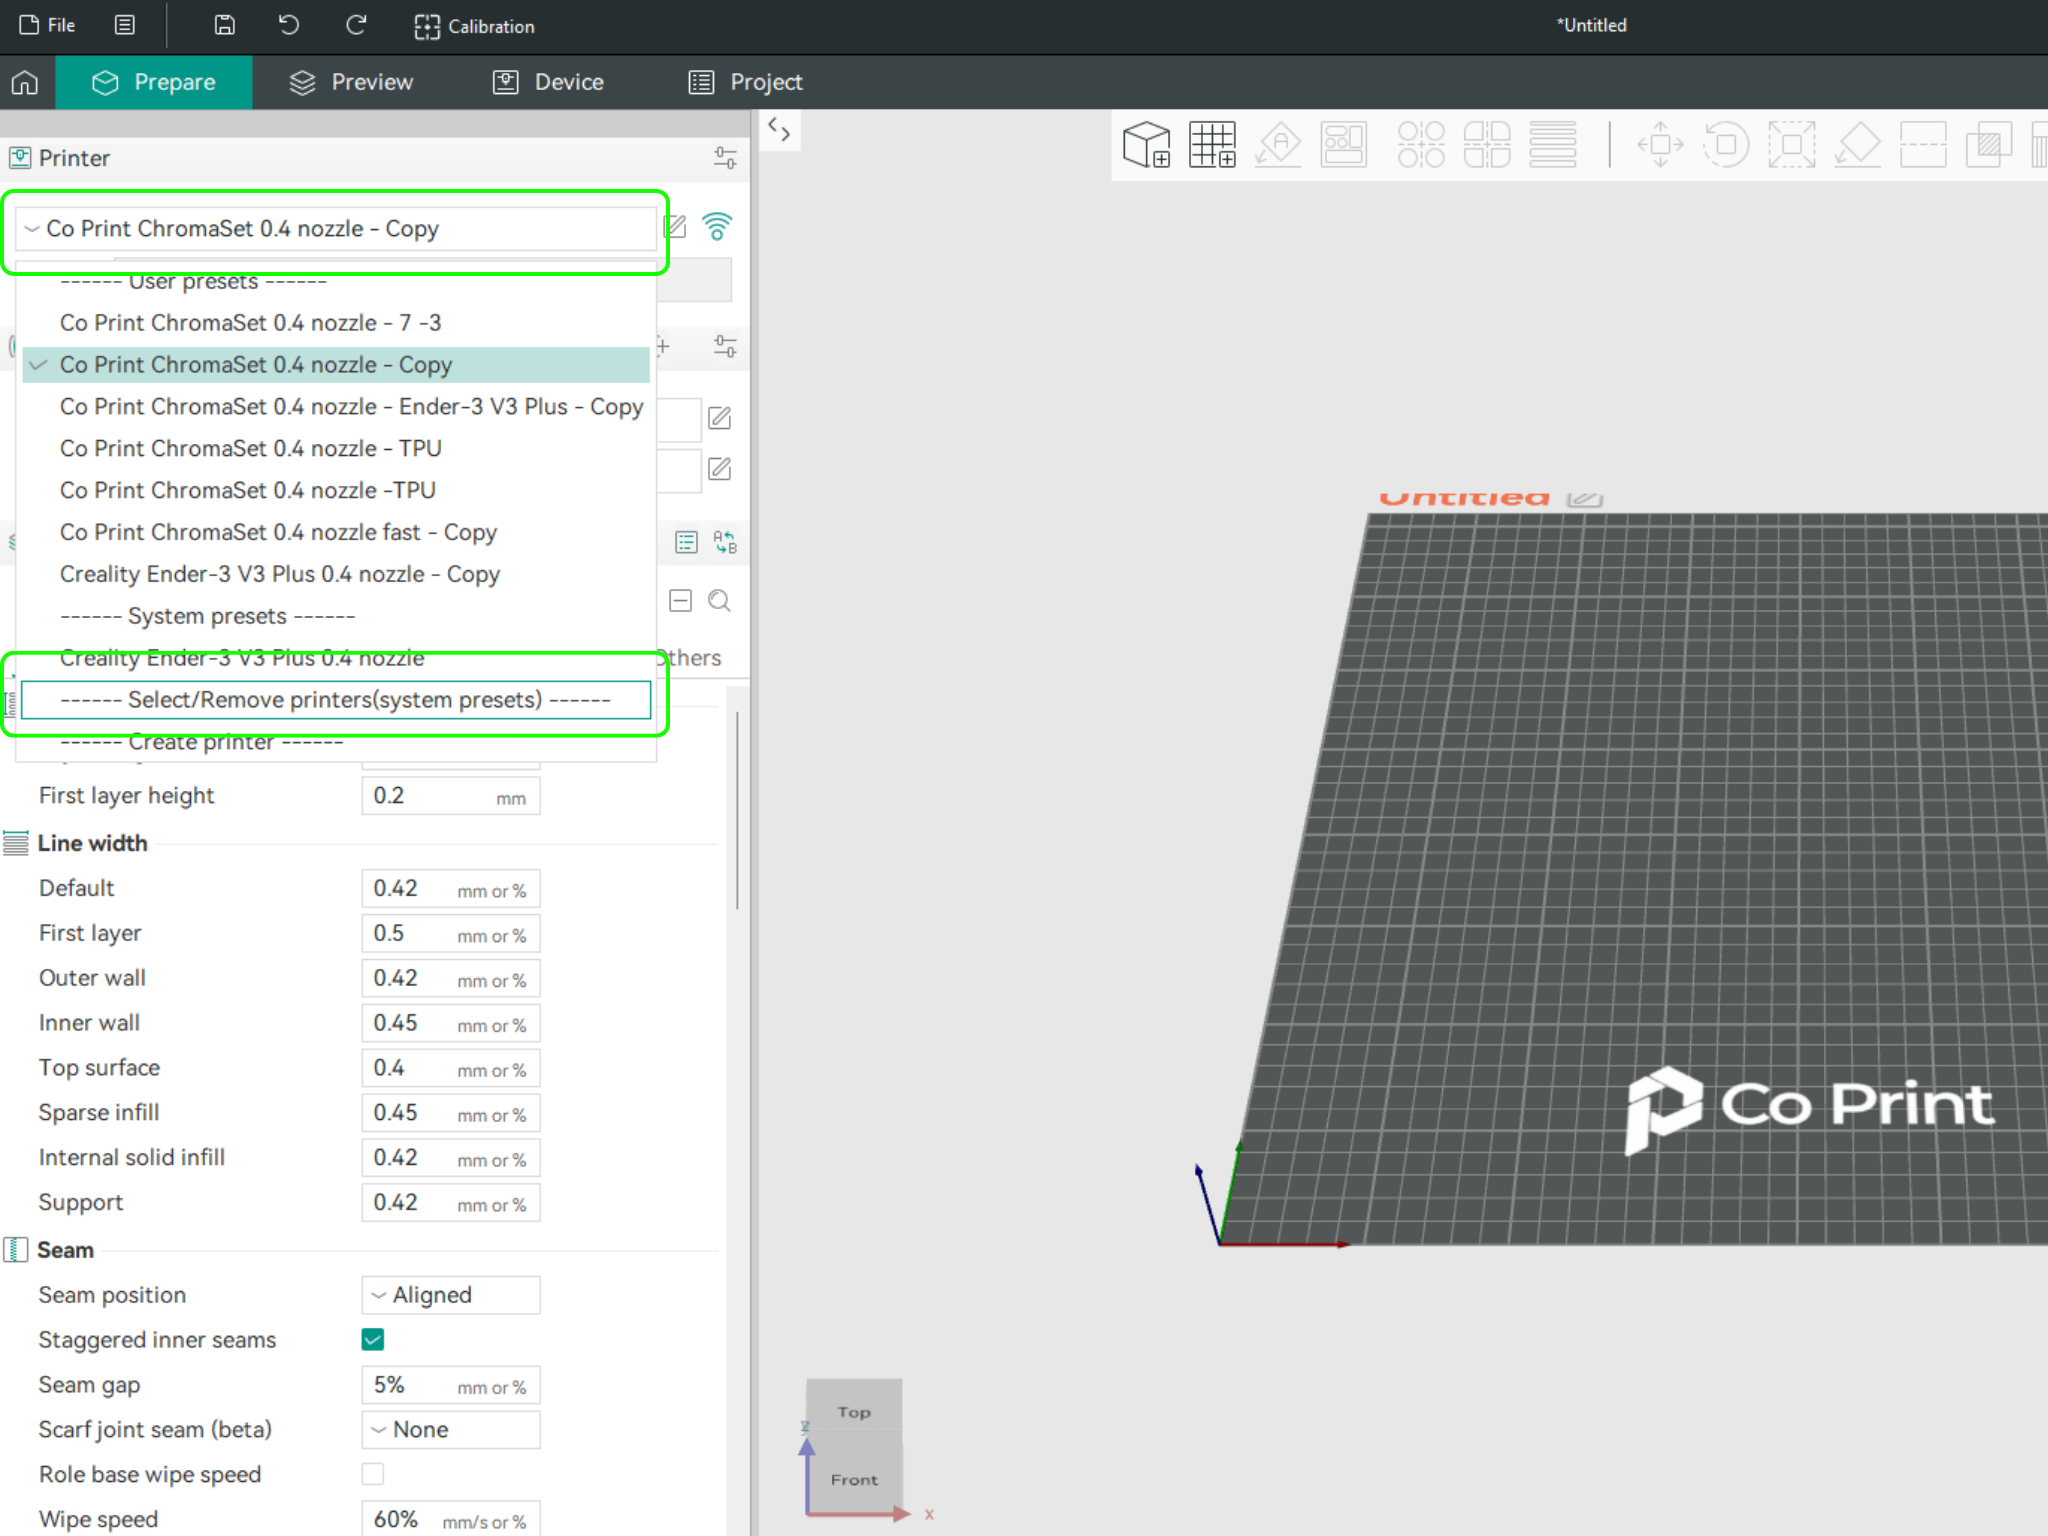
In the left menu, go to the Printers section and click on “Select/Remove printers”.
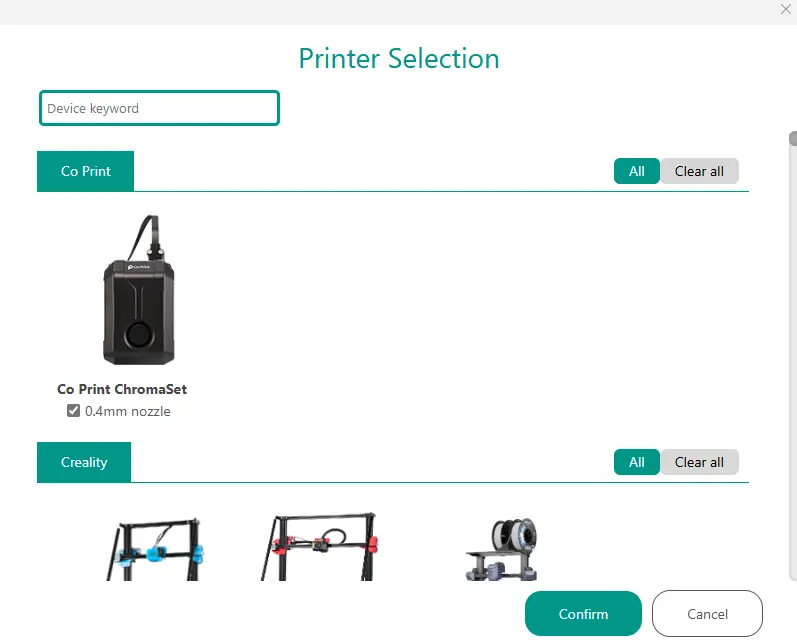
- In the opened menu, find and select Co Print. Then click "Confirm".
- After loading the settings, you need to adjust them in OrcaSlicer according to your printer’s bed size.
- You can import your model into OrcaSlicer as shown in the videos below, paint it, and start your print directly from within OrcaSlicer.