¶ Printer Settings
¶ How to Install to Blue PTFE?
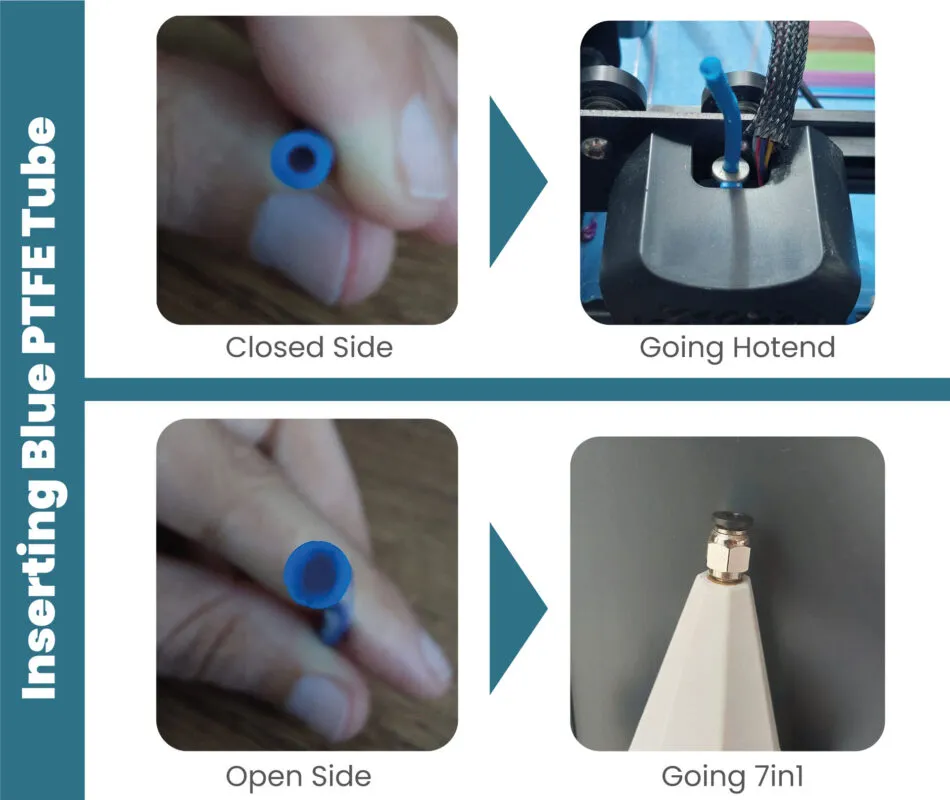
We use Blue PTFE pipe to connect the single output of the 7in1 piece to the hotend. The upper and lower entrances of the Blue PTFE pipe sent in the box are different from each other.
The upper entrance of the tube comes in an enlarged form so that the filament from the 7in1 can easily enter the blue PTFE tube. Plug the extended plug into the fittings on the 7in1. Then push the other end into the hotend until there is no gap between it and the nozzle.

¶ Table Calibration
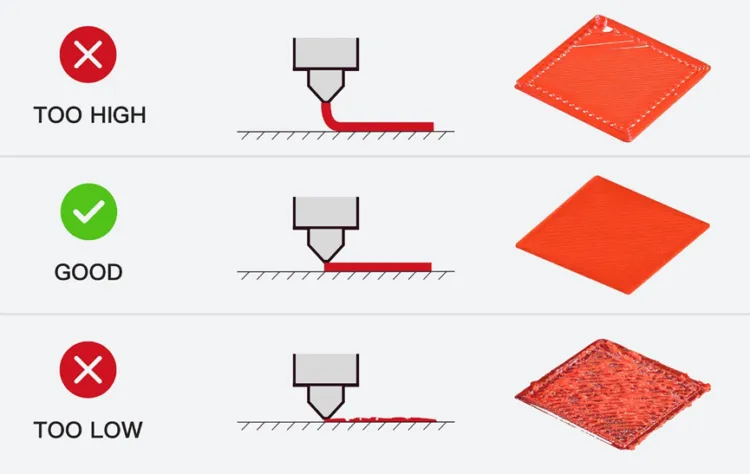
Starting 3D printing with a good first layer is crucial to successful printing. If the nozzle is too close to the table during printing, the first layer may curl, distort and crush. This causes the raid to be cancelled. At the same time, the nozzle may become clogged and your device may become unable to print.
Likewise, if the nozzle is too far from the table, your print will most likely be distorted. The basic parameter in the first layer calibration is the Z-Offset value. This value determines the height between the table and the nozzle.
After you bring the head of the machine to the starting point by clicking the Auto Home button from the menu, you can adjust the height with the help of a piece of paper from the nuts on the 4 sides of the table. Move the head of the printer to the corner and adjust it so that there is only a paper gap between the table and the nozzle. You should feel a frictional force on the paper, not too much.

¶ Extruder Calibration (E-step)
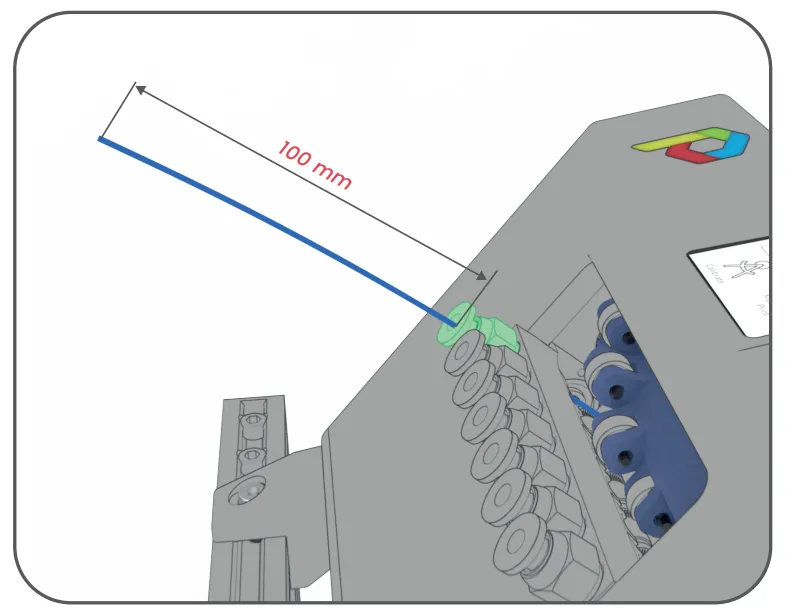
First, heat the nozzle of your 3D printer up to 200 degrees. Remove the PTFE tip from the 7in1. Then cut the filament parallel to the surface of the PTFE. Extrude the filament 100mm using the Prepare>move>E axis menu.
Cut the filament from the end point of the PTFE. Measure the protruding filament. The result is; You can calculate your E Step value by using the old "ESTEP value" x "100" divide"result" formula. You can repeat this process until you reach the correct result.
