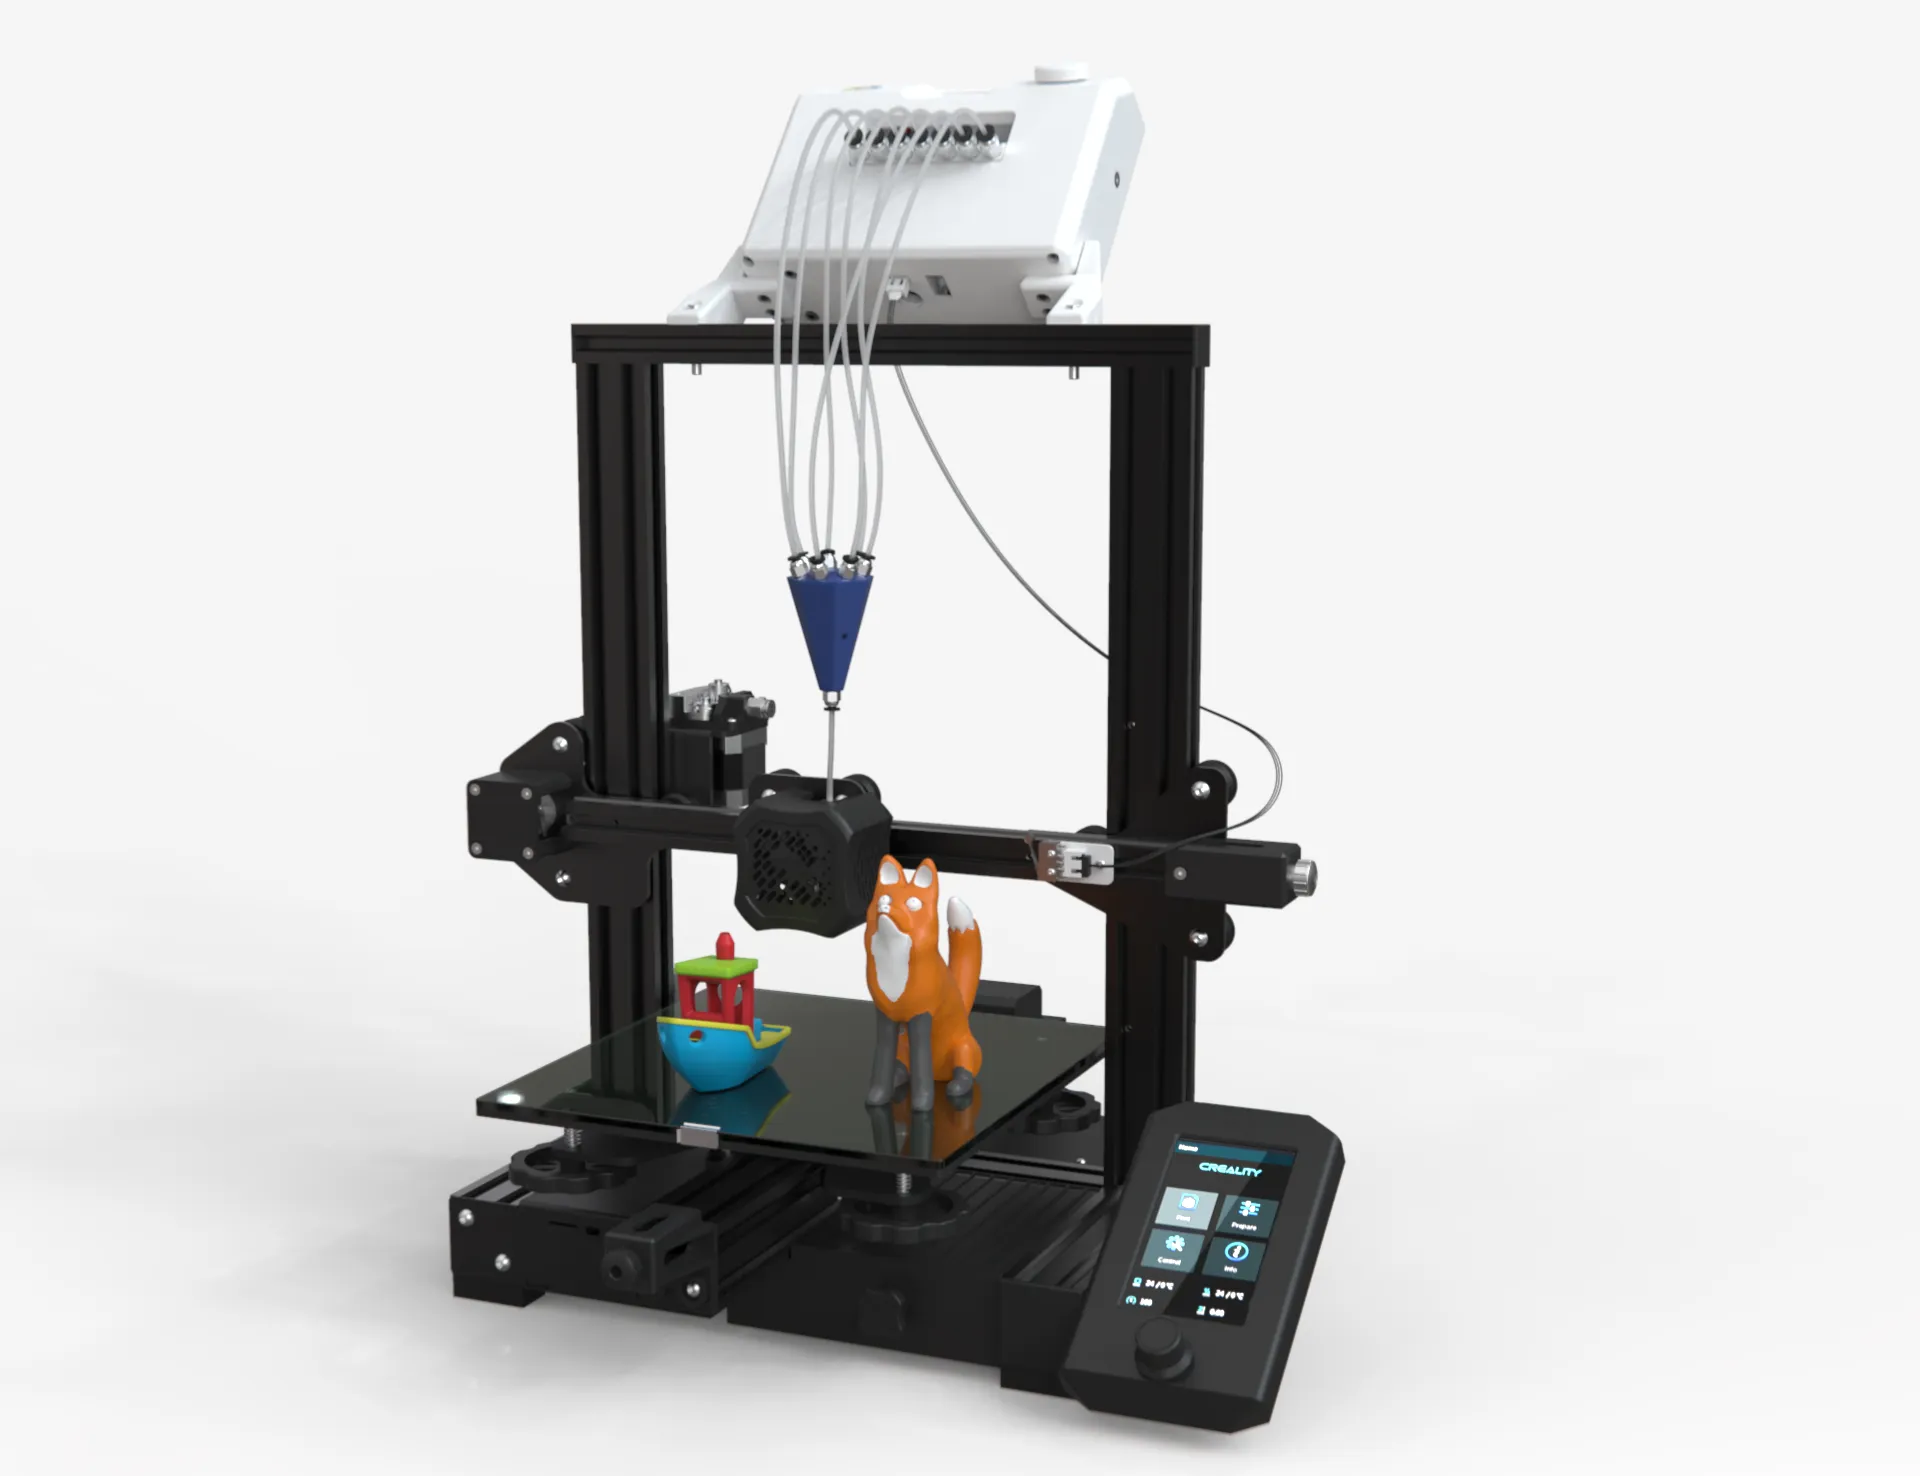
¶ HOW TO SETUP CO PRINT ?
Installation guide of Co Print multi filament module on 3D printers
¶ 1. Place Co Print on Your 3D Printer
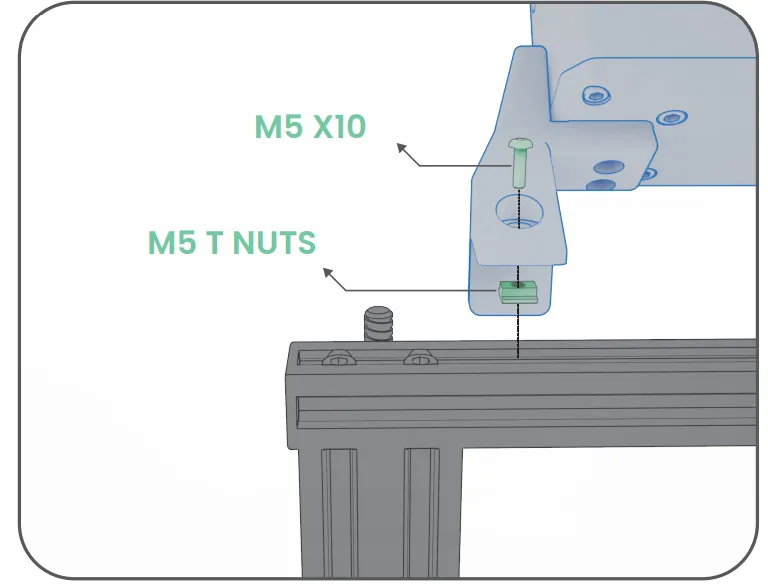
Co Print can be fixed to the top of your 3d printer with the help of T-nuts and Allen key.

¶ 2. Place the PTFE Pipe in the Hotend
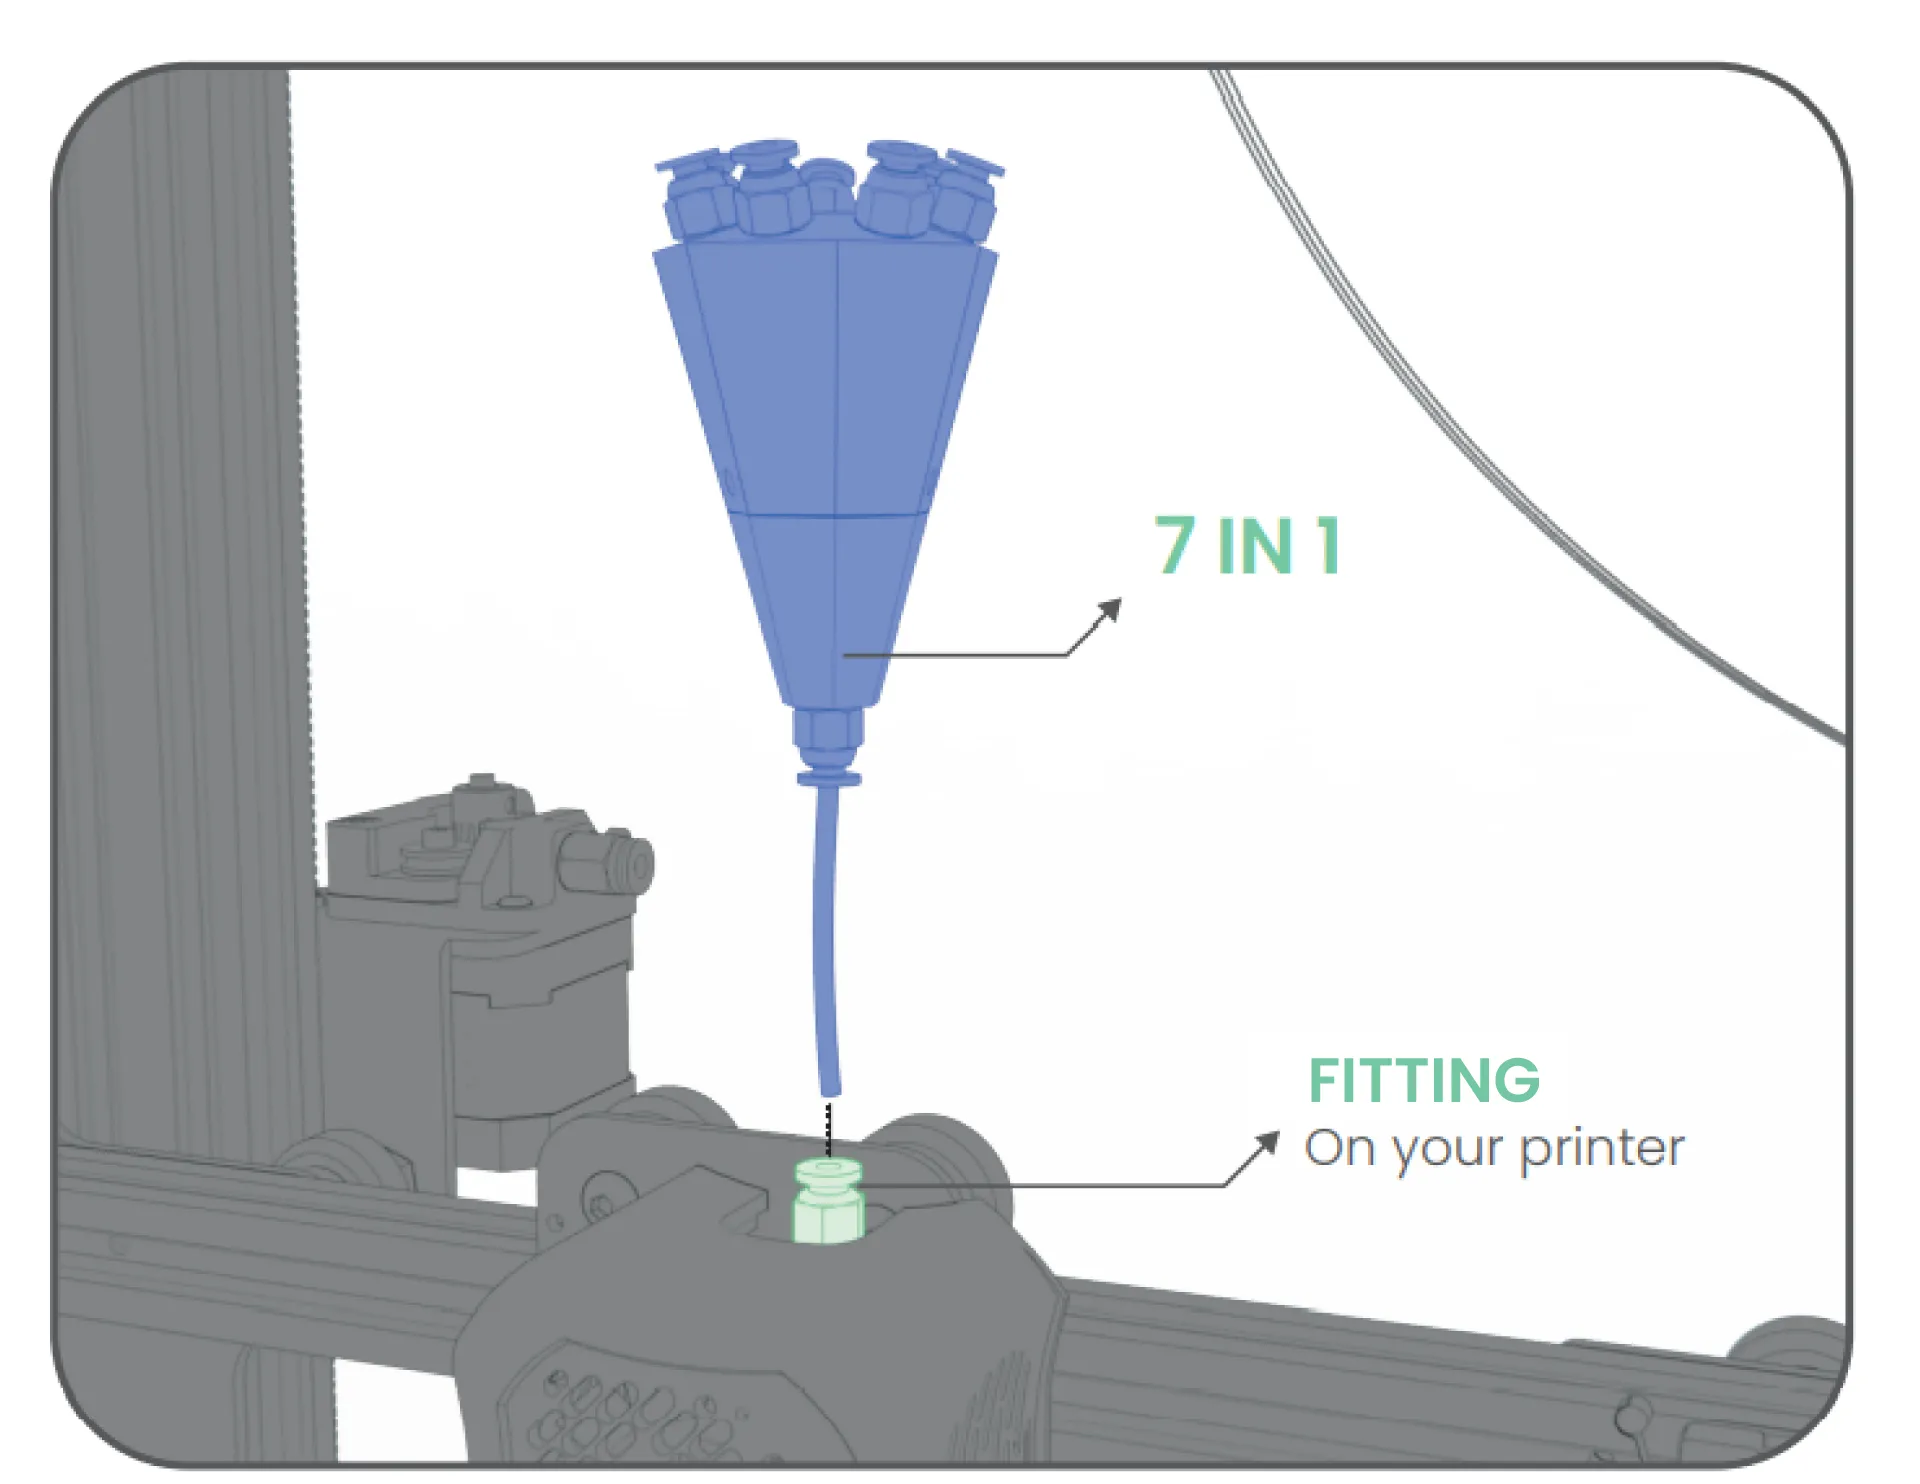
PTFE pipes should be inserted into the Co Print, 7-in-1 and your 3d printer(Hotend). But first of all the PTFE pipe that your printer currently has, must be removed. For removing the old PTFE from your printer, firstly the filament should be removed. Therefore, the hotend must be heated up to 200 degrees Celcius. After removing the filament PTFE tube can be removed easily by pressing the white part of the pipe coupling that can be seen in the picture. Keep in mind that the new PTFE tube must be inserted all the way inside of the hotend.
¶ 3. Attach PTFE Pipes to Co Print
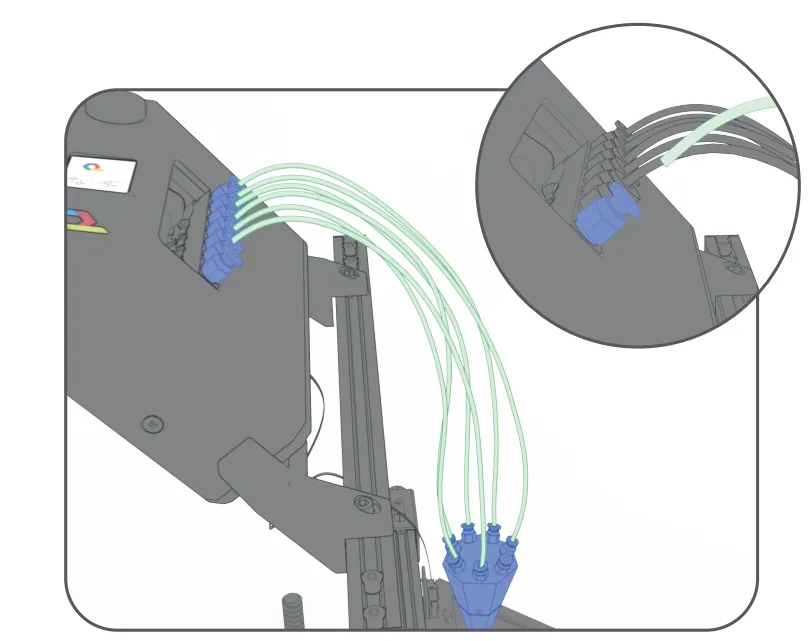
Cut the PTFE tubing that comes with Co Print into suitable lengths and insert it between Co Print and the coupling piece.
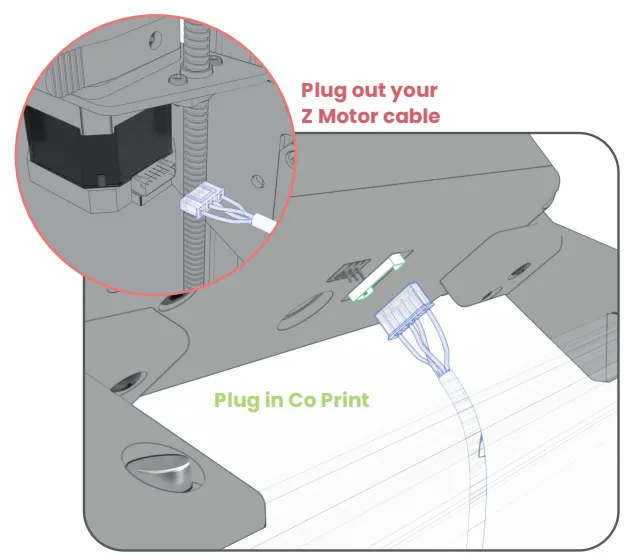
¶ 4. Plug Extruder Motor Cable of 3D Printer to Co Print
The extruder mechanism in Co Print is controlled by the 3D printer, so you need to connect the cable of your 3D printer’s extruder motor to the motor in Co Print.
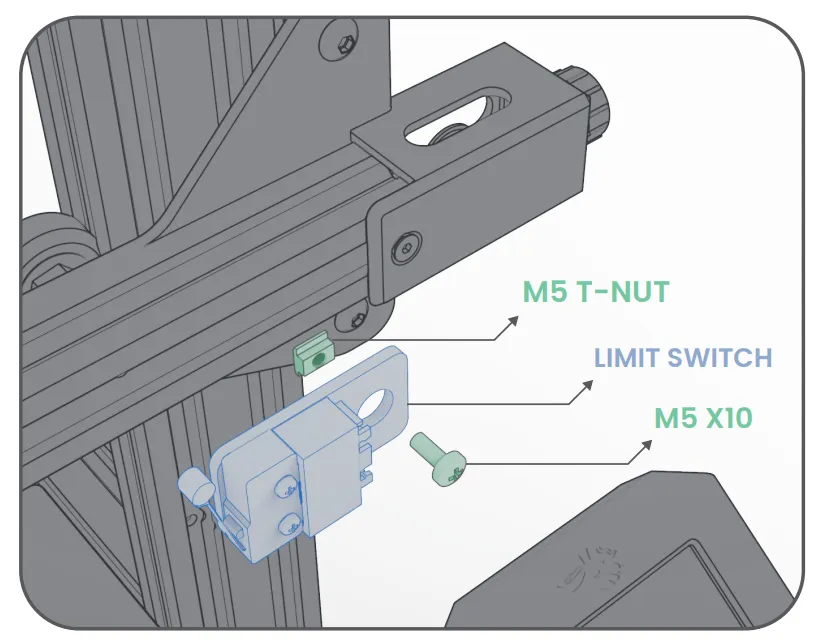
¶ 5. Place Limit Switch at X Maximum Point of 3D Printer
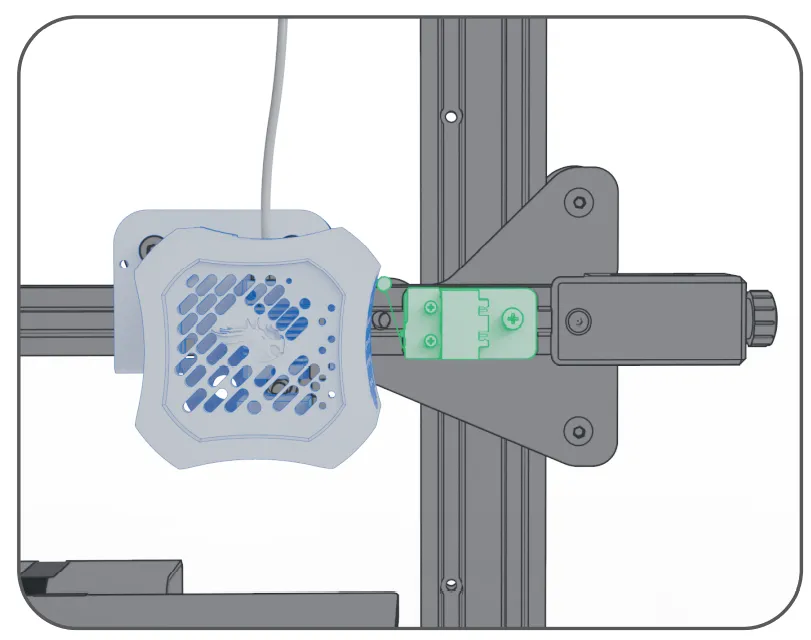
The limit switch that comes with Co Print is the part that communicates Co Print and the 3D Printer by notifying Co Print of the filament change during printing. Therefore, it should be placed at 215 mm level on the X axis. (This value may change in the application where print files are being edited.)
The hotend of the 3D Printer should be touching the limit switch as in the picture, while it is at 215 mm in the X axis.
¶ 6. Extruder Calibration
- Since the extruder mechanism of your 3D Printer is now the motor and gear in Co Print and the diameter of the gear will have changed, you need to calibrate the extruder.
- You can reach this setting by following the steps of Control -> Motion -> E/Step -> Extruder on your 3D Printer.
- The result we have reached as a result of our calculations and tests is that this value is 328.0.
- After changing this setting to 328.0 in your own 3D Printer, you can reach a more accurate result by advancing 100 mm filament and measuring the advancing filament length (Old E/Step value *100/Measured length) by determining your own value with the formula.

¶ 7. Plug in the Power Cable
Complete the setup step by plugging in the power adapter cable.

